1993 CHEVROLET CORVETTE display
[x] Cancel search: displayPage 112 of 370
Downloaded from www.Manualslib.com manuals search engine hm
TRIP OD0 Press. this button to.
change the odometer. Ee,ading to- a trip
odometer--teading. P1es.s again ta-retm
the display to the odometer reading.,
The trip odometer can be u-sehl to
measure the actual distance you travel
on a trip. TQ -set it to zero, see TRIP
RESET below. The..adometer will.
ihrninate
with the fgni"tion off .and the
parkifig lights on.
TRIP RESET: With TRIP OD0
selected for, dis.play, .p ms ..and hold.the
TRJP button for two seconds to change
the trip odometer ,reading to zero.
ENG MET This batton chaqp the
display from customary .Uaited States
measures. (English) tu Canadian
measures (mettic).
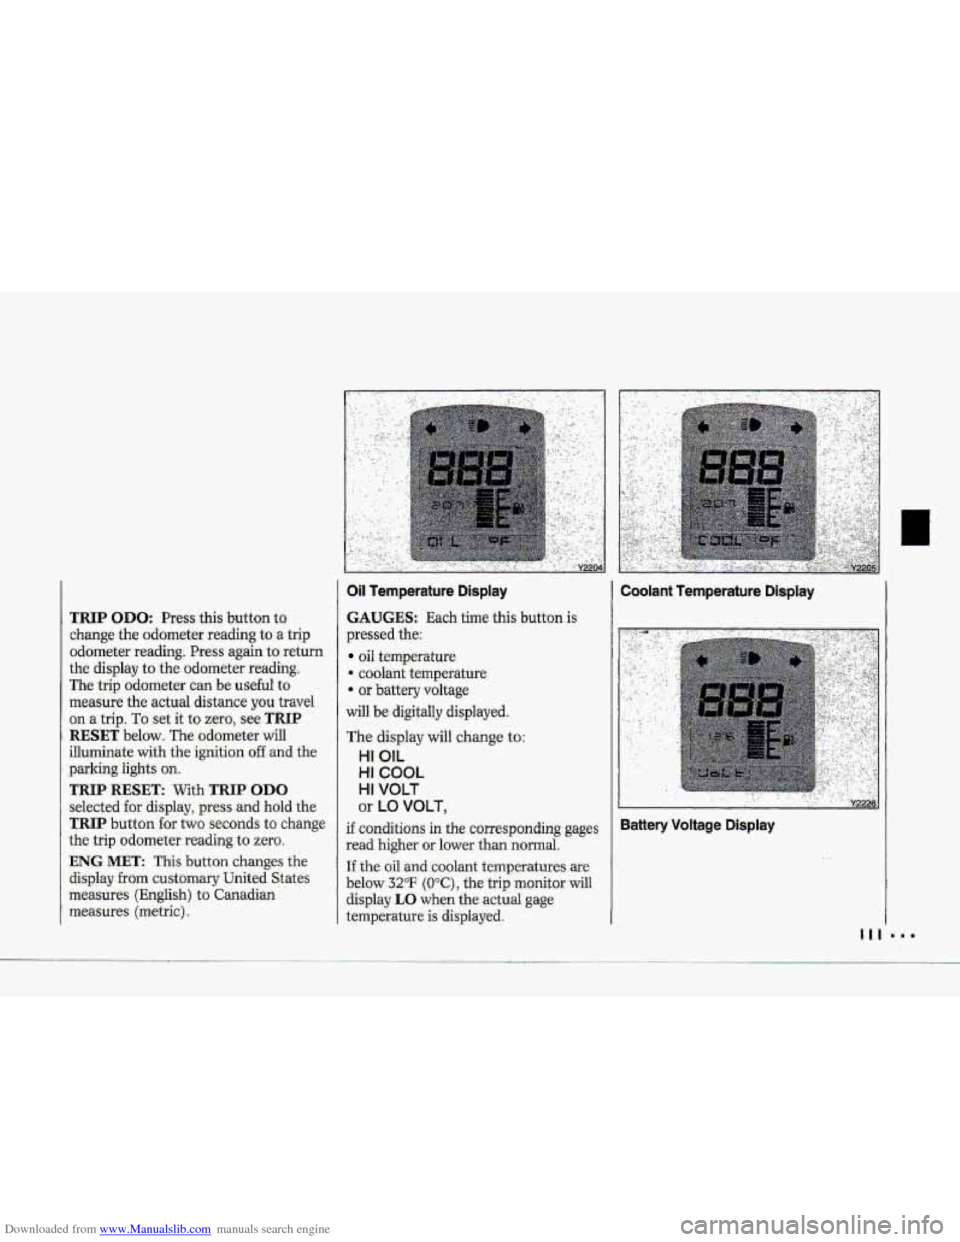
OH femperature Display
GAUGES: E+& time this button is
prwsed the:
oil temperature
-4 coolant temperature.
.- or battery voltage
will be- digitally displayed.
The displey will change to:
HI OIL
HI COUL
HI VOLT
or LO VOLT,
.If conditions in the. c.prresponding gages
read higher or lower th.m normal.
If the oil mdxoolant ternpxatur.e$ arc
below 32°F (O,*C), the trip monitor will
display LO when the,actual gage
ternpiratwe is displayed I
Coolant Temperature Dtsplay
Battery Voltage Displ,ay
Page 113 of 370
Downloaded from www.Manualslib.com manuals search engine Features & Controls
..I I
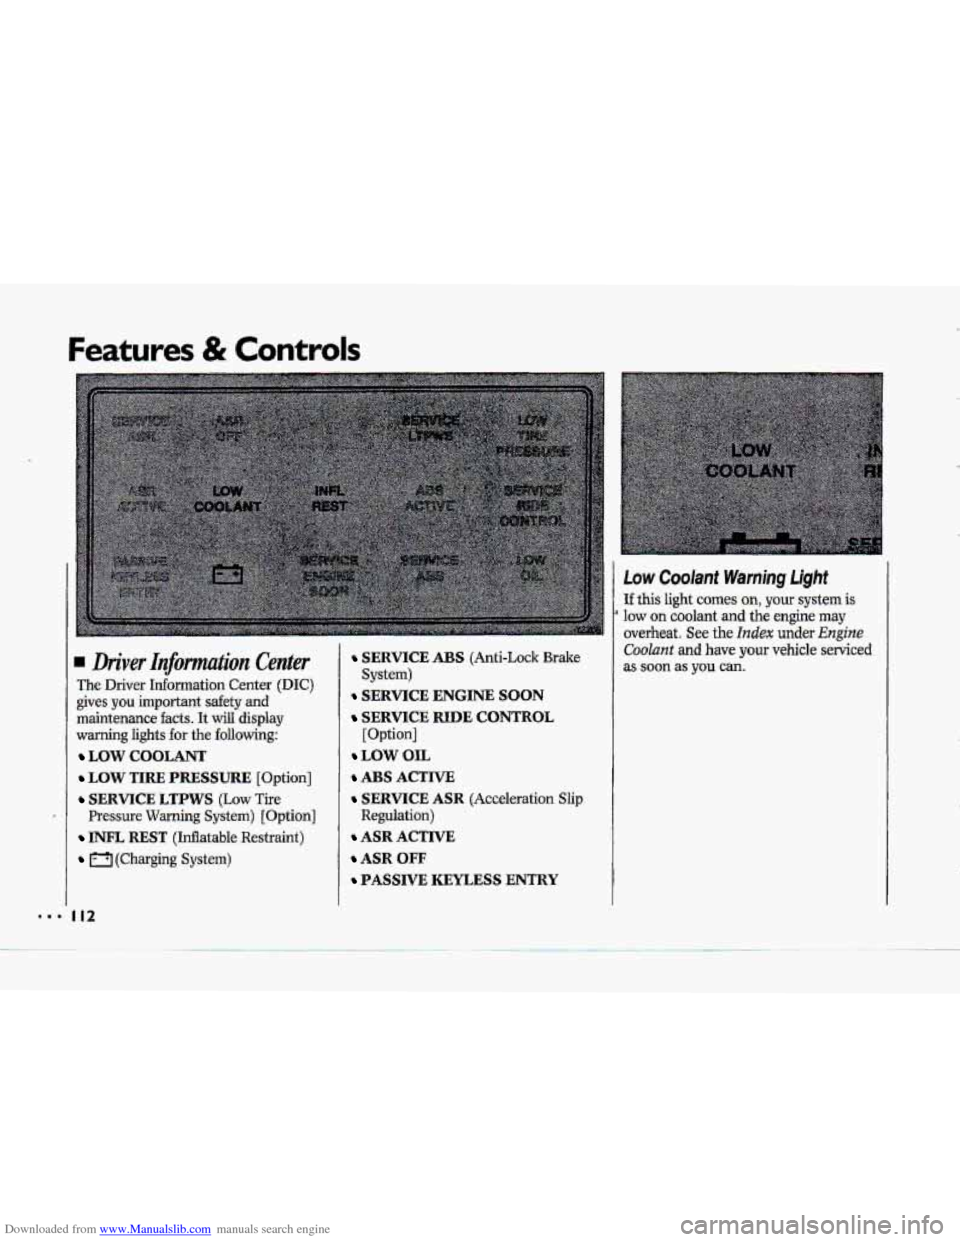
Low Coolant Warning Light
If this light comes on, your system is
overheat. See the Index under Engine
Coolant and have your vehicle serviced
a low on coolant and the engine may
Driver Infomtation Center
The Driver Information Center (DIC)
gives you important safety and
maintenance
facts. It will display
warning lights
€or the following:
LOW COOLANT
LOW TIRE PRESSURE [Option]
SERVICE LTPWS (Low Tire
Pressure Warning System) [Option]
INFL REST (Inflatable Restraint)
(Charging System)
I12
SERVICE ABS (Anti-Lock Brake
SERVICE ENGINE SOON
SERVICE RIDE CONTROL
[Option]
LOW OIL
ABS ACTIVE
SERVICE ASR (Acceleration Slip
Regulation)
ASR ACTIVE
ASR OFF
PASSIVE KEYLESS ENTRY
System) as soon as you can.
Page 121 of 370
Downloaded from www.Manualslib.com manuals search engine Features & Controls
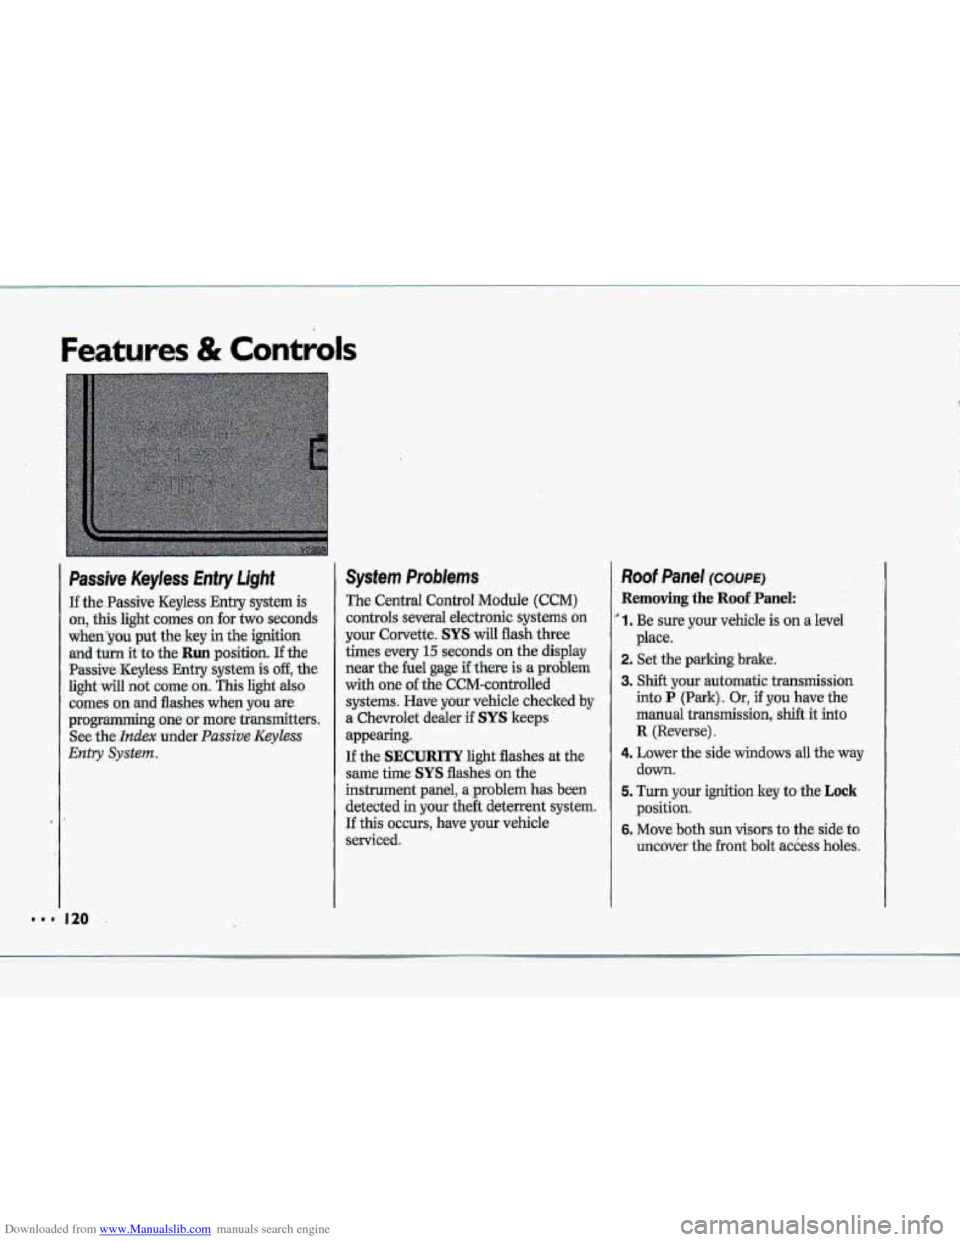
Passive Keyless Entry Light
If the.Passive Keyless Entry system is
on, this light comes on for two seconds
whenyou put the key in the ignition
and turn it to the Run position. If the
Passive -Keyless Entry .system is off, the
light will not cume on. This light also
comes on .md flashes when you we
programming~ one or more transmitters.
See
the- Index under. Passive Keyless
Entry System.
System Problems
The Central Control Module (CCM)
controls several electronic systems on
your Corvette. SYS will flash three
times every
15 seconds on the display
near the he1 gage if there is a problem
with one of the CCM-cantrolled
systems. Have your vehicle checked
by
a. Chevrolet dealer if SYS keeps
appearing.
If the SECURITY light flashes at the
same the SYS flashes on the
instrument panel, a ,problem has been
detected in your the& deterrent system.
If this OCCUTS, have YQW vehicle
serviced.
Roof Panel ~XWE)
Removing the Roof Panel:
' 1. Be sure your vehicle is on a level
2. Set the parking brake.
3. Shift your automatic transmission
into P (Park). Or, if you have the
manual
transmission, shift it into
R {Reverse).
4. Lower the side windows all the'way
down.
5. Turn your ignition key to the Lock
position.
6. Move both sun visors to the side to
uncover the
.front bolt access holes.
place.
k p*
.&
"' 120
Page 141 of 370
Downloaded from www.Manualslib.com manuals search engine Comfort Controls & Audio Systems
... I..
1. 140
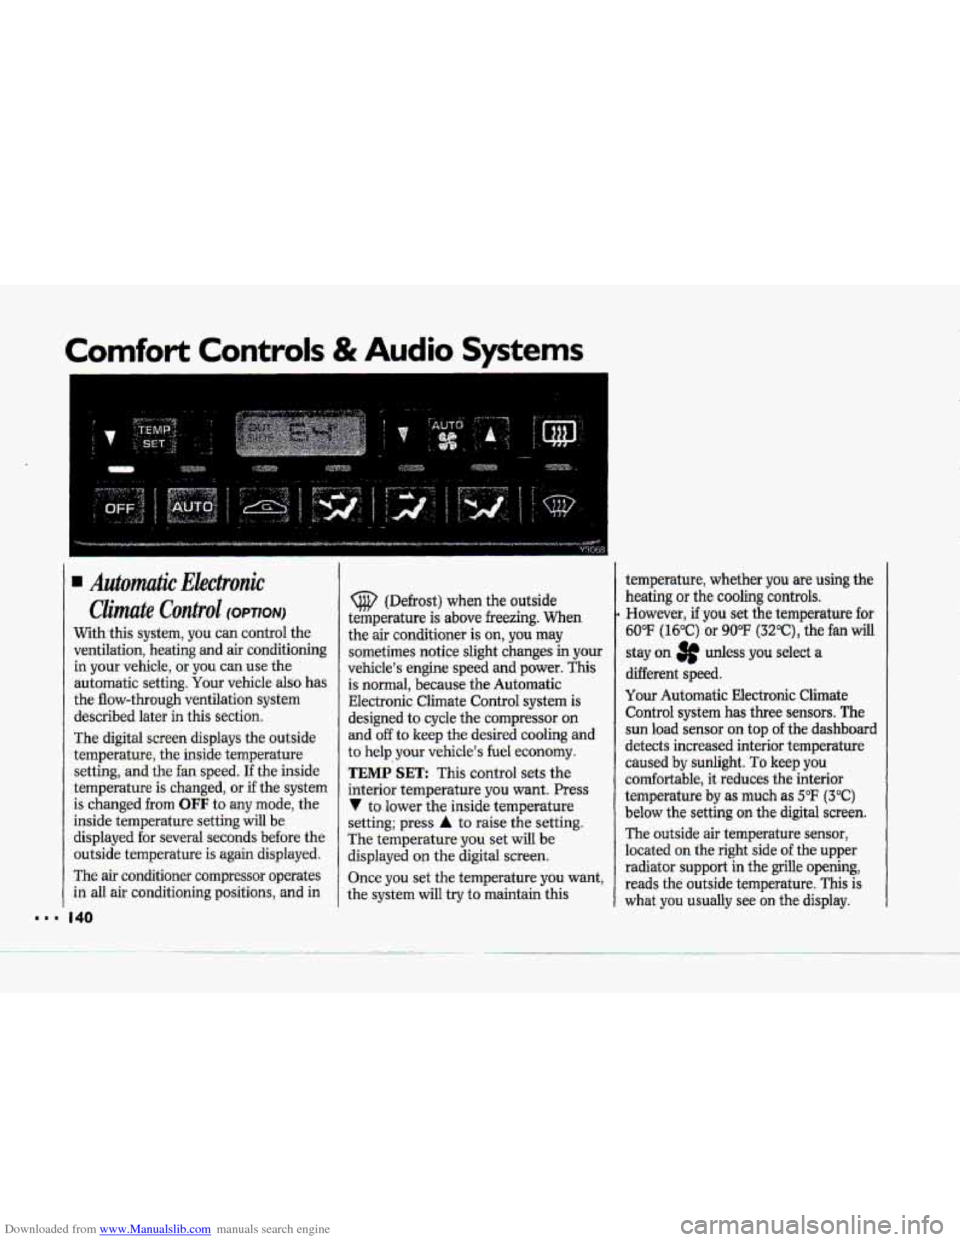
Automutic Ekctronic
Climate Control (OPTION)
With this system, you can control the
ventilation, heating
and air conditioning
in your vehicle, or you can use the
automatic setting.
Your vehicle also has
the flow-through ventilation system
described later
in this section.
The digital screen displays the outside
temperature, the inside temperature
setting, and the fan speed.
If the inside
temperature is changed,
or if the system
is changed from
OFF to any mode, the
inside temperature setting will be
displayed for several seconds before the
outside temperature is again displayed.
The
air conditioner compressor operates
in all air conditioning positions, and in
(@ (Defrost) when the outside
temperature is above freezing.
When
the air conditioner is on, you may
sometimes notice slight changes in your
vehicle's engine speed and power. This
is normal, because the Automatic
EIectronic Climate Control system
is
designed to cycle the compressor on
and off to keep the desired cooling and
to
help your vehicle's fuel economy.
TEMP SET: This control sets the
interior temperature you want. Press
V to lower the inside temperature
setting; press
A to raise the setting.
The temperature
you set will be
displayed on the digital screen.
Once you set the temperature you want,
the system will try to maintain this temperature,
whether
you are using the
heating
or the cooling controls.
However, if you set the temperature for
60°F (16°C) or 90°F (3Z°C), the fan will
stay on 3p udess you select a
different speed.
Your Automatic Electronic Climate
Control system
has three sensors. The
sun load sensor on top of the dashboard
detects increased interior temperature
caused by sunlight.
To keep you
comfortable, it reduces the interior
temperature
by as much as 5°F (3°C)
below the setting on the digital screen.
The outside air temperature sensor,
located on the right
side of the upper
radiator support
in the grille opening,
reads the outside temperature.
This is
what you usually see on the display.
Page 142 of 370
Downloaded from www.Manualslib.com manuals search engine 4
$"
i i
I i
?- i
i
i I
r I
r"
!
The outside ternperatufe sensor reading
is filtered (to minimize false readings)
as follows:
If- the outside temperature decreases,
the -&splayed temperature
will update
immediately.
I€- the outside temperature increases
(such as when stopped in traffic), the
displayed temperature will not update
until one
of the following eonditiom
is met:
Vehicle speed is above 25 mph
Vehicle speed 'is above 45 mph
Updates will occur continuously as long
as the vehicle speed remains above
25 mph (40 Wh).
zf the ignition is turned off for more
than three hours, the current outside air
tempepature when the vehicle is restarted
will be stored in the system immediately.
The third sensor
is the in-vehicle
tempefature sensor, located
in-the
center air outlet on the passenger side.
If you block or cover either interior
sensor, the sensor
will give your system
a false reading.
(40 ,nn/h) for at least 3 minutes, or
(72 krn/h) for 1% minutes.
AUTO (Automatic): This system
autmnatically
adjusts to the
temperature range you select.
rt stays
at. this temperature
with the least
possible noise level
and it will select
the best mode (Heater,
Air
Conditioning or Bi-Level) and fm
speed to keep you comfortable. The
fan blower
will vary its speed
automatically unless you ovenide
it
with theVqrAbutton,
1 .I Set the temperature you want with
2. Press AUTO. An indicator light will
3. Press A (Vent) to allow outside. air
the
TEMP SET switch.
glow above
this.hutton.
to
flaw into the vehicle.
d
Page 144 of 370
Downloaded from www.Manualslib.com manuals search engine h
P
To Reset Your System:
1. Turn your ignition.lrey to Off or
Lock.
2. Pull the Courtesy Lights Fuse and
Radio Fuse .out of the- main fuse
panel for
one minute.
3. Put-the fuses back in and start your
vehicle. Your system shuuld be
working.
If you still have a problem,
see your deder,
.For
fuse location, see the Index under
Fuses E. CircuitBreakers and Fuse
.Panel.
Directional Controls
When the €allowing buttons are pressed,
an indicator light.
will glow above .the
button and the fan speed will go to
AUTO 3f unless you select a dBerent
speed. When the system is'changed
€rum
OFF tu any mode, the inside
temperature setting is displayed for
several seconds before the .outside
temperature is again displayed.
& (Maximum A/C): Use for
maximum cooling
or quick cool-down
on very hot days..
This setting will not
operate when outside temperatures are
below
40°F (5°C) I
-2 (Bi-Level): This setting lets air
inte the vehicle only through the
.heater and air conditioner outlets and
brings.the temperature
to the range
you choose. It controls the fan blower
speed by using t-he input signals.
Bi-Level al.so
defogs the side windows,
You can. override the,fan blower speed
by using
the V and A buttons.
a(Vent): In this setting, the
compressor
will not. mn. The-system
will adju-st
to the temperature you
choose, but it cannot cool the vehicle
to a temperature colder than the
outside air temperature, This setting
Page 150 of 370
Downloaded from www.Manualslib.com manuals search engine P
E""
F
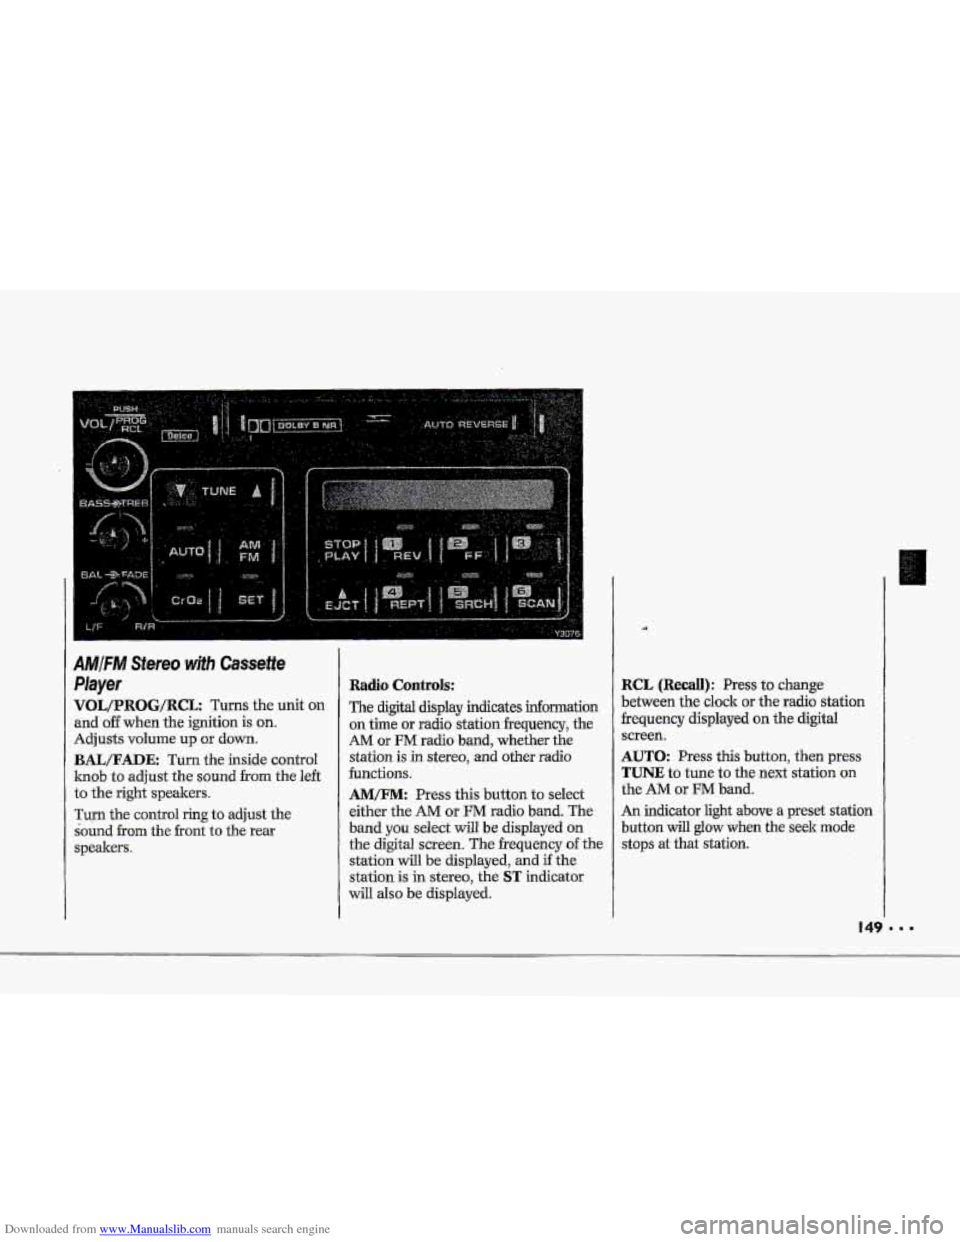
IMjFM Stereo wjth Cassette
'layer
qOL/PROG/RCL Turns the unit on
md off when the ignition is on.
Idjusts volume up or down.
BAIJFADE: Turn the inside control
mob to adjust the sound from the left
:o the right speakers.
rum the control ring to adjust the
bund
from the front to the rear
;peakem.
Radio Controls:
The digital display indicates infomation
on time or radio stationfrequency, the
AM or FM radio band, whether the
station is
in stereo, and other radio
functions.
AMEM: Press this button to select
either the
AM or FM radio band. The
band
you select will be displayed on
the digital screen. The frequency of the
station
will be displayed, and if the
station is in stereo, the
ST indicator
will also be displayed.
RCL (Recall): Press to change
between the clock or the radio station
frequency displayed on the digital
screen.
AUTO: Press this button, then press
TUNE to tune to the next station on
the AM or FM band.
An indicator light above
a preset station
button
will glow when the seek mode
stops at that station.
Page 151 of 370
Downloaded from www.Manualslib.com manuals search engine Comfort Controls & Audio Systems
AMlFM Stereo with Cassette
PIayer (cum)
TUNE. Press this control to tune in.
stations higher or lower on the AM.or
FM radio band. For rapid tuning, press
and hold one side of.TUNE., then:press
the other side. The display will revert
to time if the tuning activity has
ceased for approximately five sec0nd.s.
BASWXREB (Treble): The inside
knob adjusts the bass level up or
down. The autside ring;adjQsts the
treble level up or down.
To Preset Radio Stations:
The six numbered- pushbuttons can be.
used to preset up to twelve-radio
stations (six AM -and six FM stati.ons).
1. Tune in the desired station.
2, Press SET. The SET indicator light
will glow.
3. While the SET indicator. light- glows,
press one. of the six pushbuttons.
Whenever
you press this button again,
the preset station will be tuned in.
4. Repeat steps 1-3 -for each of six AM
and six FM stations,
To Play a Cassette Tape:
This audio system has automatic.
on Dolby B NR@- to reduce background
noise. on Dolby encoded tapes. Dolby"
Noise Re:du.ction is manufactured under
license from Dolby Laboratories
Licensing Corporation.
Dolby@ and the
00 symbol are trademarks of Dolby
Laboratories Licensing Corporation.
Turn the VOL 1Znd.b.ts turn the radio
on. Then push a Cassetteinto the
cassette entry door (the tape side goes
in :first). Do not use tapes-that are
loQger- than 45 minutes on each,:side.
The
display will indicate CA IN when a
cassette tape is in tkplayer.