1993 CHEVROLET CAMARO headlight bulb
[x] Cancel search: headlight bulbPage 81 of 358

9
The Turn
SignaUHeadlight
Beam
Lever
The lever on the left side of the steering
column includes your:
0 Turn Signal and Lane Change
0 Headlight Highbow Beam and
Passing Signal
0 Windshield Wipers
0 Windshield Washer
0 Cruise Control (Option)
Indicator
c; C. , .“ ,
i
I:
rum Signal and Lane Change
ndicator
’he turn signal has two upward
(for
tight) and two downward (for Left)
lositions. These positions allow you
to
ignal a turn or a lane change.
b signal a turn. move the lever all the
vay up or down. When the turn is
inished, the lever will return
.utomatically.
A green arrow on the instrument panel
will flash in the direction of the turn or
lane change.
To signal a lane change, just raise or
lower the lever
until the green arrow start:
to flash. Hold it there until you complete
your lane change. The lever
will return by
itself when you release
it.
As you signal a turn or a lane change, if
the arrows don’t flash but just stay on, a
signal bulb may be burned out and other
drivers won’t see your
turn signal.
If a bulb is burned out, replace it to help
avoid an accident.
If the green arrows
don’t go on at
all when you signal a turn,
check the fuse (see “Fuses” in the Index)
and for burned-out bulbs.
ProCarManuals.com
Page 253 of 358

m
2.
3.
4.
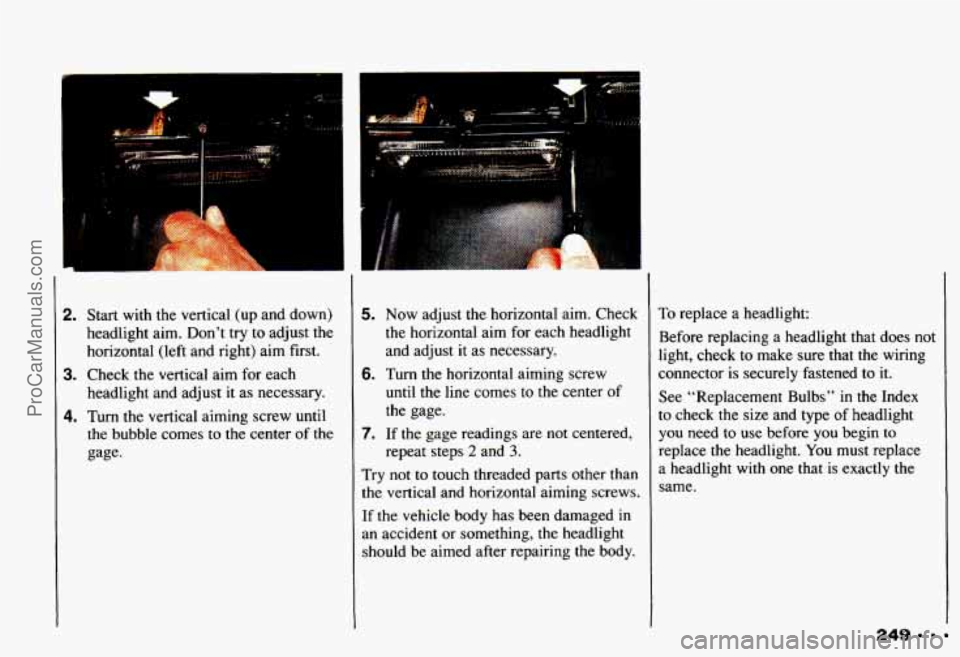
Start with the vertical (up and down)
headlight aim. Don’t try to adjust the
horizontal (left and right) aim first.
Check the vertical aim for each
headlight and adjust it as necessary.
Turn the vertical aiming screw until
the bubble comes
to the center of the
gage-
5. Now adjust the horizontal aim. Check
the horizontal aim for each headlight
and adjust it as necessary.
until the line comes to
the center of
the gage.
repeat steps
2 and 3.
6. Turn the horizontal aiming screw
7. If the gage readings are not centered,
Try not to touch threaded parts other than
the vertical and horizontal aiming screws.
If the vehicle body has been damaged in
an accident or something, the headlight
should be aimed after repairing the body.
To replace a headlight:
Before replacing a headlight that does not
light, check to make sure that the wiring
connector is securely fastened
to it.
See “Replacement Bulbs’’ in the Index
to check the size and type of headlight
you need to use before you begin to
replace the headlight. You must replace
a headlight with one that is exactly the
same.
249
ProCarManuals.com
Page 255 of 358

I
r 1
3.
4.
5.
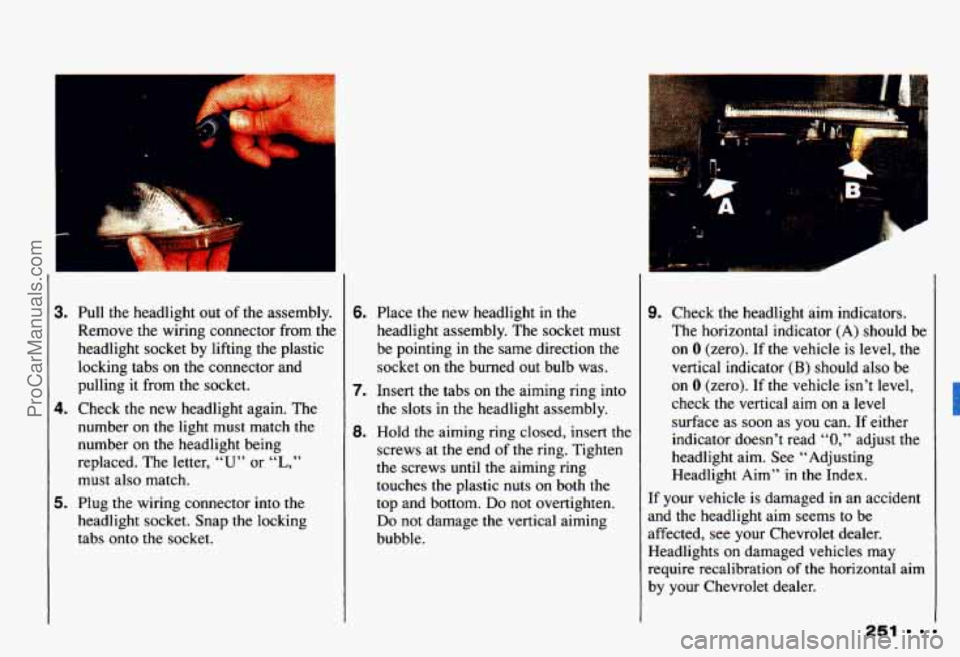
Pull the headlight out of the assembly.
Remove
the wiring connector from the
headlight socket by lifting the plastic
locking tabs on the connector and
pulling it from the socket.
Check
the new headlight again. The
number on
the light must match the
number on
the headlight being
replaced. The letter,
“U” or “L,”
must also match.
Plug the wiring connector into the
headlight socket. Snap the locking
tabs onto the socket.
6.
7.
8.
Place the new headlight in the
headlight assembly. The socket must
be pointing
in the same direction the
socket on the burned out bulb was.
Insert the tabs on the aiming ring into
the slots in the headlight assembly.
Hold the aiming ring closed, insert the
screws at the end of the ring. Tighten
the screws
until the aiming ring
touches the plastic nuts on both the
top and bottom.
Do not overtighten.
Do not damage the vertical aiming
bubble.
. ..
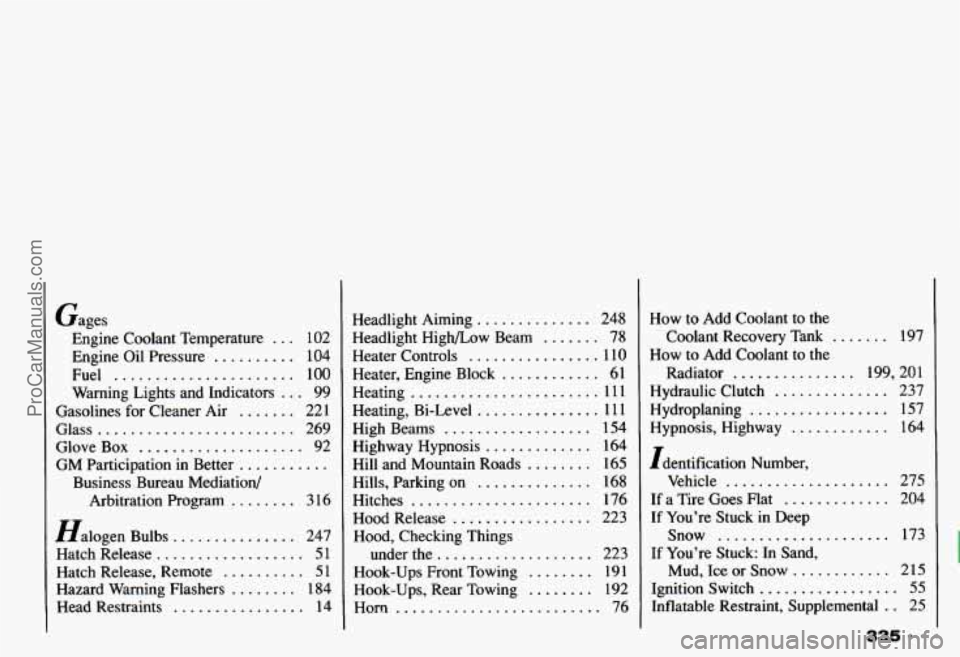
9. Check the headlight aim indicators.
The horizontal indicator (A) should be
on
0 (zero). If the vehicle is level, the
vertical indicator
(B) should also be
on 0 (zero). If the vehicle isn’t level,
check the vertical aim on a level
surface as soon as you can. If either
indicator doesn’t read
“0,” adjust the
headlight aim. See “Adjusting
Headlight Aim”
in the Index.
If your vehicle
is damaged in an accident
and the headlight aim seems to be
affected, see your Chevrolet dealer.
Headlights on damaged vehicles may
require recalibration
of the horizontal aim
by your Chevrolet dealer.
251
ProCarManuals.com
Page 283 of 358

Replacement Bulbs
Ashtray* ......................................................... 194
Automatic Transmission Indicator
...................................... 73
Backup
......................................................... 1141
Center High-Mounted Stoplight
....................................... 921
Cluster
.......................................................... 161
Console
......................................................... 194
Dome
........................................................... 561
DoorCourtesy
..................................................... 70
Fog
............................................................. 885
GloveBox ....................................................... 194
Front Parking and Turn Signal
....................................... 2397
Headlight
(Low Beam) ........................................... H-4351
Headlight (High Beam)
.......................................... H-4352
Heater and
A/C Control .............................................. 37
High Beam Indicator
............................................... 161
Indicator Lights
................................................... 161
License
.......................................................... 194
Reading
....................................................... 212-2
Sidemarker
....................................................... 194
TailOnly
........................................................ 194
Tail/Stop/Turn
................................................... 2057
"Manual transmission only
.
Turn Signal Indicators .............................................. 161
279 =
ProCarManuals.com
Page 334 of 358

9 330
Brakes Adjustment
................. 146
Anti-lock (ABS)
............. 143
Fluid
...................... 245
Master Cylinder
............. 244
Parking
..................... 70
Pedal Travel
................ 146
Rear Drum
................. 145
System Parts. Replacing
....... 246
System Warning Light
........ 100
Trailer
..................... 177
Wear Indicators. Disc
......... 145
Braking (Control
of a Vehicle) .... 141
Braking
in Emergencies ......... 146
“Break.1n.
.. New Vehicle ........ 55
Brightness Control .............. 85
Bulb Replacement ............. 247
Headlight Aiming
............ 248
Headlights
................. 248
Center High-Mounted
Stoplight
................. 252
Front Turn Signal
............ 252
Rear Lights
................. 253
Rear Sidemarker
............. 254
Bulbs. Replacement
............ 279
Bulbs. Halogen
................ 247
Capacities and Specifications
... 280
Carbon Monoxide
.............. 75
Care of Safety Belts
............ 269
Cassette and Compact Disc
Storage
..................... 93
Cassette Tape Player.
AM/FM Stereo with ........... 11 7 Cassette Tape Player. Care
Cassette Tape.
To Play a
of Your .................... 128
AM/FM Stereo with Cassette
Tape Player
................ 119
Chains. Safety
................ 177
Chains. Tire
.................. 264
Changing
a Flat Tire ............ 205
Check Gages Light
............. 105
Checking Things under the
Hood ...................... 223
Checking Your Restraint System
... 45
Chemical Paint Spotting
......... 273
Chevrolet Roadside Assistance
... 319
Chevrolet Service Publications (Ordering Information)
....... 323
ProCarManuals.com
Page 339 of 358

Gages Engine Coolant Temperature
... 102
Engine Oil Pressure .......... 104
Fuel ...................... 100
Warning Lights and Indicators ... 99
Gasolines for Cleaner Air ....... 221
Glass ........................ 269
Glove Box .................... 92
GM Participation in Better ...........
Business Bureau Mediation/
Arbitration Program
........ 3 16
Halogen Bulbs ............... 247
Hatch Release .................. 51
Hatch Release. Remote .......... 51
Hazard Warning Flashers ........ 184
Head Restraints ................ 14
Headlight Aiming .............. 248
Headlight Highbow Beam ....... 78
Heater Controls ................ 110
Heater. Engine Block ............ 61
Heating ....................... 11 1
Heating. Bi-Level ............... 111
High Beams .................. 154
Highway Hypnosis ............. 164
Hill and Mountain Roads ........ 165
Hills. Parking on .............. 168
Hitches ...................... 176
Hood Release ................. 223
Hood. Checking Things
under the
................... 223
Hook-Ups Front Towing ........ 19 1
Hook-Ups. Rear Towing ........ 192
Horn ......................... 76
How to Add Coolant to the
Coolant Recovery Tank
....... 197
How to Add Coolant to the
Radiator
............... 199. 201
Hydraulic Clutch .............. 237
Hydroplaning ................. 157
Hypnosis. Highway ............ 164
Identification Number.
Vehicle
.................... 275
If a Tire Goes Flat ............. 204
If You’re Stuck in Deep
Snow
..................... 173
If You’re Stuck: In Sand.
Mud. Ice or Snow ............ 215
Ignition Switch ................. 55
Inflatable Restraint. Supplemental . . 25
335 . .
ProCarManuals.com