1993 CHEVROLET CAMARO bulb
[x] Cancel search: bulbPage 81 of 358

9
The Turn
SignaUHeadlight
Beam
Lever
The lever on the left side of the steering
column includes your:
0 Turn Signal and Lane Change
0 Headlight Highbow Beam and
Passing Signal
0 Windshield Wipers
0 Windshield Washer
0 Cruise Control (Option)
Indicator
c; C. , .“ ,
i
I:
rum Signal and Lane Change
ndicator
’he turn signal has two upward
(for
tight) and two downward (for Left)
lositions. These positions allow you
to
ignal a turn or a lane change.
b signal a turn. move the lever all the
vay up or down. When the turn is
inished, the lever will return
.utomatically.
A green arrow on the instrument panel
will flash in the direction of the turn or
lane change.
To signal a lane change, just raise or
lower the lever
until the green arrow start:
to flash. Hold it there until you complete
your lane change. The lever
will return by
itself when you release
it.
As you signal a turn or a lane change, if
the arrows don’t flash but just stay on, a
signal bulb may be burned out and other
drivers won’t see your
turn signal.
If a bulb is burned out, replace it to help
avoid an accident.
If the green arrows
don’t go on at
all when you signal a turn,
check the fuse (see “Fuses” in the Index)
and for burned-out bulbs.
ProCarManuals.com
Page 106 of 358

Features 8t Controls
f
I
I
. ’ 102
If the light stays on or comes on when
you’re driving, stop
as soon as possible
and turn the key off. Then start the engine
to reset the system. If the light still stays
on, or comes on again while you’re
driving, your Chevrolet needs service.
Unless the regular brake system warning
light is also on, you
will still have brakes,
but not anti-lock brakes. If the regular
brake system warning
light is also on, see
“Brake System Warning Light” earlier
in
this part. When your anti-lock system is working,
the message
LOW TRAC will appear on
your instrument cluster. This means that
slippery road conditions may exist. Adjust
your driving accordingly. The light
will
stay on for about four seconds after the
ABS stops working. The
LOW TRAC
light also comes on during engine starting
as
a bulb check.
Engine Coolant Temperature Gage
This gage shows the engine coolant
temperature.
If the gage pointer moves
into the red area, your engine is
too hot!
It means that your engine coolant has
overheated. If you have been operating
your vehicle under normal driving
conditions, you should
pull off the road,
stop your vehicle and
turn off the engine
as soon as possible.
HOT COOLANT CAN BURN YOU
BADLY!
In ”Problerns on the Road,” this manual
shows
what to do. See “Engine
Overheating”
in the Index.
ProCarManuals.com
Page 183 of 358

Turn Signals When Towing a Trailer
When you tow a trailer, your vehicle has to
have a different turn signal flasher and
extra wiring. The green arrows on your
instrument panel will flash whenever you
signal a turn or lane change. Properly
hooked up, the trailer lights will also flash,
telling other drivers you’re about to
turn,
change lanes or stop.
When towing a trailer, the green arrows on
your instrument panel will flash for turns
even if the bulbs on the trailer are burned
out. Thus,
you may think drivers behind
you are seeing your signal when they are
not. It’s important to check occasionally to
be sure the trailer bulbs are still working.
Driving on Grades
Reduce speed and shift to a lower gear
before you start down a long or steep
downgrade. If
you don’t shift down, you
might have to use your brakes
so much
that they would get hot and no longer work well.
On a long uphill grade, shift down and
reduce your speed to around
45 mph
(70 km/h) to reduce the possibility of
engine and transmission overheating. If you
are towing a trailer and you
have an automatic transmission with
Overdrive, you may prefer to drive
in D
instead of Overdrive (or, as you need to,
a lower gear). Or, if you have a manual
transmission
with fifth (or sixth) gear
and you are towing a trailer, it’s better
not to use
fifth (or sixth) gear. Just drive
in fourth gear (fifth gear
if you have
a six-speed manual transmission)
(or, as you need to, a lower gear.
ProCarManuals.com
Page 221 of 358

Part b
Here you will find information
about the care
of your Chevrolet .
This part begins with service and
fuel information. and then it shows
how
to check important fluid and
lubricant levels
. There is also
technical information about your
vehicle. and a section devoted to
its appearance care
.
Service & Appearance Care
Service .......................................................... 218
Fuel
............................................................ 219
Checking Things under the Hood
..................................... 223
HoodRelease
................................................... 223
Engineoil
...................................................... 226
Aircleaner
..................................................... 230
Automatic Transmission Fluid
...................................... 233
Manual Transmission Fluid
........................................ 235
Hydraulicclutch
................................................ 237
RearAxle
...................................................... 237
Enginecoolant
.................................................. 238
Power Steering Fluid
............................................. 242
Windshield Washer Fluid
.......................................... 243
Brake Master Cylinder
............................................ 244
Battery
........................................................ 246
Bulb Replacement
................................................. 247
Loading Your Vehicle
.............................................. 255
Appearance Care and Maintenance Materials
............................ 274
Vehicle Identification Number (VIN)
.................................. 275
Service Parts Identification Label
..................................... 275
Add-on Electrical Equipment
........................................ 275
Fuses and Circuit Breakers
.......................................... 276
Replacement Bulbs
................................................ 279
Capacities and Specifications
......................................... 280
Tires
............................................................ 256
Appearancecare
.................................................. 265
217
ProCarManuals.com
Page 251 of 358

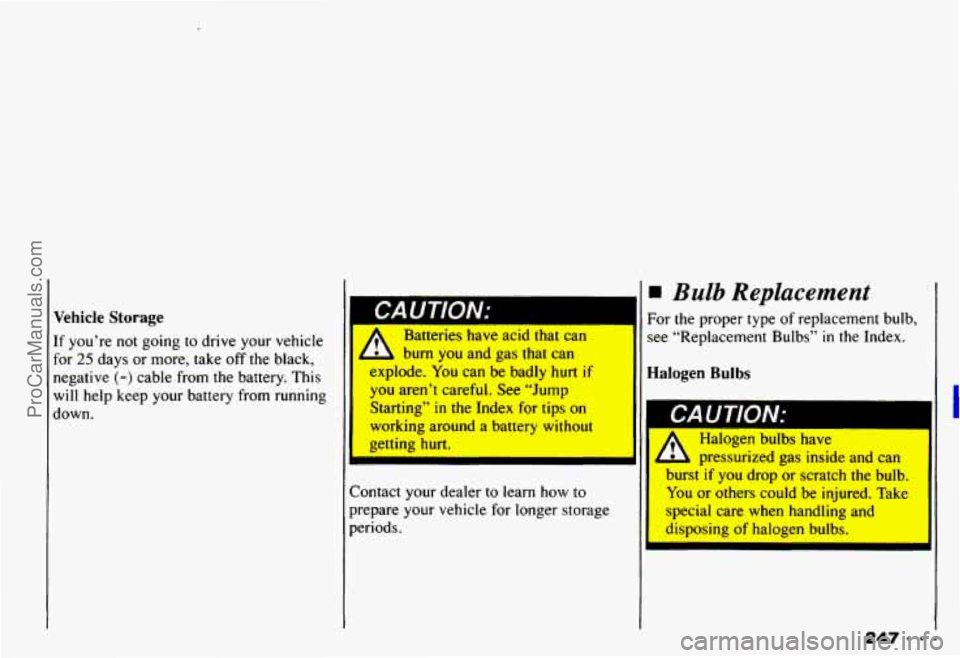
Vehicle Storage
If you’re not going to drive your vehicle
for
25 days or more, take off the black,
negative
(-) cable from the battery. This
will help keep your battery from running
down.
I I Bulb Replacement
CAUTION:
I
I For the proper type of replacement bulb,
Batteries have acid that can see “Replacement Bulbs” in the Index.
burn you and gas that can
explode. You can be badly hurt
if Halogen Bulbs
vou aren’t careful. See “Jump
:Starting” in the Index for tips on
working around a battery without
I
nettinn hurt.
Contact your dealer to learn how to
prepare your vehicle
for longer storage
periods. Halogen bulbs have
pressurized gas inside and can
I burst if you drop or scratch the bulb.
You or others could be injured. Take
special care when handling and
disposing of halogen bulbs.
ProCarManuals.com
Page 253 of 358

m
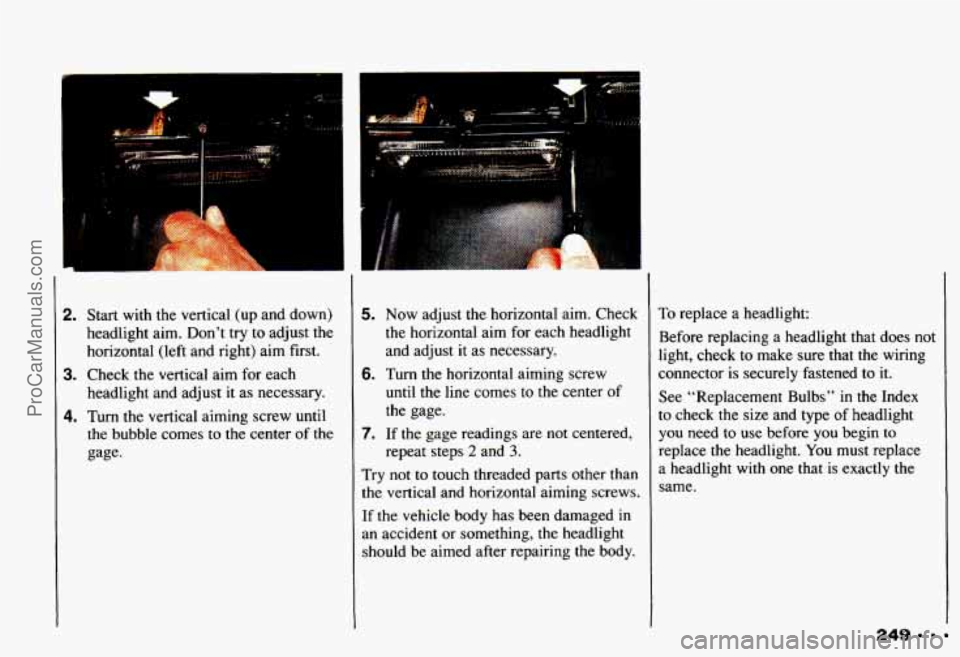
2.
3.
4.
Start with the vertical (up and down)
headlight aim. Don’t try to adjust the
horizontal (left and right) aim first.
Check the vertical aim for each
headlight and adjust it as necessary.
Turn the vertical aiming screw until
the bubble comes
to the center of the
gage-
5. Now adjust the horizontal aim. Check
the horizontal aim for each headlight
and adjust it as necessary.
until the line comes to
the center of
the gage.
repeat steps
2 and 3.
6. Turn the horizontal aiming screw
7. If the gage readings are not centered,
Try not to touch threaded parts other than
the vertical and horizontal aiming screws.
If the vehicle body has been damaged in
an accident or something, the headlight
should be aimed after repairing the body.
To replace a headlight:
Before replacing a headlight that does not
light, check to make sure that the wiring
connector is securely fastened
to it.
See “Replacement Bulbs’’ in the Index
to check the size and type of headlight
you need to use before you begin to
replace the headlight. You must replace
a headlight with one that is exactly the
same.
249
ProCarManuals.com
Page 255 of 358

I
r 1
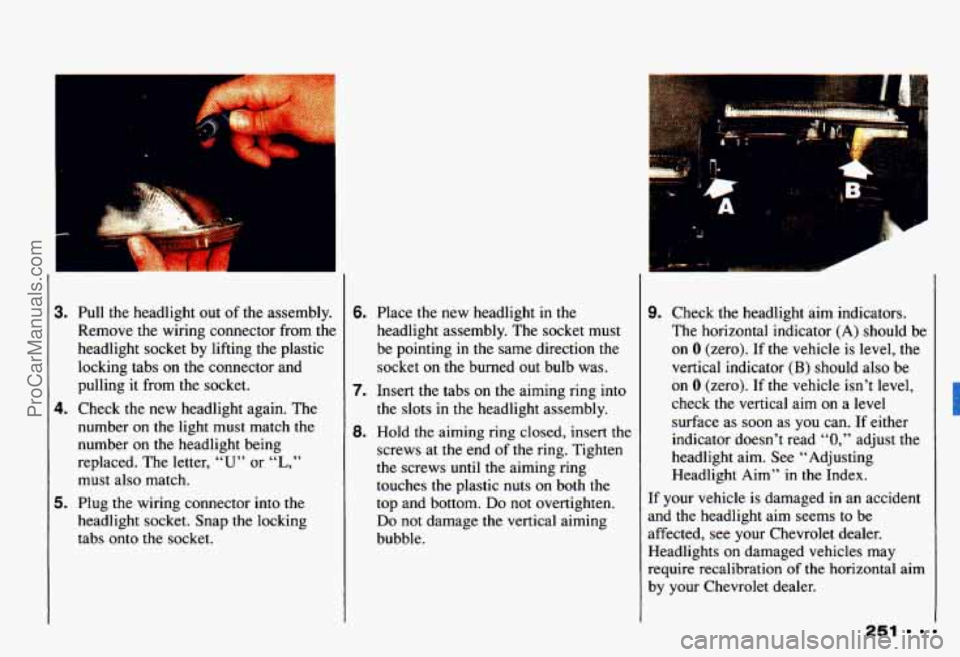
3.
4.
5.
Pull the headlight out of the assembly.
Remove
the wiring connector from the
headlight socket by lifting the plastic
locking tabs on the connector and
pulling it from the socket.
Check
the new headlight again. The
number on
the light must match the
number on
the headlight being
replaced. The letter,
“U” or “L,”
must also match.
Plug the wiring connector into the
headlight socket. Snap the locking
tabs onto the socket.
6.
7.
8.
Place the new headlight in the
headlight assembly. The socket must
be pointing
in the same direction the
socket on the burned out bulb was.
Insert the tabs on the aiming ring into
the slots in the headlight assembly.
Hold the aiming ring closed, insert the
screws at the end of the ring. Tighten
the screws
until the aiming ring
touches the plastic nuts on both the
top and bottom.
Do not overtighten.
Do not damage the vertical aiming
bubble.
. ..
9. Check the headlight aim indicators.
The horizontal indicator (A) should be
on
0 (zero). If the vehicle is level, the
vertical indicator
(B) should also be
on 0 (zero). If the vehicle isn’t level,
check the vertical aim on a level
surface as soon as you can. If either
indicator doesn’t read
“0,” adjust the
headlight aim. See “Adjusting
Headlight Aim”
in the Index.
If your vehicle
is damaged in an accident
and the headlight aim seems to be
affected, see your Chevrolet dealer.
Headlights on damaged vehicles may
require recalibration
of the horizontal aim
by your Chevrolet dealer.
251
ProCarManuals.com
Page 256 of 358

Service Station Information
, ,'
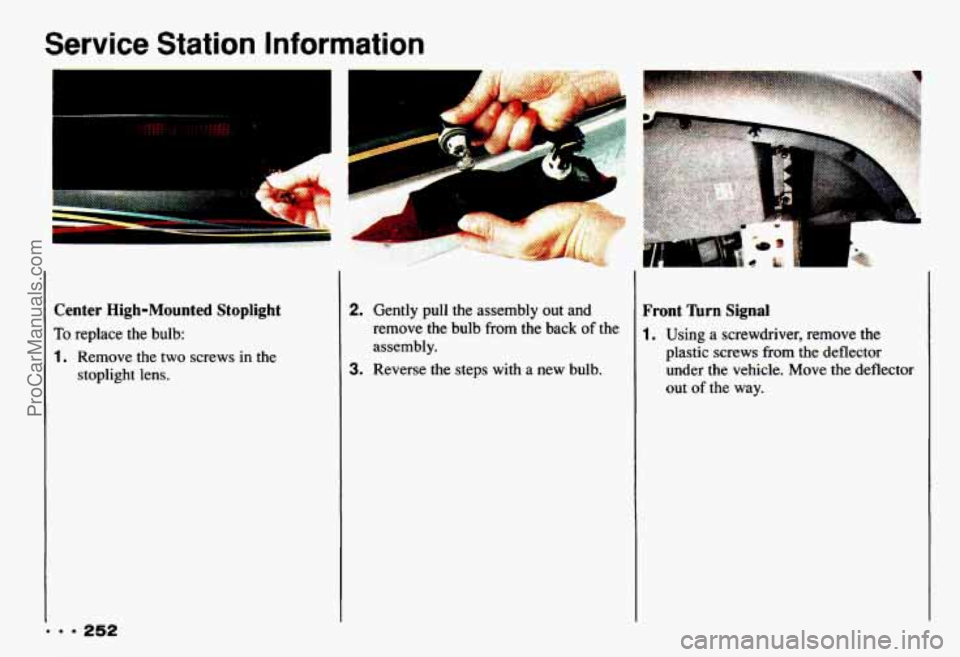
Center High-Mounted Stoplight
To replace the bulb:
1. Remove the two screws in the
stoplight lens.
2. Gently pull the assembly out and
remove the bulb
from the back of the
assembly.
3. Reverse the steps with a new bulb.
Front 'hrn Signal
1. Using a screwdriver, remove the
plastic screws from the deflector
under the vehicle. Move the deflector
out of the way.
ProCarManuals.com