1993 CADILLAC FLEETWOOD display
[x] Cancel search: displayPage 138 of 386
Downloaded from www.Manualslib.com manuals search engine The same button also makes other readings (like temperature, fuel and
odometer) go between English and metric.
Speedometer and Qdometer
Your speedometer lets you see your speed in both miles per hour (mph)
and kilometers per hour (kmih). Your odometer shows how far your
vehicle has been driven, in either miles (used in the
U.S.) or kilometers
(used
in Canada).
Trip Qdometer
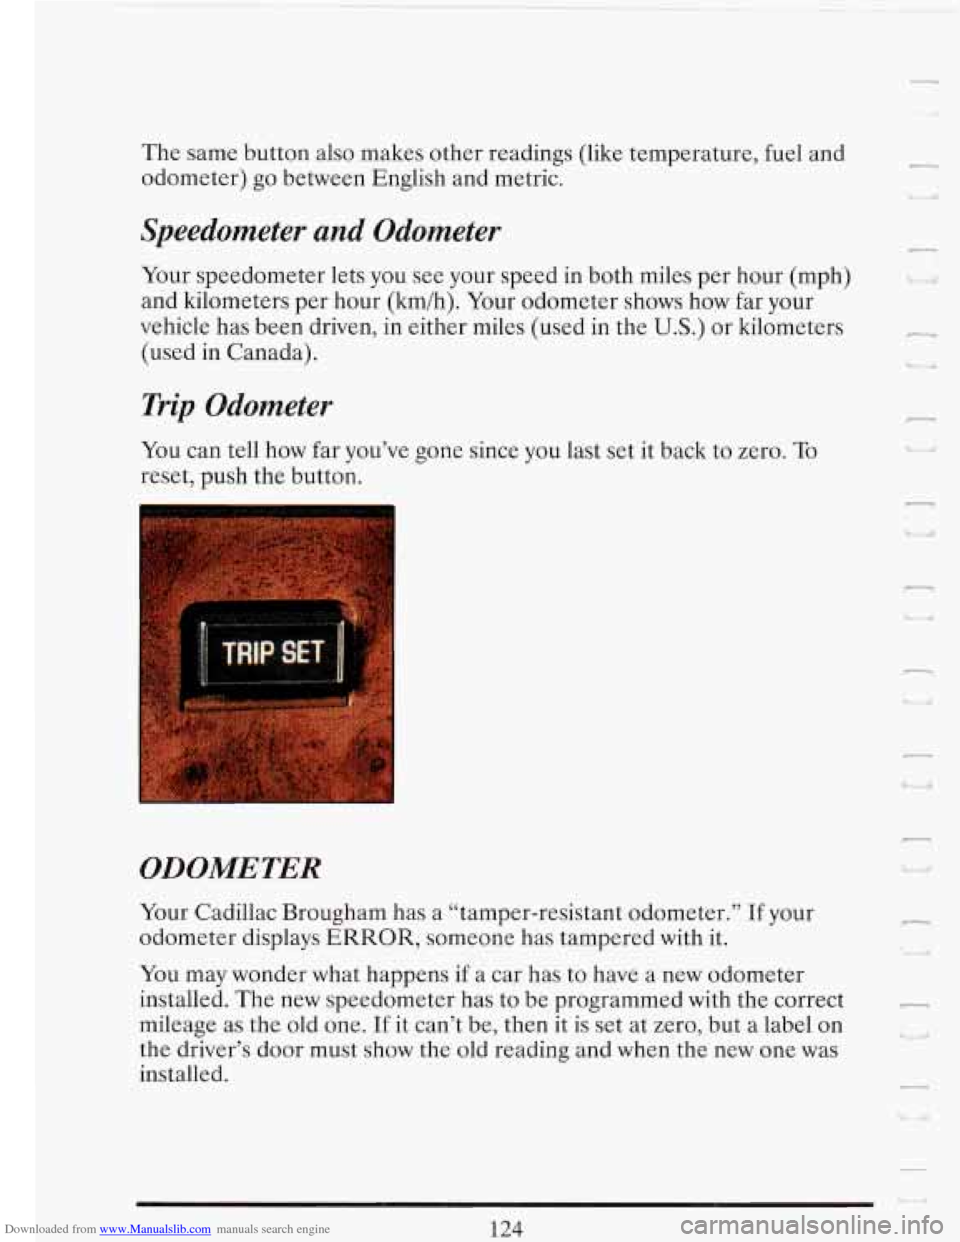
You can tell how far you’ve gone since you last set it back to zero. To
reset, push the button.
n
‘I a
-
w ‘I
ODOMETER
Your Cadillac Brougham has a “tamper-resistant odometer.” If your
odometer displays
ERROR, someone has tampered with it.
You may wonder what happens if a car has to have a new odometer
installed. The new speedometer has to be programmed with the correct
mileage as the old one.
If it can’t be, then it is set at zero, but a label on
the driver’s door must show the old reading and when the new one was
installed.
n
r
L
124
Page 153 of 386
Downloaded from www.Manualslib.com manuals search engine ELECTRONIC CLIMTE CONTROL
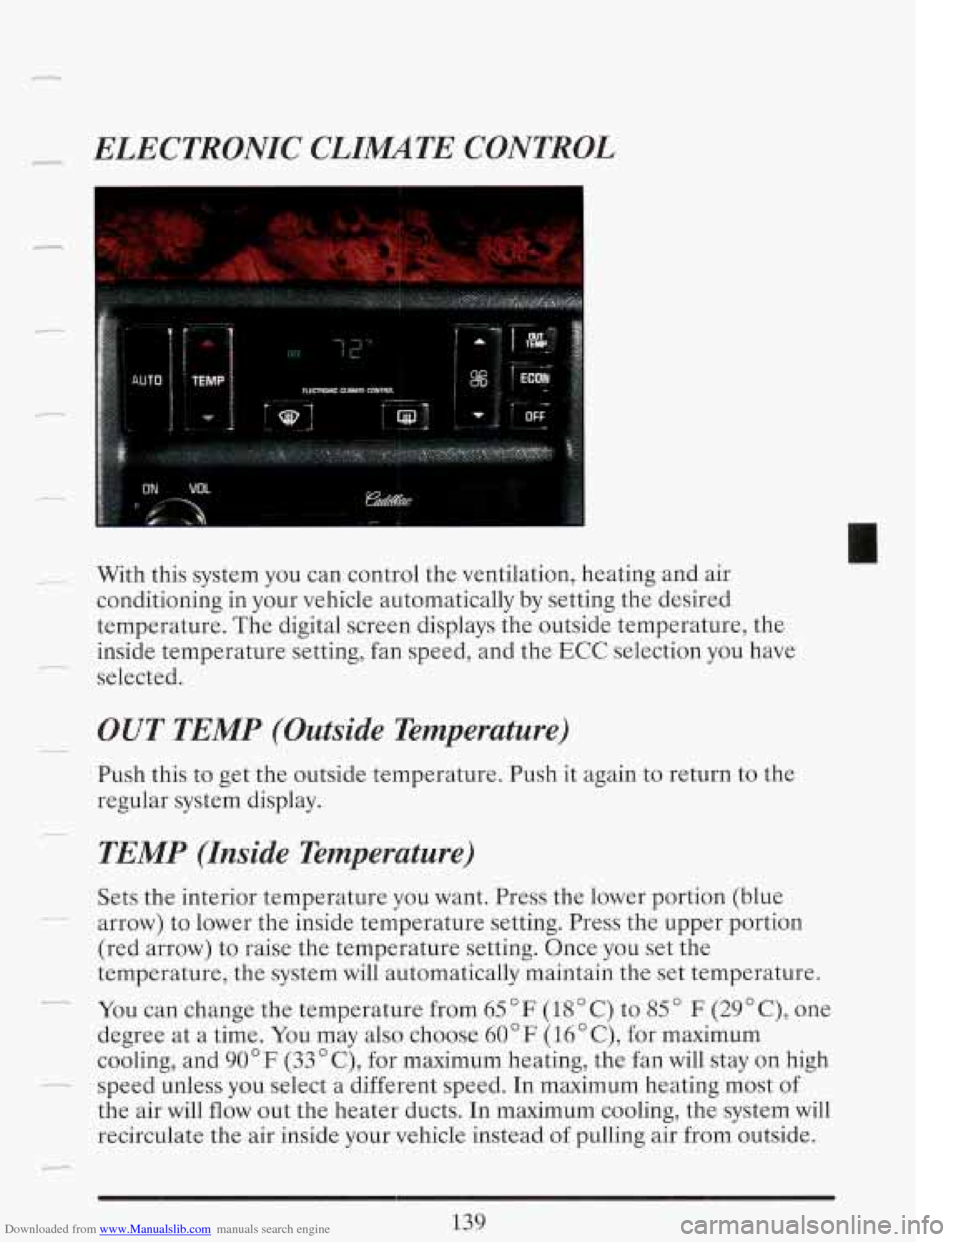
With this system you can control the ventilation, heating and air
conditioning in your vehicle automatically by setting the desired
temperature. The digital screen displays the outside temperature, the
inside temperature setting, fan speed, and the ECC selection you have
selected.
OUT TEMP (Outside Temperature)
Push this to get the outside temperature. Push it again to return to the
regular system display.
TEMP (Inside Temperature)
Sets the interior temperature you want. Press the lower portion (blue
arrow) to lower the inside temperature setting. Press the upper portion
(red arrow) to raise the temperature setting. Once you set the
temperature, the system will automatically maintain the set temperature.
You can change the temperature from
65 " F (18 " C) to 85 " F (29' C), one
degree at a time. You may also choose
60 " F (16 " C), for maximum
cooling, and
90°F (33" C), for maximum heating, the fan will stay on high
the air will flow out the heater ducts. In maximum cooling, the system will
recirculate the air inside your vehicle instead
of pulling air from outside.
- -.
-
- speed unless you select a different speed. In maximum heating most of
Page 154 of 386

Downloaded from www.Manualslib.com manuals search engine OFF
Nothing is on, but air will flow through your Cadillac if the the car is
moving. The air flow will be felt through the heater ducts.
ECON
Use this in cold or cool weather to save fuel. It won’t cool or remove
humidity from the air. However, the system will try to keep the air at the
chosen temperature.
If it’s
so warm outside that you need to cool the air, use the next choice.
AUTO
With this setting the system automatically controls the temperature, air
distribution and fan speeds.
In cold conditions the the fan well not come
on until the system senses that the engine has started to warm up. This
prevents cold air from blowing on you and your occupants.
f
n
LI.
n
-i
-1
I
The fan speed is controlled automatically if you have the Electronic
Climate Control set on “AUTO.” However, if you want the fan to run at a
-
lower speed, push the lower portion of the fan switch.
If you want the blower to run at a fixed higher speed, push the upper
portion of the fan switch until you see “HI”
on the display. P-
If you want the fan to run at a fixed low speed, push the switch until“L0”
is shown on the display. L,
If you want the fan speed to be automatic but you like the fan to be
higher or lower than the “AUTO” settings, just push the switch until
either“
HI AUTO” or “AUTO LO” is displayed.
If the Fahrenheit
(F”) or Celsius (C”) symbol begins to flash, or flashes
when you turn on the ignition, it indicates an electrical problem with your
Page 160 of 386
Downloaded from www.Manualslib.com manuals search engine The upper knob
The upper knob does these four things:
It turns the radio on and off.
n
It controls the volume.
Volume level automatically adjusts to compensate for road and wind
noise as your driving your Cadillac. Adjust the volume
to the listening
level you want at any time. Then as you drive the volume
will change
to match the noise present at any particular speed. The volume should
always sound close to the same level to you as you drive.
It lets you see what station you have. (When the radio is on, push the 'k
knob to display the station.)
i9
n
U
r
It tells you the time. (When the ignition is off, push the upper knob to
display the time.)
1. >
Behind the upper knob is a balance control. It moves the sound between
the left and right speakers.
f---
7
u
The lower knob
Turn the lower knob to choose radio stations. Push the knob to switch
from
AM to FM.
The control behind the lower knob moves the sound between your front -
and rear speakers. 'I i
SCAN n I
When you pash this switch either up or down, the SCAN indicator in the
display will light and the radio will find the next station and stay there for
5 to 10 seconds. Then it will go to the next station and pause, and keep
doing that. When you want it to stop, just push either the SCAN switch
2, I
again or the upper knob. I
SEEK
This switch chooses stations, but it doesn't keep moving as SCAN does.
When you push
SEEK up or down, the radio will automatically go to the
next strongest station and stay there.
_a
146
Page 162 of 386
Downloaded from www.Manualslib.com manuals search engine Follow these steps to modify each of the Preset Auto-equalization
buttons.
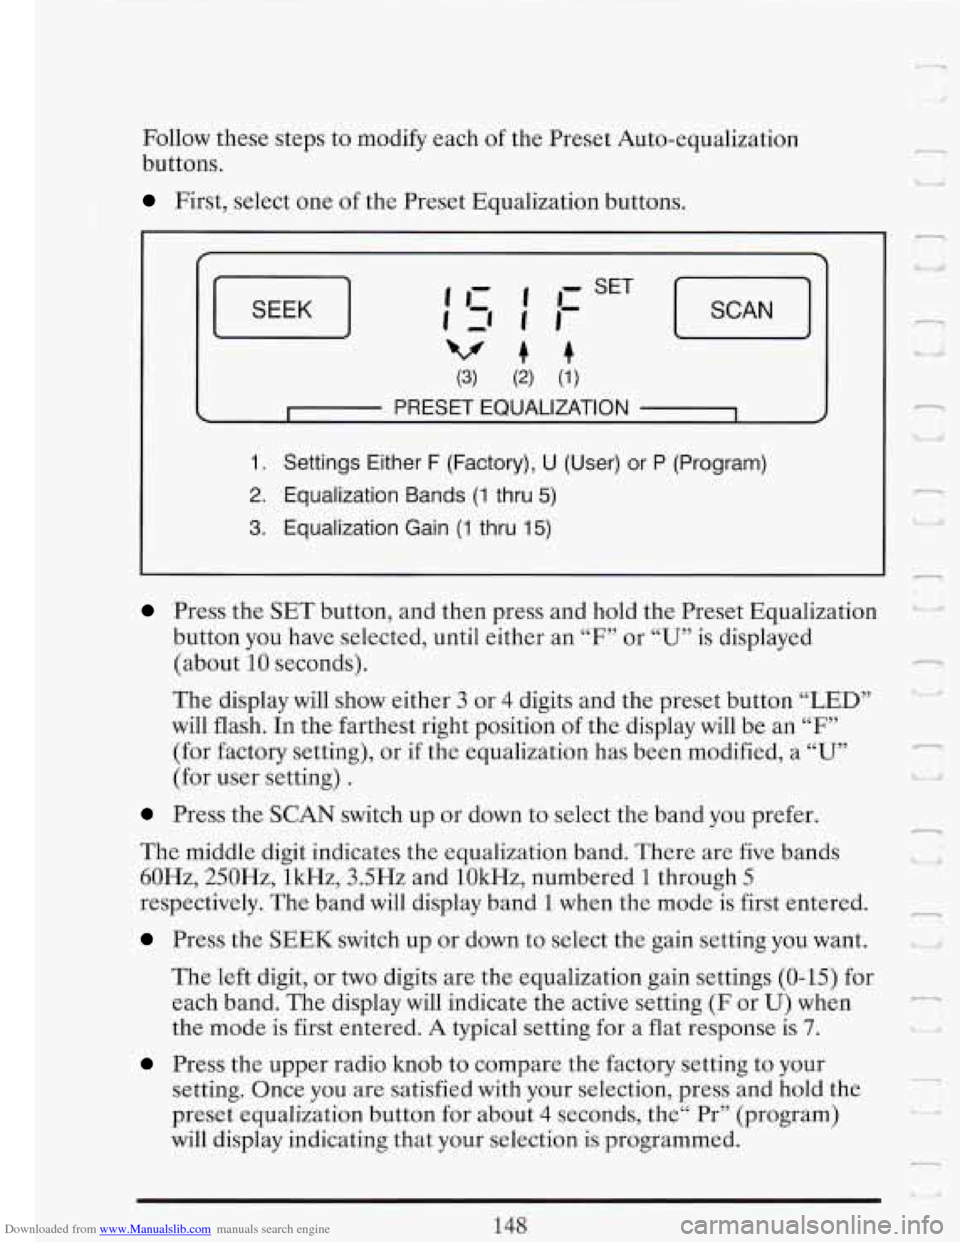
First, select one of the Preset Equalization buttons.
SEEK J
(3) (2) (1)
c I PRESET EQUALIZATION 1 4
1. Settings Either F (Factory), U (User) or P (Program)
2. Equalization Bands (1 thru 5)
3. Equalization Gain (1 thru 15)
Press the SET button, and then press and hold the Preset Equalization
button you have selected, until either an
“F7’ or “U” is displayed
(about
10 seconds).
The display will show either 3 or 4 digits and the preset button “LED”
will flash. In the farthest right position
of the display will be an “F”
(for factory setting), or if the equalization has been modified, a “U”
(for user setting) .
Press the SCAN switch up or down to select the band you prefer.
The middle digit indicates the equalization band. There are five bands
60Hz, 250Hz, lkHz, 3.5Hz and lOkHz, numbered
1 through 5
respectively. The band will display band 1 when the mode is first entered.
Press the SEEK switch up or down to select the gain setting you want.
The left digit, or two digits are the equalization gain settings (0-15) for
each band. The display
will indicate the active setting (F or U) when
the mode is first entered.
A typical setting for a flat response is 7.
Press the upper radio knob to compare the factory setting to your
setting. Once you are satisfied with your selection, press and hold the
preset equalization button for about
4 seconds, the“ Pr” (program)
will display indicating that your selection is programmed.
148
l n
d
r
Lj Ill
--
.-
I -.
Page 166 of 386

Downloaded from www.Manualslib.com manuals search engine ST-PLAY (Stop-Play)
Press ST-PLAY to switch back to the radio without ejecting the tape. In
ST-PLAY function
only the tuning knob can be used for selecting stations.
To Eject A Tape
To remove the tape once it is stopped, push EJECT
The Delco Cassette And Compact Disc Music System
This optional sound system combines an AM/FM stereo radio with a
cassette tape player and a compact disc player in a single unit.
To operate the radio and cassette tape player portion of this music
system, please read the beginning of this section, “How To Operate Your
Sound System” and “Your Cassette Tape Player”.
To Play the Disc Player
Before you begin, please note: don’t use the mini-discs that are called
“singles”
. They won’t eject. Use full-size compact discs only.
Turn the radio on.
2
U a,
Insert a disc (label side up) partway into the slot. The player will pull it in.
Wait a few seconds and the disc will play.
The DNR@ will be disabled and -
I
the display will show Track “ 1 TRKCD” for about 5 seconds, then “CD”
will show in the display.
1F
If the disc comes back out, check to see if
The disc is upside down.
The disc is dirty, scratched, or wet.
There’s too much moisture in the air. (If there is, wait about one hour
and try again).
I
RCLIPROG (RecalllProgram)
Press once to see which track is being played. (It also allows for disc
programming.)
n
-
152
Page 167 of 386

Downloaded from www.Manualslib.com manuals search engine r
e Within 5 seconds press it a second time to see how long the disc has
e Press it a third time to see the time of day.
been
playing.
To Program ’Ikacks
You can program up to 10 tracks for your listening pleasure.
1. Press the RCL/PROG knob. “CD” and “TRACK” will light in the
2. Within 5 seconds, turn the lower TUNE knob to the track you want to
display.
This also allows you to program disc track playback.
hear first. The track number will flash.
3. Press the SET button and the track number will stop flashing. This
indicates that the track is programmed.
4. Repeat steps 2 and 3 to program up to 9 more tracks.
5. Press the RCL/PROG knob a second time to begin playing the first
To cancel the programming mode press RCL/PROG and press SET If
~ “ALE is showing on the display, allow 10 seconds to pass. You can also
cancel the programming mode by ejecting the disc.
programmed
track.
Push this switch up or down
to go to the beginning of the next or previous
track. At least
8 seconds must have played for the SEEK function to find
~ the start of the current track.
SCAN
Push this switch up or down to sample about 15 seconds of the beginning
of each track. Press it again or the upper knob to stop the SCAN
function.
Note:
If you are in the Program mode, it is possible to modify the
playback order by using the TUNE knob.
If you need to review the
playback order use either the SEEK or SCAN switch. This review can be
stopped by pushing the SCAN switch.
~
7
-
153
Page 168 of 386
Downloaded from www.Manualslib.com manuals search engine - t
REV (Reverse)
Push and hold REV to return rapidly to a favorite passage. Release it to
play the passage. The elapsed time will be displayed to show the reverse
progress of the
CD.
FWD (Fast Forward)
Press and hold FWD to advance quickly within a track. Release it to
resume playing. Elapsed time will be displayed to show the forward
progress
of the CD.
ST-EJECT (Stop-Eject)
Press ST-EJECT The disc or tape will stop without ejecting it and the
radio will start to play. Press it again and the disc
or tape will eject.
PLAY
Press PLAY to restart the disc or tape. It will begin playing at the point
where it had stopped. If the CD and cassette tape are inserted at the
same time, pressing the play button will switch between CD and the Tape.
COMP (Compression)
r-) U
1 I. L
Pressing COMP makes soft and loud passages more nearly equal in
volume. For example, playing classical or jazz music with very quiet and
very loud passages in the same tune. The COMP display will light as long
as COMP
is on. E
Setting The Clock
Turn the ignition and radio on. Then:
To Set the Hour:
Press SET, and within 5 seconds,
"I Lr/ 'i
Press and hold SEEK up or down. When the clock gets to the correct
hour, let go. -