1993 BUICK LESABRE clock
[x] Cancel search: clockPage 119 of 324

@ Part 3 Comfort Controls & Audio Systems
In this part you’ll find out how to operate the comfort control systems and audio systems offered with your Buick . Be
sure to read about the particular system supplied with your vehicle
.
Part 3 includes:
Comfort Control System
........................................................ 122
Heater and Defroster
....................................................... 123. 126
Airconditioner
........................................................... 119. 125
Rear Window Defogger
.................................................... 124. 127
Ventilation
................................................................... 126
Audiosystems
.................................................................... 127
Settingtheclock
................................................. 130. 132. 134. 137
RadioControls
....................................................... 129. 130. 133
TapePlayerControls
................................................... 132. 134. 136
CDPlayerControls
............................................................ 138
Understanding Radio Reception .................................................. 127
CareofCompactDiscs
......................................................... 142
Antennacare
................................................................ 142
Care
of Cassette
Tape Player & Tapes ............................................. 141
117
-
Page 131 of 324
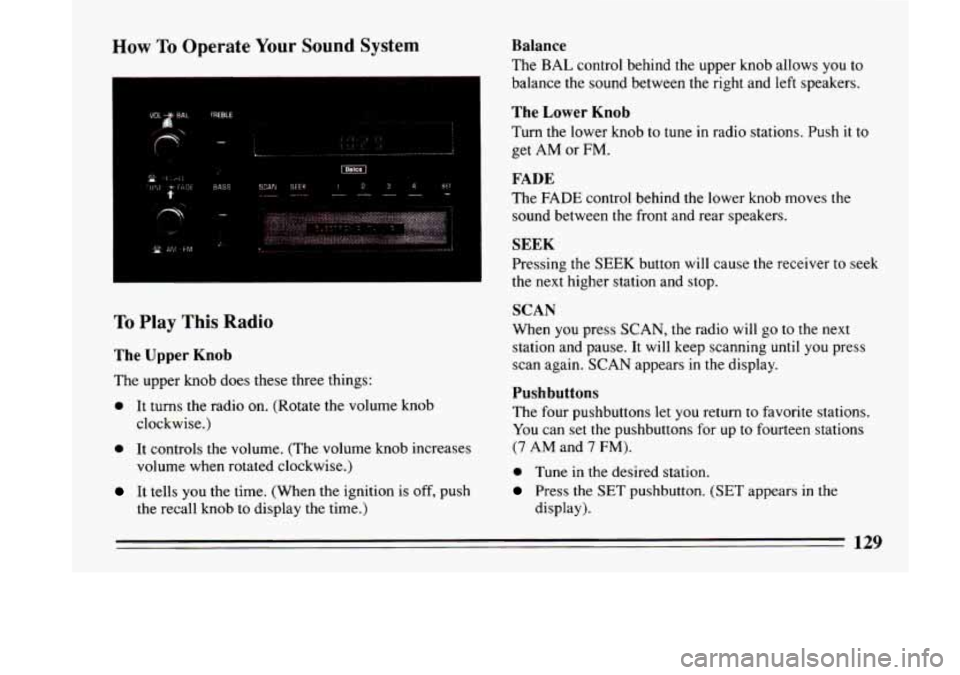
How To Operate Your Sound System
SCAN SEEK i234 SEI ---- _--- -
,.
I
To Play This Radio
The Upper Knob
The upper knob does these three things:
0 It turns the radio on. (Rotate the volume knob
clockwise.)
0 It controls the volume. (The volume knob increases
volume when rotated clockwise.)
It tells you the time, (When the ignition is off, push
the recall knob to display
the time.)
Balance
The BAL control behind the upper knob allows you to
balance the sound between the right and left speakers.
The Lower Knob
Turn the lower knob to tune in radio stations. Push it to
get AM or FM.
FADE
The FADE control behind the lower knob moves the
sound between
the front and rear speakers.
SEEK
Pressing the SEEK button will cause the receiver to seek
the next higher station and stop.
SCAN
When you press SCAN, the radio will go to the next
station and pause. It will keep scanning
until you press
scan again. SCAN appears
in the display.
Pushbuttons
The four pushbuttons let you return to favorite stations.
You can set the pushbuttons for up to fourteen stations
(7 AM and 7 FM).
0 Tune in the desired station.
Press the SET pushbutton. (SET appears in the
display).
129
Page 132 of 324
0 Within 5 seconds, push one of the four pushbuttons
to store
the station.
Whenever
you press that button, the preset station will
return. In addition to the 4 stations set as above, up to
three additional stations may be preset
on each band by
pressing two adjoining buttons at the same time.
Tune in the desired station.
Press SET pushbutton. (SET appears in the display).
Within 5 seconds, press any two adjoining
pushbuttons at the same time. The station will return
when the same two buttons are pressed again.
To set the clock,
Press the SET pushbutton.
Within 5 seconds, press and hold SEEK until the
correct minute appears on the display.
Press and hold SCAN until the correct hour appears
on the display.
Treble
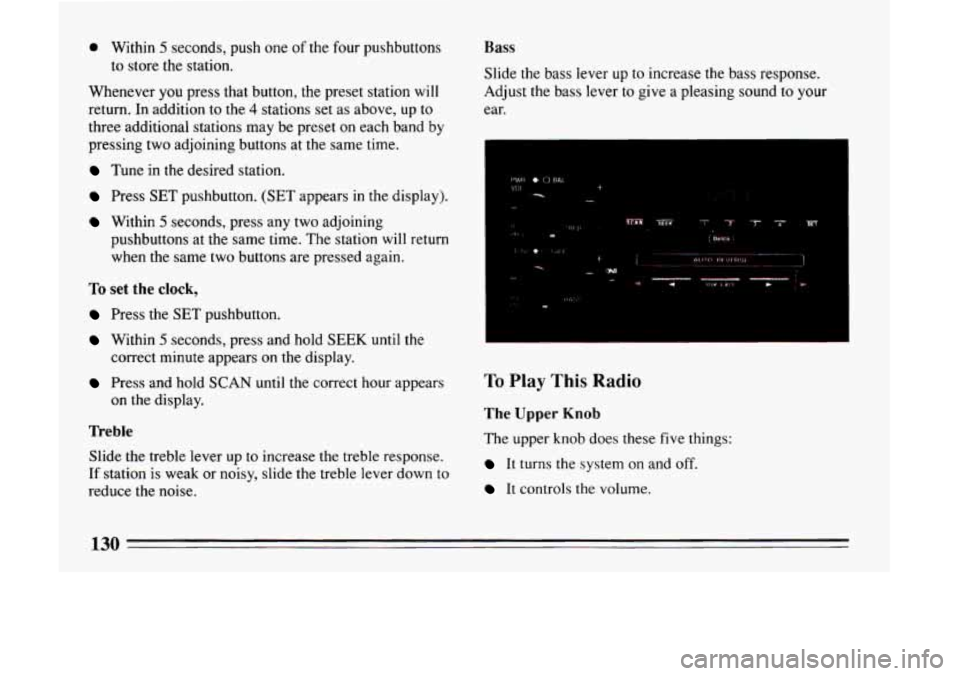
Slide the treble lever up to increase the treble response.
If station is weak or noisy, slide
the treble lever down to
reduce the noise.
Bass
Slide the bass lever up to increase the bass response.
Adjust the bass lever to give a pleasing sound to your
ear.
To Play This Radio
The Upper Knob
The upper knob does these five things:
It turns the system on and off.
It controls the volume.
130
Page 134 of 324
Clock
To set the clock:
Press the SET button.
0 Within 5 seconds, press and hold SCAN until the
correct hour appears on the display.
Press and hold SEEK until the correct minute
appears on the display.
Treble
Slide the TREBLE lever up to increase the treble
response. If station is weak or noisy, slide the TREBLE
lever down
to reduce the noise.
Bass
Slide the BASS lever up to increase the bass response.
Adjust the BASS lever to give a pleasing sound to your
ear.
DNR~
This is the Dynamic Noise Reduction button, DNR@
helps remove background hiss from the radio or tape
player. You may want to leave
it pushed in all the time.
To Play A Cassette
Your tape player is built to work best with tapes that are
30 to 45 minutes long on each side. Tapes longer than
that are
so thin they may not work well in this player.
With the radio on, push
a tape into the slot marked
AUTO REVERSE (tape side goes in first).
Once
the tape is playing, use the upper and lower knobs
for volume, balance and fade just as you did for radio.
The arrows indicate which side
of the tape is being
played. Your tape player has an auto reverse feature
which automatically plays the other side
of the tape after
the first side has played.
FWD
To advance the tape forward, press b and the tape will
rapidly go forward until you press
the 4 button or
STOP-EJECT lightly.
REV
To reverse the tape, press 4 and the tape will rapidly go
backward until you press the p button or STOP-EJECT
lightly.
132
Page 136 of 324
RCL
It tells you the time or the radio frequency. When the
ignition
is off, push RCL to display the time. With the
radio on, when the time is displayed, push
RCL to
display the frequency.
SEEK 4 or b
Pressing the SEEK 4 or b button will cause the
receiver to seek
the next lower or higher station and
stop.
SCAN
When you press SCAN, the radio will go to the next
station and pause and keep doing that until
you press
SCAN again. SC will appear in the display.
Pushbuttons
The five pushbuttons let you return to favorite stations.
You can set the pushbuttons for up to ten stations (5 AM
and 5 FM).
0 Tune in the station you want to listen to.
Press the SET pushbutton. (The display will show
SET.)
0 Within 5 seconds, push one of the five pushbuttons.
(SET will disappear from the display when the
station is set.)
Whenever you press that button, the preset station
will return.
Clock
To set the clock,
Press the SET button.
0 Within 5 seconds, press and hold SCAN until the
correct hour appears on the display.
Press and hold SEEK 4 or b until the correct
minute appears on the display.
To Adjust The Tone
Use the levers next to the display to set the bass,
midrange, and treble until
you get the sound you want.
The
60 and 250 levers adjust the bass; 1K is midrange;
and
3.5K and 1OK control the treble.
We suggest you start with the center lever
(LK) in the
midpoint position. Then move the others up or down
until you get the amount of bass and treble you like.
To Play A Cassette
Your tape player is built to work best with tapes that are
30 to 45 minutes long on each side. Tapes longer than
that are
so thin they may not work well in this player.
134
Page 139 of 324
RCL
It tells you the time. When the ignition is off, push RCL
to display the time. With the radio on, and the time
displayed, push it to see the frequency.
SEEK 4 or b
Pressing the SEEK 4 or b button will cause the
receiver
to seek the next lower or higher station and
stop.
SCAN
When you press SCAN, the radio will go to the next
station and pause and keep doing that until you press
SCAN again. SC will appear in the display.
Pushbuttons
The five pushbuttons let you return to favorite stations.
You can set the pushbuttons for up to ten stations (5 AM
and 5 FM).
Tune in the station you want to listen to.
0 Press the SET pushbutton. The display will show
SET.
0 Within 5 seconds, push one of the five pushbuttons.
SET will disappear from the display when the station
is set.
Whenever you press that button, the preset station will
return.
Clock
To set the clock:
0 Press the SET p lushbutt on.
0 Within 5 seconds, press and hold SCAN until the
0 Press and hold SEEK or 4 until the correct
correct
hour appears
on the display.
minute appears
on the display.
To Adjust The Tone
Use the levers next to the display to set the base,
midrange and treble until
you get the sound you want.
The
60 and 250 levers adjust the bass; IK is midrange;
and
3.5K and 10K control the treble.
We suggest
you start with the center lever (IK) in the
midpoint position. Then move the others up or down
until you get the amount
of bass and treble you like.
137
Page 167 of 324
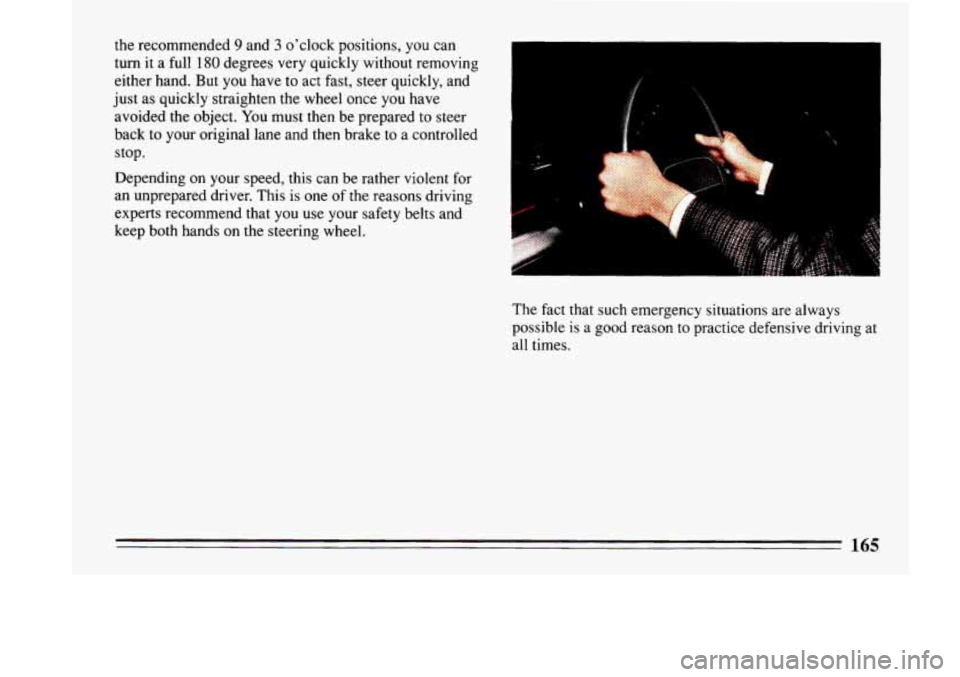
the recommended 9 and 3 o'clock positions, you can
turn
it a full 180 degrees very quickly without removing
either hand. But you have to act fast, steer quickly, and
just as quickly straighten the wheel once
you have
avoided the object. You must then be prepared to steer
back to your original lane and then brake to a controlled
stop.
Depending on your speed, this can be rather violent for
an unprepared driver. This is
one of the reasons driving
experts recommend that
you use your safety belts and
keep both hands on the steering wheel.
The fact that such emergency situations are always
possible
is a good reason to practice defensive driving at
all times.
165
Page 223 of 324
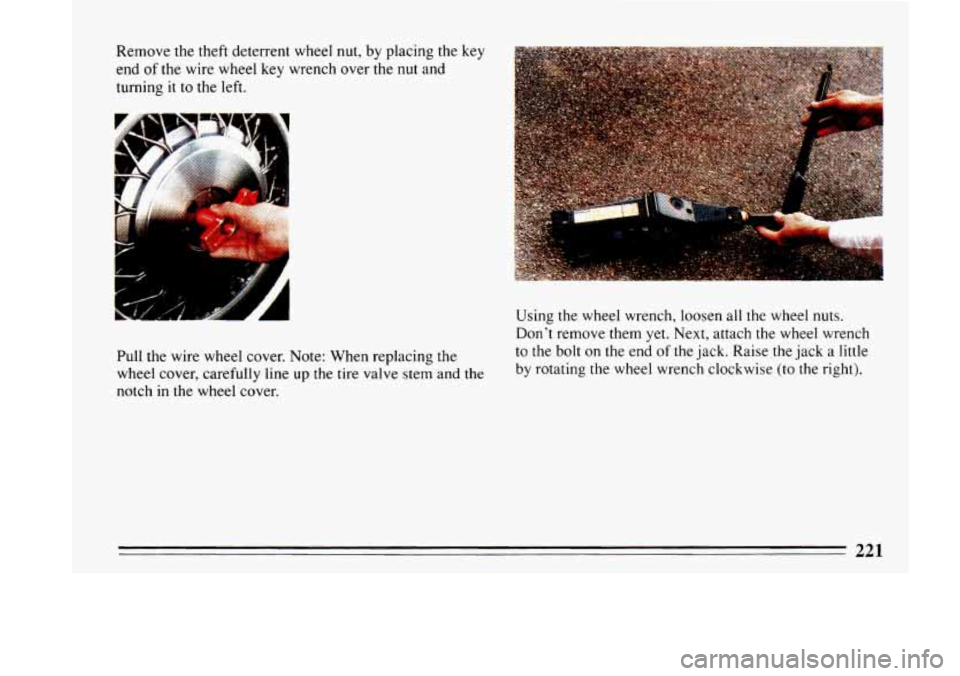
Remove the theft deterrent wheel nut, by placing the key
end of the wire wheel key wrench over the nut and
turning it to the left.
Pull the wire wheel cover. Note: When replacing the
wheel cover, carefully line up the tire valve stem and the
notch in the wheel cover. Using the wheel wrench, loosen
all the
wheel nuts.
Don’t remove them yet. Next, attach the wheel wrench
to the bolt
on the end of the jack. Raise the jack a little
by rotating the wheel wrench clockwise (to the right).
221