1990 VOLKSWAGEN TRANSPORTER torque
[x] Cancel search: torquePage 42 of 165
Downloaded from www.Manualslib.com manuals search engine
CONTROLS AND EQUIPMENT
I - Tachometer*
"he red shaded area at the end of the scale indicates the maximum permissible
engine rpm (revolutions per minute) for all gears after the break-in period. Before
'eaching this area, the next higher gear
snould be selected or the foot eased off
the accelerator pedal. Earlier shifting saves fuel and reduces noise.
Sniff to the next lower gear when the en-
; ne rpm drops below 1500 rpm.
~ne green shaded area on the scale snows the speed at which the engine is de-
•
eloping its most favourable torque.
3 - Normal clock*
~J
set the clock, depress the knob in the : al center and
turn.
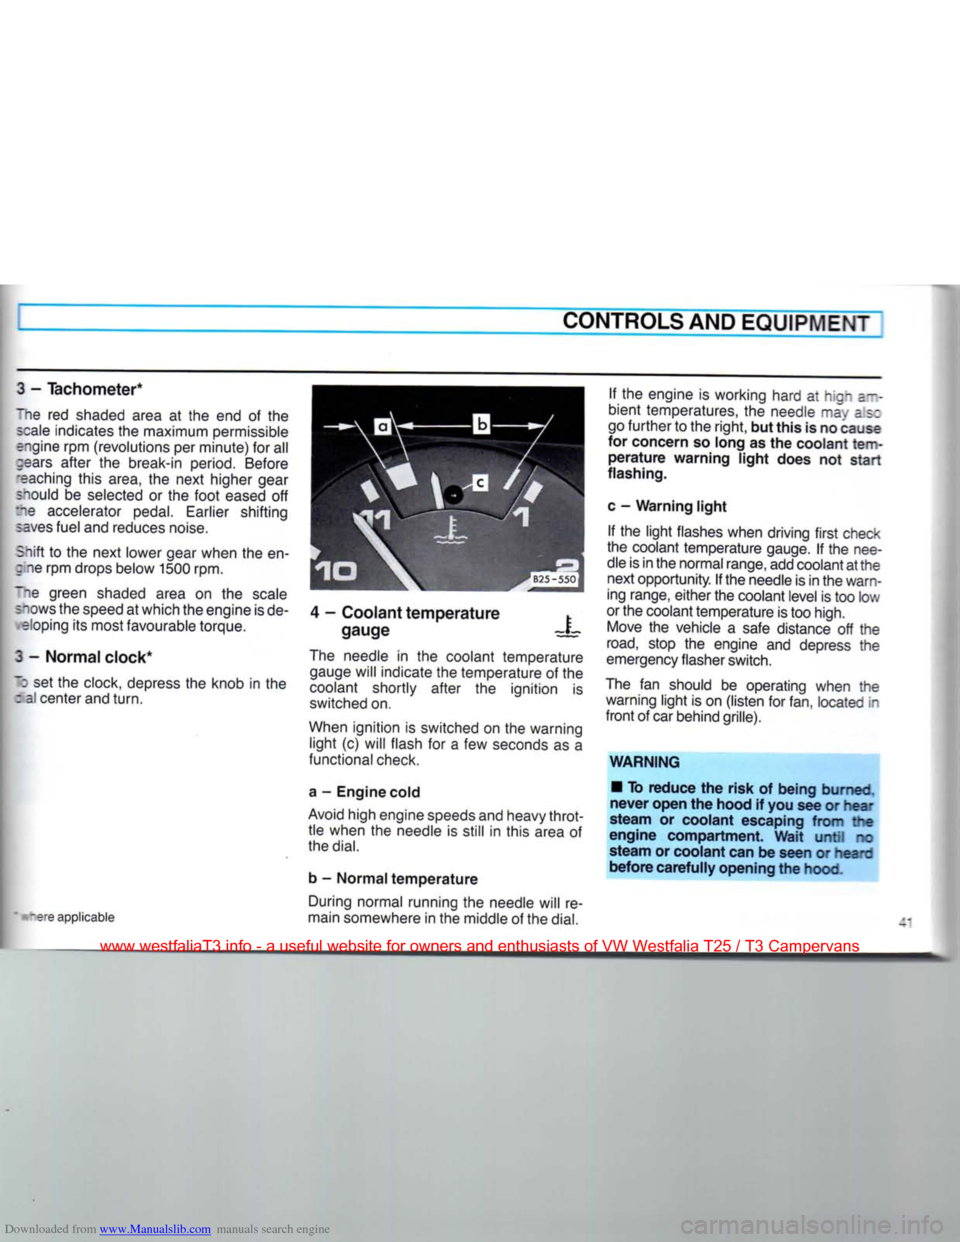
4 - Coolant temperature
gauge X
tare applicable The needle in the coolant temperature
gauge will indicate the temperature of the
coolant shortly after the ignition is
switched on.
When ignition is switched on the warning light (c) will flash for a few seconds as a
functional check.
a - Engine cold
Avoid high engine speeds and heavy throt tle when the needle is still in this area of
the
dial.
b - Normal temperature During normal running the needle will re
main somewhere in the middle of the
dial.
If the engine is working hard at hign a--
bient temperatures, the needle may as:
go further to the right, but this is no cause
for concern so long as the coolant
tem
perature warning light does not start
flashing.
c - Warning light If the light flashes when driving first check
the coolant temperature gauge. If the nee
dle is in the normal range, add coolant at the next opportunity. If the needle is in the warn
ing range, either the coolant level is too low
or the coolant temperature is too high. Move the vehicle a safe distance off the
road,
stop the engine and depress the
emergency flasher switch.
The fan should be operating when the warning light is on (listen for fan, located in
front of car behind grille).
WARNING • To reduce the risk of being burned,
never open the hood if you see or hear
steam or coolant escaping from the
engine compartment. Wait until no
steam or coolant can be seen or heard
before carefully opening the hood.
www.westfaliaT3.info - a useful website for owners and enthusiasts of VW Westfalia T25 / T3 Campervans
Page 103 of 165
Downloaded from www.Manualslib.com manuals search engine
[
VEHICLE
CARE
LUBRICANTS I
Climate Tropical
40'
30-
20- 10-
0-
10'
20
30'
Single grade oil
Multi grade oil
Gasoline Engines
|B25-565/21
Engine
Your engine was factory filled with an all- season high quality engine oil. If you need
to add oil between oil changes use any high quality petroleum or synthetic based
oil with correct specifications.
The following term must appear on the oil container singly or in combination with
other designations: "API Service SF or
SG".
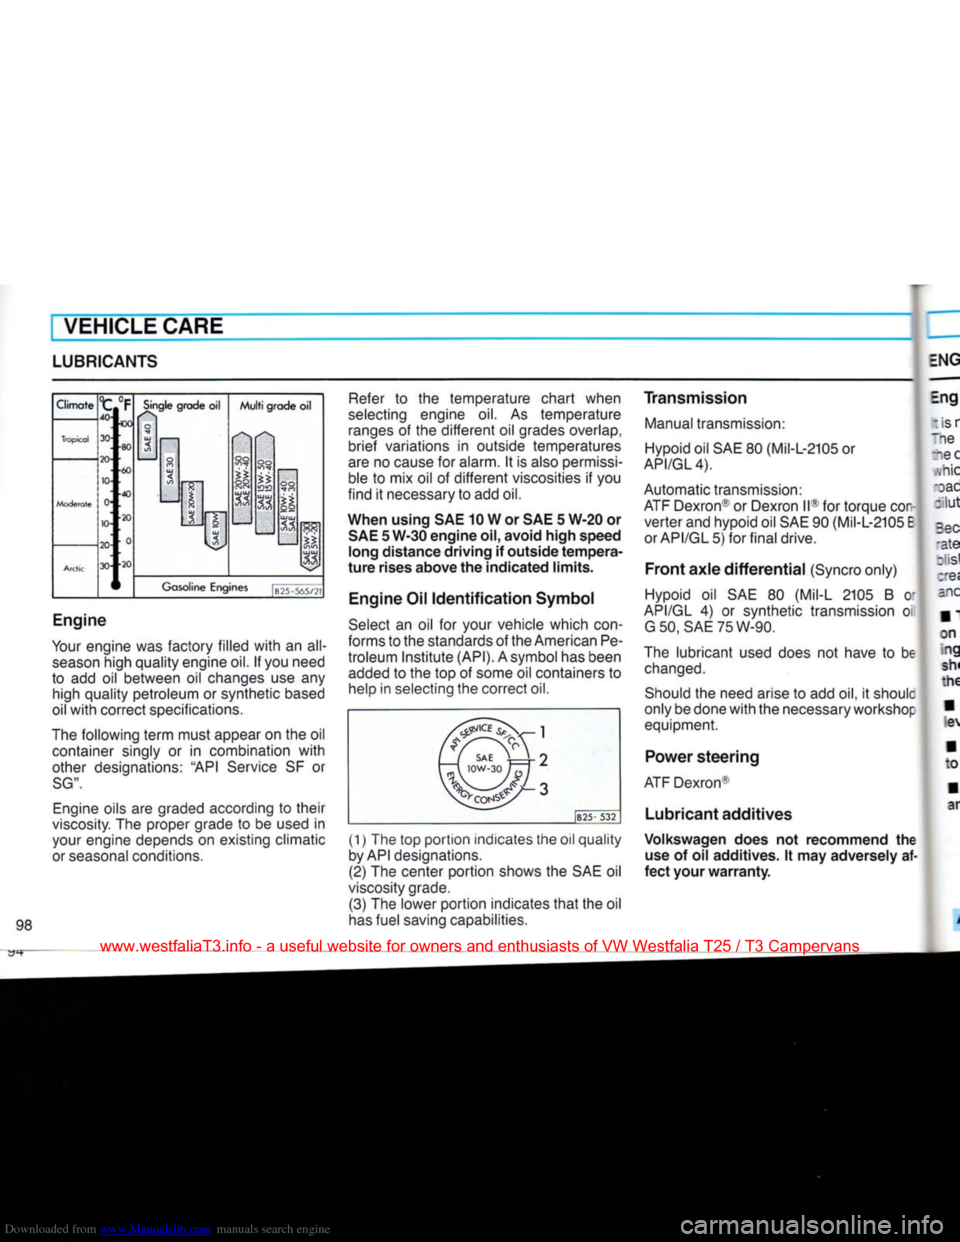
Engine oils are graded according to their
viscosity. The proper grade to be used in your engine depends on existing climatic
or seasonal conditions. Refer to the temperature chart when
selecting engine oil. As temperature ranges of the different oil grades overlap,
brief variations in outside temperatures
are no cause for alarm. It is also permissi ble to mix oil of different viscosities if you
find it necessary to add oil.
When using SAE 10 W or SAE 5 W-20 or SAE 5 W-30 engine oil, avoid high speed
long distance driving if outside tempera
ture rises above the indicated limits.
Engine Oil Identification Symbol
Select an oil for your vehicle which
con
forms to the standards of the American Pe
troleum Institute (API). A symbol has been added to the top of some oil containers to help in selecting the correct oil.
-l -l
/ / SAE '. j -2
t—i iow-3o jji -3
1B25-
532
98 (1) The top portion indicates the oil quality
by API designations.
(2) The center portion shows the SAE oil
viscosity grade.
(3) The lower portion indicates that the oil
has fuel saving capabilities. Transmission
Manual transmission: Hypoid oil SAE 80 (Mil-L-2105 or
API/GL4).
Automatic transmission:
ATF Dexron® or Dexron II® for torque cor
verter and hypoid oil SAE 90 (Mil-L-2105
E
orAPI/GL5) for final drive.
Front axle differential (Syncro only)
Hypoid oil SAE 80 (Mil-L 2105 B M
API/GL 4) or synthetic transmission oi
G50,
SAE75W-90.
The lubricant used does not have to be
changed.
Should the need arise to add oil, it shoulc
only be done with the necessary workshop equipment.
Power steering
ATF Dexron®
Lubricant additives
Volkswagen does not recommend the use of oil additives. It may adversely af
fect your warranty.
www.westfaliaT3.info - a useful website for owners and enthusiasts of VW Westfalia T25 / T3 Campervans
Page 107 of 165
Downloaded from www.Manualslib.com manuals search engine
VEHICLE CARE
AUTOMATIC TRANSMISSION FLUID / MANUAL TRANSMISSION OIL
Automatic Transmission Fluid
The torque converter and the transmis
sion are lubricated with Automatic Trans mission Fluid (ATF).
The final drive requires hypoid oil SAE 90,
which does not have to be changed.
Checking the ATF level
The ATF has to be checked at frequent intervals, for instance, when the engine
oil is being checked or at least at the intervals specified in your Maintenance
booklet.
Always heed WARNINGS on page 97. A correct ATF level is very important for
transmission operation.
To obtain an accurate reading, the
vehicle must be on level ground, and the
fluid must have reached operating
tem
perature. Normally, after a cold-start the
fluid will reach operating temperature when the vehicle has been driven for ab
out 6 miles or 10 km. If the ATF is too cool
or too hot, the fluid level reading will be inaccurate.
WARNING Before checking the ATF, the selector
lever must be securely locked in the Park position and the parking brake ap
plied firmly.
Checking the ATF level is potentially hazardous because the hot engine has
to be running during the check. Do not
attempt to check the ATF before read ing all WARNINGS on page 97.
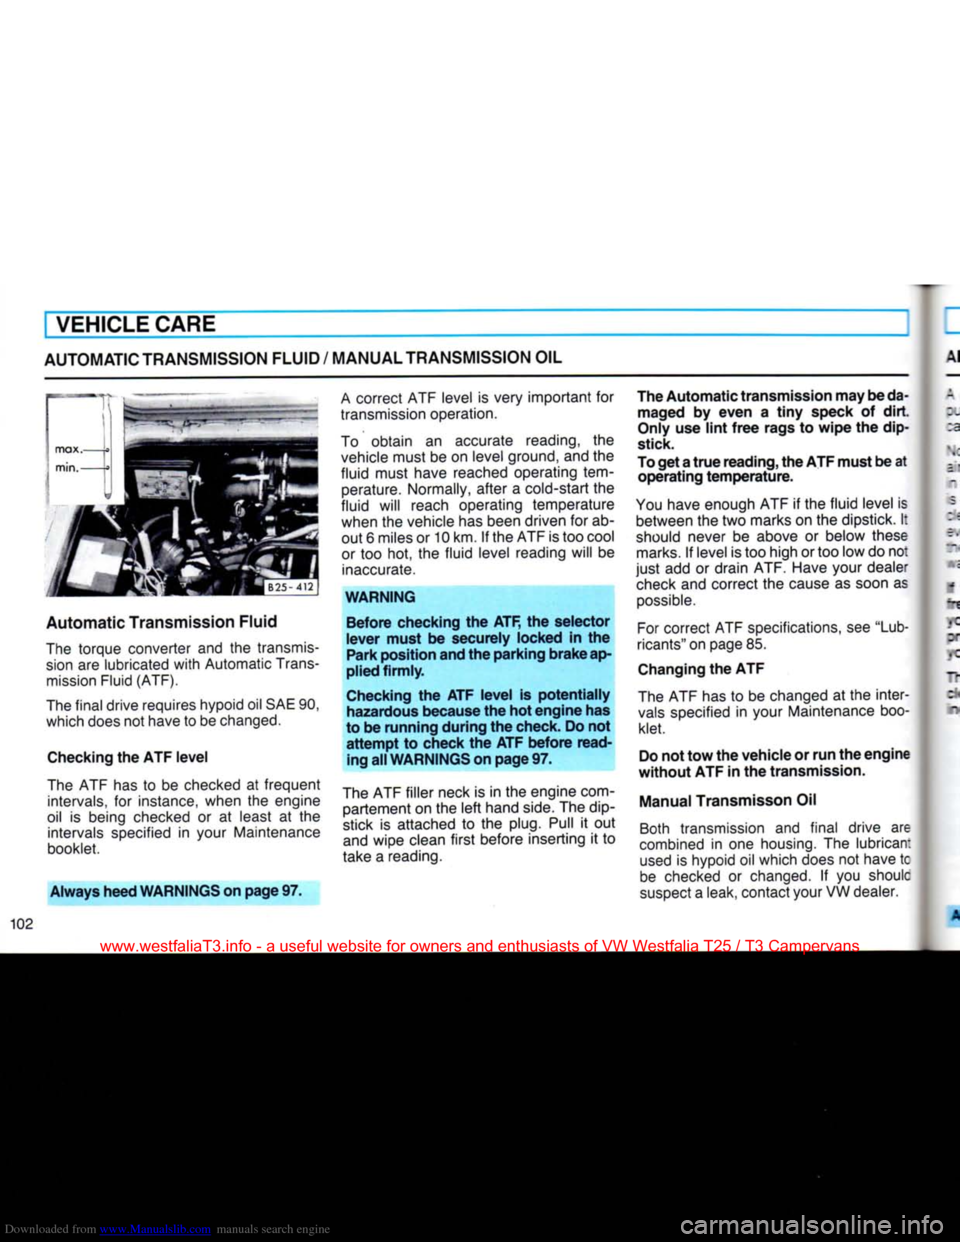
The ATF filler neck is in the engine com- partement on the left hand side. The dip
stick is attached to the
plug.
Pull it out
and wipe clean first before inserting it to
take a reading. The Automatic transmission may be da
maged by even a tiny speck of dirt.
Only use lint free rags to wipe the dip
stick.
To get a true reading, the ATF must be at operating temperature.
You have enough ATF if the fluid level is between the two marks on the dipstick. I:
should never be above or below these marks. If level is too high or too low do not
just add or drain ATF. Have your dealer check and correct the cause as soon as possible.
For correct ATF specifications, see "Lub
ricants" on page 85.
Changing the ATF
The ATF has to be changed at the inter vals specified in your Maintenance booklet.
Do not tow the vehicle or run the engine
without ATF in the transmission.
Manual Transmisson Oil Both transmission and final drive are
combined in one housing. The lubrican: used is hypoid oil which does not have tc
be checked or changed. If you shoulc
suspect a leak, contact your VW dealer.
www.westfaliaT3.info - a useful website for owners and enthusiasts of VW Westfalia T25 / T3 Campervans
Page 120 of 165
Downloaded from www.Manualslib.com manuals search engine
VEHICLE CARE
K >i
|B43-155|
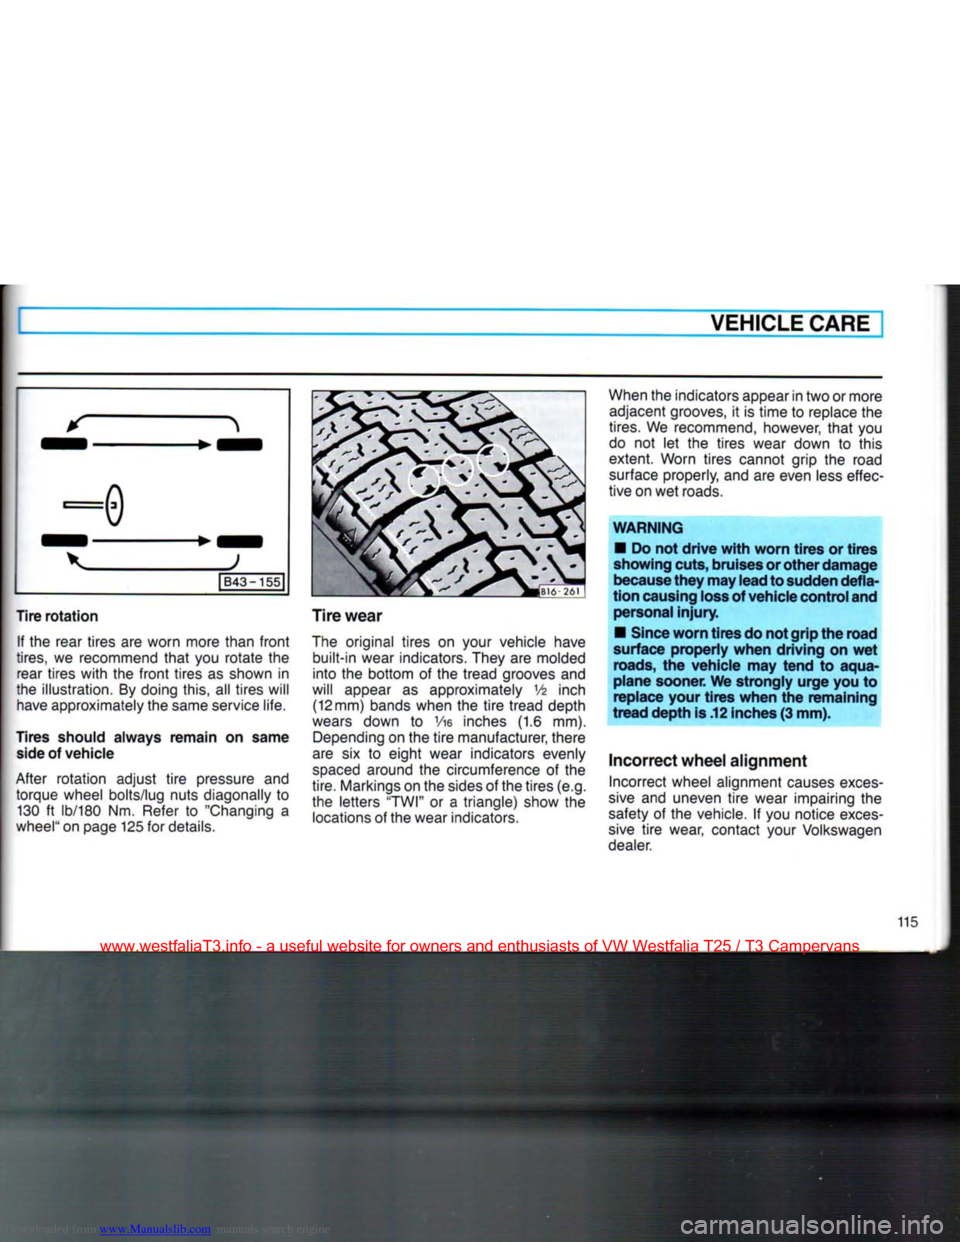
Tire rotation If the
rear tires
are
worn more than
front
tires,
we
recommend
that
you
rotate
the
rear tires
with
the
front
tires
as
shown
in
the illustration.
By
doing this,
all
tires will
have
approximately the same service life.
Tires
should always remain on same
side
of vehicle
After rotation adjust
tire
pressure
and
torque wheel bolts/lug nuts diagonally
to
130
ft
lb/180
Nm.
Refer
to
"Changing
a
wheel"
on page 125
for
details.
Tire
wear
The
original tires
on
your vehicle have
built-in wear indicators. They
are
molded
into
the
bottom
of the
tread grooves
and
will appear
as
approximately
V6
inch (12 mm) bands when
the
tire
tread depth
wears
down
to Vie
inches
(1.6 mm).
Depending
on the
tire
manufacturer, there
are
six to
eight wear indicators evenly
spaced
around
the
circumference
of the
tire. Markings on the sides
of
the tires (e.g.
the letters "TWI"
or a
triangle) show
the
locations
of
the wear indicators.
When
the indicators appear in two
or
more
adjacent grooves,
it is
time
to
replace
the
tires.
We
recommend, however,
that
you
do
not let the
tires wear down
to
this
extent. Worn tires cannot grip
the
road
surface
properly, and are even
less
effec
tive on wet roads.
WARNING
•
Do not drive
with
worn tires or tires
showing
cuts,
bruises
or other damage
because
they may lead to
sudden
defla
tion
causing
loss
of
vehicle
control
and
personal
injury.
•
Since
worn tires do not grip the road
surface
properly when driving on wet
roads,
the vehicle may tend to aqua
plane sooner. We strongly urge you to
replace your tires when the remaining
tread depth is .12
inches
(3 mm).
Incorrect
wheel
alignment
Incorrect wheel alignment
causes
exces
sive
and
uneven
tire
wear impairing
the
safety
of the
vehicle.
If
you notice
exces
sive
tire
wear, contact your Volkswagen
dealer.
115
www.westfaliaT3.info - a useful website for owners and enthusiasts of VW Westfalia T25 / T3 Campervans
Page 132 of 165
Downloaded from www.Manualslib.com manuals search engine
DO-IT-YOURSELF-SERVICE
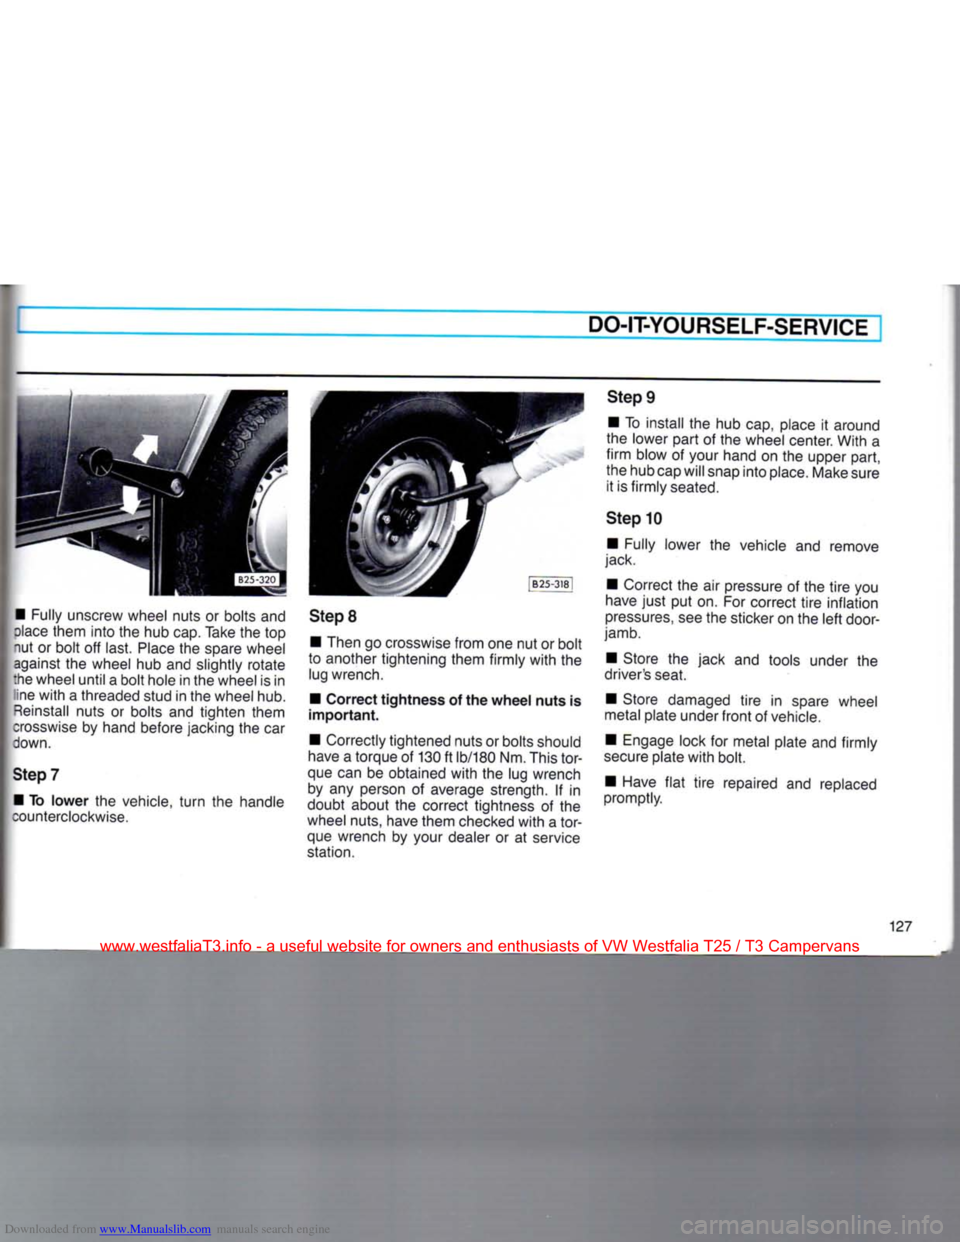
• Fully unscrew wheel nuts or bolts and
dace
them into the hub cap. Take the top
nut or bolt off last.
Place
the spare wheel against the wheel hub and slightly rotate
:he wheel until a bolt hole in the wheel is in ine
with
a threaded stud in the wheel hub.
Reinstall
nuts or bolts and tighten them
crosswise
by hand before jacking the car
down.
Step
7 • To
lower
the vehicle,
turn
the handle
counterclockwise.
Step
8
• Then go crosswise from one nut or bolt
to another tightening them firmly
with
the lug wrench.
• Correct
tightness
of the
wheel
nuts
is
important.
• Correctly tightened nuts or bolts should
have
a torque of 130 ft lb/180 Nm. This
tor
que can be obtained
with
the lug wrench by any person of average strength. If in
doubt about the correct tightness of the
wheel nuts, have them checked
with
a
tor
que wrench by your dealer or at service
station.
Step
9
• To install the hub cap, place it around
the lower part of the wheel center. With a
firm
blow of your hand on the upper part,
the hub cap will snap into place. Make sure it is firmly seated.
Step
10 • Fully lower the vehicle and remove
jack.
• Correct the air pressure of the
tire
you
have
just
put on. For correct
tire
inflation
pressures,
see the sticker on the
left
door-
jamb.
• Store the jack and tools under the
driver's seat.
• Store damaged
tire
in spare wheel
metal plate under
front
of vehicle.
• Engage lock for metal plate and firmly
secure
plate
with
bolt.
• Have
flat
tire
repaired and replaced
promptly.
127
www.westfaliaT3.info - a useful website for owners and enthusiasts of VW Westfalia T25 / T3 Campervans
Page 147 of 165
Downloaded from www.Manualslib.com manuals search engine
I TECHNICAL
DESCRIPTION
ENGINE
MANUAL
TRANSMISSION
AUTOMATIC
TRANSMISSION
• Four stroke gasoline engine in rear.
• Four cylinder horizontally opposed.
• Crankshaft
with
four main bearings.
• Liquid cooling system, thermostatically
controlled.
• Thermoswitch operated electric fan. • Pressure oil feed
with
gear - type
pump and
full
flow
filter.
• Self-adjusting hydraulic valve filters.
• AFC (Airflow controlled) fuel injection.
•
Paper
element air cleaner.
• Exhaust emission control system
with
activated charcoal
filter
in the fuel system.
• Breakerless electronic ignition. • Single plate, dry clutch.
• Synchronized four speed transmission
and'
differential in one housing
with
com
mon lubrication.
•
Rear
wheel drive,
with
two constant
velocity joints per drive shaft.
Syncro • Hydraulically operated single plate
clutch.
• Baulk synchronised 4-speed manual
transmission
with
additional Low-speed
traction gear (4+L transmission).
• Permanent four-wheel drive through
viscous
coupling.
• Manually operated differential lock for
rear final drive available as optional extra. • Hydrodynamic torque converter an:
planetary gearing
with
three forward an:
one reverse gear.
• Final drive in separate housing.
•
Rear
wheel drive,
with
two constar:
velocity joints per drive shaft.
www.westfaliaT3.info - a useful website for owners and enthusiasts of VW Westfalia T25 / T3 Campervans
Page 151 of 165

Downloaded from www.Manualslib.com manuals search engine
TECHNICAL DATA
ENGINE
DATA/SPARK PLUGS
Engine Maximum
output
SAE net 90 hp at 4800 rpm
Maximum torque SAE net 117,3 ft lb at 3200 rpm
No.
of cylinders 4
Displacement 129 CID (2109 cm3)
Stroke 2.99 in (76 mm)
Bore
3.70 in (94 mm)
Compression
ratio
Fuelf)
9.0:1
Compression
ratio
Fuelf)
Regular
unleaded
Sparkplugs
Bosch
W7CC0
Beru
14L-7CU/14L-7C
Champion
N288
1) Minimum octane rating and
further
details see page 86.
Notes
Spark
plugs are replaced during the Volks
wagen scheduled Maintenance service. If
you replace the spark plugs between the
Volkswagen
Maintenance services, the
following should be noted: • Engine, spark plugs and the ignition
system are matched. To avoid faulty opera
tion
or engine damage, use only Original
Volkswagen
spark plugs. It is especially important to note the number of electrodes
and heat value. • Since spark plug specifications may
change
for technical reasons during a cur
rent
model year, we recommend
that
you
obtain your spark plugs from a Volks
wagen dealer who has the latest informa
tion.
146
www.westfaliaT3.info - a useful website for owners and enthusiasts of VW Westfalia T25 / T3 Campervans