1988 OPEL CALIBRA rear view mirror
[x] Cancel search: rear view mirrorPage 19 of 525

8Electric door mirror switch -
removal and refitting
2
Removal
1Disconnect the battery negative lead.
2Prise the plastic surround from the door
interior handle.
3Free the trim panel from the top edge of the
door by releasing the securing clips. This can
be done using a screwdriver, but it is
preferable to use a forked tool, to minimise
the possibility of damage to the trim panel and
the clips.
4Note the position of the mirror switch wiring
connector in the bracket at the top of the
door, then separate the two halves of the
connector.
5Prise the switch from the door trim panel,
and feed the wiring through the panel.
Refitting
6Refitting is a reversal of removal, but ensure
that the wiring is correctly routed, so as not to
foul the door interior handle mechanism.
9Sunroof operating switch -
removal and refitting
2
Removal
1Disconnect the battery negative lead.
2Prise the courtesy lamp from the roof trim
panel, and disconnect the wiring.
3Remove the two trim panel securing
screws, and withdraw the trim panel from the
roof, disconnecting the wiring from the
sunroof operating switch.
4Release the securing clips, then pull the
switch from the rear face of the trim panel.
Refitting
5Refitting is a reversal of removal.
10Courtesy lamp switch -
removal and refitting
2
Removal
1Disconnect the battery negative lead.
2Open the door and remove the switch
securing screw.
3Withdraw the switch from the door pillar,
and pull the wiring out sufficiently to prevent it
from springing back into the pillar.4Disconnect the wiring and remove the
switch.
Refitting
5Refitting is a reversal of removal.
11Luggage compartment lamp
switch - removal and refitting
2
Removal
1Disconnect the battery negative lead.
2Open the boot lid or tailgate, as applicable,
and remove the switch securing screw.
3Withdraw the switch from the body panel,
and pull the wiring out sufficiently to prevent it
from springing back into the body.
4Disconnect the wiring and remove the
switch.
Refitting
5Refitting is a reversal of removal.
12Brake lamp switch - removal
and refitting
2
Removal
1Disconnect the battery negative lead.
2Remove the lower trim panel from the
driver’s footwell.
3Disconnect the wiring plug from the brake
lamp switch, then twist the switch
anti-clockwise and remove it from its bracket.
Refitting
4Refitting is a reversal of removal.
13Handbrake “on” warning
lamp switch - removal and
refitting
3
For access to the switch, the handbrake
lever must be removed. Removal and refitting
of the switch is described as part of the
handbrake lever removal and refitting
procedure, in Chapter 9.
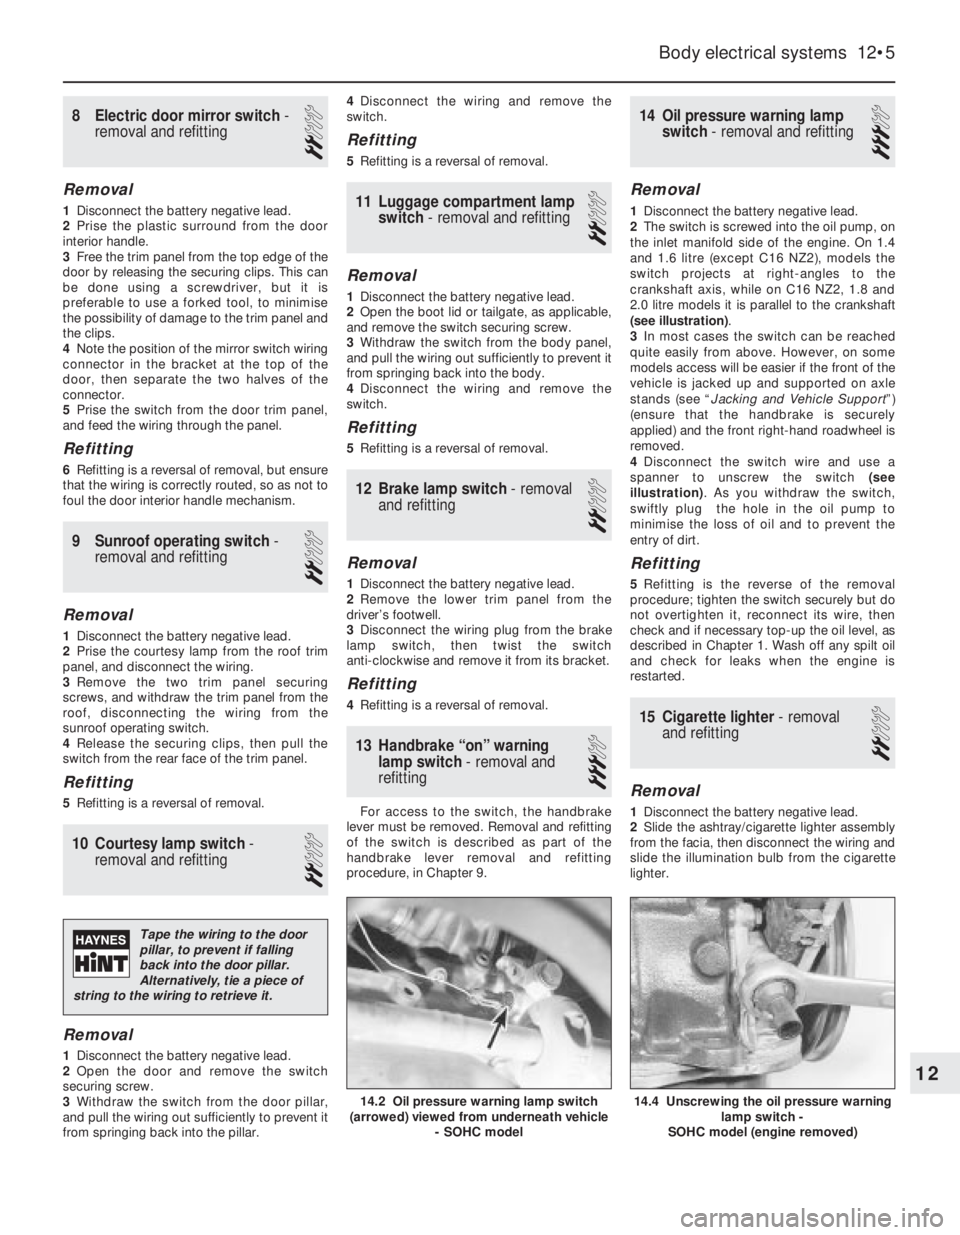
14Oil pressure warning lamp
switch - removal and refitting
3
Removal
1Disconnect the battery negative lead.
2The switch is screwed into the oil pump, on
the inlet manifold side of the engine. On 1.4
and 1.6 litre (except C16 NZ2), models the
switch projects at right-angles to the
crankshaft axis, while on C16 NZ2, 1.8 and
2.0 litre models it is parallel to the crankshaft
(see illustration).
3In most cases the switch can be reached
quite easily from above. However, on some
models access will be easier if the front of the
vehicle is jacked up and supported on axle
stands (see “Jacking and Vehicle Support”)
(ensure that the handbrake is securely
applied) and the front right-hand roadwheel is
removed.
4Disconnect the switch wire and use a
spanner to unscrew the switch (see
illustration). As you withdraw the switch,
swiftly plug the hole in the oil pump to
minimise the loss of oil and to prevent the
entry of dirt.
Refitting
5Refitting is the reverse of the removal
procedure; tighten the switch securely but do
not overtighten it, reconnect its wire, then
check and if necessary top-up the oil level, as
described in Chapter 1. Wash off any spilt oil
and check for leaks when the engine is
restarted.
15Cigarette lighter - removal
and refitting
2
Removal
1Disconnect the battery negative lead.
2Slide the ashtray/cigarette lighter assembly
from the facia, then disconnect the wiring and
slide the illumination bulb from the cigarette
lighter.
Body electrical systems 12•5
14.4 Unscrewing the oil pressure warning
lamp switch -
SOHC model (engine removed)14.2 Oil pressure warning lamp switch
(arrowed) viewed from underneath vehicle
- SOHC model
12
Tape the wiring to the door
pillar, to prevent if falling
back into the door pillar.
Alternatively, tie a piece of
string to the wiring to retrieve it.
Page 110 of 525

4Remove the seven trim panel securing
screws that are located along the bottom
edge of the door, and around the bottom
edge of the armrest/hand grip. Release the
door pocket clip, which is located below and
to the rear of the door pocket, out of view.
5The remaining nine plastic clips securing
the trim panel to the door must now be
released. This can be done using a
screwdriver, but it is preferable to use a
forked tool, to minimise the possibility of
damage to the trim panel and the clips. The
clips are located around the outer edge of the
trim panel.
6Once the clips have been released, pull the
trim panel away from the door, and push the
large clip at the rear of the door pocket
rearwards to allow the trim panel to be
withdrawn.
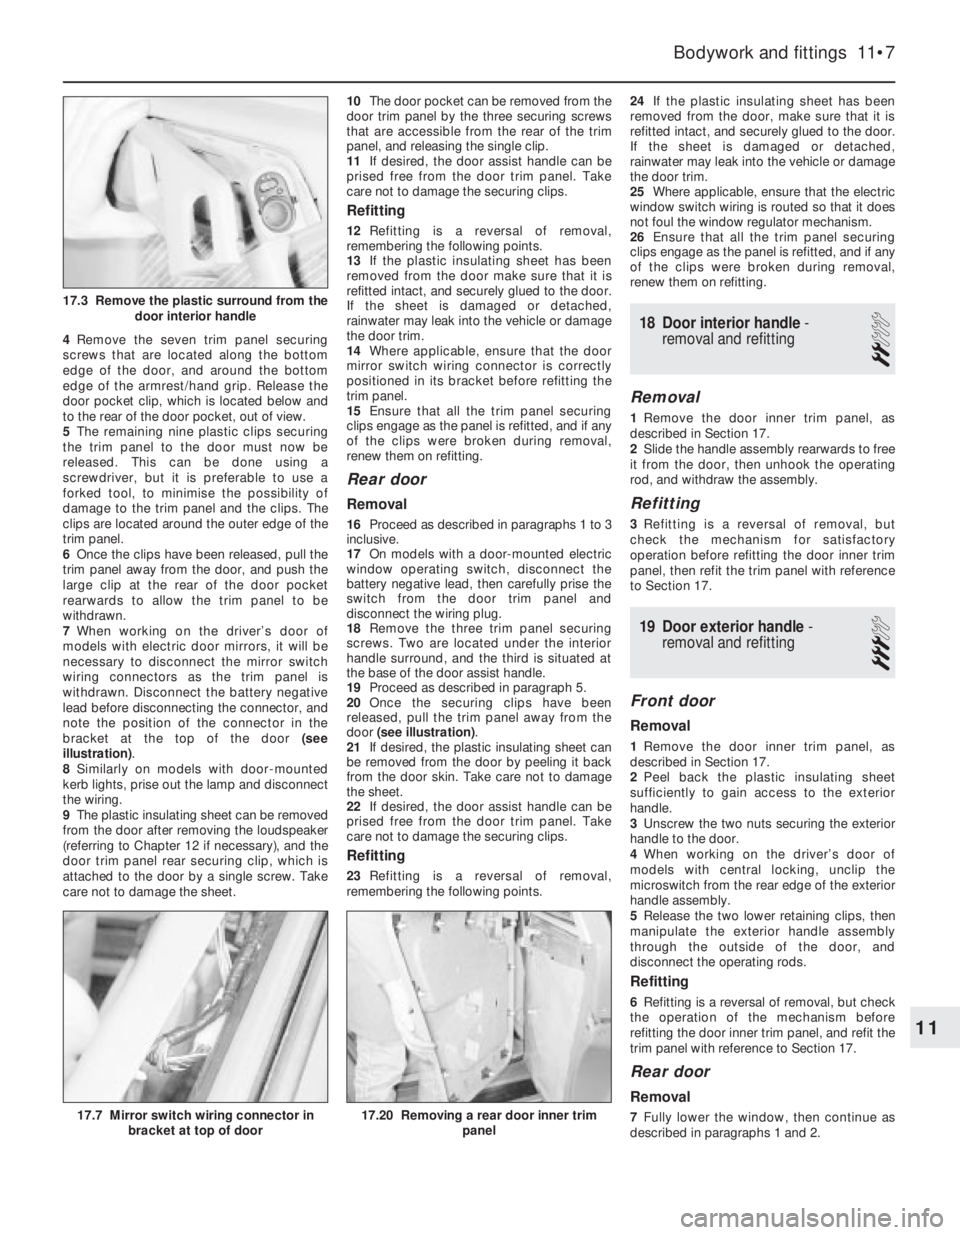
7When working on the driver’s door of
models with electric door mirrors, it will be
necessary to disconnect the mirror switch
wiring connectors as the trim panel is
withdrawn. Disconnect the battery negative
lead before disconnecting the connector, and
note the position of the connector in the
bracket at the top of the door (see
illustration).
8Similarly on models with door-mounted
kerb lights, prise out the lamp and disconnect
the wiring.
9The plastic insulating sheet can be removed
from the door after removing the loudspeaker
(referring to Chapter 12 if necessary), and the
door trim panel rear securing clip, which is
attached to the door by a single screw. Take
care not to damage the sheet.10The door pocket can be removed from the
door trim panel by the three securing screws
that are accessible from the rear of the trim
panel, and releasing the single clip.
11If desired, the door assist handle can be
prised free from the door trim panel. Take
care not to damage the securing clips.
Refitting
12Refitting is a reversal of removal,
remembering the following points.
13If the plastic insulating sheet has been
removed from the door make sure that it is
refitted intact, and securely glued to the door.
If the sheet is damaged or detached,
rainwater may leak into the vehicle or damage
the door trim.
14Where applicable, ensure that the door
mirror switch wiring connector is correctly
positioned in its bracket before refitting the
trim panel.
15Ensure that all the trim panel securing
clips engage as the panel is refitted, and if any
of the clips were broken during removal,
renew them on refitting.
Rear door
Removal
16Proceed as described in paragraphs 1 to 3
inclusive.
17On models with a door-mounted electric
window operating switch, disconnect the
battery negative lead, then carefully prise the
switch from the door trim panel and
disconnect the wiring plug.
18Remove the three trim panel securing
screws. Two are located under the interior
handle surround, and the third is situated at
the base of the door assist handle.
19Proceed as described in paragraph 5.
20Once the securing clips have been
released, pull the trim panel away from the
door (see illustration).
21If desired, the plastic insulating sheet can
be removed from the door by peeling it back
from the door skin. Take care not to damage
the sheet.
22If desired, the door assist handle can be
prised free from the door trim panel. Take
care not to damage the securing clips.
Refitting
23Refitting is a reversal of removal,
remembering the following points.24If the plastic insulating sheet has been
removed from the door, make sure that it is
refitted intact, and securely glued to the door.
If the sheet is damaged or detached,
rainwater may leak into the vehicle or damage
the door trim.
25Where applicable, ensure that the electric
window switch wiring is routed so that it does
not foul the window regulator mechanism.
26Ensure that all the trim panel securing
clips engage as the panel is refitted, and if any
of the clips were broken during removal,
renew them on refitting.
18Door interior handle -
removal and refitting
2
Removal
1Remove the door inner trim panel, as
described in Section 17.
2Slide the handle assembly rearwards to free
it from the door, then unhook the operating
rod, and withdraw the assembly.
Refitting
3Refitting is a reversal of removal, but
check the mechanism for satisfactory
operation before refitting the door inner trim
panel, then refit the trim panel with reference
to Section 17.
19Door exterior handle -
removal and refitting
3
Front door
Removal
1Remove the door inner trim panel, as
described in Section 17.
2Peel back the plastic insulating sheet
sufficiently to gain access to the exterior
handle.
3Unscrew the two nuts securing the exterior
handle to the door.
4When working on the driver’s door of
models with central locking, unclip the
microswitch from the rear edge of the exterior
handle assembly.
5Release the two lower retaining clips, then
manipulate the exterior handle assembly
through the outside of the door, and
disconnect the operating rods.
Refitting
6Refitting is a reversal of removal, but check
the operation of the mechanism before
refitting the door inner trim panel, and refit the
trim panel with reference to Section 17.
Rear door
Removal
7Fully lower the window, then continue as
described in paragraphs 1 and 2.
Bodywork and fittings 11•7
17.20 Removing a rear door inner trim
panel17.7 Mirror switch wiring connector in
bracket at top of door
17.3 Remove the plastic surround from the
door interior handle
11
Page 247 of 525

REF•8MOTTest Checks
This is a guide to getting your vehicle through the MOT test.
Obviously it will not be possible to examine the vehicle to the same
standard as the professional MOT tester. However, working through
the following checks will enable you to identify any problem areas
before submitting the vehicle for the test.
Where a testable component is in borderline condition, the tester
has discretion in deciding whether to pass or fail it. The basis of such
discretion is whether the tester would be happy for a close relative or
friend to use the vehicle with the component in that condition. If the
vehicle presented is clean and evidently well cared for, the tester may
be more inclined to pass a borderline component than if the vehicle is
scruffy and apparently neglected.
It has only been possible to summarise the test requirements here,
based on the regulations in force at the time of printing. Test standards
are becoming increasingly stringent, although there are some
exemptions for older vehicles. For full details obtain a copy of the Haynes
publication Pass the MOT! (available from stockists of Haynes manuals).
An assistant will be needed to help carry out some of these checks.
The checks have been sub-divided into four categories, as follows:
HandbrakeMTest the operation of the handbrake.
Excessive travel (too many clicks) indicates
incorrect brake or cable adjustment.
MCheck that the handbrake cannot be
released by tapping the lever sideways. Check
the security of the lever mountings.
Footbrake
MDepress the brake pedal and check that it
does not creep down to the floor, indicating a
master cylinder fault. Release the pedal, wait
a few seconds, then depress it again. If the
pedal travels nearly to the floor before firm
resistance is felt, brake adjustment or repair is
necessary. If the pedal feels spongy, there is
air in the hydraulic system which must be
removed by bleeding.MCheck that the brake pedal is secure and in
good condition. Check also for signs of fluid
leaks on the pedal, floor or carpets, which
would indicate failed seals in the brake master
cylinder.
MCheck the servo unit (when applicable) by
operating the brake pedal several times, then
keeping the pedal depressed and starting the
engine. As the engine starts, the pedal will
move down slightly. If not, the vacuum hose or
the servo itself may be faulty.
Steering wheel and column
MExamine the steering wheel for fractures or
looseness of the hub, spokes or rim.
MMove the steering wheel from side to side
and then up and down. Check that the
steering wheel is not loose on the column,
indicating wear or a loose retaining nut.
Continue moving the steering wheel as before,
but also turn it slightly from left to right.
MCheck that the steering wheel is not loose
on the column, and that there is no abnormalmovement of the steering wheel, indicating
wear in the column support bearings or
couplings.
Windscreen and mirrors
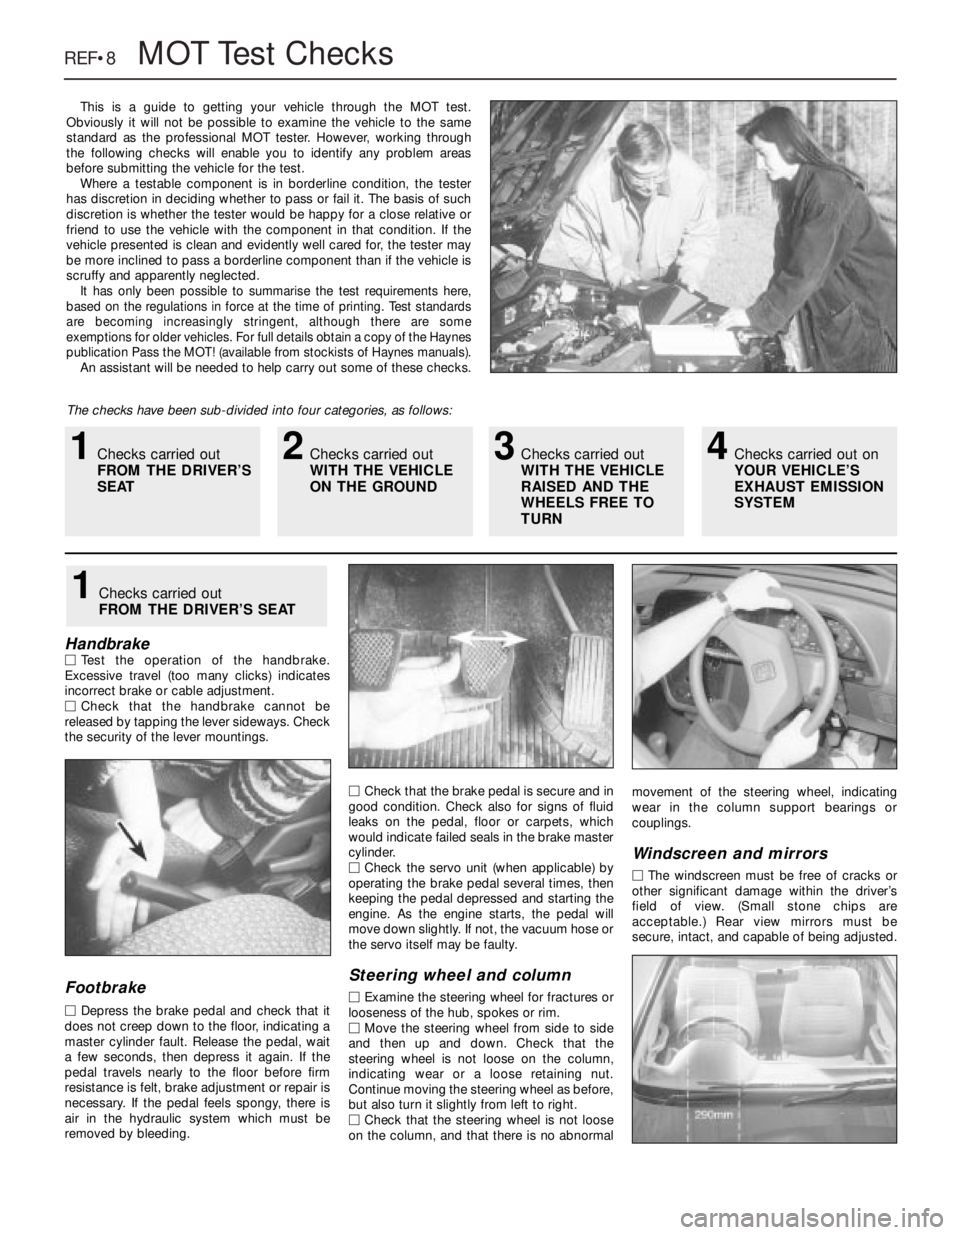
MThe windscreen must be free of cracks or
other significant damage within the driver’s
field of view. (Small stone chips are
acceptable.) Rear view mirrors must be
secure, intact, and capable of being adjusted.
1Checks carried out
FROM THE DRIVER’S SEAT
1Checks carried out
FROM THE DRIVER’S
SEAT2Checks carried out
WITH THE VEHICLE
ON THE GROUND3Checks carried out
WITH THE VEHICLE
RAISED AND THE
WHEELS FREE TO
TURN4Checks carried out on
YOUR VEHICLE’S
EXHAUST EMISSION
SYSTEM
Page 266 of 525

Pierburg 2E3 carburettor- 4A•5
Piston rings- 2A•30
Piston/connecting rod- 2A•29
Plastic components- 11•3
Potentiometer- 4B•12, 4B•16
Power steering fluid - 0•14, 0•17, 1•2, 1•12
Power steering pump- 10•22
Power steering system bleeding- 10•22
Punctures- 0•8
RRadiator- 3•3
Radiator cooling fan- 3•5
Radiator grille- 11•12
Radio/cassette anti theft system- REF•5
Radio/cassette player- 12•18
Rear hub- 10•10, 10•15
Rear lamps- 12•11
Rear suspension assembly- 10•15
Relays- 12•3
Release bearing (clutch)- 6•6
Repair procedures- REF •4
Respraying- 11•2
Reversing lamp switch- 7A•6
Road test- 1•13
Roll bars- 10•8, 10•13, 10•17
Routine maintenance - 1•1 et seq
SSafety first!- 0•5
Scratches- 11•2
Seat belts- 11•21
Seats- 11•20, 11•22
Seats heated- 12•6
Selector cable (automatics)- 7B•4
Selector lever- 7B•4
Sender unit fuel level- 4A•4, 4B•8
Sender units (temperature gauge)- 3•6
Servicing - see Routine maintenance
Servo unit (braking system)- 9•15
Shock absorber- 10•11
Shoes (brake)- 9•6
Short-circuit finding- 12•2
Spark plugs- 1•3, 1•14, 1•16
Speakers- 12•17
Speedometer cable- 12•18
Speedometer drive- 7A•6
Starter inhibitor switch- 7B•3
Starter motor- 5•8
Starting problems- 0•6
Steering wheel alignment- 10•1, 10•24
Steering- 10•1 et seq
camber - 10•1 10•24
castor - 10•1, 10•24
column - 10•18
damper - 10•21
fault diagnosis - REF•12, REF•17gear - 10•21
power steering system bleeding - 10•22
power steering fluid - 0•17, 1•2
power steering pump - 10•22
shaft rubber coupling - 10•18
tie-rod end - 10•23
toe setting - 10•1, 10•24
wheel - 10•17
wheel bearing - 10•4, 10•9, 10•14
wheel with airbag - 12•20
Stub axle- 10•13
Subframe- 10•5
Sump- 2A•27, 2B•9
Sunroof- 11•13
Sunroof motor- 12•18
Sunroof switch- 12•5
Suspension- 10•1 et seq
anti-roll bars - 10•8, 10•13, 10•17
assembly (rear) - 10•15
coil spring (rear) - 10•12, 10•15
fault diagnosis - REF•12, REF•17
level control system - 10•14
lower arm (front) - 10•7
rear hub - 10•10, 10•15
shock absorber - 10•11
strut (front) - 10•6
stub axle - 10•13
sub frame - 10•5
trailing arms - 10•12, 10•16
wheel bearing - 10•4, 10•9, 10•14
Suspension/steering checks- 1•10
Switches:
brake lamp - 12•5
cooling fan - 3•6
courtesy lamp - 12•5
electric door mirror - 12•5
handbrake warning lamp - 12•5
hazard warning - 12•4
heater blower motor - 12•4
ignition - 12•3
indicator - 12•4
kickdown - 7B•3
lights - 12•4
luggage compartment - 12•5
oil pressure warning lamp - 12•5
push button - 12•4
reversing lamp - 7A•6
starter inhibitor - 7B•3
sunroof - 12•5
TTailgate- 11•5
Temperature gauge sender- 3•6
Temperature sensor (automatics)- 7B•5
Thermostat- 3•4
Throttle cable- 4A•5, 4B•9
Throttle pedal- 4A•5Tie-rod end- 10•23
Timing- 5•2, 5•13
Timing belt- 1•16, 2A•13, 2B•3, 2B•6
Toe setting- 10•1, 10•24
Tools and working facilities- REF•4, REF•6,
REF•7
Towing- 0•9
Trim panel (door)- 11•6
Tyre checks- 0•16, 0•17
Tyre pressures- 0•17
UUnderbody- 11•1
Underbody views- 1•7
Underbonnet views- 0•10, 1•5
Upholstery and carpets- 11•2
VVacuum servo unit (braking system)- 9•15
Valve lifters- 2A•24, 2B•9
Valves- 2A•5, 2B•2
Vehicle identification numbers- REF•3
Ventilation system- 3•1 et seq
Vents- 3•8
WWasher fluid- 0•13, 1•2
Washers- 12•13, 12•15
Water pump- 3•4
Weekly checks- 0•10et seq
Wheelalignment- 10•1, 10•24
Wheel arch liners- 11•12
Wheel bearing- 10•4, 10•9, 10•14
Wheel changing- 0•8
Wheel cylinder- 9•11
Window glass- 11•9
Window regulator- 11•10
Windscreen- 11•9, 11•12
Wiper blades- 0•15, 12•13
Wiper motors- 12•14
Wiring diagrams- 12•22 et seq
Index REF•27
REF