1987 PORSCHE 944 fuel pressure
[x] Cancel search: fuel pressurePage 3 of 66

INDEX
A
ABS Acceleration diagram Accelerator pedal Air Bag System Air - cleaner
- conditioner
- filter
Alternator warning light Antifreeze Antilock, Brake system Anti-theft alarm Ashtray Automatic- garage door
- speed control
- transmission
- transmission fluid B
Battery
Boost pressure gauge
Brake - booster
- fluid
- fluid warning light
- pads
- parking
- pedal
- system
- warning light
Break-in hints
Bulb replacing
Buzzer 28,39
118-129
55
20, 21, 38, 3980, 8144-4680,81 39
74,75,11028, 39
11
42, 98
25
29
53-55
78,110,128
90-9234
27
39,79,11039
27,37,47,79,80 26
26, 27
26,27,11537
47
93-98
10,18,24,30
C/D
CASIS
Capacities
Car care instructions
Casis
Catalytic Converter
Cautions
Central locking
Central warning light
Cigarette lighter
Cleaning
Clock
Clutch pedal
Collapsible spare tire
Control warning light system
Coolant Temperature Gauge
Cooling system
Corrosion prevention
Dashboard
Defogging/defrosting
Dimensions
Doors
Driving hints
E/F
Electrical system
Emergency- flasher
- starting
Emission Control System
Engine - cooling
- exhaust
- hood
- number
- oil checking & changing
- oil
-speed, max 35
110
61-66
35
50,10267
13
37
41
61-66 40
27
85
36-39 36
74-77
65-66
24
44-46 114
12,138-9, 48, 49
89-92
41
92
100-103 74-77
48
586
69-72
69,110,111,128
34,47,52,106-
108
Fan control switch knob
Fan, radiator
Filling capacities
Fog lights
Fuel - economy
- evaporation control
- gauge
- recommendation
- tank
Fuses and relays
G/H
Gas Station Information
Gasohol
Gasoline
Gear ratio diagram
Gearshift lever
Glove compartment
Hatchback
Headlights
Headlight- dimmer
- flasher
- switch
- washing system
Heater/ventilation controls
Hood - front
- rear
Horn
I/J
Ignition/steering lock
Instrument illumination
Instruments
Interior ligh 44
36, 74 110
30, 96, 97
49
103 37
50, 51
50,110
89,126
126-129 51
50,51
122-125 52-55
42
56
30,95,99 30
30
30
31,32,81,11044-4658
56,57
21,24
24
30
33-40
43, 98
4
Jack
- supports
K/L
Keys
Kickdown
Lane changer
Leather
License plate light
Light switch
Lights - ashtray
- fog
- interior
- license plate
- parking
- turn signal
Locks - doors, wheels
Loudspeakers
Lubricants
Luggage compartment
M/O
Manual transmission
- oil
Mirrors
Oil- change
- consumption
- filter changing
- pressure gauge
- pressure warning light
Octane rating
Oxygen Sensor
P/R
Paint code number 68
87, 88, 129
10-11,86 55
30
65
98
30
98
30, 96, 97
43, 9898
30, 37, 93, 94
30,93,94
10-13, 86 89
110,111 57
52,122-125 77,11022,43
71,72
47, 69
71, 72 38
38
50, 51,106-108 101,102
7
Parking- brake
- lights
Performance
Power assisted steering
Power train
Power windows
Prop-up roof
Radiator fan
Rear - hood
- view mirrors
- window defogger
- wiper
Recirculation Switch
Refrigerant
Relays
Rims
Roof racks
Roof, removable S
Safe driving hints
Safetybelts
Safety belt warning light
Safety compliance sticker
Seat heating System
Seats
Sekuriflex windshield
Shift indicator
Shift points
Side marker lights
Ski racks
Snow- chains
- tires
Spare tire, collapsible
Spark plugs
Specifications, engine
26, 3730,37,93,94116731091259, 6036, 7456,572241424446,11089,12664,112,11357,11459, 60
8-9
17-21,6518,3771514-1631, 63, 643552-559457,11483, 84,112,113
83,84, 111,113
85106-108106-109
Speedometer
Starting procedures
Sun visors
T/U
Tachometer
Technical data
Tirepressure
Tires
Tool kit
Trip odometer
Transmission oil
Trunk
Turn signal lights
Undercoating
Unleaded fuel
V/W
Vehicle identification
Ventilation
Voltmeter
Warning/indicator lights
Washer reservoir
Washing
Water temperature gauge
Weatherstrips
Weights
Wheel alignment
Wheel nuts, lockable
Wheels
Wheel changing
Windows
Windshield- washer reservoir
- wiper/washer lever 3324, 2543
34, 35105-12582,112,113,12947,82-87,112,113683377, 78,11056,5730, 37, 93, 9465, 66,10050, 51,106-108,110
6-744-463835-4081,11061-6636641141158647,64,82-87,11285-8812,63,6481,11031
5
Page 12 of 66
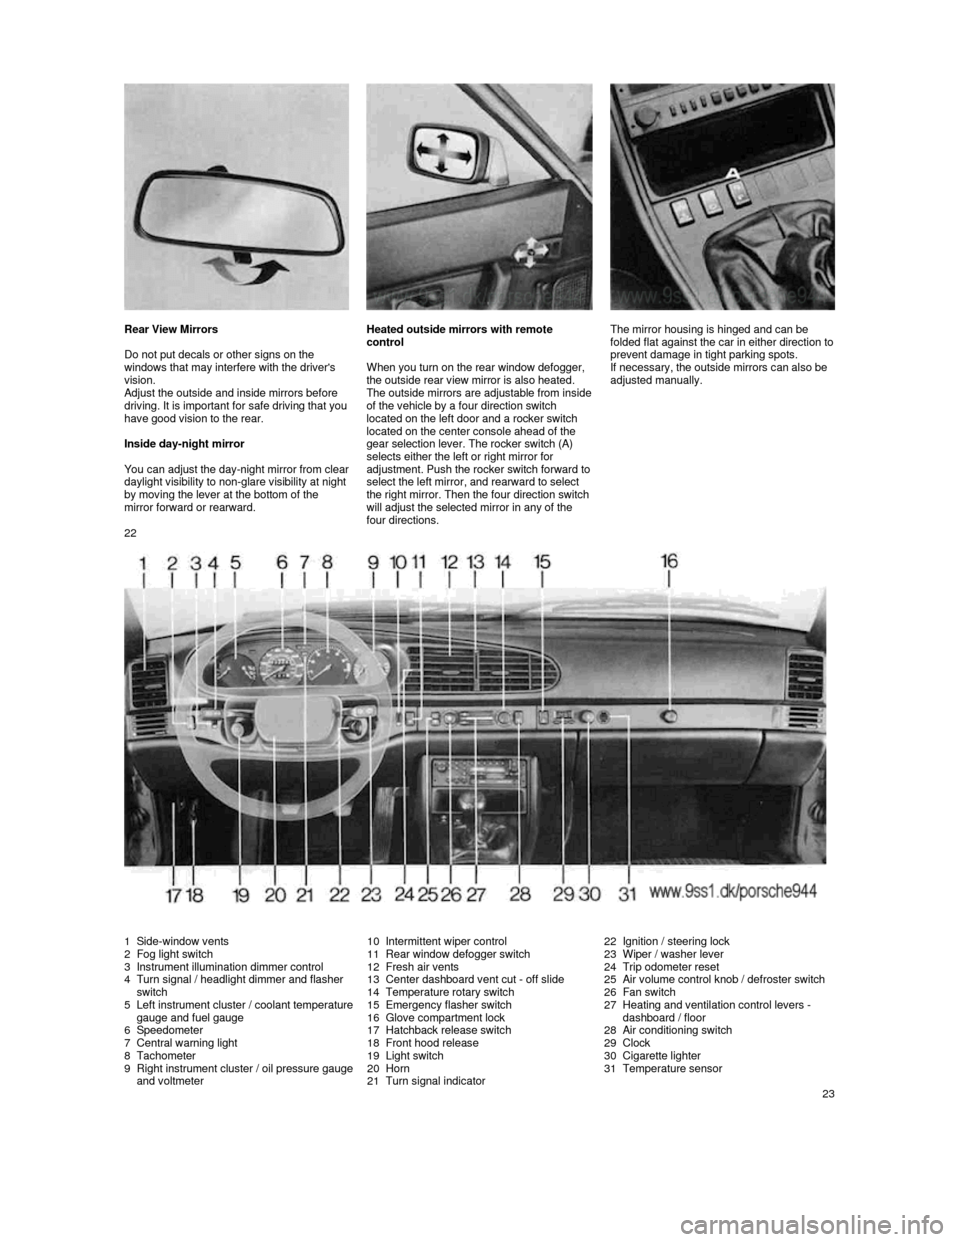
Rear View Mirrors
Do not put decals or other signs on the
windows that may interfere with the driver's
vision.
Adjust the outside and inside mirrors before driving. It is important for safe driving that you have good vision to the rear.
Inside day-night mirror
You can adjust the day-
night mirror from clear daylight visibility to non-glare visibility at night by moving the lever at the bottom of the
mirror forward or rearward.
Heated outside mirrors with remote
control
When you turn on the rear window defogger,
the outside rear view mirror is also heated.
The outside mirrors are ad
justable from inside of the vehicle by a four direction switch
located on the left door and a rocker switch
located on the center console ahead of the
gear selection lever. The rocker switch (A)
selects either the left or right mirror for
adjustment. Push
the rocker switch forward to select the left mirror, and rearward to select
the right mirror. Then the four direction switch
will adjust the selected mirror in any of the four directions.
The mirror housing is hinged and can be
folded flat against the c
ar in either direction to prevent damage in tight parking spots.
If necessary, the outside mirrors can also be
adjusted manually.
22
1 Side-window vents 2 Fog light switch
3 Instrument illumination dimmer control
4 Turn signal / headlight dimmer and flasher
switch
5
Left instrument cluster / coolant temperature gauge and fuel gauge
6 Speedometer
7 Central warning light
8 Tachometer
9 Right instrument cluster / oil pressure gauge and voltmeter
10 Intermittent wiper control
11 Rear window defogger switch
12 Fresh air vents
13 Center dashboard vent cut -
off slide14 Temperature rotary switch
15 Emergency flasher switch
16 Glove compartment lock
17 Hatchback release switch
18 Front hood release
19 Light switch
20 Horn
21 Turn signal indicator
22 Ignition / steering lock
23 Wiper / washer lever
24 Trip odometer reset
25
Air volume control knob / defroster switch
26 Fan switch
27 Heating and ventilation control levers -
dashboard / floor
28
Air conditioning switch
29 Clock
30 Cigarette lighter
31 Temperature sensor
23
Page 13 of 66
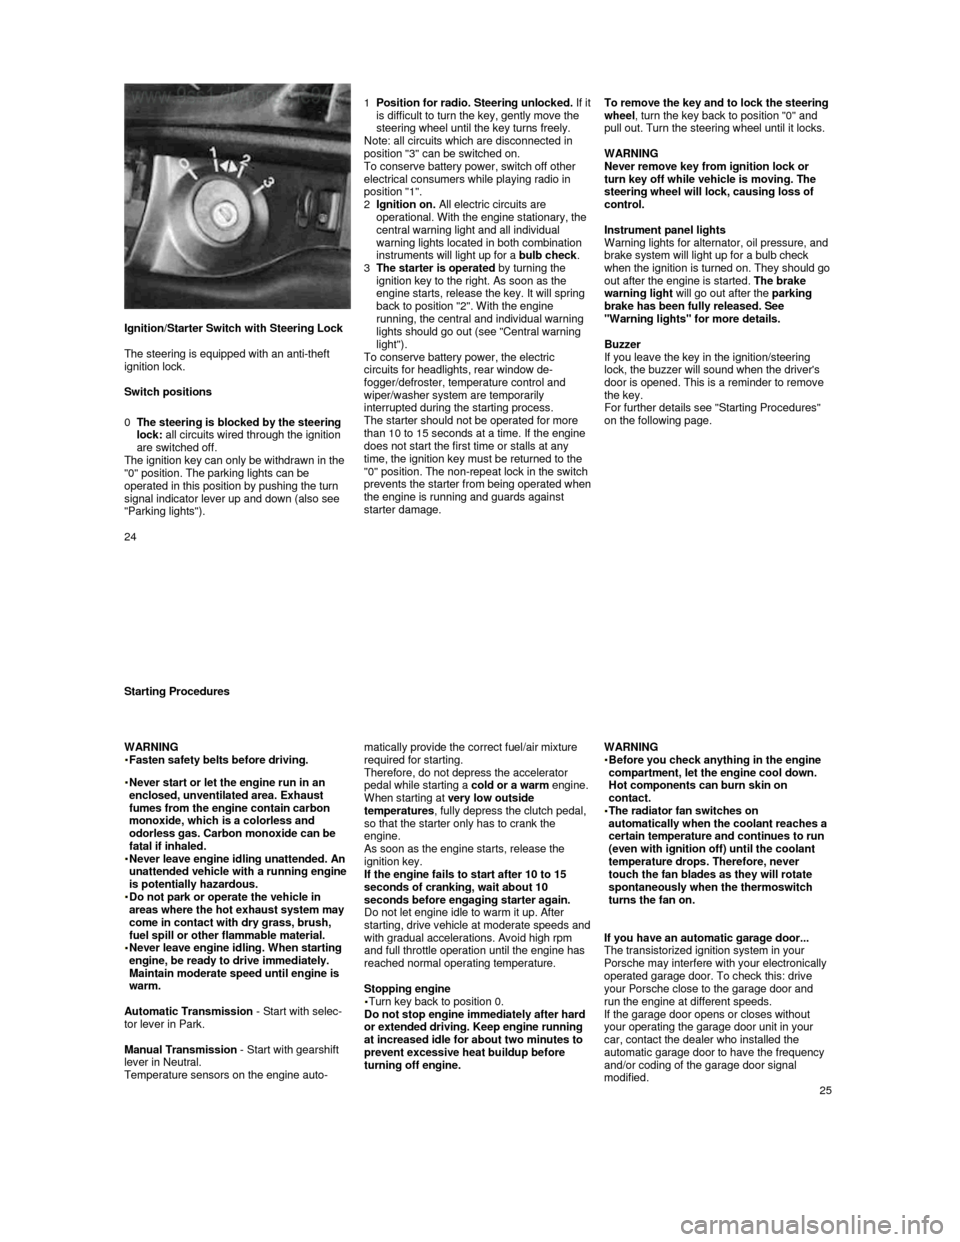
Ignition/Starter Switch with Steering Lock
The steering is equipped with an anti-theft
ignition lock.
Switch positions
0
The steering is blocked by the steering lock: all circuits wired through the ignition
are switched off.
The ignition key can only be withdrawn in the
"0" position. The parking lights can be
operated in this position by pushing the turn
signal indicator lever up and down (also see
"Parking lights").
1 Position for radio. Steering unlocked. If it is difficult to turn the key, gently move the
steering wheel until the key turns freely.
Note: all circuits which are disconnected in
position "3" can be switched on.
To conserve battery power, switch off other
electrical consumers while playing radio in
position "1".
2
Ignition on. All electric circuits are
operational. With the engine stationary, the
central warning light and all individual
warning lights located in both combination
instruments will light up for a bulb check.
3
The starter is operated by turning the
ignition key to the right. As soon as the
engine starts, release the key. It will spring
back to position "2". With the engine
running, the central and individual warning
lights should go out (see "Central warning
light").
To conserve battery power, the electric
circuits for headlights, rear window de-
fogger/defroster, temperature control and
wiper/washer system are temporarily interrupted during the starting process.
The starter should not be operated for more
than 10 to 15 seconds at a time. If the engine
does not start the first time or stalls at any
time, the ignition key must be returned to the
"0" position. The non-repeat lock in the switch
prevents the
starter from being operated when the engine is running and guards against
starter damage.
To remove the key and to lock the steering
wheel
, turn the key back to position "0" and
pull out. Turn the steering wheel until it locks.
WARNING
Never remove key from ignition lock or
turn key off while vehicle is moving. The
steering wheel will lock, causing loss of
control.
Instrument panel lights
Warning lights for alternator, oil pressure, and
brake system will light up for a bulb check
when the ignition is turned on. They should go out after the engine is started. The brake
warning light will go out after the parking
brake has been fully released. See
"Warning lights" for more details.
Buzzer
If you leave the key in the ignition/steering
lock, the buzzer will sound when the driver's
door is opened. This is a reminder to remove
the key.
For further details see "Starting Procedures"
on the following page.
24
Starting Procedures
WARNING
Fasten safety belts before driving.
Never start or let the engine run in an enclosed, unventilated area. Exhaust
fumes from the engine contain carbon
monoxide, which is a colorless and
odorless gas. Carbon monoxide can be
fatal if inhaled.
Never leave engine idling unattended. An unattended vehicle with a running engine
is potentially hazardous.
Do not park or operate the vehicle in areas where the hot exhaust system may
come in contact with dry grass, brush,
fuel spill or other flammable material.
Never leave engine idling. When starting engine, be ready to drive immediately.
Maintain moderate speed until engine is
warm.
Automatic Transmission - Start with selec-
tor lever in Park.
Manual Transmission - Start with gearshift
lever in Neutral.
Temperature sensors on the engine auto- matically provide the correct fuel/air mixture
required for starting.
Therefore, do not depress the accelerator
pedal while starting a cold or a warm engine.
When starting at very low outside
temperatures , fully depress the clutch pedal,
so that the starter only has to crank the
engine.
As soon as the engine starts, release the ignition key.
If the engine fails to start after 10 to 15
seconds of cranking, wait about 10
seconds before engaging starter again.
Do not let engine idle to warm it up. After
starting, drive vehicle at moderate speeds and with gradual accelerations. Avoid high rpm
and full throttle operation until the engine has
reached normal operating temperature.
Stopping engine
Turn key back to position 0.
Do not stop engine immediately after hard
or extended driving. Keep engine running
at increased idle for about two minutes to
prevent excessive heat buildup before
turning off engine.
WARNING
Before you check anything in the engine compartment, let the engine cool down.
Hot components can burn skin on
contact.
The radiator fan switches on automatically when the coolant reaches a
certain temperature and continues to run
(even with ignition off) until the coolant
temperature drops. Therefore, never
touch the fan blades as they will rotate
spontaneously when the thermoswitch
turns the fan on.
If you have an automatic garage door...
The transistorized ignition system in your
Porsche may interfere with your electronically
operated garage door. To check this: drive
your Porsche close to the garage door and
run the engine at different speeds.
If the garage door opens or closes without
your operating the garage door unit in your
car, contact the dealer who installed the
automatic garage door to have the frequency
and/or coding of the garage door signal
modified.
25
Page 18 of 66
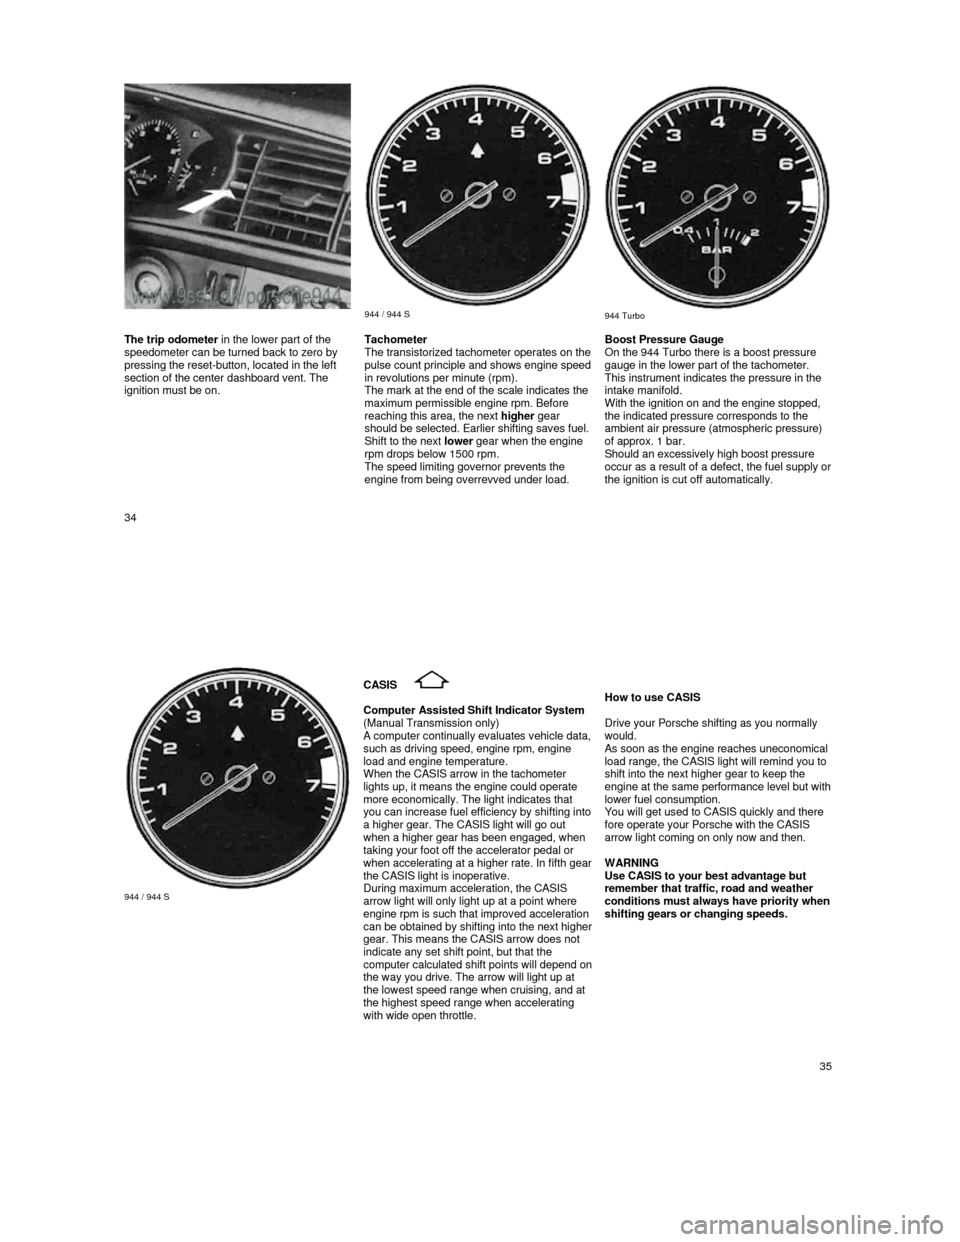
944 / 944 S
944 Turbo The trip odometer
in the lower part of the
speedometer can be turned back to zero by
pressing the reset-button, located in the left
section of the center dashboard vent. The
ignition must be on. Tachometer
The transistorized tachometer operates on the pulse count principle and shows engine speed in revolutions per minute (rpm).
The mark at the end of the scale indicates the
maximum permissible engine rpm. Before
reaching this area, the next higher gear
should be selected. Earlier shifting saves fuel.
Shift to the next lower gear when the engine
rpm drops below 1500 rpm.
The speed limiting governor prevents the
engine from being overrevved under load.
Boost Pressure Gauge
On the 944 Turbo there is a boost pressure
gauge in the lower part of the tachometer.
This instrument indicates the pressure in the
intake manifold.
With the ignition on and the engine stopped,
the indicated pressure corresponds to the
ambient air pressure (atmospheric pressure)
of approx. 1 bar.
Should an excessively high boost pressure
occur as a result of a defect, the fuel supply or the ignition is cut off automatically.
34
944 / 944 S
CASIS
Computer Assisted Shift Indicator System (Manual Transmission only) A computer continually evaluates vehicle data, such as driving speed, engine rpm, engine
load and engine temperature.
When the CASIS arrow in the tachometer
lights up, it means the engine could operate
more economically. The light indicates that
you can increase fuel efficiency by shifting into a higher gear. The CASIS light will go out when a higher gear has been engaged, when taking your foot off the accelerator pedal or when accelerating at a higher rate. In fifth gear the CASIS light is inoperative.
During maximum acceleration, the CASIS
arrow light will only light up at a point where
engine rpm is such that improved acceleration
can be obtained by shifting into the next higher gear. This means the CASIS arrow does not
indicate any set shift point, but that the
computer calculated shift points will depend on the way you drive. The arrow will light up at
the lowest speed range when cruising, and at
the highest speed range when accelerating
with wide open throttle.
How to use CASIS
Drive your Porsche shifting as you normally
would. As soon as the engine reaches uneconomical load range, the CASIS light will remind you to
shift into the next higher gear to keep the
engine at the same performance level but with lower fuel consumption.
You will get used to CASIS quickly and there
fore operate your Porsche with the CASIS
arrow light coming on only now and then.
WARNING
Use CASIS to your best advantage but
remember that traffic, road and weather
conditions must always have priority when shifting gears or changing speeds.
35
Page 19 of 66
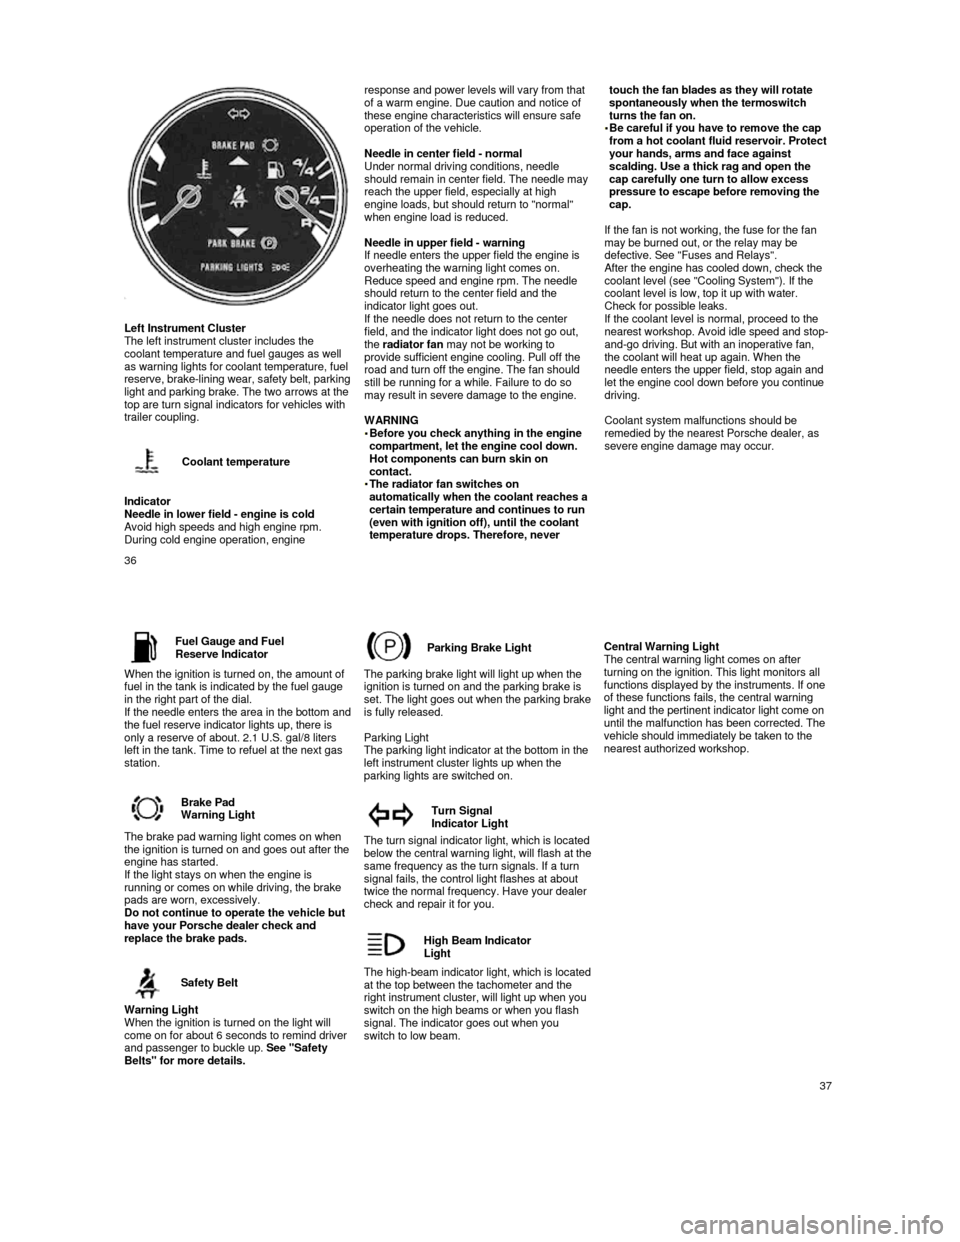
Left Instrument Cluster
The left instrument cluster includes the
coolant temperature and fuel gauges as well
as warning lights for coolant temperature, fuel
reserve, brake-
lining wear, safety belt, parking light and parking brake. The two arrows at the
top are turn signal indicators for vehicles with
trailer coupling.
Coolant temperature
Indicator
Needle in lower field - engine is cold
Avoid high speeds and high engine rpm. During cold engine operation, engine
response and power levels will vary from that
of a warm engine. Due caution and notice of
these engine characteristics will ensure safe
operation of the vehicle.
Needle in center field - normal
Under normal driving conditions, needle
should remain in center field. The needle may
reach the upper field, especially at high
engine loads, but should return to "normal"
when engine load is reduced.
Needle in upper field - warning
If needle enters the upper field the engine is
overheating the warning light comes on.
Reduce speed and engine rpm. The needle
should return to the center field and the
indicator light goes out.
If the needle does not return to the center
field, and the indicator light does not go out,
the radiator fan may not be working to
provide sufficient engine cooling. Pull off the
road and turn off the engine. The fan should
still be running for a while. Failure to do so
may result in severe damage to the engine.
WARNING
Before you check anything in the engine compartment, let the engine cool down.
Hot components can burn skin on
contact. The radiator fan switches on automatically when the coolant reaches a
certain temperature and continues to run
(even with ignition off), until the coolant
temperature drops. Therefore, never
touch the fan blades as they will rotate spontaneously when the termoswitch
turns the fan on.
Be careful if you have to remove the cap from a hot coolant fluid reservoir. Protect
your hands, arms and face against
scalding. Use a thick rag and open the
cap carefully one turn to allow excess
pressure to escape before removing the
cap.
If the fan is not working, the fuse for the fan
may be burned out, or the relay may be
defective. See "Fuses and Relays".
After the engine has cooled down, check the coolant level (see "Cooling System"). If the
coolant level is low, top it up with water.
Check for possible leaks.
If the coolant level is normal, proceed to the
nearest workshop. Avoid idle speed and stop-
and-go driving. But with an inoperative fan,
the coolant will heat up again. When the
needle enters the upper field, stop again and
let the engine cool down before you continue
driving.
Coolant system malfunctions should be
remedied by the nearest Porsche dealer, as
severe engine damage may occur.
36
Fuel Gauge and FuelReserve Indicator
When the ignition is turned on, the amount of
fuel in the tank is indicated by the fuel gauge
in the right part of the dial.
If the needle enters the area in the bottom and the fuel reserve indicator lights up, there is
only a reserve of about. 2.1 U.S. gal/8 liters
left in the tank. Time to refuel at the next gas
station.
Brake Pad
Warning Light
The brake pad warning light comes on when the ignition is turned on and goes out after the engine has started.
If the light stays on when the engine is
running or comes on while driving, the brake
pads are worn, excessively.
Do not continue to operate the vehicle but
have your Porsche dealer check and
replace the brake pads.
Safety Belt
Warning Light
When the ignition is turned on the light will
come on for about 6 seconds to remind driver
and passenger to buckle up. See "Safety
Belts" for more details.
Parking Brake Light
The parking brake light will light up when the
ignition is turned on and the parking brake is
set.
The light goes out when the parking brake is fully released.
Parking Light
The parking light indicator at the bottom in the
left instrument cluster lights up when the
parking lights are switched on.
Turn Signal
Indicator Light
The turn signal indicator light, which is located below the central warning light, will flash at the same frequency as the turn signals. If a turn
signal fails, the control light flashes at about
twice the normal frequency. Have your dealer
check and repair it for you.
High Beam Indicator
Light
The high-beam indicator light, which is located at the top between the tachometer and the
right instrument cluster, will light up when you
switch on the high beams or when you flash
signal. The indicator goes out when you
switch to low beam.
Central Warning Light
The central warning light comes on after
turning on the ignition. This light monitors all
functions displayed by the instruments. If one
of these functions fails, the central warning
light and the pertinent indicator light come on
until the malfunction has been corrected. The
vehicle should immediately be taken to the
nearest authorized workshop.
37
Page 20 of 66
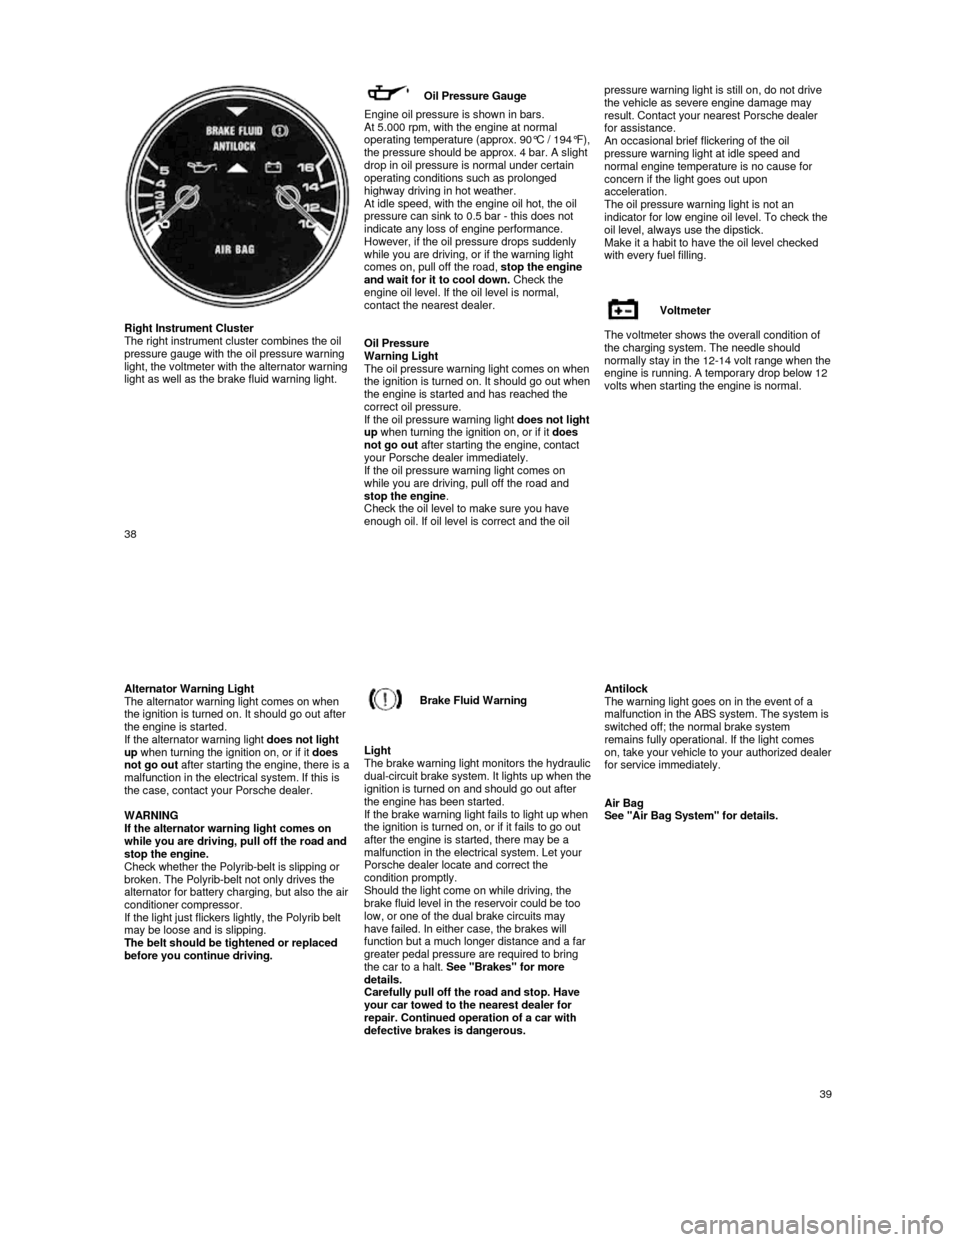
Right Instrument Cluster
The right instrument cluster combines the oil
pressure gauge with the oil pressure warning
light, the voltmeter with the alternator warning
light as well as the brake fluid warning light.
Oil Pressure Gauge
Engine oil pressure is shown in bars. At 5.000 rpm, with the engine at normal operating temperature (approx. 90°C / 194°F), the pressure should be approx. 4 bar. A slight
drop in oil pressure is normal under certain
operating conditions such as prolonged
highway driving in hot weather.
At idle speed, with the engine oil hot, the oil pressure can sink to 0.5 bar - this does not
indicate any loss of engine performance.
However, if the oil pressure drops suddenly
while you are driving, or if the warning light comes on, pull off the road,
stop the engine
and wait for it to cool down. Check the
engine oil level. If the oil level is normal,
contact the nearest dealer.
Oil Pressure
Warning Light
The oil pressure warning light comes on when the ignition is turned on. It should go out when the engine is started and has reached the
correct oil pressure.
If the oil pressure warning light
does not light up when turning the ignition on, or if it does
not go out after starting the engine, contact
your Porsche dealer immediately.
If the oil pressure warning light comes on
while you are driving, pull off the road and stop the engine .
Check the oil level to make sure you have
enough oil. If oil level is correct and the oil pressure warning light is still on, do not driv
e
the vehicle as severe engine damage may
result. Contact your nearest Porsche dealer
for assistance.
An occasional brief flickering of the oil pressure warning light at idle speed and
normal engine temperature is no cause for
concern if the light goes out upon
acceleration.
The oil pressure warning light is not an
indicator for low engine oil level. To check the
oil level, always use the dipstick.
Make it a habit to have the oil level checked
with every fuel filling.
Voltmeter
The voltmeter shows the overall condition of
the charging system. The needle should
normally stay in the 12-
14 volt range when the engine is running. A temporary drop below 12
volts when starting the engine is normal.
38
Alternator Warning Light
The alternator warning light comes on when
the ignition is turned on. It should go out after
the engine is started.
If the alternator warning light does not light
up when turning the ignition on, or if it does
not go out
after starting the engine, there is a malfunction in the electrical system. If this is
the case, contact your Porsche dealer.
WARNING
If the alternator warning light comes on
while you are driving, pull off the road and
stop the engine.
Check whether the Polyrib-belt is slipping or
broken. The Polyrib-belt not only drives the
alternator for battery charging, but also the air
conditioner compressor.
If the light just flickers lightly, the Polyrib bel t
may be loose and is slipping.
The belt should be tightened or replaced
before you continue driving.
Brake Fluid Warning
Light
The brake warning light monitors the hydraulic dual-circuit brake system. It lights up when the ignition is turned on and should go out after
the engine has been started.
If the brake warning light fails to light up when
the ignition is turned on, or if it fails to go out
after the engine is started, there may be a
malfunction in the electrical system. Let your
Porsche dealer locate and correct the
condition promptly.
Should the light come on while driving, the
brake fluid level in the reservoir could be too
low, or one of the dual brake circuits may
have failed. In either case, the brakes will
function but a much longer distance and a far
greater pedal pressure are required to bring
the car to a halt. See "Brakes" for more
details.
Carefully pull off the road and stop. Have
your car towed to the nearest dealer for
repair. Continued operation of a car with
defective brakes is dangerous.
Antilock
The warning light goes on in the event of a
malfunction in the ABS system. The system is
switched off; the normal brake system
remains fully operational. If the light comes
on, take your vehicle to your authorized dealer for service immediately.
Air Bag
See "Air Bag System" for details.
39
Page 26 of 66
Fuel Economy
Fuel economy will vary depending on where,
when and how you drive, optional equipment installed, and the general condition of your
car. A car tuned to specifications and correctly maintained, will help you get maximum fuel
economy.
Have your vehicle tuned to specifications.
Fuel injection should be adjusted to
specifications.
Spark plugs should be clean, properly
gapped and fire efficiently.
Air cleaner should be dirt free to allow proper engine "breathing". Battery should be fully charged. Wheels should be properly aligned. Tires should be inflated at correct pressures. Keep a light foot on the accelerator pedal. Drive smoothly, avoid abrupt changes in
speed as much as possible.
Avoid jack rabbit starts and sudden stops. Do not drive longer than necessary in the
lower gears. Shifting up early helps to save
fuel.
Avoid unnecessary idling. Turn the engine
off.
Prolonged "warm up" idling wastes gas. Start the vehicle just before you are ready to drive. Accelerate slowly and smoothly.
Any additional weight carried in the vehicle reduces fuel economy. Always keep cargo to
a minimum and remove all unnecessary
items.
Organize your trips to take in several
errands.
Use air conditioner only when needed. All electrical equipment contribute to increased fuel consumption.
The EPA estimated m.p.g. is to be used for
comparison purposes, actual mileage may be
different from the estimated m.p.g., depending on your driving speed, weather conditions and trip length. Your actual highway mileage will
probably be less than the estimated m.p.g.
Please observe all local and national speed
limits.
49
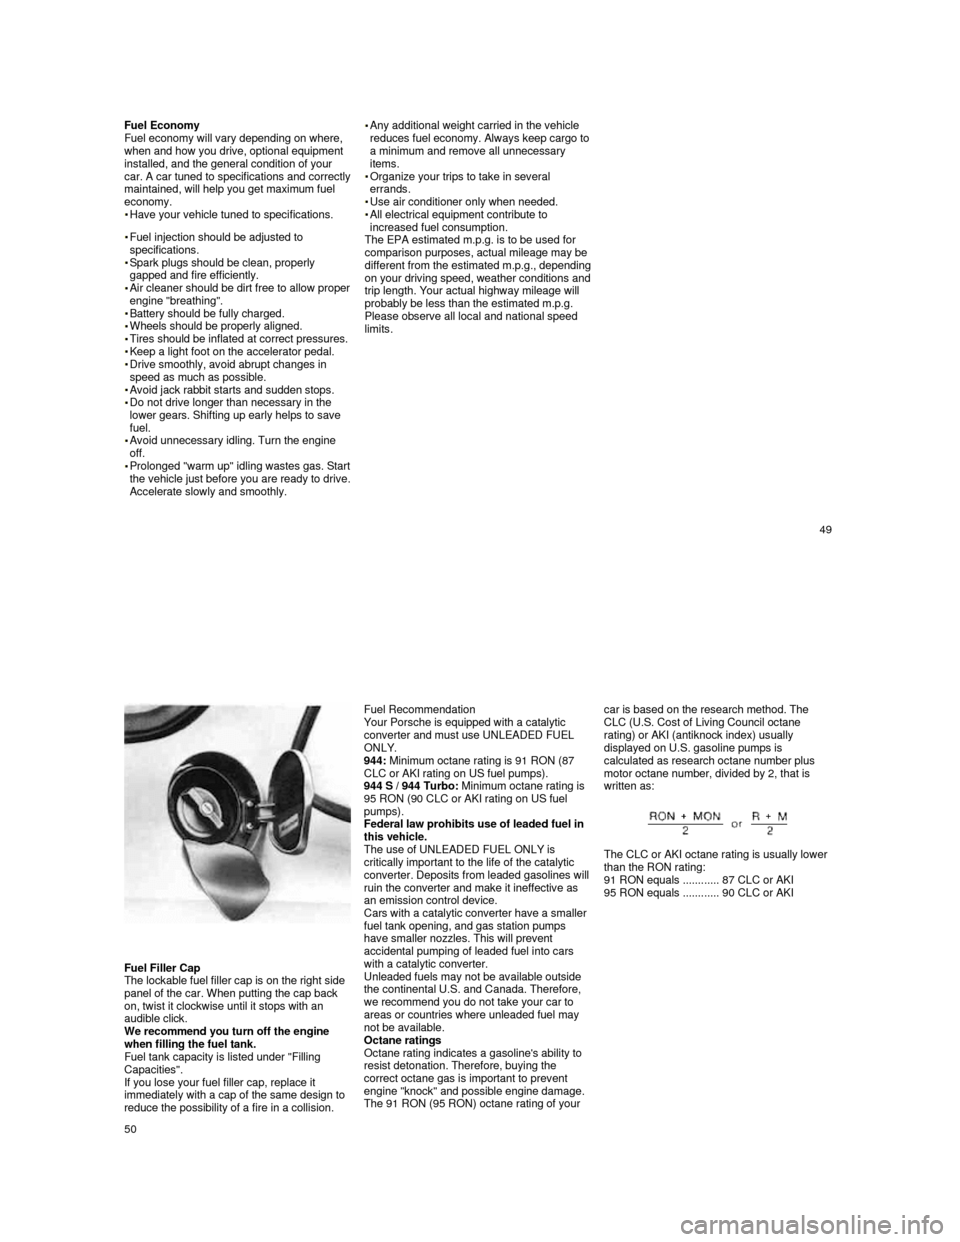
Fuel Filler Cap
The lockable fuel filler cap is on the right side
panel of the car. When putting the cap back
on, twist it clockwise until it stops with an
audible click.
We recommend you turn off the engine
when filling the fuel tank.
Fuel tank capacity is listed under "Filling
Capacities".
If you lose your fuel filler cap, replace it
immediately with a cap of the same design to
reduce the possibility of a fire in a collision.
Fuel Recommendation
Your Porsche is equipped with a catalytic
converter and must use UNLEADED FUEL
ONLY.
944:
Minimum octane rating is 91 RON (87
CLC or AKI rating on US fuel pumps).
944 S / 944 Turbo: Minimum octane rating is
95 RON (90 CLC or AKI rating on US fuel
pumps).
Federal law prohibits use of leaded fuel in
this vehicle.
The use of UNLEADED FUEL ONLY is
critically important to the life of the catalytic
converter. Deposits from leaded gasolines will ruin the converter and make it ineffective as
an emission control device.
Cars with a catalytic converter have a smaller
fuel tank opening, and gas station pumps
have smaller nozzles. This will prevent
accidental pumping of leaded fuel into cars
with a catalytic converter.
Unleaded fuels may not be available outside
the continental U.S. and Canada. Therefore,
we recommend you do not take your car to areas or countries where unleaded fuel may
not be available.
Octane ratings
Octane rating indicates a gasoline's ability to
resist detonation. Therefore, buying the
correct octane gas is important to prevent
engine "knock" and possible engine damage.
The 91 RON (95 RON) octane rating of your
car is based on the research method. The CLC (U.S. Cost of Living Council octane
rating) or AKI (antiknock index) usually
displayed on U.S. gasoline pumps is
calculated as research octane number plus
motor octane number, divided by 2, that is
written as:
The CLC or AKI octane rating is usually lower
than the RON rating:
91 RON equals ............ 87 CLC or AKI
95 RON equals ............ 90 CLC or AKI
50
Page 29 of 66
Neutral
Shift to this position for standing with brakes
applied.
Never use Neutral for coasting downhill.
You may lose control over the car because of reduced braking and cause serious damage to the transmission when a driving range has to be selected. CAUTION: While driving with the automatic speed control set (at speeds above 25 mph or 40 km/h), do not bring shift lever into
the Neutral position as excessive engine
rpm and severe engine damage may result.
Maneuvering
When alternating between forward (D) and
reverse (R) (for instance, while maneuvering
the car into a tight parking space), only shift
into Reverse or Drive
when the car has come to a full stop and the engine is running at idle
speed.
Stuck in snow, mud or sand
When alternating between Drive and
Reverse in an effort to free the vehicle,
depress the accelerator pedal lightly while the
transmission is in gear, and release the
accelerator pedal while shifting. Do not race
the engine and avoid spinning the wheels.
Do not repeat "rocking" back and forth
with wheels spinning at high engine speed
and heavy throttle, as serious damage may be caused to the automatic transmission
and other critical parts.
If you cannot free the vehicle after a few
"rocking" attempts, call for help or a tow truck.
Accelerator Pedal
For good fuel economy we recommend
smooth and even acceleration. Very fast, racy
driving, alternating between full throttle and
hard braking, raises the fuel consumption
considerably. Also, tires and brake linings
wear faster. It is more economical to drive smoothly and at a fairly constant speed.
Accelerator "Kickdown"
When depressing the accelerator pedal you
will find resistance near the full throttle position. By applying greater pressure the
pedal can be pushed beyond this point to the
kick-down position. The transmission will now
shift automatically into the next lower gear to
give you maximum acceleration, and only shift up again after the engine has reached
maximum speed in that particular gear.
WARNING
Be careful when using the kickdown on
slippery roads. Rapid acceleration may
cause skidding.
Please observe the following when applying
the accelerator kickdown:
With the selector lever in D, you can apply the kickdown to make the transmission shift down into second gear when driving below 88 mph
or 140 km/h and down to first gear when
driving below 47 mph or 75 km/h.
With the selector lever in "2", you can apply
the kickdown to make the transmission shift
down into first gear when driving below 47
mph or 75 km/h.
As soon as you release the pedal from the kickdown position the next higher gear is
automatically engaged.
Please observe all local and national speed limits.
55
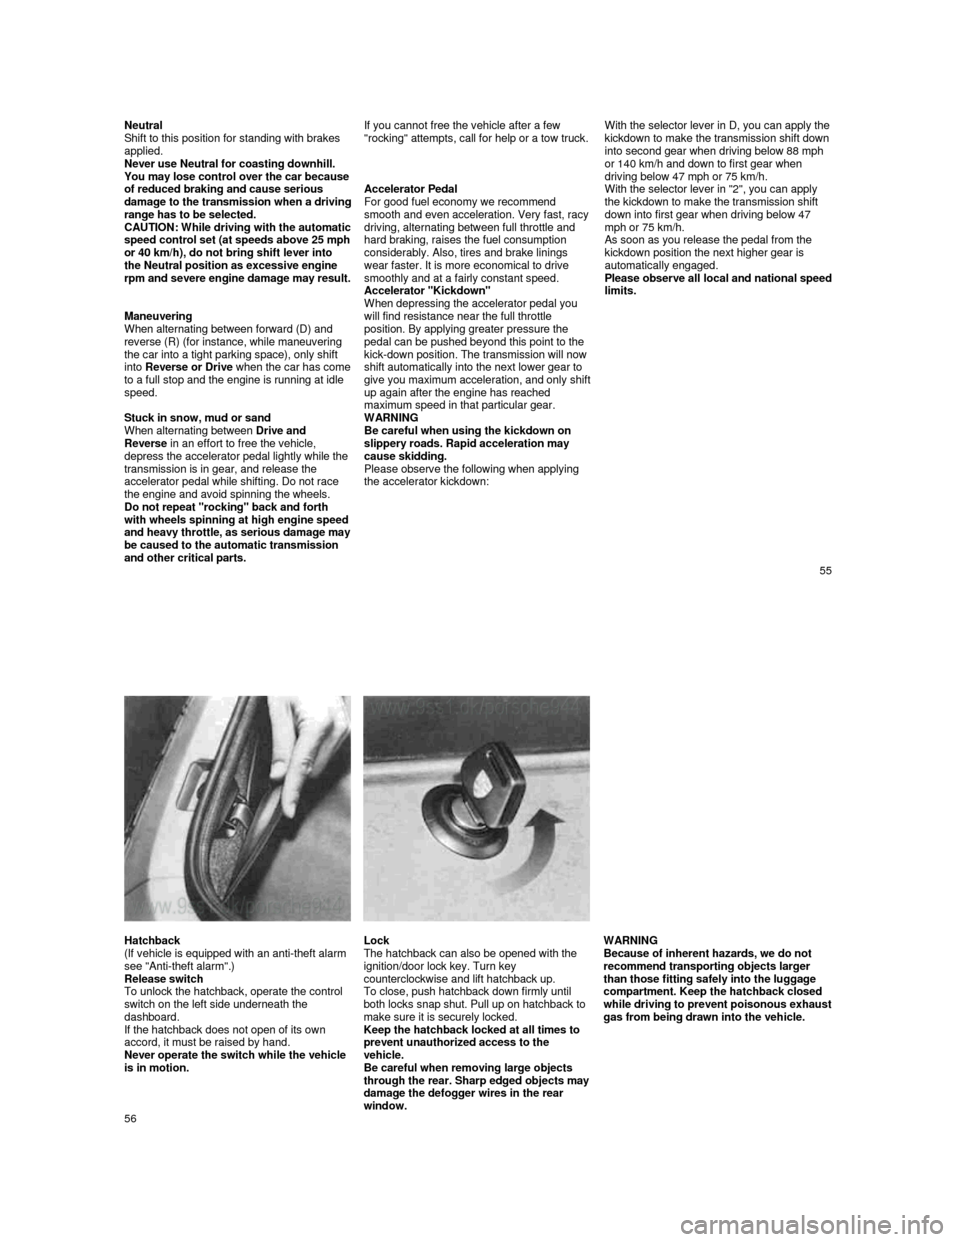
Hatchback
(If vehicle is equipped with an anti-theft alarm
see "Anti-theft alarm".)
Release switch
To unlock the hatchback, operate the control
switch on the left side underneath the
dashboard.
If the hatchback does not open of its own
accord, it must be raised by hand.
Never operate the switch while the vehicle
is in motion. Lock
The hatchback can also be opened with the
ignition/door lock key. Turn key
counterclockwise and lift hatchback up.
To close, push hatchback down firmly until
both locks snap shut. Pull up on hatchback to
make sure it is securely locked.
Keep the hatchback locked at all times to
prevent unauthorized access to the
vehicle.
Be careful when removing large objects
through th
e rear. Sharp edged objects may damage the defogger wires in the rear
window.
WARNING
Because of inherent hazards, we do not
recommend transporting objects larger
than those fitting safely into the luggage
compartment. Keep the hatchback closed
while dr
iving to prevent poisonous exhaust gas from being drawn into the vehicle.
56