1984 CHEVROLET CAVALIER key
[x] Cancel search: keyPage 6 of 105
Downloaded from www.Manualslib.com manuals search engine SECTION 1
BEFORE DRIVING YOUR CAVALIER
TRANSAXLE
While reading this manual, you will nole many references 10 Ihe "transaxle." The transaxle is a transmission and differential (axle) combined in a singl ,e unit.
To avoid confusion, the word
"transaxle" will be used throughout this manual 10 refer to bolh Ihe transmission and differenlial funclions.
DRIVER DAILY CHECKUST
Be sure you know how to use your vehicle and its equipment before operating it
Before Entering the Vehicle
1. See that windows, mirrors and lights are clean and unobstructed.
2. If any lire does not look normal, check it with a pressure gage.
3. Look for fluid leaks .
4. Be sure everything is properly stowed.
5. Check the area behind the vehicle if you are about to back up.
__ Before Driving Off
1. Lock all doors.
2. Adjust the seat and any movable head restraint
3. Adjust inside and outside mirrors.
4. DO NOT allow anyone to ride where there is no seat belt ; and ALWAYS properly fasten the seat belt.
5. Check that all the warning lights work as the key is turned to "Run" or "Start"
6. Check all gages (including the fuel gage).
7 . Release the parking brake (and make sure the
"BRAKE " light turns .off).
See related topics in this manual
or the Maintenance Schedule folder H problems are found.
STOWING THINGS IN (OR ON) THE VEHICLE
CAUTION: Put luggage or cargo In the trunk, or rea' area if postible. Cargo weight,
whether In the trunk or rear area, should be located as far forward as possible. Cargo weight on the roof Shoukt be positioned .s evenly as possible. Secure all i1ems in place to help keep them -from being thrown about and injuring people during a cot"-ion or sudden maneuver. Do not pile luggage or cargo higher than the seetbaCks. Do not place anything on the filler panel, or any cargo cover between the rear seat~.ck and window.
GUARD AGAINST THEFT
Your new Cava~er has many features to help prevent then of the vehicle, its
equipment, and contents. But these anti-then features
depend upon you to work.
t -1
Page 7 of 105
Downloaded from www.Manualslib.com manuals search engine The time to be most on guard is when leaving the vehicle:
1. Park in a lighted spot when you can, and fully close all windows and
any roof panels.
2 .
Lock the steering column and take the keys:
• Turn the key to "Lock" while depressing the key release lever (if so
equipped) and remove the
key. This locks the ignition and both
steering and shift controls , unless your manual transaxJe vehicle has a key release lever . In thai case . Ihe shiH control is not locked. The key can be removed only when the ignition is locked.
• II you must leave a key wilh the vehicle. leave the square-head key
only. Take the oval-head key with you. This will help prevent unwanted
entry into your vehicle or any locked compartment at a later date. Be
sure to
lock the glove box since the remote release button allows the
hatchback.
tailgate , or trunk to be opened even though the ignition key
has been removed .
3. Keep items that may appear to be of value out of sight and locked up
when possible.
4 .
Lock all doors.
KEYS
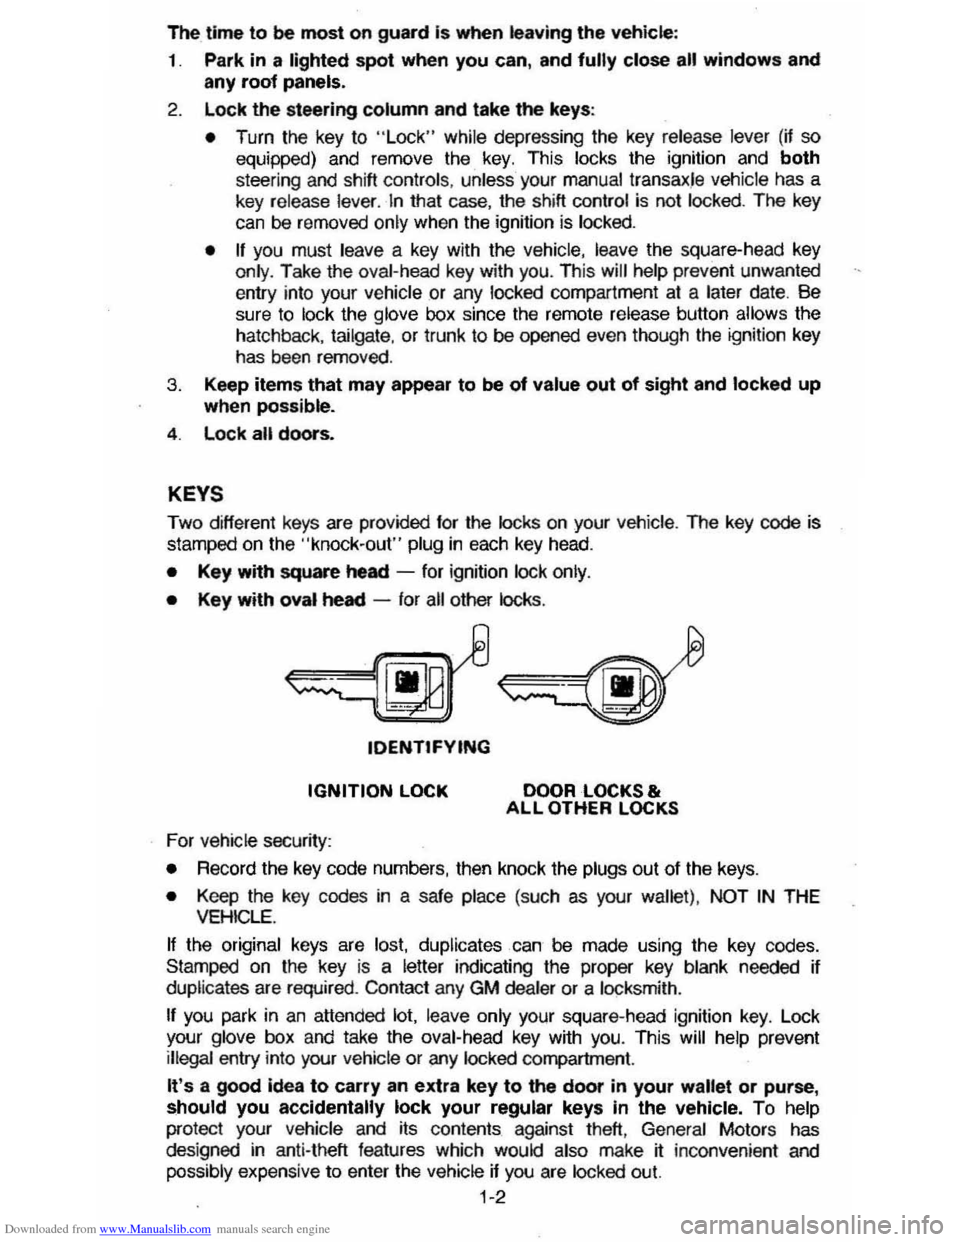
Two different keys are provided for the locks on your vehicte. The key code is
stamped on the "knock-out" plug in each key head.
• Key with square heed -for ignition lock only.
• Key with oval heed -for all other locks .
tDENTtFYING
IGNITION LOCK
For vehicle security:
DOOR LOCKS & ALL OTHER LOCKS
•
Record the key code numbers, then knock the plugs out of the keys.
• Keep the key codes in a safe place (such as your wallet) . NOT IN THE VEHICLE.
If the original keys are lost. duplicates can be made using the key codes.
Stamped on the key
is a letter indicating the proper key blank needed if
duplicates are required . Contact any GM dealer or a locksmith .
If you park in an attended lot. leave only your square-head ignition key. Lock
your glove box and take the oval-head key with you. This will help prevent illegal entry into your vehicle or any locked compartment.
It's a good idea to carry an extra key to the door in your wallet or purse, should you accidentally lock your regular keys In the vehicle. To help
protect your Vehicle and its contents against theft, General Motors has
des igned in anti-theft features which would also make jf: inconvenient and
possibly expensive to enter the vehicle if you are locked out.
1-2
Page 8 of 105
Downloaded from www.Manualslib.com manuals search engine DOOR LOCKS
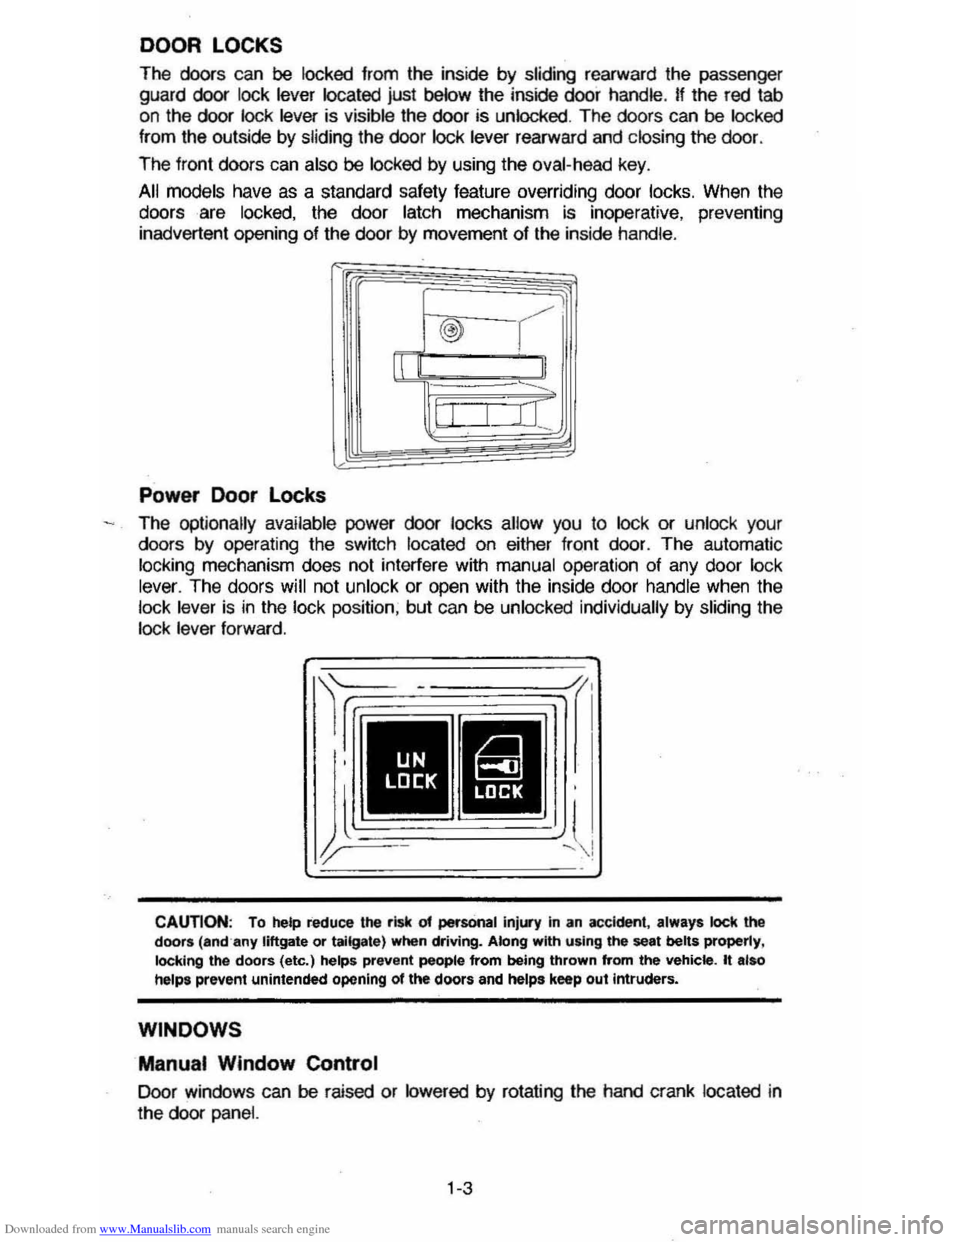
The doors can be locked from the inside by sliding rearward the passenger
guard
door lock lever located just below the inside door handle . If the red tab on the door lock lever is visible the door is unlocked . The doors can be locked
from the outside by sliding the door lock lever rearward and closing the door.
The front doors can
also be locked by using the oval-head key.
All inodels have as a standard safety feature overriding door locks. When the doors ·are locked, the door latch mechanism is inoperative, preventing
inadvertent opening 01 the door by movement of the inside handle.
@ r------
II II
lJI
[ Sf J ,tr=I ___ ,
Power Door Locks
The optionally available power door locks allow you to lock or unlock your
dears by operating the switch located on either front door. The automatic
locking mechanism does not interfere with manual operation of any door lock
lever. The doors will not unlock or open with the inside door handle when the lock lever is in the lock position, but can be unlocked individually by sliding the
lock lever forward.
r
CAUTION: To help reduce the risk of persOnal inj .... y in an accident. always lock the doors (and"any liftgate or tailgate) when driving. Along with using the seat belts properly.
locking the doors (etc.) helps prevent people from being thrown from the vehicle. It also helps prevent unintended opening of the doors and helps keep out intruders.
WINDOWS
Manual Window Control
Door windews can be raised or lowered by rotating the hand crank located in
the dear
panel.
1-3
Page 15 of 105
Downloaded from www.Manualslib.com manuals search engine 4. To lengthen the center seat lap belt, place the latch plate at a right angle
to the belt webbing and pull on the latch plate; the belt should then slide
easily.
Rear Seat Shoulder Belts (Dealer-Installed Accessory)
Except Convertible
When properly worn with a lap bell, a shoulder belt (available for rear outboard
seats) can give riders added protection. It can prevent or reduce impact with the inside of the vehicle by restraining the upper body in a collision, especially
in a frontal impact.
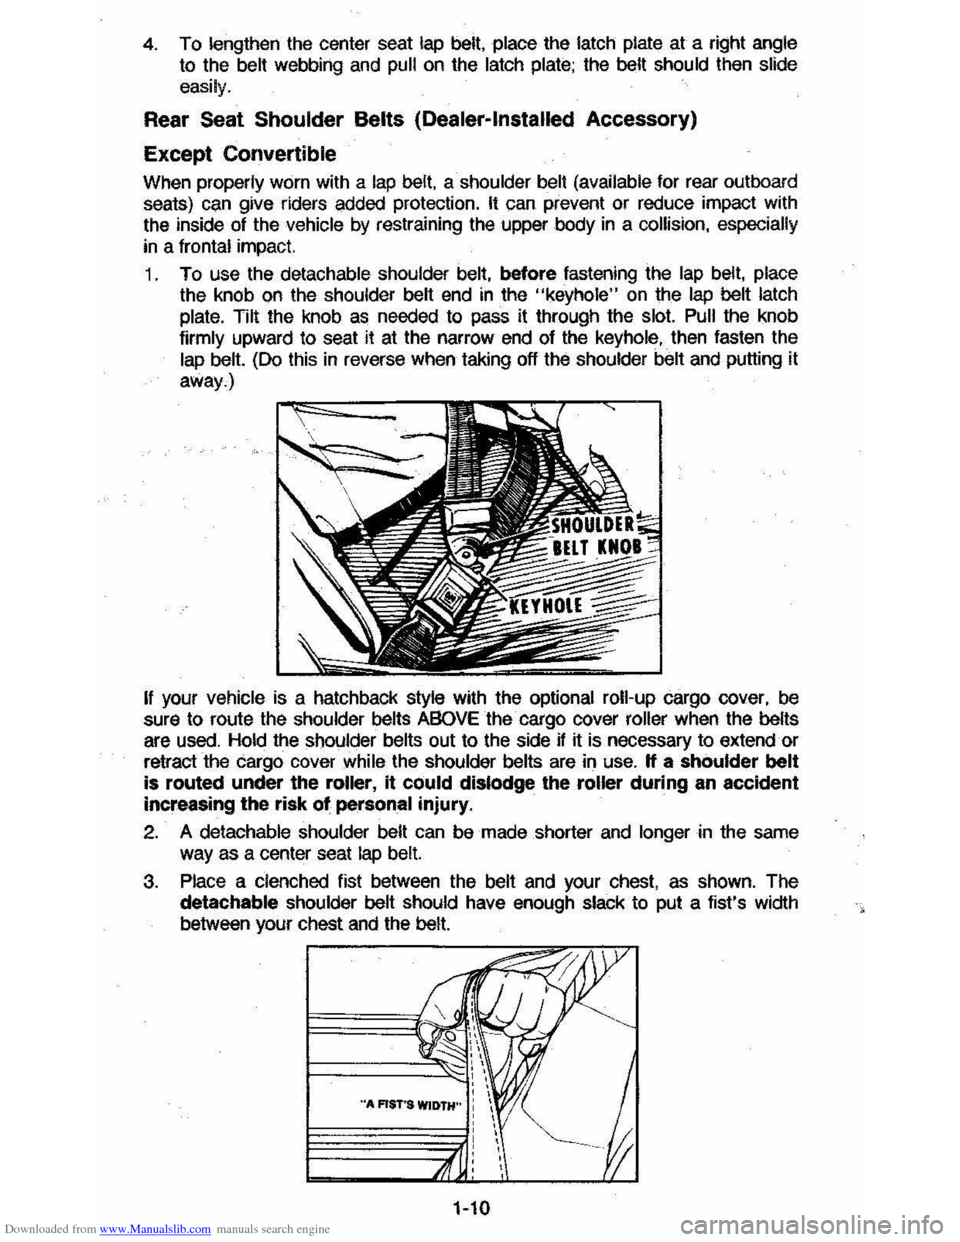
1 . To use the detachable
shoulder belt, before fastening the lap belt, place the knob on the shoulder belt end in the "keyhole" on the lap bell latch
plate. Tilt
the knob as needed to pass it through the slot. Pull the knob
firmly upward to seat it at the narrow end of the keyhole, then fasten the lap belt. (Do this in reverse when taking off the shoulder belt and putting it
away.)
If your vehicle is a hatchback style with the optional roll-up cargo cover, be
sure to route the shoulder belts ABOVE the cargo cover roller when the belts are used. Hold the Shoulder belts out to the side if it is necessary to extend or
retract the cargo cover
while the shoulder belts are in use. If a shoulder belt
is routed under the roller, it eQuid dislodge the roller during an accident
increasing
the risk of personal injury.
2. A detachable shoulder belt can be made shorter and longer in the same way as a center seat lap belt.
3. Place a clenched fist between the belt and your chest, as shown. The
detachable shoulder belt should have enough slack to put a fist's width
between your chest
and the belt.
1-10
Page 16 of 105
Downloaded from www.Manualslib.com manuals search engine Keep any shoulder belt slack to a minimum. Too much belt slack could
reduce the amount of protection in an accident because the belt is too loose to restrain you properly_
Seat Belt Inspection
Now and Ihen check that belts. buckles, latch plates, retractors, reminder
systems and guide
loops work properly; look for loose parts or damage that
could keep the restraint system from doing its job. Replace a
belt if the
webbing has been cut or otherwise damaged. Replace belts in use during all
but a minor collision; if there is any question, replace the belt.
SEAT BELT LIGHT/BUZZER REMINDER
When the key is turned to "Run" or "Start," a light will come on for four to
eight seconds to remind people to fasten their· seat belts. Unless the driver's
seat
belt is buckled, a buzzer will sound at the same time.
If the seat belt or reminder system does not work as described, see your dealer
for service.
CHILD RESTRAINT
All vehicle occupants and especially children should be restrained
whenever riding
in vehicles. Holding a child in your arms is NOT a substitute for a child restraint system. In an accident, a child held in a person's arms can
be struck or crushed by any unrestrained- rider. An unrestrained child could
also be injured by striking the interior, or by being ejected from the vehicle
during a sudden maneuver or impact. A child restraint system can help
protect a child in a vehicle.
In convertibles, a top-strap-equipped child restraint can only be used in
the Iront seat because there is no appropriate place to aUach a top strap
anchor bracket behind the rear seat in this vehicle. Installing a top strap
anchor bracket behind the rear seat may expose the child to hazards if the top
is raised or lowered with the child restraint occupied,
and, the bracket itself
may damage the convertible top.
In using any child restraint system, be sure to read and follow all instructions on installation and use that come with the system.
Riding Without A Child Restraint
For the best protection in an accident or sudden maneuver, children
small enough lor child restraint systems should be restrained that way.
However, the
following may provide some degree of protection for such children if a child restraint is not used.
• Place an infant who cannot sit up in a baby carrier, preferably covered and
padded. Put it crossways on the vehicle seat and securely restrain it with the vehicle's seat belts. Or, if that is not possible, place it crossways on the floor behind the driver's seat.
• Children who can sit up by themselves should be restrained with a lap belt
when riding in a rear seat. In the front seat a child should wear both lap
and shoulder belt. If the shoulder belt irritates the neck or face move the
child
closer to the center of the vehicle or to the rear seat. Never let a child stand or kneel on any seat. If unusual conditions prevent the use of
restraints, the
child should stand on the floor behind the driver's seat.
1-11
Page 23 of 105
Downloaded from www.Manualslib.com manuals search engine Frequent short trips, excessive idling and use of the air conditioner in cool
weather (when "vent" would provide adequate comfort), all can contribute to
decreased fuel economy .
The careful attention you give your vehicle as far as maintenance and repairs
are concerned will also help fuel economy . Proper engine and air cleaner
maintenance, lubrication intervals, wheel alignment and tire inflation pressures, when closely adhered to, will pay dividends in improved fuel economy as well as longer vehicle Irte.
Fuel Selection
Use only unleaded gasoline meeting the octane ratings given under "Fuel Requirements " in this section of the manual. Unleaded gasoline must be used
for the
emission control system to operate properly . Leaded gasoline will
damage the Computer Command
Control system oxygen sensor (if so equipped) and affect emission control. Using leaded gasoline can also damage
other parts of the emission control system and could result in loss of emission warranty coverage.
STEERING COLUMN CONTROLS
ANTl-THEFT STEERING COLUMN LOCK
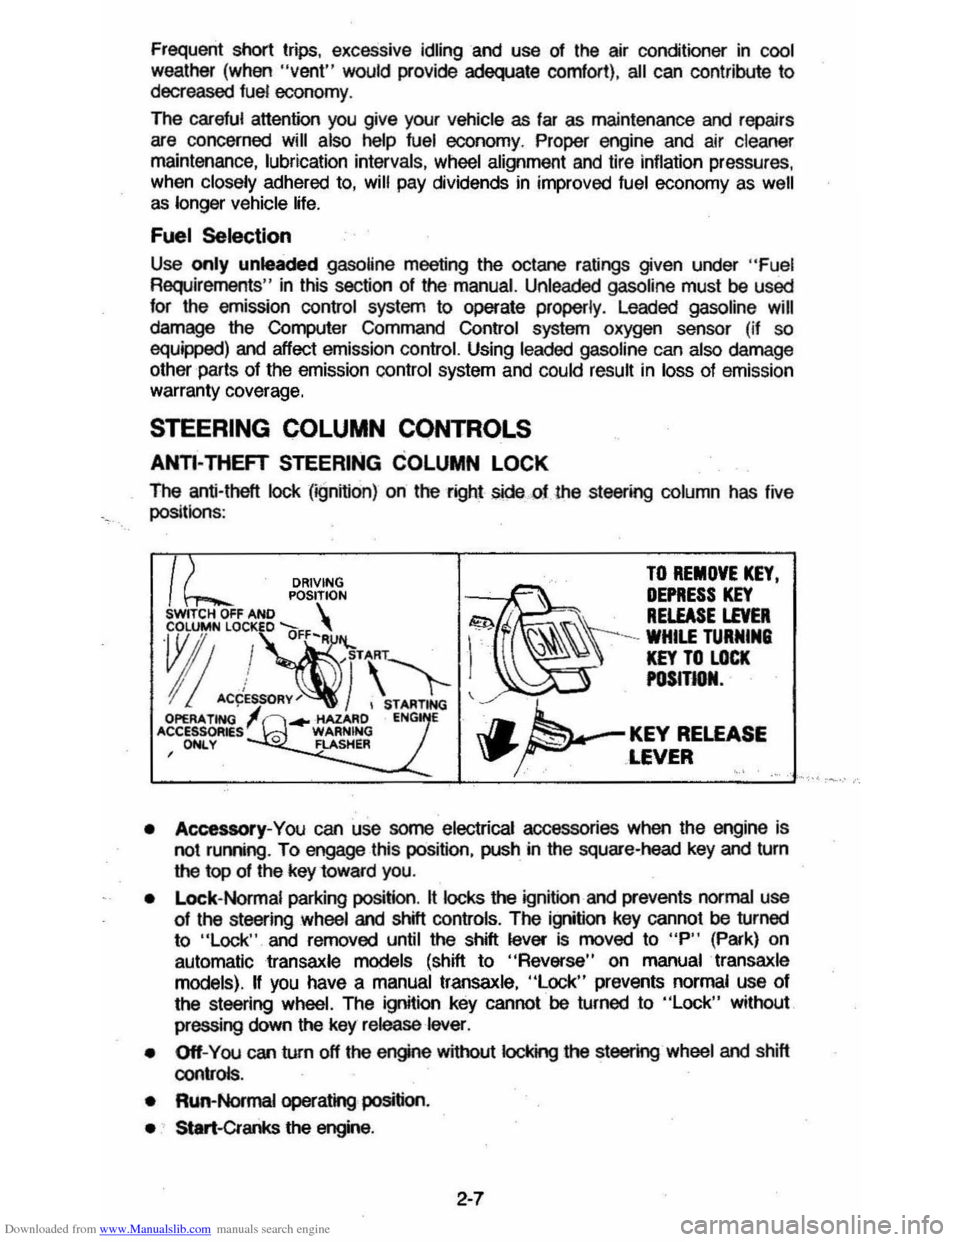
The anti-theft lock (;gnifion) on the right sidecf the st_ing column has live
positionS :
DRIVING TO REMOVE KEY.
POSITION ~~ DEPRESS KEY SWITCH OFF AND S . . RELEASE LEVER
~"!~·\'1-1 ~\\\-=~"
I! ACCES~RY~) , STARTING ~ OPERA. TING ... -HAZARD ENG E 'CCESSOR~sl 0 WARNING J.. KEY RELEASE , ONLY FLASHER \P' ... ~ ,LEVER '.' .'
• Accessory-You can use some electrical accessories when the engine is
not ruming . To engage this position, push in the square-head key and turn
the top of the key 10ward you.
•
Lock- Normal parking position. It locks the ignition and prevents normal use 01 the st_ing wheel and shill controls. The ignition key cannot be turned
to "Lock " and removed until the shift lever is moved to "P" (Park) on
automatic
transaxle models (shift to "Reverse" on manual transaxle
models).
II you have a manual transaxle, "Lock" prevents normal use 01
the steering wheel. The ignition key cannot be turned to "Lock" without
pressing down
the key release lever.
• Off-You can turn off the engine without IocI
• Run-Normal operating position.
• Start-Cranks the engine .
2-7
Page 24 of 105
Downloaded from www.Manualslib.com manuals search engine CAunOM: tf you need to tum oft the ... whikt the vehicte ls moving, turn the key only to "Oft." DO NOT depreSS the key release lever while turning the Ignition off._This
wln ·lock the steering column and result in loss arability to steer the vehlete.
If you have trouble turning the key to unlock the ignition, first be sure the key is
pushed in all the way . Then , try to turn the steering wheel as hard as you can .
in the direclioo the
wheels are tUrned . At the same ti me , turn the ignition kay
w~h as much eftort as you can apply with your hand. Do not try to use a tool of
any kind to
apply more force on the lock knob , as tnis could break the knob.
NOTICE: Do not park, idle, or operate your vehk:le over combustible materials, such
as grass or leaves . They couki touch the hot exhaust ay8tem and ignite.
Parking
CAUTION: Before the driver leaves this vehicle, to reduce the risk of personal injury ... resun of vehicle movement:
1. Firmly apply the parking brake.
2. Shift the automatic transtixle to Park or the manual tranSlale to "Reverse."
3. Tum the kef to "Lock. " On vehietn wrth manual transaxle$, __ ~ the key reiease tever and tum the key to·'Loclic. " .
4. Remove the key (the chime ia designed to remind you).
To reduce the chance of persona' injury and/or vehicle damage due' to engine overheating , never lellVe the engine Idling without an alert driver present. If the engine ahoukl overheat, as indicated by the Erlgine Coolant Temperature light Of gage,
Immediate action 1a required to correct the concIUon. Continued operation 01' the engine . enn FOA -A SHORT TtME may resutt In a fire.
TURN SIGNAL AND MULTI-FUNCTION LEVER
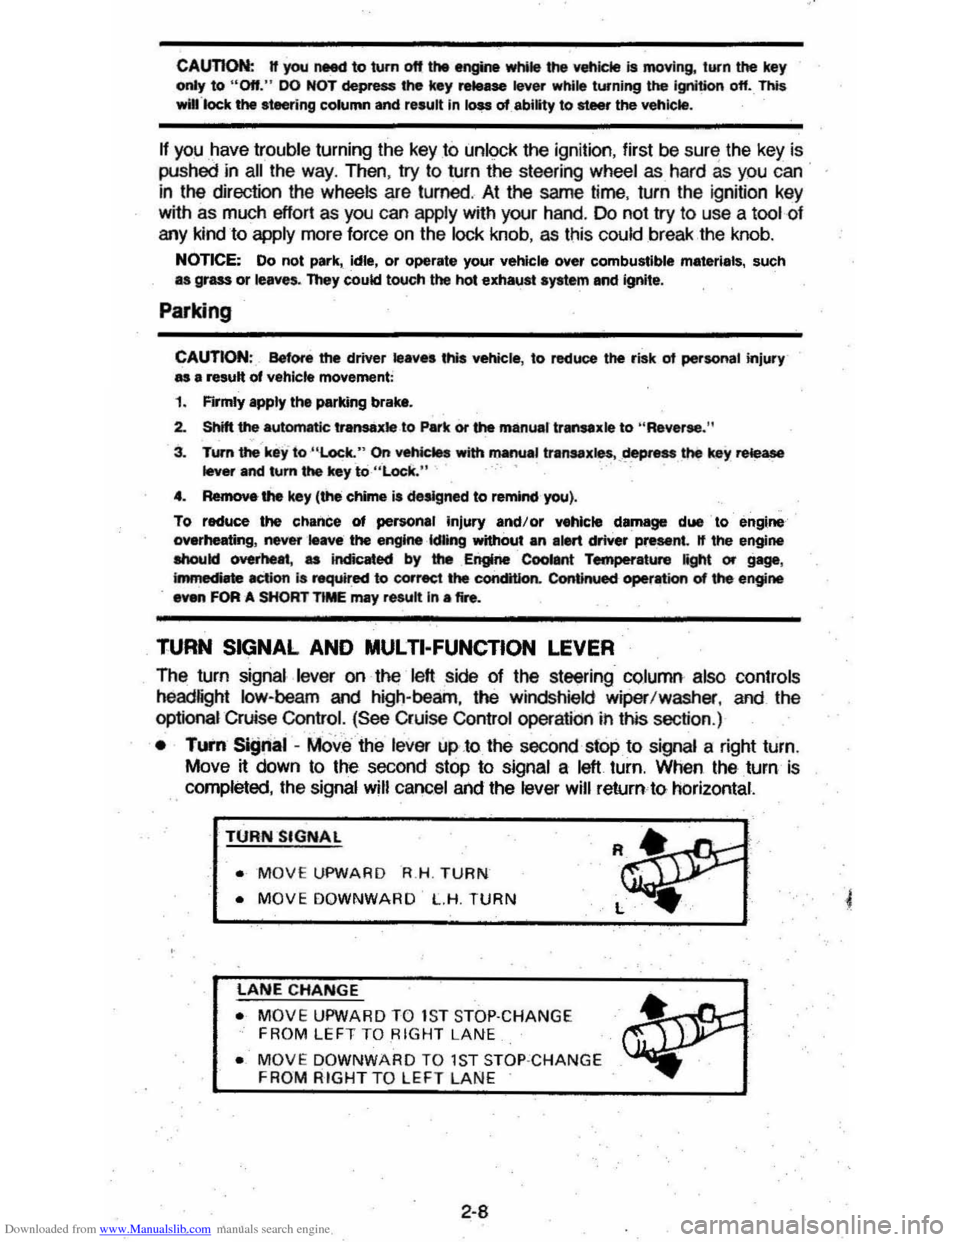
The turn signal lever on the left side of the steering column also controls headlight low-beam and high-beam, the windshield wiper/washer, and the
optional Cruise
Control. (See Cruise Control operatiOn in this section .)
• TUI'fI Si!Jnal -MOve the lever up .to the second stop to signal a right turn.
Move
~ down to the second stop to signal a left turn. When the turn is
completed, the signal will cancel and the lever will return to horizontal.
TURN SIGNAL
• MOVE UPWARD R.H . TURN
• MOVE DOWNWARD L.H. TURN
LANE CHANGE
• MOVE UPWARD TO 1S T STOP·CHANGE
FROM LEFT TO RIGHT LANE
• MOVE DOWNWARD TO 1ST STOP ·CHANGE FROM RIGHT TO LEFT LAN E
2-8
Page 26 of 105
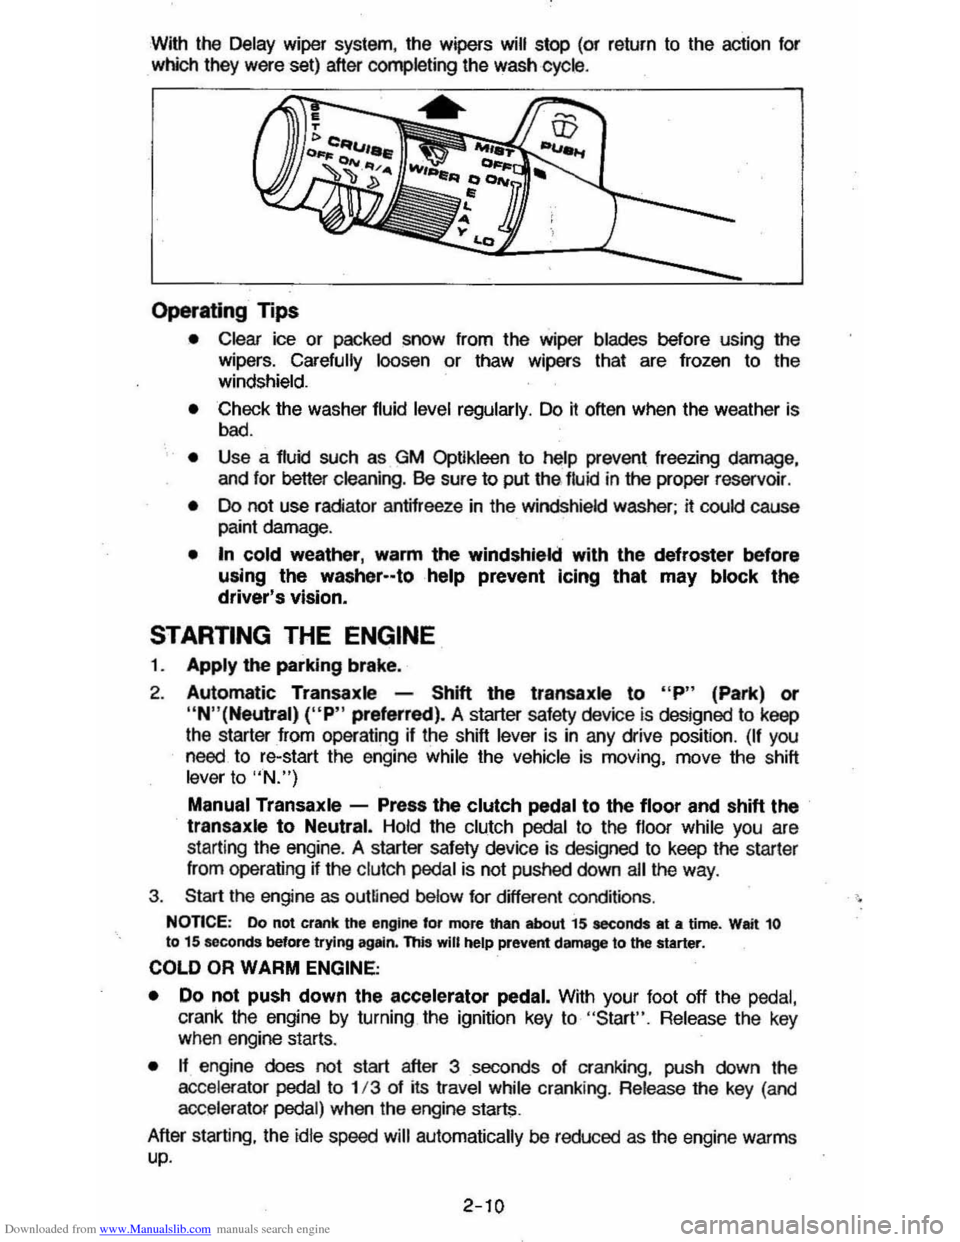
Downloaded from www.Manualslib.com manuals search engine With the Delay wiper system, the wipers will stop (or return to the action for
which they were set) after completing the wash cycle .
Operating Tips
• Clear ice or packed snow from the wiper blades before using the
wipers. Carefully loosen or thaw wipers that are frozen to the
windshield.
• Check the washer fluid level regularly. Do it often when the weather is
bad.
• Use a fluid such as GM Optikleen to help prevent freezing damage,
and lor better cleaning. Be sure to put thE> lIuid in the proper reservoir .
• Do not use radiator antifreeze in the windshield washer; it could cause paint damage.
• In cold weather, warm the windshield with the defroster before
using the washer--tohelp prevent Icing that may block the driver's vision.
STARTING THE ENGINE
1. Apply the parking brake.
2. Automatic Transaxle -Shift the transaxls to "P" (Park) or
"N"(Neutral) ("P" preferred). A starter safety device is designed to keep
the starter
from operating if the shift lever is in any drive position. (If you need. to re-start the engine while the vehicle is moving. move the shift lever to "N.")
Manual Transaxle -Press the clutch pedal to the floor and shift the transaxle to Neutral. Hold the clutch pedal to the lIoor while you are
starting the engine. A starter safety device is designed to keep the starler
Irom operating ~ the clutch pedal is not pushed down ail the way .
3. Start the engine as outlined below for different conditions .
NonCE: Do not crank the engine for more than about 15 seconds at a time. Wait 10 to 15 seconds before trying agltin. this will help prevent damage to the starter.
COLD OR WARM ENGINE;
•
Do not push down the accelerator pedal. With your foot off the pedal,
crank the engine by turning the ignition key to "Start". Release the key when engine starts.
• n engine does not start after 3 seconds 01 cranking. push down the
accelerator pedai to 1/3 of its travel while cranking . Release the key (and
accelerator pedal) when the engine starts.
After starting. the
idle speed will automatically be reduced as the engine warms up.
2-10