1984 CHEVROLET CAVALIER child restraint
[x] Cancel search: child restraintPage 12 of 105
Downloaded from www.Manualslib.com manuals search engine Power Operated Front Seats (Optional)
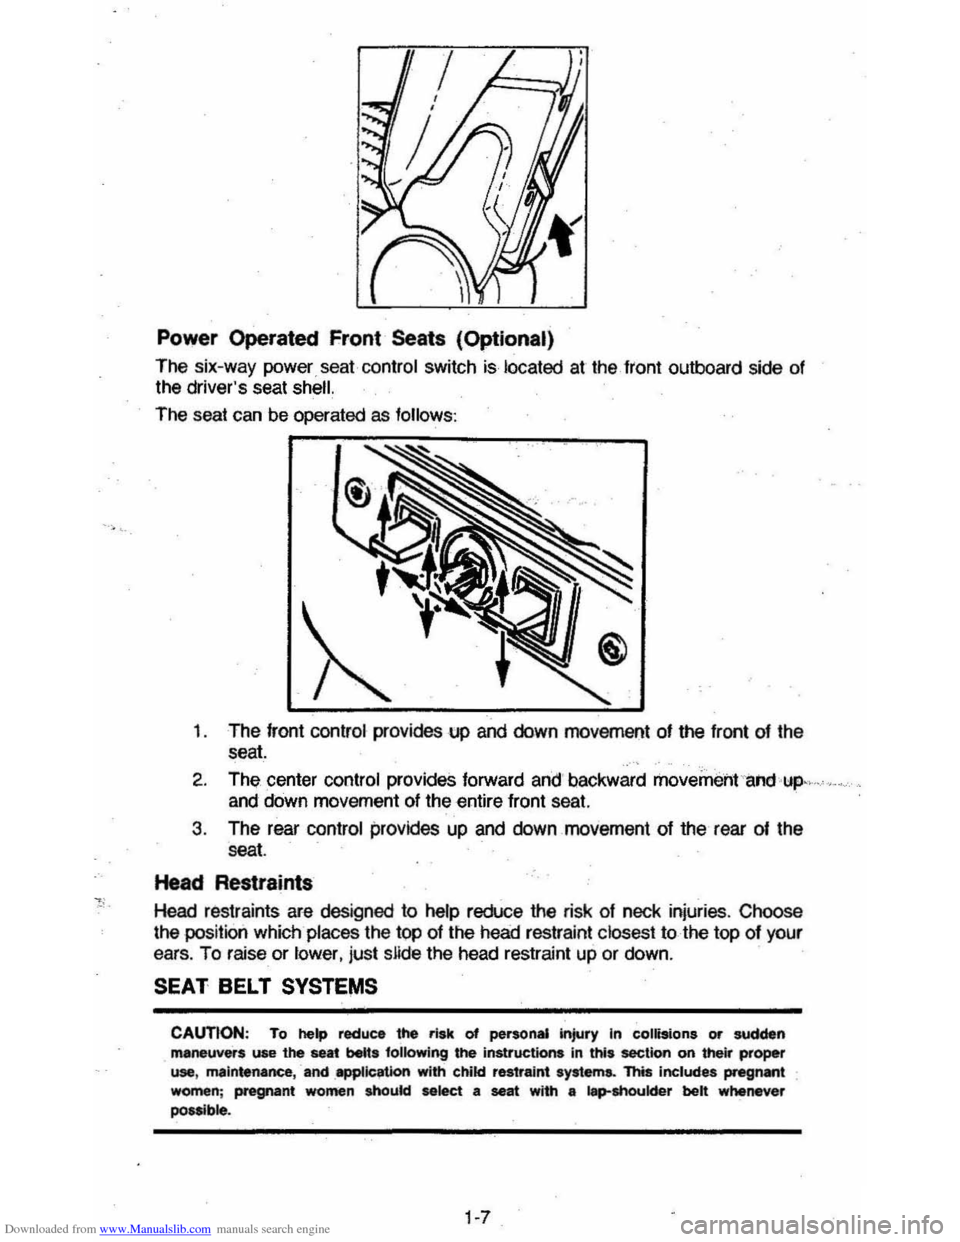
The six-way power seat. control switch is located at the. front outboard side of the driver's seat shell.
The seat can be operated as follows :
t . The front control provides up and down movement of the front of the
seat.
2. The center control provides forward and' backward movement ·i,"d·~p" ..
and down movement of the entire front seat.
3 . The rear
control provides up and down movement of the rear of the
seat.
Head Restraints
Head restraints are designed to help reduce the risk of neck injuries . Choose
the position which
places the top of the head restraint closest to the top of your ears. To raise or lower, just slide the head restraint up or down.
SEAT BEL.T SYSTEMS
CAUTION: To help reduce the risk 01 personal injury In collisions or sudden maneuvers use the selt belts fOllowing the instructions in this section on their proper use, mlintenance. -and IPPUCaUon with child res1riUnt system.. This includes pregnant women ; pregnant women shoukl Mk!ct a seat wrth a tep-shoukler bett whenever OOsoible.
1 .. 7
Page 16 of 105
Downloaded from www.Manualslib.com manuals search engine Keep any shoulder belt slack to a minimum. Too much belt slack could
reduce the amount of protection in an accident because the belt is too loose to restrain you properly_
Seat Belt Inspection
Now and Ihen check that belts. buckles, latch plates, retractors, reminder
systems and guide
loops work properly; look for loose parts or damage that
could keep the restraint system from doing its job. Replace a
belt if the
webbing has been cut or otherwise damaged. Replace belts in use during all
but a minor collision; if there is any question, replace the belt.
SEAT BELT LIGHT/BUZZER REMINDER
When the key is turned to "Run" or "Start," a light will come on for four to
eight seconds to remind people to fasten their· seat belts. Unless the driver's
seat
belt is buckled, a buzzer will sound at the same time.
If the seat belt or reminder system does not work as described, see your dealer
for service.
CHILD RESTRAINT
All vehicle occupants and especially children should be restrained
whenever riding
in vehicles. Holding a child in your arms is NOT a substitute for a child restraint system. In an accident, a child held in a person's arms can
be struck or crushed by any unrestrained- rider. An unrestrained child could
also be injured by striking the interior, or by being ejected from the vehicle
during a sudden maneuver or impact. A child restraint system can help
protect a child in a vehicle.
In convertibles, a top-strap-equipped child restraint can only be used in
the Iront seat because there is no appropriate place to aUach a top strap
anchor bracket behind the rear seat in this vehicle. Installing a top strap
anchor bracket behind the rear seat may expose the child to hazards if the top
is raised or lowered with the child restraint occupied,
and, the bracket itself
may damage the convertible top.
In using any child restraint system, be sure to read and follow all instructions on installation and use that come with the system.
Riding Without A Child Restraint
For the best protection in an accident or sudden maneuver, children
small enough lor child restraint systems should be restrained that way.
However, the
following may provide some degree of protection for such children if a child restraint is not used.
• Place an infant who cannot sit up in a baby carrier, preferably covered and
padded. Put it crossways on the vehicle seat and securely restrain it with the vehicle's seat belts. Or, if that is not possible, place it crossways on the floor behind the driver's seat.
• Children who can sit up by themselves should be restrained with a lap belt
when riding in a rear seat. In the front seat a child should wear both lap
and shoulder belt. If the shoulder belt irritates the neck or face move the
child
closer to the center of the vehicle or to the rear seat. Never let a child stand or kneel on any seat. If unusual conditions prevent the use of
restraints, the
child should stand on the floor behind the driver's seat.
1-11
Page 55 of 105
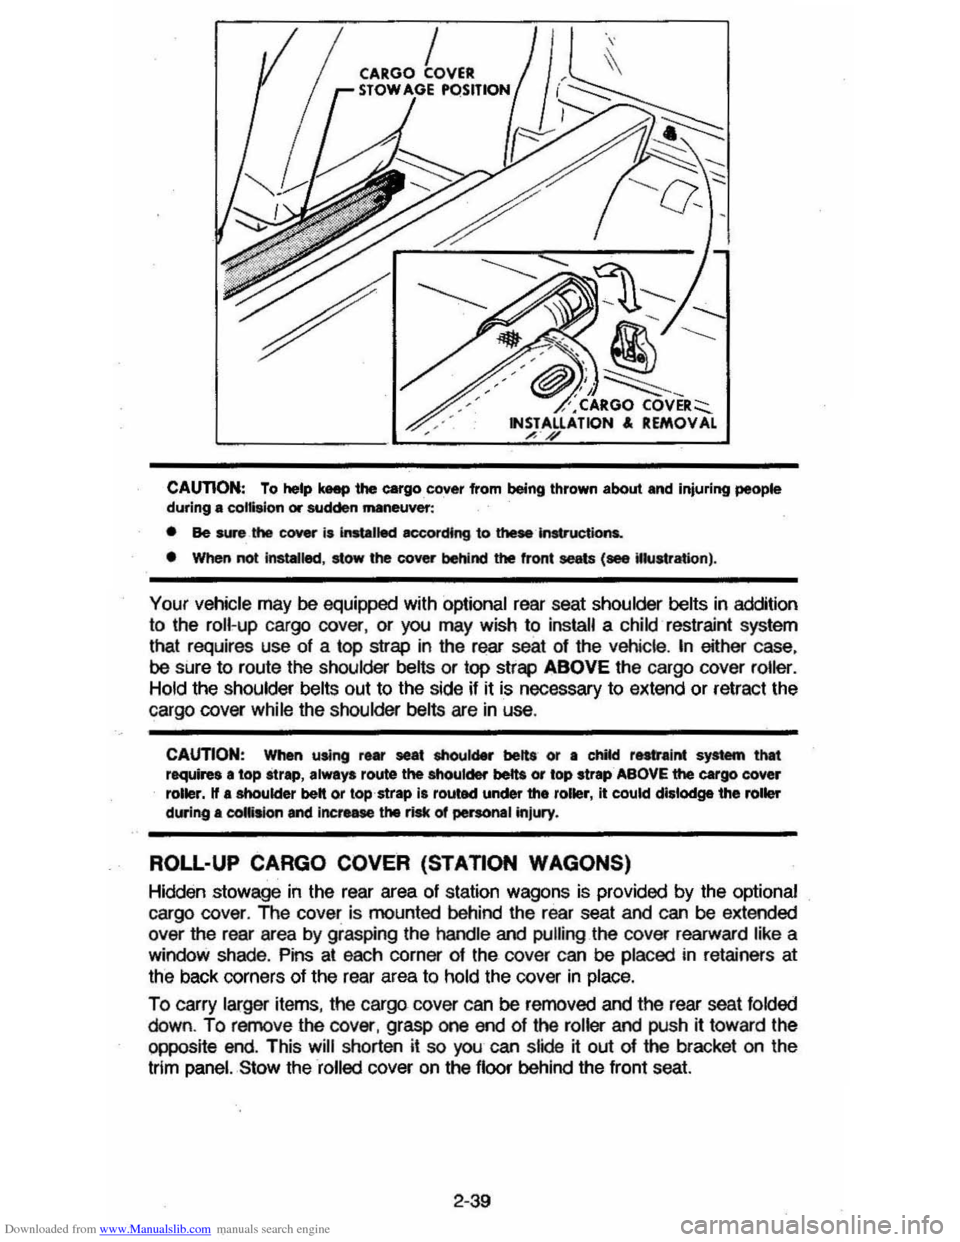
Downloaded from www.Manualslib.com manuals search engine CAUTION: To help keep the cargo . cover from being thrown about and injuring people during a collision or sudden maneuver:
• Be SW"8 the COYW is Installed IICCOf'dfng to theM Instructions.
• When not installed, stow the cover behind the front seets (see ilustration).
Your vehicle may be equipped with optional rear seat shoulder belts in addition
to the roll-up cargo cover, or you may wish to install a child restraint system
thai requires use of a top strap in the rear seat of the vehicle.
In either case,
be sure to route the shoulder belts or top strap ABOVE the cargo cover roller. Hold the shoulder belts out to the side if it is necessary to extend or retract the
cargo cover
while the shoulder belts are in use.
CAUTION: When using rew' sea. shoulder bette or • chikt rnfrainC system that requires a top .trap, alwaY' route the shoulder bett$ or top strap ABOVE the cargo cover roller. If a shoulder belt or top strap is routed under the roller, it could dislodge the roller during a coIIiaion and increne the risk of personal injury.
ROLL-UP CARGO COVER (STATION WAGONS)
Hidden stowage in the rear area of station wagons is provided by the optional
cargo cover . The cover is mounted behind the rear seat and can be extended
over the rear area by grasping Ihe handle and pullinglhe cover rearward like a
window shade. Pins at each corner of Ihe cover can be placed in retainers at
the back corners of the rear area to hold the
cover in place.
To carry larger items, the cargo cover can be removed
and the rear seat folded
down. To remove the cover. grasp one end of the roller and push it toward the oppos~e end. This will shorten it so you can slide ~ out of the bracket on the
trim panel. Slow the rolled
cover on the floor behind the front seat.
2-39
Page 56 of 105
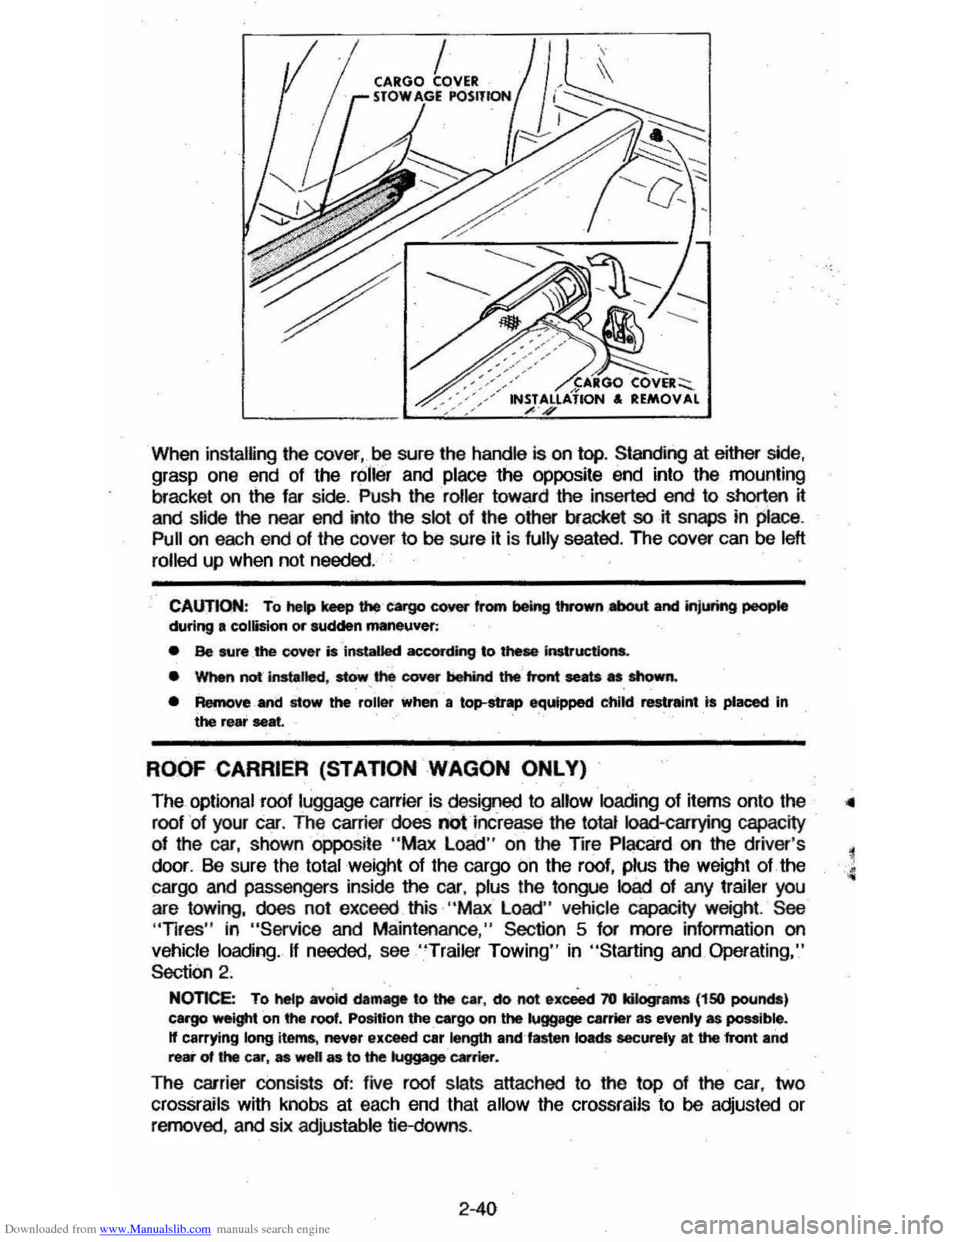
Downloaded from www.Manualslib.com manuals search engine When installing the cover,oo sure the handle is on top. Standing at either side, grasp one end of the roller and place the opposite end into the mounting
bracket on
the far side . Push the roller toward the inserted end to shorten it
and slide the near end into the slot of the other bracket so it snaps in place.
Pull on each end of the cover to 00 sure it is fully seated. The cover can be left
rolled
up when not needed .
CAUTION: To help keep u.., cargo cover from being thrown .,.a,oot and jnjlM'ing people during a collision or sudden maneuver:
• Be sure _the cover is installed according to these Instructions.
• WMn not-instalted, stow, the cover behind the front seats as shown.
• Remove and stow the roiler when a top-strap equipped child restraint is placed In the rear seat.
ROOF CARRIER (STAnON WAGON ONLY)
The optional roof luggage carrier is designed to allow loading of items onto the
roof
' of your car. The carrier does not increase the total Ioad-carrying capacity
of the car, shown oppoSite "Max Load " on the TIre Placard on the driver's
door. Be sure the
total weight of the cargo on the roof, plus the weight of the
cargo and passengers inside
the car, plus the tongue load of any trailer you
are towing, does not exceed this· "Max Load" vehicle capacity weight. See "Tires" in "Service and Maintenance," Section 5 for more information on
vehicle loading. If needed, see "Trailer Towing" in "Starting and. Operating,"
Section 2 .
NOnce: To hetp avOid damage to the car, do not exceect 70 kilograms (150 pounds) cargo weight on the roof. Position the cargo on the luggage carrier as evenly as possible. If carrying long items , never exceed car length emUasten loads eacurely at the front and rear of the car, as well as to the luggage ~rier.
The carrier consists of: five roof slats attached to the top of the car, two
crossrails with knobs at each end that allow the crossrails to 00 adjusted or removed, and six adjustable tie-downs.
2-40
Page 102 of 105
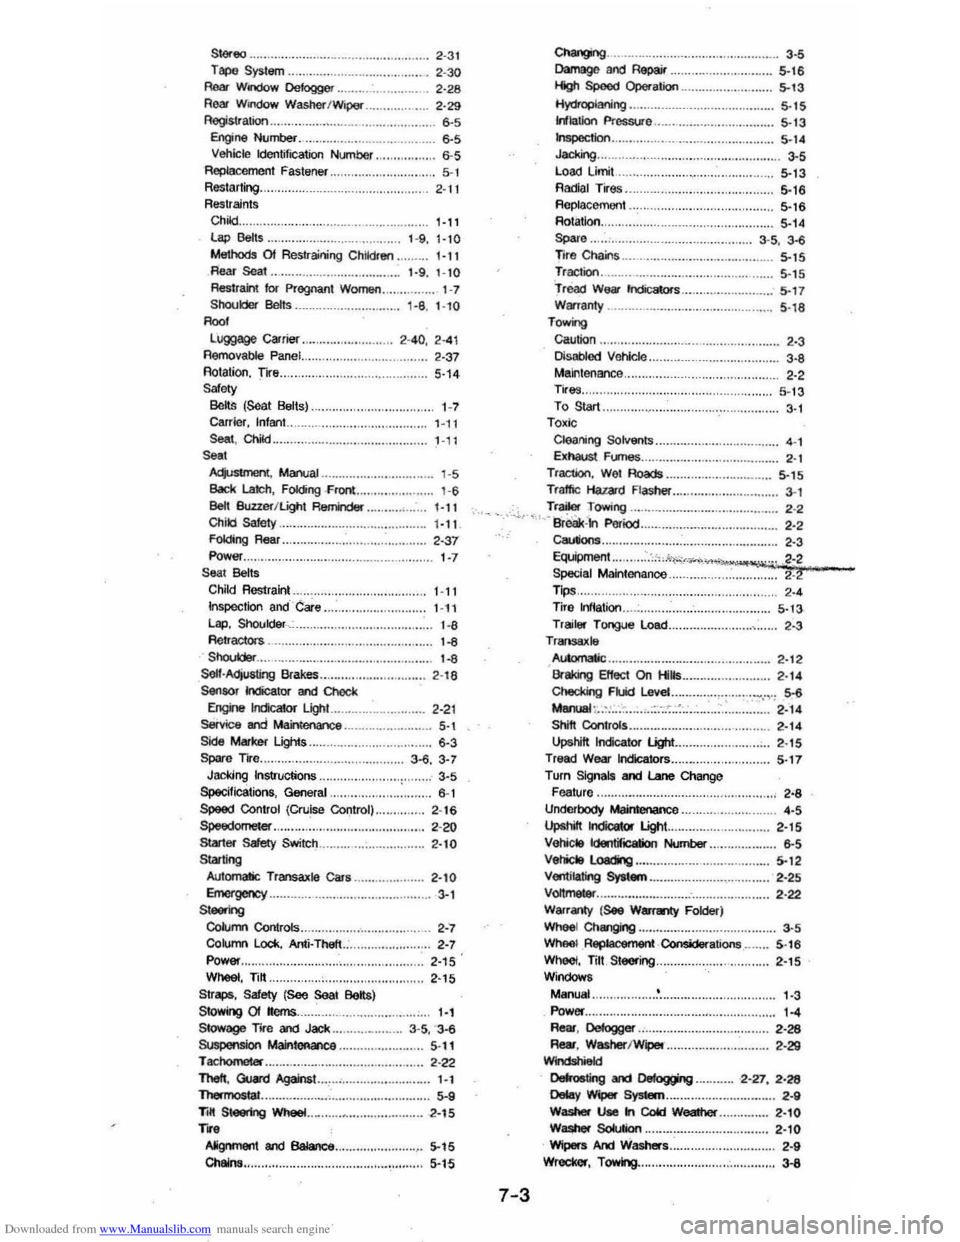
Downloaded from www.Manualslib.com manuals search engine STereo.. 2-3 1 Tapu System ..... ....... .............. ........... 2-30 Rear WnJow Defogger ...•.•.......•.• .. . 2,26 Roar Window Washer/Wiper.. .. 2,29 Aegstration.. &5 Engine Number. &5 VehICle identifICation Number. &5 Replacement Fastener .. 5 -1
Restarting.
Restraints Child ... Lap Belts .. Methods Of Restr~ring Children •.. ReM Seat .. Reslraill lor Pfegnan WomtHI • . Shoulder Belts ___________ .......•..•.•.. Rool
2 -11
'-II ',9, 1-10 1-11 1·9 . HO H H l. l-10
Luggage
ca-rier .... ...... ............. 2-40, 2-4 Removable Panel. 2-37 Rotation. Tire .. Safoty BeltS (Seat Belts) .
5-14
,-, Carrior, InfiYIt . 1 -11 Seal, Child .... ..... ..... .... .. . .•.. 1-1 1
.. " Adj;stment, M
'-II 1-11 1-6 1-6
1-6 SOouIcIer_.. . _ .. _ ....... .............•.•.• SoII.Adjusting Bfakes Sensor Indicator and Check Eogr.e Irdcator Light . Service and Mainl:enMC8 •. Side Marker Ligtts ..
••.•. 2·1 8
2-21 . ....... 5,1 '-3 Spare Tire .. ... .............. 3·6. 3-7 Jacking Instructions .. Specifications, General,. $peed Control (Cruise Control) ..
-. 8tafteJ Sdety Switch ... _ .... _ ..........•.•
.... "'" Automatic Transaxle cars .. Emergency .. S-.. ColImn Controls .. Column Lock, Anti-Theft Power ..
3-5 ' -I 2 -16 2 -2<) 2-10
. ... 2-10 ...... 3-1
2-7 ... 2-7 .. '. 2-15 ' Wheel, Tilt ............. ; ........................... 2·15 Straps, Safety (See Seat Belts)
Stowing 01 Items. .. .............. . 1-' 3·5 , '3-6 Stowage Tire and Jack .. Suspension Maintenance .. 5·11 Tachomeler ...... ... ..... ........... ............ ..... 2·22 Theft, ou.d Againsl... 1-1 ThennostaI ..... ........ 5-9 Tilt SMering WheeL. r .. Alignment and Balance ... Chains •.
........ -2-15
5-15
5-15
Changing .................... .... ..... ................. 3.5 Damage al'l(j Repaj!' ... . .. ...... .. .... .......... 5-16 High Speod Operation __ ............•..•.•. 5-13 Hydroplaning .. _ ................. 5 .15 Wlallorl Pr~e.. . ..................... 5 .13 W;pection ... 5-14 Jackng... 3·5 L03(I Limit . Radial Tires .. Replacemont .. Rotation . Spare .. Tire Chains ..
5·13
5·16
5'16 5·14 3 -5 , 3-6 5 '15 Trac tion ........................... .................. 5 -1 5 lreacl W6iI' 1r"IcIicaIors.. 5017 Warranty ......... _ .................................. 5-18 T_
Caution ........ ~obIod Vehicle .. Mal1tonance , . Tires ...... . To Starl .. To)[iC Cleaning Solvents .. E)[haust n..mes .. Traction . Wei Roads ..
2-3
3 -8
2 ·2
5 ·13 3-1
.. .... ..... 4-1 2 -1 5 '15
Traffic Hazard Flasher ......... ... .... ......... 3,1
, T~ TOWing .... ............. ........ .............. 2 -2 -~,-u,_ BreOk~" Pofiod ................. ....... ............ . 2.2
7-3
CauIioc:II .................. ...... ...................... 2·3
~=~~'~~~~~·~':~~~~~~~~:::~:i·~~:;;---Tips.. 2.4 Tire W1ation.... 5.13 Trailer Tongue Load .............. ........ ,.. 2.3 TrlWlSaX!e AlAomaIic .. 2· 12 'Braking EtIect On Hills ....... 2·14 Checking FUd Level ............... ........ ¥,.,.: 506 ManuaI·, .. : ::.;:-... 2-14 ShIft Controls .. Upshift Indlcator light .. 2 -14 2 ·15 Tread Wear Ind"lCators.. 5·17
Turn Signals and Lane Change Feature ............................................... , 2·8 UndorbOcly Maintenance.. .. .......... 4·5 Upshift Indicator Light.. 2·15 Vehicle kJentjicaliCJO Number.. 6·S Vetjcte Loadir1g •.•.......... _ .......... _........ 5'12 Ventilating System .................... , .......... 2·25 Voltmeter ....................... .. 2·22 Wamny {Sue W.f1Iflty Folder; Wheel Cha.lgiog ................. ... .. _ ............... 3 -5
Wheel Replacement·Considerations.. 5 ·16 Wheel, Tilt. Steering.. 2·t5 Window$ Manual.. 1.3 Power ........ ................................... ......... 1·4 Rear, Defogger .................................... 2.28 Rear , Washer/Wipel. . 2·29
-0et0atIng ..:I 08t0gging .......... 2-27, 2-28 DMay Wiper System .. _ .................. ........ 2·9 Washer Uae In Cold WNilher .. WUhet Solution .. Wipers And Washers .. Wrecker , TOWing ..
2-10
2-10
2-. 3 ..