1984 CHEVROLET CAVALIER Repair
[x] Cancel search: RepairPage 17 of 105
Downloaded from www.Manualslib.com manuals search engine SECTION 2
STARTING AND OPERATING
ENGINE EXHAUST GAS CAUTION
(CARBON MONOXIDE)
CAUTION:-Do not breathe exhaust gas because it contains carbon monoxide, which by itself has no color crador. Carbon monoxide is a
dangerous gas. It can cause unconsciousness and can be lethal.
If at any time you think exhaust fumes are entering the vehicle, have the cause
determined and corrected as soon as possible. If you must drive under these conditions, drive only with ALL windows lully OPEN.
Protect against carbon monoxide entry into the vehicle body. The best way is
to keep the engine exhaust system,
vehicle body and body ventilation system
properly maintained. We recommend that the exhaust system and body be
inspected by a competent technician:
• each time the vehicle is raised for an oil change;
• whenever a change is noticed in the sound, of the exhaust system;
• whenever the exhaust system, underbody or rear of the vehicle is damaged
or becomes corroded.
See your Maintenance Schedule folder for parts requiring inspection.
To allow proper operation of your vehicle's ventilation system, keep the air inlet
grille in front of the windshield clear of snow, leaves or other obstructions at all
times.
DO NOT PARK WITH THE ENGINE RUNNING OR IDLE THIS VEHICLE FOR
MORE
THAN 10 MINUTES WITH THE VENTILATION SYSTEM CONTROL
SWITCH
IN THE "OFF" POSITION. EVEN WITH THE VENTILATION SYSTEM ON, RUNNING THE ENGINE WHILE PARKED OR STOPPED FOR LONGER
PERIODS OF TIME IS NOT
RECOMMENDED. ENTRY OF CARBON
MONOXIDE INTO THE CAR BODY IS POSSiBlE WITH A POORLY REPAIRED, DAMAGED, OR CORRODED EXHAUST SYSTEM OR BODY.
Do not run the engine in CONFINED areas (such as garages or next to a
building) any more than needed to move the vehicle. When the
vehicle has to
be stopped
in an UNCONFINED area with the engine running for any more
than a few minutes, take the following steps:
A. Adjust the heating or cooling system to force outside air into the vehicle as
follows:
1. On vehicles not equipped with air conditioning, set the fan to
intermediate or high speed and the upper control lever to any position.
2. On vehicles equipped with air conditioning, set the fan to an
intermediate or high speed and the upper control lever to any position
except
"OFF" or "MAX."
B. Keep the exhaust tailpipe area clear of snow and other material to help
reduce the buildup of exhaust gases under the vehicle. This is particularly
important when parked in blizzard conditions.
2-1
Page 23 of 105
Downloaded from www.Manualslib.com manuals search engine Frequent short trips, excessive idling and use of the air conditioner in cool
weather (when "vent" would provide adequate comfort), all can contribute to
decreased fuel economy .
The careful attention you give your vehicle as far as maintenance and repairs
are concerned will also help fuel economy . Proper engine and air cleaner
maintenance, lubrication intervals, wheel alignment and tire inflation pressures, when closely adhered to, will pay dividends in improved fuel economy as well as longer vehicle Irte.
Fuel Selection
Use only unleaded gasoline meeting the octane ratings given under "Fuel Requirements " in this section of the manual. Unleaded gasoline must be used
for the
emission control system to operate properly . Leaded gasoline will
damage the Computer Command
Control system oxygen sensor (if so equipped) and affect emission control. Using leaded gasoline can also damage
other parts of the emission control system and could result in loss of emission warranty coverage.
STEERING COLUMN CONTROLS
ANTl-THEFT STEERING COLUMN LOCK
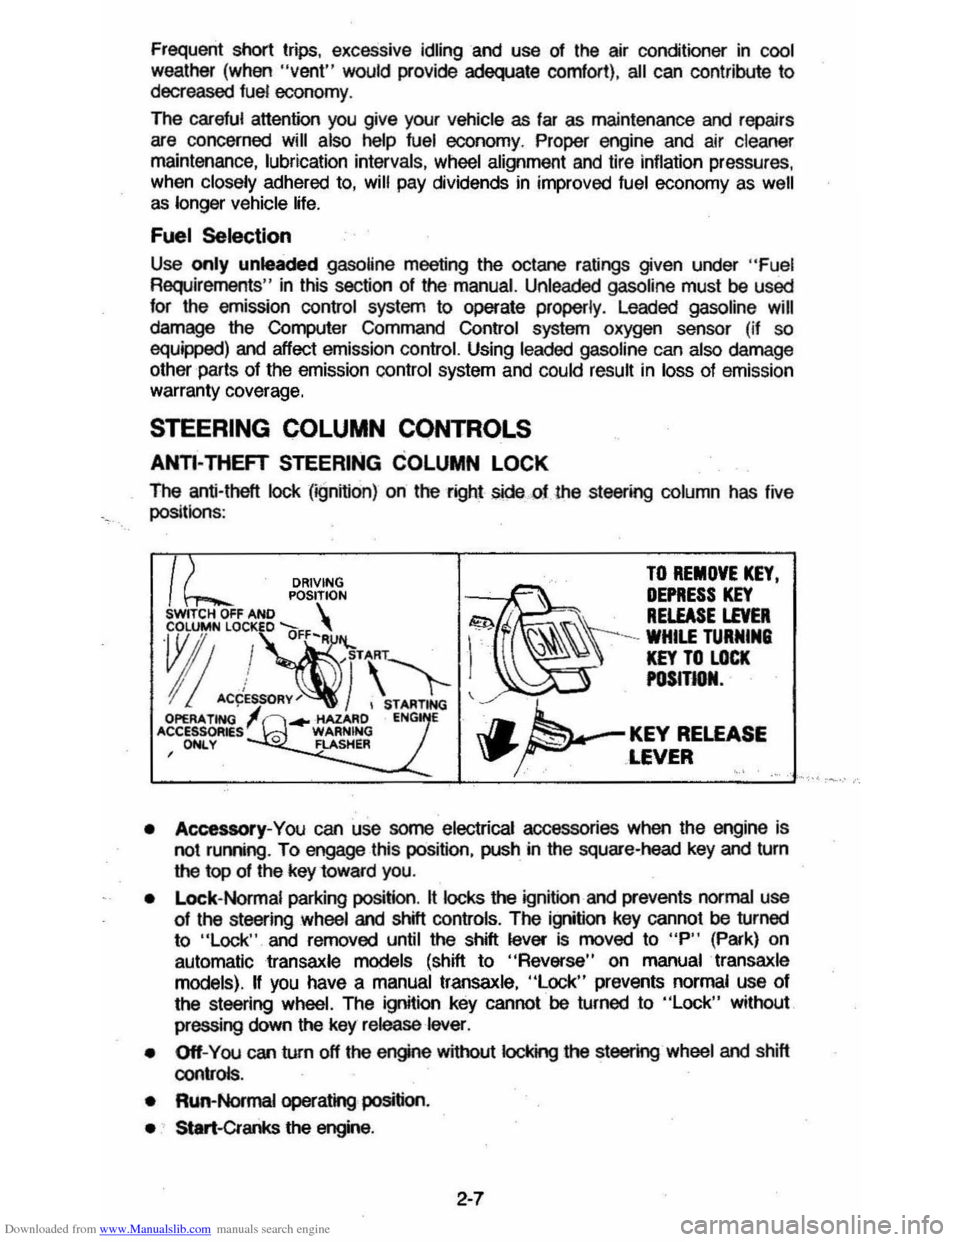
The anti-theft lock (;gnifion) on the right sidecf the st_ing column has live
positionS :
DRIVING TO REMOVE KEY.
POSITION ~~ DEPRESS KEY SWITCH OFF AND S . . RELEASE LEVER
~"!~·\'1-1 ~\\\-=~"
I! ACCES~RY~) , STARTING ~ OPERA. TING ... -HAZARD ENG E 'CCESSOR~sl 0 WARNING J.. KEY RELEASE , ONLY FLASHER \P' ... ~ ,LEVER '.' .'
• Accessory-You can use some electrical accessories when the engine is
not ruming . To engage this position, push in the square-head key and turn
the top of the key 10ward you.
•
Lock- Normal parking position. It locks the ignition and prevents normal use 01 the st_ing wheel and shill controls. The ignition key cannot be turned
to "Lock " and removed until the shift lever is moved to "P" (Park) on
automatic
transaxle models (shift to "Reverse" on manual transaxle
models).
II you have a manual transaxle, "Lock" prevents normal use 01
the steering wheel. The ignition key cannot be turned to "Lock" without
pressing down
the key release lever.
• Off-You can turn off the engine without IocI
• Run-Normal operating position.
• Start-Cranks the engine .
2-7
Page 29 of 105
Downloaded from www.Manualslib.com manuals search engine ....rr -~
II'!
I~ ,
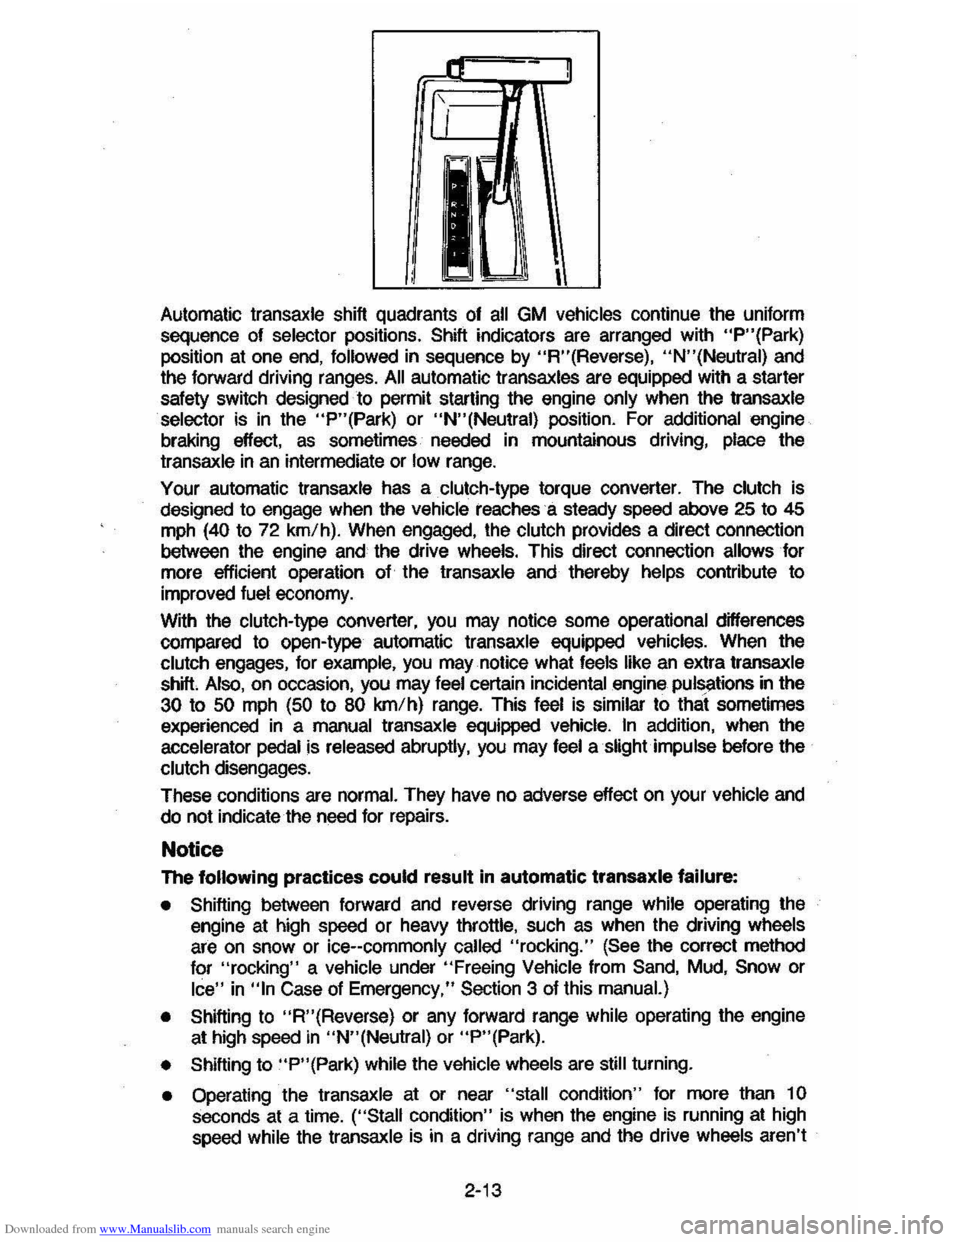
Automatic transaxle shift quadrants of all GM vehicles continue the uniform
sequence of
selector positions. Shift indicators are arranged with "P"(Park) position at one end, followed in sequence by "R"(Reverse), "N"(Neutral) and
the forward driving ranges. All automatic transaxles are equipped with a starter
safety switch designed to permit starting the engine
only when the transaxle selector is in the "P"(Park) or "N"(Neutral) position. For additional engine
braking eftect,
as sometimes needed in mountainous driving, place the
transaxle in an intermediate or low range.
Your automatic transaxle has a clutch-type torque converter. The clutch is
designed to engage when the
vehicle reaches a steady speed aibove 25 to 45 mph (40 to 72 km/h). When engaged, the clutch provides a direct connection
between the engine and the drive wheels. This direct connection allows for
more efticient operation of the transaxle and thereby
helps contribute to
improved
fuel economy.
With the clutch-type converter,
you may notice some operational differences
compared to open-type automatic transaxle equipped vehicles. When the
clutch engages, for example, you may notice what feels like an extra transaxle
shift Also, on occasion, you may feel certain incidental engine pulSi'tions in the
30 to 50 mph (50 to 80 km/h) range. This feel is similar to that sometimes
experienced in a manual transaxle equipped vehicle. In addition, when the
accelerator
pedal is released abruptly, you may feel a slight impulse before the
clutch disengages.
These conditions
are normal. They have no adverse effect on your vehicle and
do not indicate the need for repairs.
Notice
The following practices could result in automatic transaxle failure:
• Shifting between forward and reverse driving range while operating the
engine at high speed or heavy throttle, such as when the driving wheels
are on snow or ice--commonly called "rocking." (See the correct method
for
"rocking" a vehicle under "Freeing Vehicle from Sand, Mud, Snow or
Ice" in "In Case of Emergency," Section 3 of this manual.)
•
Shifting to "R"(Reverse) or any forward range while operating the engine
at high speed in "N"(Neutral) or "P"(Park).
•
Shifting to "P"(Park) while the vehicle wheels are still turning.
• Operating the transaxle at or near "stall condition" for more than 1 0 seconds at a time. ("Stall condition" is when the engine is running at high speed while the transaxle is in a driving range and the drive wheels aren't
2-13
Page 37 of 105
Downloaded from www.Manualslib.com manuals search engine • Amount of fuel required for fill-up may not exactly correspond to gage.
• Needle may not move away from FULL until some time after fill-up.
• Needle may move during turns; stops and accelerations.
When the ignition switch is turned to the OFF position, the needle will not
necessarily return
all the way to the EMPTY mark.
Oil Pressure Light
When the ignition is turned to "Run," the "Oil" warning light appears until the
engine is started. Thereafter, the light should be off unless there is insufficient
oil pressure or engine idle speed is below normal. If the light should come on
at any time while driving (other than momentarily at idle speed or after a
sudden stop), stop immediately and investigate the cause of
low oil pressure.
This could possibly be caused by low oil level in the crankcase. Engine
operation with low oil pressure will 9ause damage to the engine.
Engine Coolant Temperature Light
This light is located in the instrument cluster and is designed to come on to warn the driver that the engine coolant has overheated and immediate
action is required to correct the condition. As a check that the bulb and its
circuit are working, the light will come on during engine starting; if it does not,
have it repaired
promptly. If the light comes on at any other time, see "Engine
Cooling System Overheating" in "In Case of Emergency," Section 3 of this manual.
CAUTION: It the Engine Coolant Temperature Light shows an overheat condition or you have other reason to suspect the engine may be overheating, continued operation of the engine EVEN FOR A SHORT TIME may result in a fire and the risk of personal injury and/or severe vehicle damage. Take immediate action as outlined under "Engine Cooling System Overheating" in "In Case of Emergency," Section 3.
Generator Indicator Light
The VOLT light is designed to come on when the ignition key is in the "RUN" position, but before the engine is started. After the engine starts, the light
should go out and remain out. If the light remains· on when engine is running,
have your authorized
dealer locate and correct the trouble as soon as possible.
Shift Indicator Light
The Shift Indicator Light is covered in the "Manual Transaxle" information in
this section.
"Check Engine" Light
Most gasoline engine vehicles sold in the Unijed States (and some vehicles
sold
in Canada) have the Computer Command Control system.
Vehicles with the Computer Command Control system include a "CHECK
ENGINE" light
on the instrument panel designed to indicate the need for
system service. It will come on during engine starting to let you know the bulb
is working. (The light will stay on a short time after the engine starts.)
2-21
Page 38 of 105
Downloaded from www.Manualslib.com manuals search engine Have the system repaired n the "CHECK ENGINE" light does not come on during engine starting. If the light comes on, either intermittently or
continuously while driving, service to the Computer Command Control system
is required. AHhough in most cases the vehicle is drivable, and does not
require towing, see your authorized
dealer as soon as possible for service of
the system.
Continued driving without having the Computer
Command Control system serviced could cause damage to the emission control system. It could also affect fuel economy and drivability.
See also "Computer Command Control system" in Section 5 of this manual.
Brake System Warning Light
The regular braking system is a dual system designed so that one part will
provide some braking if there is a
loss of hydraulic pressure in the other part of
the system. The system has a
"BRAKE" warning light located in the
instrument panel. The "BRAKE" light is designed to come on briefly during
engine starting so you can check that the bulb is okay. To serve as a reminder,
the
light should stay on when the parking brake is not fully released and the
ignition is
on. Have the system repaired if the light does not come on when it should. This warning light does not do away with the need for brake inspection
and maintenaflce. The brakelluid level must be checked regularly. See your
Maintenance Schedule folder for other brake checks.
I! the light remains on aller engine start up or comes on during operation of the vehicle, it may mean that there is something wrong with part of the brake
system.
What
to do:
1. Check to see that the parking brake has been released. I! it has been:
2. Pull off the road and stop carefully. Remember that:
• Stopping distances may be longer.
•
You may have to push harder on the pedal.
•
The pedal may go down farther than normal.
3. Tryout the brakes by starting and stopping on the road shoulder--then:
• I! you judge it to be safe, drive cautiously at a safe speed to the
nearest dealer for repair. Or,
• Have vehicle towed to the nearest dealer for repair.
Continued driving without getting necessary repairs
could be dangerous.
Tachometer
The optional tachometer indicates the speed of the engine in revolutions per
minute. The indicated number, times
100, gives the engine speed. Operating
the engine with the tachometer reading in the color-coded high-speed area
could lead to serious engine damage.
Voltmeter
When the engine is operating, the voltmeter indicates the electrical system
voltage. During minimum electrical load, the pointer will read to the right of the
center.
As the electrical load is increased, or in stop-and-go driving, the pointer
will rotate to the Ieli. A meter reading continuously in the left or right zone
indicates
an electrical system failure. Cause of the failure should be determined and corrected.
2-22
Page 53 of 105
Downloaded from www.Manualslib.com manuals search engine To store the sunshield when rennoved from the car, always select a place
where the sunshade can lay flat without anything stored on top of it or leaned against it. Hanging the sunshade flat on a wall by its hinges is an excellent way
to store it.
As with any decorative surface. washing with a mild soap and water solution is
recommended . Abrasive materials or chemical solvents may adversely affect
the finish of the sunshade.
FOLDING SEATBACK OPERATION
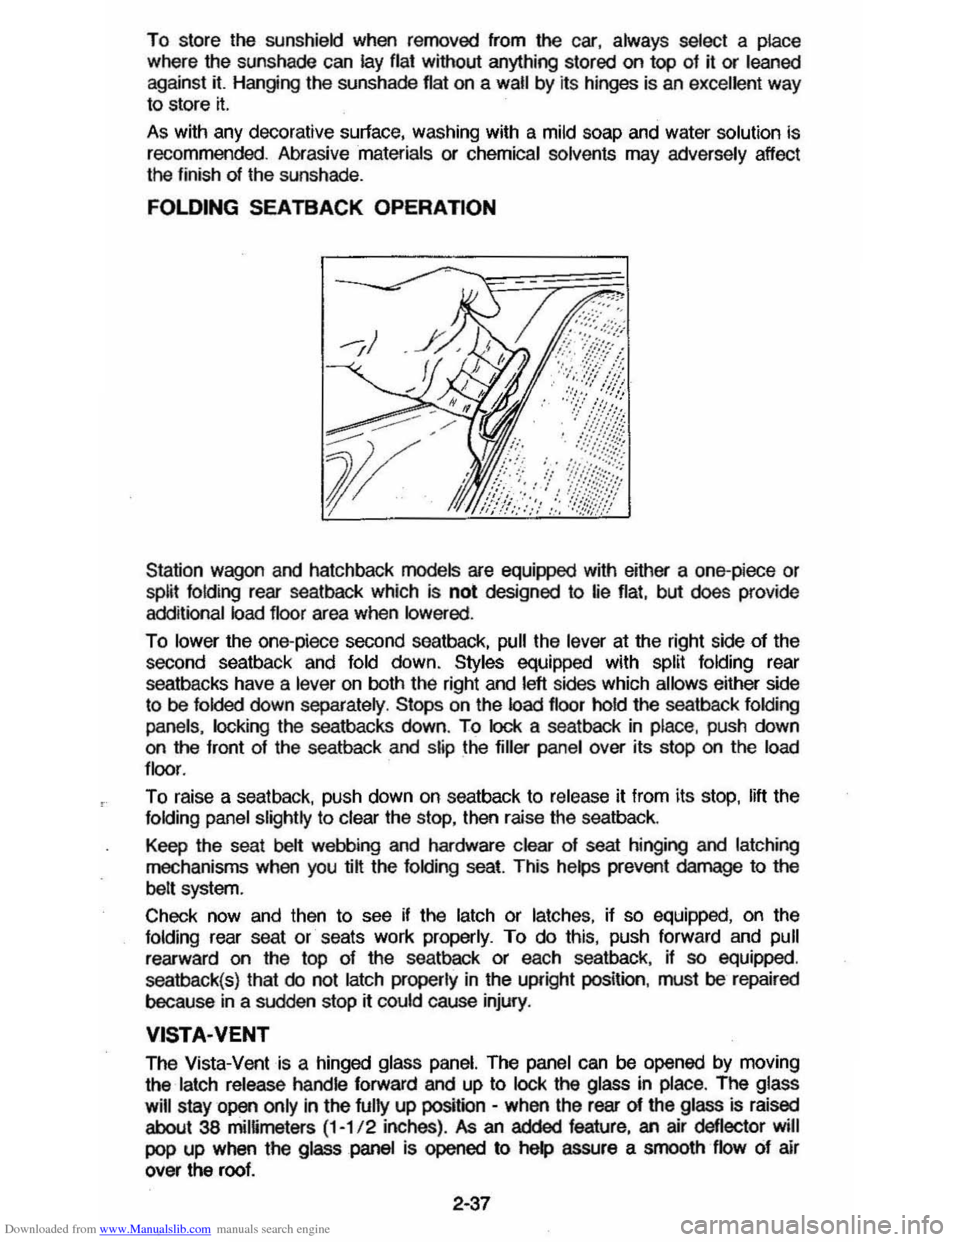
Station wagon and hatchback models are equipped with either a one-piece or split folding rear seatback which is not designed to lie flat, but does provide
additional load floor area when lowered .
To lower the one-piece second seatback, pull the lever at the right side of the
second seatback and fold down. Styles equipped with split folding rear
seatbacks have a
lever on both the right and left sides which allows either side
to be folded down separately . Stops on the load floor hold the seatback folding
panels. locking
the seatbacks down. To lock a seatback in place, push down on the front of the seatback and slip the filler panel over its stop on the load
floor .
To raise a seat back. push down on seatback to release it from its stop. lift the folding panel slightly to clear the stop, then raise the seatback.
Keep the seat
belt webbing and hardware clear of seat hinging and latching
mechanisms when you @ the folding seat. This helps prevent damage to the
belt system.
Check now and then
to see if the latch or latches, if so equipped, on the folding rear seat or seats work properly. To do this, push forward and pull
rearward on the top of the seatback or each seatback, if so equipped.
seatback(s) that
do not latch properly in the upright position. must be repaired
because
in a sudden stop rt could cause injury.
VISTA·VENT
The Vista-Vent is a hinged glass panel. The panel can be opened by moving
the
latch release handle forward and up to lock the glass in place. The glass
will
stay open only in the fully up position -when the rear of the glass is raised
about 38 mimmeters (1-1/ 2 inches) . As an added feature, an air deflector will
pop up when the glass panel is opened to help assure a smooth flow of air
over the roof.
2·37
Page 65 of 105

Downloaded from www.Manualslib.com manuals search engine 3. Install wheel and tire assembly and install hub cap by pushing or hitting
into place (the wheel can be mounted with hub cap in place). The hub cap
must be oriented by engaging the bump on the side of the hub cap
retention tab with the cutout on the side of the wheel pilot hole.
Compact Spare
The compact spare tire is designed to save space in your stowage area, and
its lighter weight makes it easier to install if a flat tire occurs. The lighter weight also helps improve fuel economy. ~--~------~~
" you have a flat tire, follow the jacking Instructions in this section, while keepingihese points in mind:
• Check the tire inflaiionpressureas soon as practical after installing the
spare (we suggest you use a 'pocket-type high'pressure inflation gage) and
adjust the pressure to 415
kilopascals (60 pounds per square inch). The
tire pressure should be checked at least monthly and kept at 415 kPa (60
psi) while the tire is stored . Also at least monthly , ·qheck that the spare lire is stowed securely ; tighten it if ~ is not.
NOTICE: Bee ... this tire is smaller than the standard tire, vehicle ground clearance is reduced. Do not take your vehicle through an automatic car wash while ~ spare I. Installed; the vehicle may catch on the equipment, possibly resulting In property damag_.
• YOU can expect a tread life up to 3,000 miles (4 800 kilometers), dependiQg on road conditions and your driving habits. The tire was designed to let you
finish an extended trip (up to 3,000 miles/4 800 kilometers) and buy a replacement tire, -if needed, at a store of your choice. However, to conserve
tire tread ~fe, return the spare to the stowage area as' soon as it is
convenient to have your standard tire repaired or replaced.
• Because the compact spare was specnically designed for your vehicle , ~ should not be used on any other vehicle.
• The compact spare tire and wheel are designed for use with each other.
The compact spare tire should not be mounted on any other type of wheel, and the compact spare wheel should not have any other type of tire
mounted on it. Also, do not try to use wheel covers or trim rings on the
CQr1l>aCt spare whe el since they will not fit. If such use is attempted,
damage to tIlese items or other vehicle components may occur.
• Do not use tire chains with your :compact spare tire. Because of the smaller tire size, a tire chain will not fit properly. This could cause damage to the
vehicle and result in loss of the chain.
3-7
Page 71 of 105
Downloaded from www.Manualslib.com manuals search engine Cleaning White Sidewall Tires
Use GM White Sidewall Tire Cleaner or a tire cleaner which will not harm aluminum wheel trim. A stiff brush may be used with the cleaner.
CORROSION PROTECTION
'four vehicle has been designed and built to resist corrosion. Special materials and protective finishes were used on most parts of your vehicle when it was
built to help maintain good looks, strength and reliable operation. However,
some parts which normally are not visible (such as certain parts under the
vehicle and under the hood) are such that surface rust will not affect their reliability. So, corrosion protection is not needed or used on these parts.
Sheet Metal Damage
If your vehicle is damaged and requires sheet metal repair or replacement, make sure the body repair shop applies anti-corrosion material to the parts
repaired or replaced so that corrosion protection is restored. (Also see "Finish Damage" which follows.)
Foreign Material Deposits
Calcium chloride and other salts, ice melting agents, road oil and tar, tree sap, bird droppings, chemicals from industrial chimneys, and other foreign matter
may damage vehicle finishes if left on painted surfaces.
Prompt washing may not completely remove all of these deposits. Other cleaners may be needed. When using chemical cleaners, be sure they are safe
for use on painted surfaces.
Finish Damage
Any stone chips, fractures or deep scratches in the finish should be repaired
promptly. Bare metal will corrode quickly and may develop into a major repair
expense.
Minor chips and scratches can be repaired with touch-up materials available from your dealer or other service outlets. Larger areas of finish damage can be
corrected in your dealer's body and paint shop.
Underbody Maintenance
Corrosive materials used for ice and snow removal and dust control can collect on the underbody. If these materials are not removed, accelerated corrosion
(rust) can occur on underbody parts such as fuel lines, frame, floor pan, and
exhaust system even though they have been provided with corrosion
protection.
At
least every spring, flush these materials from the underbody with plain
water. Take care to clean any areas where mud and other debris can collect.
Sediment packed in closed areas of the frame should be loosened before being flushed. If desired, your authorized dealer can do this service for you.
4-5