Page 459 of 875
GM – CAMARO 1982-1992 – Repair Guide (Checked by WxMax) 459
which could permit exhaust fumes to
seep into the passenger compartment.
Inspect all mounting brackets and hangers for deterioration, some models may
have rubber O-rings that can be ov erstretched and non-supportive. These
components will need to be replaced if fou nd. It has always been a practice to
use a pointed tool to poke up into the exhaust system where the deterioration
spots are to see whether or not they crumble. Some models may have heat
shield covering certain parts of the ex haust system , it will be necessary to
remove these shields to have the exh aust visible for inspection also.
Fig. 3: Make sure the exhaust co mponents are not contacting the body or
suspension
Page 460 of 875
GM – CAMARO 1982-1992 – Repair Guide (Checked by WxMax) 460
Fig. 4: Check for overstre tched or torn exhaust hangers
Fig. 5: Example of a badl y deteriorated exhaust pipe
Page 462 of 875

GM – CAMARO 1982-1992 – Repair Guide (Checked by WxMax) 462
REPLACEMENT
There are basically two types of exhaust sy
stems. One is the flange type where
the component ends are attached with bolts and a gasket in-between. The other
exhaust system is the slip joint type. These components slip into one another
using clamps to retain them together.
CAUTION - Allow the exhaust system to c ool sufficiently before spraying a
solvent exhaust fasteners. Some solvents are highly flammable and could ignite
when sprayed on hot exhaust components.
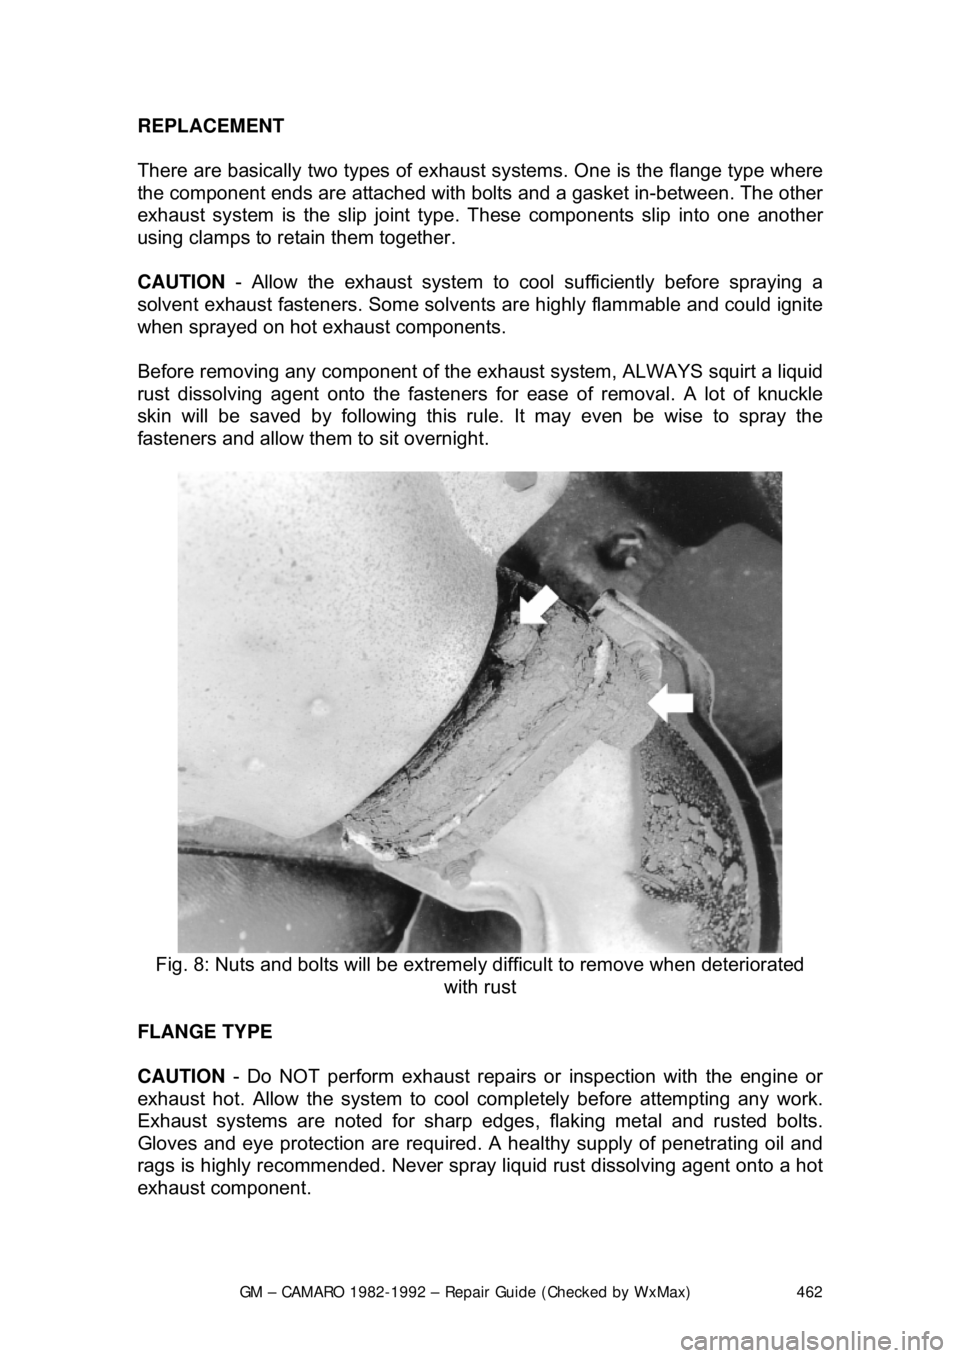
Before removing any component of the ex haust system, ALWAYS squirt a liquid
rust dissolving agent onto the fasteners fo r ease of removal. A lot of knuckle
skin will be saved by following this rule. It may even be wise to spray the
fasteners and allow them to sit overnight.
Fig. 8: Nuts and bolts will be extremely difficult to remove when deteriorated
with rust
FLANGE TYPE
CAUTION - Do NOT perform exhaust repairs or inspection with the engine or
exhaust hot. Allow the system to cool completely before attempting any work.
Exhaust systems are noted for sharp edges , flaking metal and rusted bolts.
Gloves and eye protection ar e required. A healthy supply of penetrating oil and
rags is highly recommended. Never spra y liquid rust dissolving agent onto a hot
exhaust component.
Page 463 of 875

GM – CAMARO 1982-1992 – Repair Guide (Checked by WxMax) 463
Fig. 9: Example of a fl ange type exhaust system joint
Before removing any component on a fl ange type system, ALWAYS squirt a
liquid rust dissolving agent onto the fast eners for ease of removal. Start by
unbolting the exhaust piece at both ends (if required). When unbolting the
headpipe from the manifold, make sure that the bolts are free before trying to
remove them. if you snap a stud in t he exhaust manifold, the stud will have to
be removed with a bolt extractor, which often means removal of the manifold
itself. Next, disconnect the component fr om the mounting; slight twisting and
turning may be required to remove the co mponent completely from the vehicle.
You may need to tap on the component wit h a rubber mallet to loosen the
component. If all else fails, use a hacksaw to separate the parts. An oxy-
acetylene cutting torch may be faster but the sparks are DANGEROUS near the
fuel tank, and at the very least, accident s could happen, resulting in damage to
the under-car parts, not to mention yourself.
Page 464 of 875
GM – CAMARO 1982-1992 – Repair Guide (Checked by WxMax) 464
SLIP JOINT TYPE
Fig. 10: Example of a co mmon slip joint type system
Before removing any component on the slip joint type exhaust system,
ALWAYS squirt a liquid rust dissolvin g agent onto the fasteners for ease of
removal. Start by unbolting the exhaust piece at both ends (if required). When
unbolting the headpipe from the manifold, ma ke sure that the bolts are free
before trying to remove them. if you s nap a stud in the exhaust manifold, the
stud will have to be removed with a bolt extractor, which often means removal
of the manifold itself. Next, remove the mounting U-bolts from around the
exhaust pipe you are extracti ng from the vehicle. Don't be surprised if the U-
bolts break while removing the nuts. Loosen the exhaust pipe from any
mounting brackets retaining it to t he floor pan and separate the components.
Fig. 11: Intermediate pipe attachment at muffler
Page 476 of 875

GM – CAMARO 1982-1992 – Repair Guide (Checked by WxMax) 476
Before attempting to repair a threaded
hole, remove any snapped, broken or
damaged bolts or studs. Penetrating oil ca n be used to free frozen threads. The
offending item can usually be removed with locking pliers or using a screw/stud
extractor. After the hole is clear, the thread can be repaired, as shown in the
series of accompanying illustrations and in the kit manufacturer's instructions.
ENGINE PREPARATION
To properly rebuild an engine, you must fi rst remove it from the vehicle, then
disassemble and diagnose it. Ideally you should place your engine on an engine
stand. This affords you the best access to the engine components. Follow the
manufacturer's directions for using the stand with your particular engine.
Remove the flywheel or fl explate before installing the engine to the stand.
Now that you have the engine on a stand, and assuming that you have drained
the oil and coolant from the engine, it's ti me to strip it of all but the necessary
components. Before you start disassembli ng the engine, you may want to take
a moment to draw some pictures, or fabr icate some labels or containers to mark
the locations of various components and the bolts and/or studs which fasten
them. Modern day engines use a lot of littl e brackets and clips which hold wiring
harnesses and such, and these holders are often mounted on studs and/or bolts
that can be easily mixed up. The manufacturer spent a lot of time and money
designing your vehicle, and they wouldn't have wasted any of it by haphazardly
placing brackets, clips or fasteners on t he vehicle. If it's present when you
disassemble it, put it back when you asse mble, you will regret not remembering
that little bracket which holds a wire har ness out of the path of a rotating part.
You should begin by unbolting any accessories still attached to the engine, such
as the water pump, power steering pump, alternator, etc. Then, unfasten any
manifolds (intake or exhaust) which were not removed during the engine
removal procedure. Finally, remove any covers remaining on the engine such
as the rocker arm, front or timing cove r and oil pan. Some front covers may
require the vibration dam per and/or crank pulley to be removed beforehand.
The idea is to reduce the engine to the bar e necessities (cylinder head(s), valve
train, engine block, crankshaft, pistons and connecting rods), plus any other 'in
block' components such as oil pumps, balance shafts and auxiliary shafts.
Finally, remove the cylinder head(s) from the engine block and carefully place
on a bench. Disassembly instructions fo r each component follow later in this
section.
CYLINDER HEAD
There are two basic types of cylinder heads used on today’s automobiles:
the Overhead Valve (OHV) and the Over head Camshaft (OHC). The latter can
also be broken down into two subgr oups: the Single Overhead Camshaft
(SOHC) and the Dual Overhead Camshaft (DO HC). Generally, if there is only a
single camshaft on a head, it is just referred to as an OHC head. Also, an
engine with a OHV cylinder head is also known as a pushrod engine.
Page 483 of 875

GM – CAMARO 1982-1992 – Repair Guide (Checked by WxMax) 483
Fig. 8: Use a micrometer to check the valve stem diameter
SPRINGS, RETAINERS AND VALVE LOCKS
The first thing to check is the most obv ious, broken springs. Next check the free
length and squareness of each spring. If applicable, insure to distinguish
between intake and exhaust springs. Use a ruler and/or carpenters square to
measure the length. A car penters square should be used to check the springs
for squareness. If a spring pressure test gauge is available, check each springs
rating and compare to the specifications chart. Check the readings against the
specifications given. Any springs that fa il these inspections should be replaced.
The spring retainers rarely need replacing, however they should still be checked
as a precaution. Inspect the spring mating surface and the valve lock re\
tention
area for any signs of excessive wear. Also check for any signs of cracking.
Replace any retainers t hat are questionable.
Valve locks should be inspected for exce ssive wear on the outside contact area
as well as on the inner notched surface. Any locks which appear worn or broken
and its respective valve should be replaced.
Page 487 of 875

GM – CAMARO 1982-1992 – Repair Guide (Checked by WxMax) 487
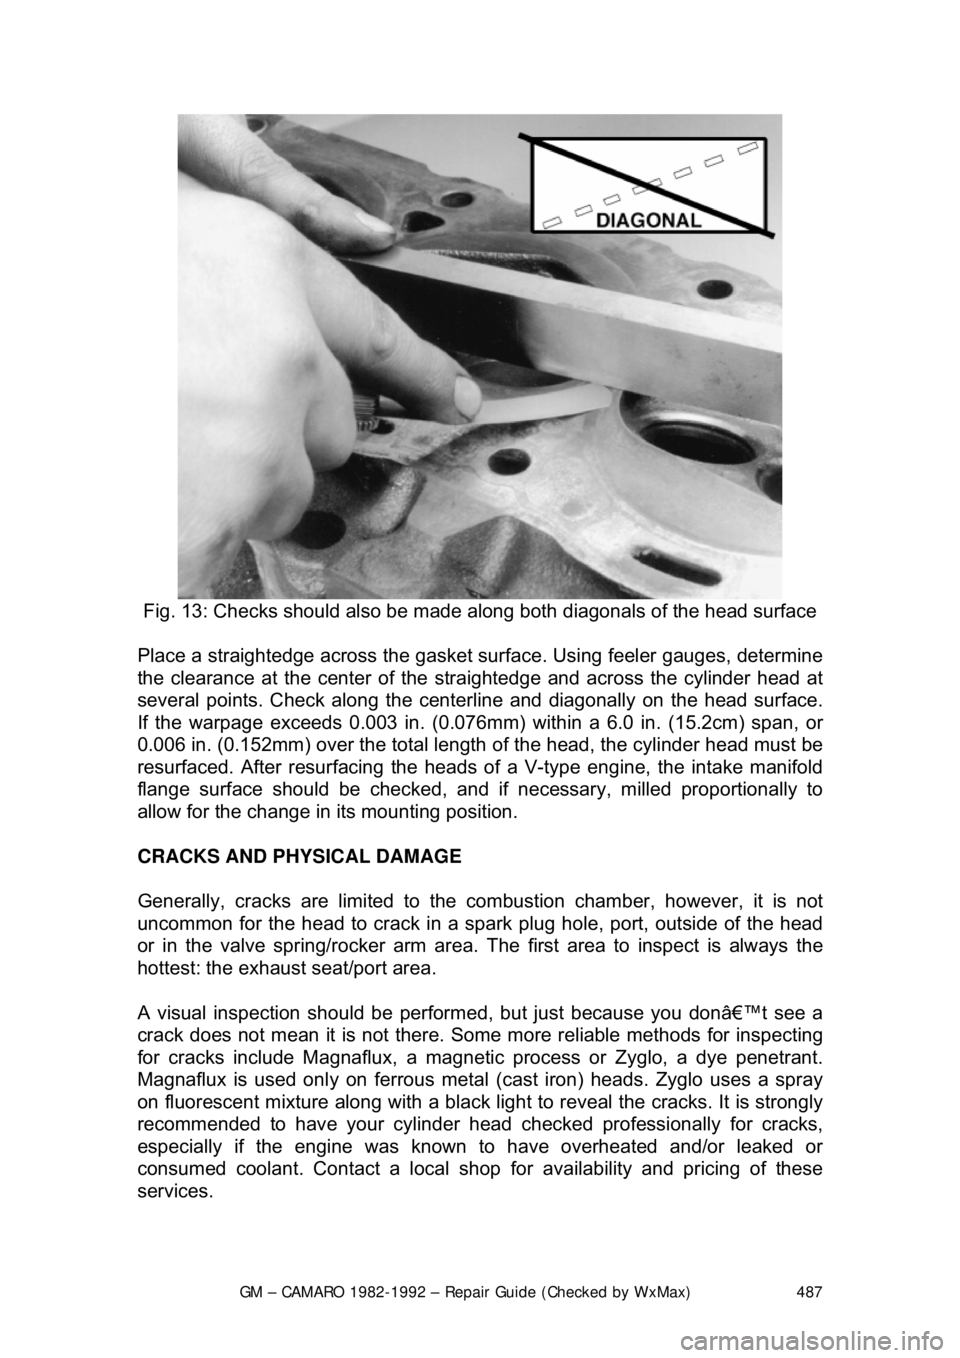
Fig. 13: Checks should also be made al ong both diagonals of the head surface
Place a straightedge across the gasket surf ace. Using feeler gauges, determine
the clearance at the cent er of the straightedge and across the cylinder head at
several points. Check along the centerli ne and diagonally on the head surface.
If the warpage exceeds 0.003 in. (0.076mm) within a 6.0 in. (15.2cm) span, or
0.006 in. (0.152mm) over the total length of the head, the cylinder head must be
resurfaced. After resurfacing the heads of a V-type engine, the intake manifold
flange surface should be checked, and if necessary, milled proportionally to
allow for the change in its mounting position.
CRACKS AND PHYSICAL DAMAGE
Generally, cracks are limited to the comb ustion chamber, however, it is not
uncommon for the head to crack in a s park plug hole, port, outside of the head
or in the valve spring/rocker arm area. The first area to inspect is always the
hottest: the exhaust seat/port area.
A visual inspection should be perform ed, but just because you don’t see a
crack does not mean it is not there. Some more reliable methods for inspecting
for cracks include Magnaflux, a magnetic process or Zyglo, a dye penetrant.
Magnaflux is used onl y on ferrous metal (cast iron) heads. Zyglo uses a spray
on fluorescent mixture along with a black light to reveal the cracks. It is strongly
recommended to have your cylinder head c hecked professionally for cracks,
especially if the engine was known to have overheated and/or leaked or
consumed coolant. Contact a local shop fo r availability and pricing of these
services.