1980 CHEVROLET CITATION door lock
[x] Cancel search: door lockPage 46 of 95

Downloaded from www.Manualslib.com manuals search engine Insta"ation
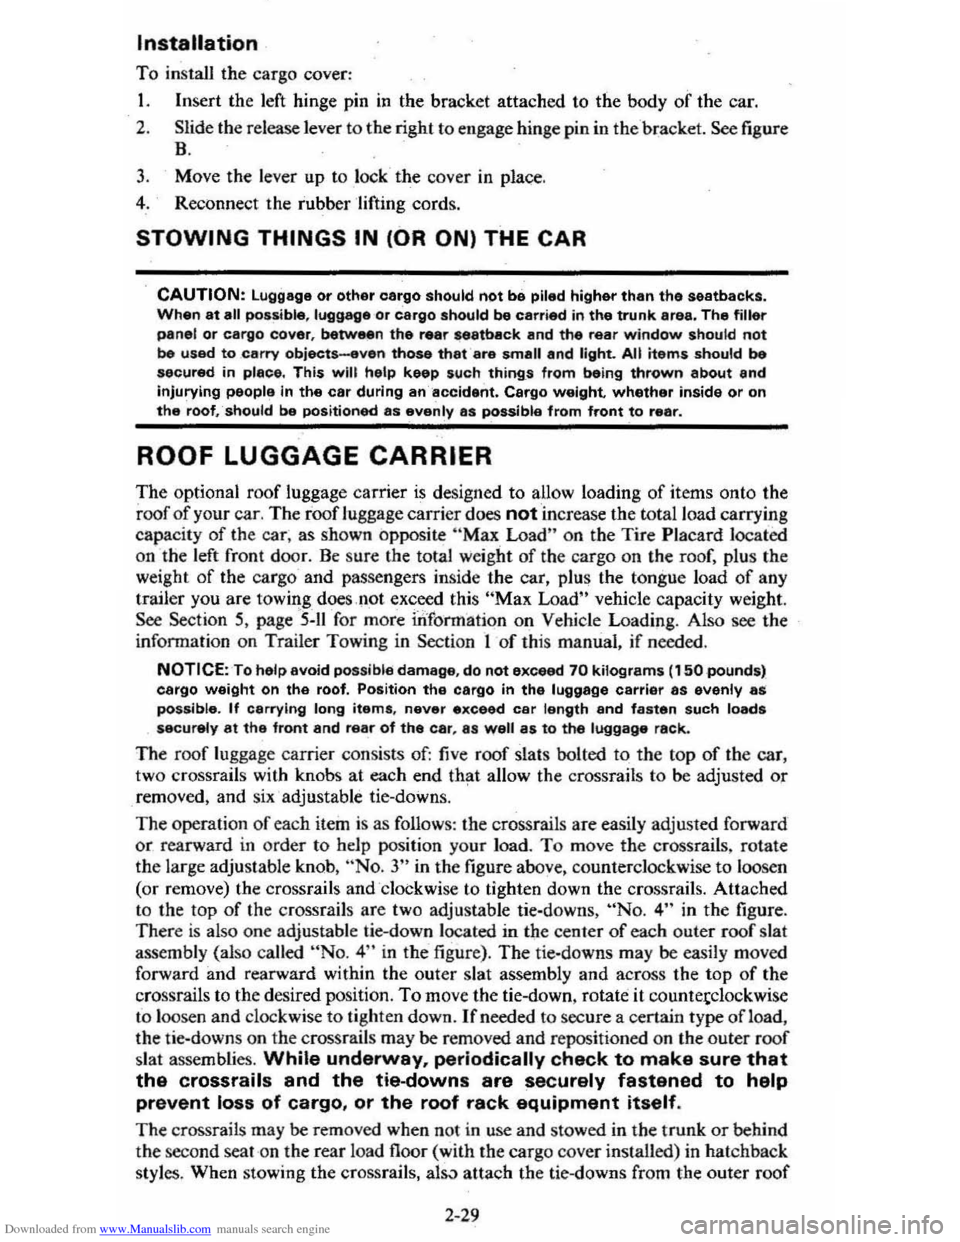
To install the cargo cover:
1. Insert the left hinge pin in the bracket attached to the body of the car.
2. Slide the release lever to the right to engage hinge pin in the 'bracket. See figure
B.
3. Move the lever up to lock the cover in place.
4. Reconnect the rubber 'lifting cords.
STOWING THINGS IN (OR ON) THE CAR
CAUTION: luggage or other cergo should not be piled higher than the seatbacks, When at all possible, luggage or cargo should be C8rrifHj in the trunk area. The filler panel or cargo cover, between the rear 88atback and the rear window should not be used to carry objects-even those that are small and light. All nems should be secured in place. This will help keep such things from being thrown about and Injurying people in the car during an accident. Cargo weight whether inside or on the roof, should be positioned as evenly as possible from front to rear.
ROOF LUGGAGE CARRIER
The optional roof luggage carrier is designed to allow loading of items onto the
roof
of your car. The roof luggage carrier does not increase the total load carrying
capacity of th e car , as shown opposite "Max Load" on the Tire Placard located
on the left front door. Be sure the total weight of the cargo on the roof, plus the
weight
of the cargo and passe ngers inside the car, plus the tongue load of any
trailer you are towing does
,1;10t exc_eed this "Max Load" vehicle capacity weight. See Section 5, page "5-11 for more information on Vehicle Loading . Also see the
infonnation on Trailer Towing
in Section 1 of this manual . if needed .
NOTICE:To helpayoid pOSSible damage, do not exceed 70 kilograms (1 50 pounds), cargo weight on the roof. Position the cargo in the luggage carrier as evenly as: pOssible. If carrying long items, never exceed car length and fasten such loads securely at the front and rear of the car, as well as to the luggage rack.
The roof luggage carrier consists of: five roof slats bolted to the top of the car,
two crossrails with knobs at each end th~t allow the crossrails to be adjusted or removed, and six' adjustable tie-downs.
The operation
of each item is as follows: the crossrails are easily adjusted forward
or rearward in order to help position your load. To move the crossrails , rotate
the large adjustable knob, ··No. 3" in the figure above. counterclockwise to loosen
(or remove) the crossrails and 'clockwise to tighten down the cros srails. Attached
to the top
of the crossrails are two adjustable tie-downs, "No.4" in the figure.
Ther e is also one adjustable lie-down located in the center of each outer roof slat
assembly (also called
"No.4" in the figure) . The tie-downs may be easily moved
forward and rearward within the outer slat assembly and across the top
of the
crossrails to the desired position.
To move the tie-down . rotate it countetclockwise
to loosen and clockwise to tighten down. If needed to sec ure a certain type of lead,
the tie-downs on the
crossratls may be removed and repos itioned on the outer roof
slat assemblies. While underway, periodically check to make sure that
the crossrails and the tie-downs are securely fastened to help
prevent loss of cargo, or the roof rack equipment itself.
The crossrails may be removed when not in use and stowed in the trunk or behind
the second seat on the rear load floor (with the carg o cover installed) in hatchback
style
s. When stowing the cressrails, al5..1 attach the tie-downs from the outer roof
2-29
Page 86 of 95

Downloaded from www.Manualslib.com manuals search engine FUSES AND CIRCUIT BREAKERS
The wiring circuits in your vehicle are protected from short circuits by a combination of fuses, circuit breakers; and fusible thermal links in the wiring itself. This greatly reduces
the hazard of electrically caused fires in the automobile.
The fuse junction box is located under the right side of the instrument panel.
The
headlight wiring is protected by a circuit breaker in the light switch. An electrical overload will cause the lights to go on an,d off, or in some cases to remain off. If this happens , have your headlight wiring checked right away. Besides a fuse, the windshield wiper motor is also protected by a circuit breaker. If the motor overheats, due to overloading caused by heavy snow, etc., the wiper ·will remain stopped until the motor cools. Be sure to have the cause of the over· loading corrected. Circuit breakers for power windows and power door locks are located on the bulkhead in the engine
compartment.
CIRCUIT RATING
Radio ........................................... 10 Amp.
Wiper
......... ......................... ......... 25 Amp .
Stop, .Rear & Front, Hazard Lamps, I.P. Indicators .. 20 Amp.
Dir.
Sig .. B.U. Lamps .............................. 20 Amp.
Heater,
AlC .............. ........................ 25 Amp .
Inst. Lamps, Radio Dial Lamp, Heater Dial Lamp, WIS Wiper Lamp, Cigarette Lighter & Ash Tray Lamp .. 5 Amp.
Gages Warning Lamps, Cruise Control , Brake Alarm,
Oil, Rear Defogger, Fuel Gage, Headlight Buzzer, Seat Belt Warning Buzzer, Temp., Gen., Idle Stop . 20 Amp.
Glove
Box Lamp, Dome Lamp, Luggage Lamp, Clock, Hood, Cigarette Lighter, Courtesy Lamps,
Key Warning .................................... 20 Amp.
Tail, Parking and
Side Marker Lamps, License Lamp 20 Am·p.
Choke Heater . . . . . . . .. .. .. . .. . . . . . . . .. . . . . 20 Amp .
Do
not use fuses of higher amperage rating than those recom· mended above.
Fusible Links are incorporated into the wiring system. These
are wires
of such a gage that they will fuse (or melt) before damage occurs to an entire wiring harness in the event of an electncal overload. See your Chevrolet Dealer if 1usible link replacement becomes necessary.
7-4
•
Page 88 of 95

Downloaded from www.Manualslib.com manuals search engine Air Cleaner ...... . Air Conditioner
Automat ic ............ . Malnt.nance Air Pre •• ur •. Tire .... A ir Vents ..... Alternator (GEN) Light .. Aluminum Car •.. AM or AM·fM R.dios ..... Antifra.z . ..... ......... .......... . App.aranc. Car ...... Ashtrays & l ighters. Assi.tance. Owner .. Autom.tic DOOf lOCks
Autom.tic: Trann.l. Malnt.mimc. Operation .. Operating Tip$ ..... Axl. , Drive .. Sabies, Reatraint of . San Joints S.ttary
5-8
2 -
22 5·10 5·11 2·21 2·17 .-. 2·24 (S •• "Coolant") '-1 2-20 0-1 1-2
5-. ,-a 2 ·10 5-8 1·10 5-8
Em.rgency SIIHting.. 3-1 Fr •• dom .... 5·9 G •• Caution... 3-1 ; GEN Light ... 2·11 T •• t Indicator... 5·9 Befortl Oriylng Your V.hicle ,., Belt •. Seat .... M. (S .. "Seat Baits",
Blower, H.at.r &. Air Cond.... 2-20 Body Oamag... 4·4 Brak.s Adjustment P.dal Trav.l Traller 'Towing .. Warning Light Bre.ka,., Circuit
Break·ln Period, N.w V.hicl •... Bright Headlights .....
2-14 2·14 1 -11 2·17 7-4 2-' 2·7,2·14 4-4 1 -3.7·4 1-12 3-6 {S •• "Sound"l 2·18, 5-2
Bright Metal CI.aning ......... .. Bl,llbs lit Fu ••• Bumpe ... lit Hitch ••.. 81,1mper Jack Operetion Bun.r •.. C·4 Syst.m .. C •• Coolant RaeoV.ry Tenk .. FI,I.I. Powar St •• ring .... R.diator ..... . Cap.city. Cargo W.ight ... .•. Cap3Cme •. Fluid .. C.r Br.ak·ln Period , N.w ..... . C.r Chemic. I ......... .. C.rbon Monoxid. Caution
'-5 Inside Back Cover .-a '-7 6-12 7-1 2-' '-7 '-1 C.r. &. CI.aning, Appear.nce 4-1 C.rgo Capacity. 5-10 Cargo on Roof, C.rrying.. ......... ............... 1·3 CargoR.ck, Roof ..... 2·29 Cargo Coyer .. ................ ........... 2-27 CATALYST Indic.tor..... 2 ·18 C.t.lytic Conv.n.r C ·4 System ......... . Chains, Tir • ..... Ch.nging Whe.'s • Tiras .. Ch.rging Systam Indicator .... CHECK ENGINE light..
2·18,5--2 5·14 3-6 3-2 2-18, 5-2
7-6
Checklist. Driver ....... . Child Seats lit Ra.traint •.. Chrome Protection .. Cigarette lightar .... Circuit Breakars . Citizens Band Radio ... " .... " .... " .. M ••••••• Cleening .. Clock
Cloth Trim Car." .. Clutch Pedal Adjl,lstment.. .. Cold Welther Stlrting ..... Compla int Procedure ..
1-1 1-10 .-. 2·20 7-' 2·2 ~ 4-1 2·20 .-, 5-8 '-a 6-1
Conditionar, Air ....... (See "Air Conditi on.r") Con.umer Relations... 6-1
Cony.)! Mirror ... C ooling System Antifraet. ICoolant, .. Overheating .. Recovary Tank .. S.rvice .. Thermostat .. CorrOSion Protection Countries. Oper.ting in Foraign ..... Cruise Control .. Cu.tomer Sarvice .. Oamage. Sheet M.tal...-. D.fogger. Rear Window. Defro.hlT , Windshiflld .. Oalay Wipers .. Descend .ing a Grade Trail.ring .. Dimen.ion. Dimmer Switch, H.adlight Dipsticks
Engine Oil .. Power Staering .. Diractional Sign." .... . Oi.c Br~ ••.. Door lock ......
Drrve lOOe
1-3
'-5 3-3 5-S '-5 5-7 .-. 2 -3 2·12 6-1 '-5 2-21 2 -20, 2·23 '-7 '-8 1-11 7-1 2-14
'-3 .-a ,-u 2·1S 1-2 5-8 Driver Checklist.... 1·1 Driving Down Steep Gr.de........ 2·9 In Ou.ty Ar......... 5·3 on Slippery Surfaces ....... .......... ,.... 2·9 Ec;Gnomy Tips , Fu" 2·4 Electric-Powered Option...... (See "Power")
Ele<:tricel System 8IttMY ... ... .
Bulbs ...... .
Circuit Brlak.rs. , .... GEN (Glnerator) light ...... Jump Scarting .. .. Sparil Plugs .. Voltm.ter ... Erne:rg.ncy , In Ca •• of Brak. Warning Light Engine Hot light .. Freeing Vahicle When Stuck ... Hazard Warning Fla.h.r .... J.cking ..... Jump 51anlng._. Towing Clr. Emission Caution .................................. . Emi .. ion Control CAT AL YST Indicator
5-S 7-3 7-. 7-' 2·17 3-1
7-2
2·19
2·17 2·17 3-7
3-1
3 ·4 .3·5 3-1
3-7
'-1
2·19
,
Page 90 of 95

Downloaded from www.Manualslib.com manuals search engine Switch Headlights .... TEMP (Temperature) .. Locks Door ...
2~19 2-17 1-2
Ignition ............................................. .. 2-5 1-1 2-2
2-25 Keys .. Theft Protection .. Lowering Seats .. Love Seat, Child & Infant: .. Lugglige/Cargo Capacity ... Luggage Rack ... Maintenance Record .. Maintenance Schedule .. Manual Transaxle Clutch Adjustment. .. .
1-10 5-11 2·29 7-12 5-.1
Maintenance ........................................... . 5-8
5-8
2-11
2· 10 2-12 4-1 4-5
1-3
Operating Tips .. Operation .. Shift Speeds. Metal Cleaners .. Metal Damage, Body ... Mirrors, Rearview .. Mobile Radios-. Monoxide Caution, Carbon .. . 2-25 2-1
2-1 2-2
2-2
2-15 Muffler ............................................... . New Car Break-In Period Octane Rating, Gasoline ... Odometer Oil, Engine Capacity .. Change Interval.. Dipstick ... Filter ... PreSsure Gage .. Pressure Light... Recommendation (Gas) .. OIL Light.. Openings, Roof... Opening The Hatchback ... Hood .. Windows ..
6-.1 5-3 (inside Back Cover) 5-3,7·1 2·1-9 2-17
5-3
2-17 (See "Roofs")
2·26 (Inside Back Cover) 1-5 Operating Speeds, New Car... 2-2 Operating Tips Fuel Economy.. 2-4 Trailer Towing.. 1-13 Transaxle... 2-9 Ventilation System.. 2.20 Operation in Foreign Countries.. 2"3 Outside Rearview Mirror.. 1.3 Overheating, Engine.. 3-3 Overseas Operation.. 2.3 Owner Assistance.. 6-1 Owner's Record... 7-11 Oxygen Sensor., 5.2 Paint Care.. 4-4
Paint Damage .. Parking;. Parking Brake .. Parking Lights .. PCV Valve & Filter .. Peda'·TI"avel, Brake ... Pedal Travel, Clutch .. Polishing & Waxing .. Pollution Control Power
4-' 2-. 2-14 7-3 7·2 2-14 5~8
.-. (See "Emission Contron
7-8
Antennas Brakes .. Door Locks .... Seats ... Steering Pressure, Oil Light ... Pressure. Tire Inflation ... Pulse Wiper ...
2-25
2-14
1-2 1-' 2·12
2-15
5-11
2-7
Pushing to Start ................................ .. 5-2 Radiator Antifreeze (Coolant) .. Cap, Prassure .. Checking Level .. Overheating .. Thermostat...
Radios & Antennas ... Raising Seats ... Rear Cargo Cover ...................... .. Compartment .. . Window Defogger .. Trailering .. Rearview Mirrors .. Reclining Seats .. Recovery Tank, Coolant .. Release
Hatc.hback
Hood .. Seatback Latch ... Reminder Lights ....
Replacement Fasteners
5-5 5-. 5-5 3-3 5-7
2-23 -2-25
2-25
2-:27
2-2,2-28 2-21 '·11 1-3 1-' 5-5
2-25 (Inside Back Cover)
1-' (See "Lights") 5-1
5-1 Replacement Maintenance Schedule .. Raplacement Owner's·Manual... 7-13 Replacement Parts ............. ....................... 7-2 Restraints .. Rocking Car When Stuck .. Roofs Carrying Cargo On ... Luggage Carrier .. Rack .. Vinyl .. Vista-Vent. ... Rotation, Tire .. Rustproofing .. Rust Protection ... Sefety Belts .. Seats (See
"Seat Belts") 3-7
1-3,2-2,9 2·29 2·29
'-5 2-26 5-12
'-5 '-5 (See "Seat Belts")
Adjustment.. 1-4 Child... 1-10 Folding.. 2-25 Latches..
1-5 Reclining.... . '-4 Seat Belts Care.. 4.3 Child Restraint ............................................ 1.10 Inspection.. 1-10 Lap/Shoulder.. 1-6 Light/Buzzer Reminder... 1;8 Pregn~nt Women .. Rear Seat. ... Self-Adjusting Brakes .. SENSOR Indicator ..
1-8 2-25 2-14 2-18,5-2 Sensor, Oxygen.... 2-18,5-2 Service & Maintenance.. 5-1 Service Station Information (InSide Back Cover) Sheet Metlll Damage... 4-5
Page 95 of 95

Downloaded from www.Manualslib.com manuals search engine SERVICE STATION INFORMATION
Refer to "Service and Maintenance"
Section for Further Details
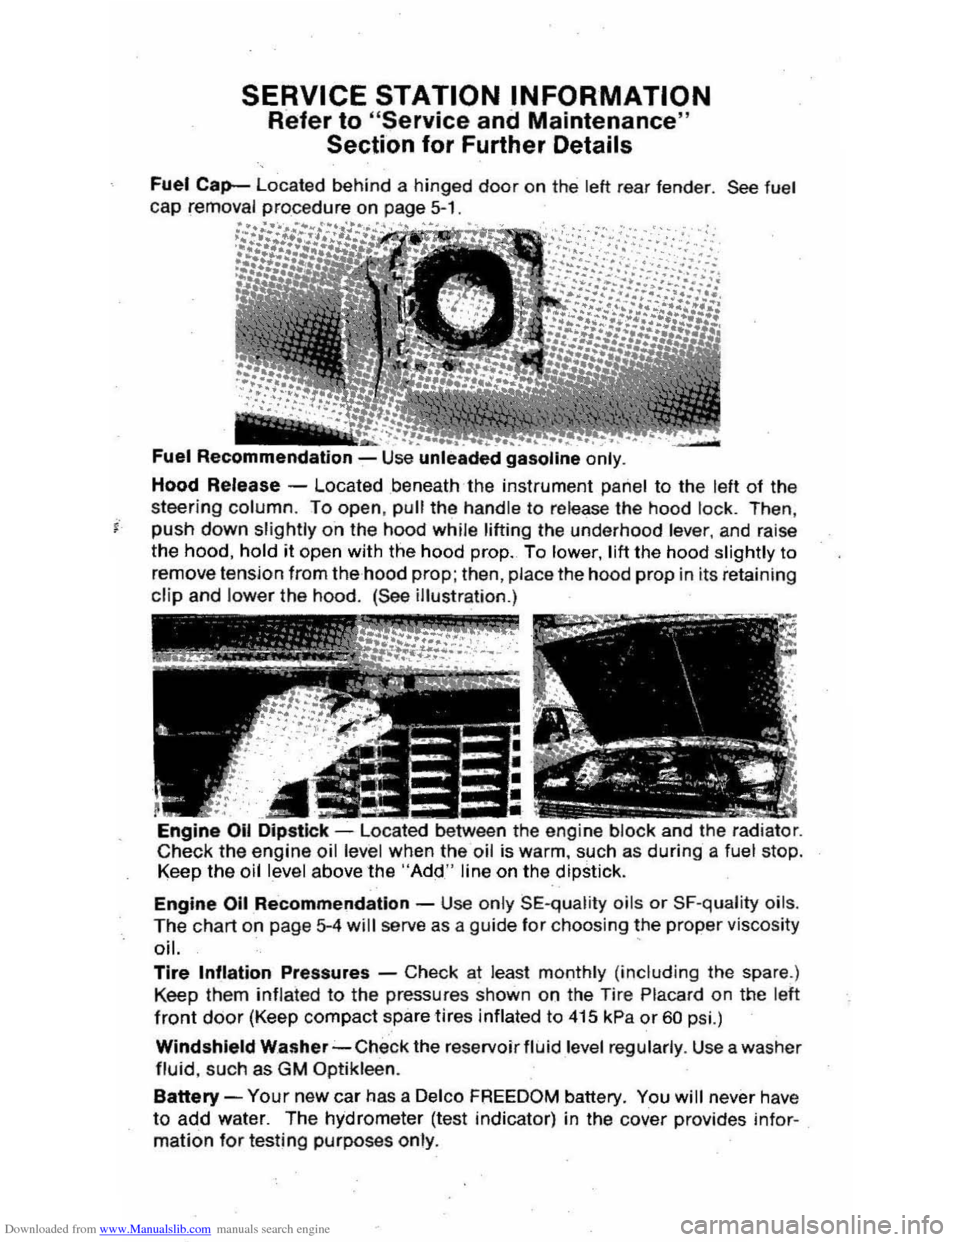
Fuel Cap-Located behind a hinged door on the lett rear fender. See fuel cap removal procedure on page 5-1.
Fuel Recommendation -Use unle~ded gasoline only .
Hood Release -Located beneath the instrument panel to the left of the
steering column. To open, pull the handle to re lease the hood lock . Then ,
j" push down slightly o "n the hood whil e lifting the underhood lever, and raise
the hood, hold it open with the hood prop. To lower, lift the hood slightly to
remove tension from the hood
prop; then , place the hood prop in its retainin g
clip and lower the hood. (See illustration.)
Engine Oil -located between the engine block and the radiator. Check the engine oil level when the oil is warm, such as during a fuel stop. Keep the oil level above the "Add" line on the .dipstick.
Engine Oil Re "commendatlon -Use only SE-q ualit y oils or SF-quality oils .
The chart o n page 5-4 will serve as a gu ide tor choosing the proper viscosity oil. .
Tire Inflation Pressures -Check at least monthly (including the spare .)
Keep them
inflated to the pressures shown on the Tire Placard on the left
front door (Keep compact spare tires inflated to 4t5 kPa or 60 psi.)
Windshield Washer-Check the reservoir fluid level regularly . Use a wa sher
fluid, such as GM Optikleen.
Battery -Your new car has a Delco FREEDOM battery. You will never have
to add water. The hydrometer (test indicator) in the cover provides infor
mation for testing purposes only.