1976 CHEVROLET VEGA tow
[x] Cancel search: towPage 10 of 87
Downloaded from www.Manualslib.com manuals search engine ·. __ .-
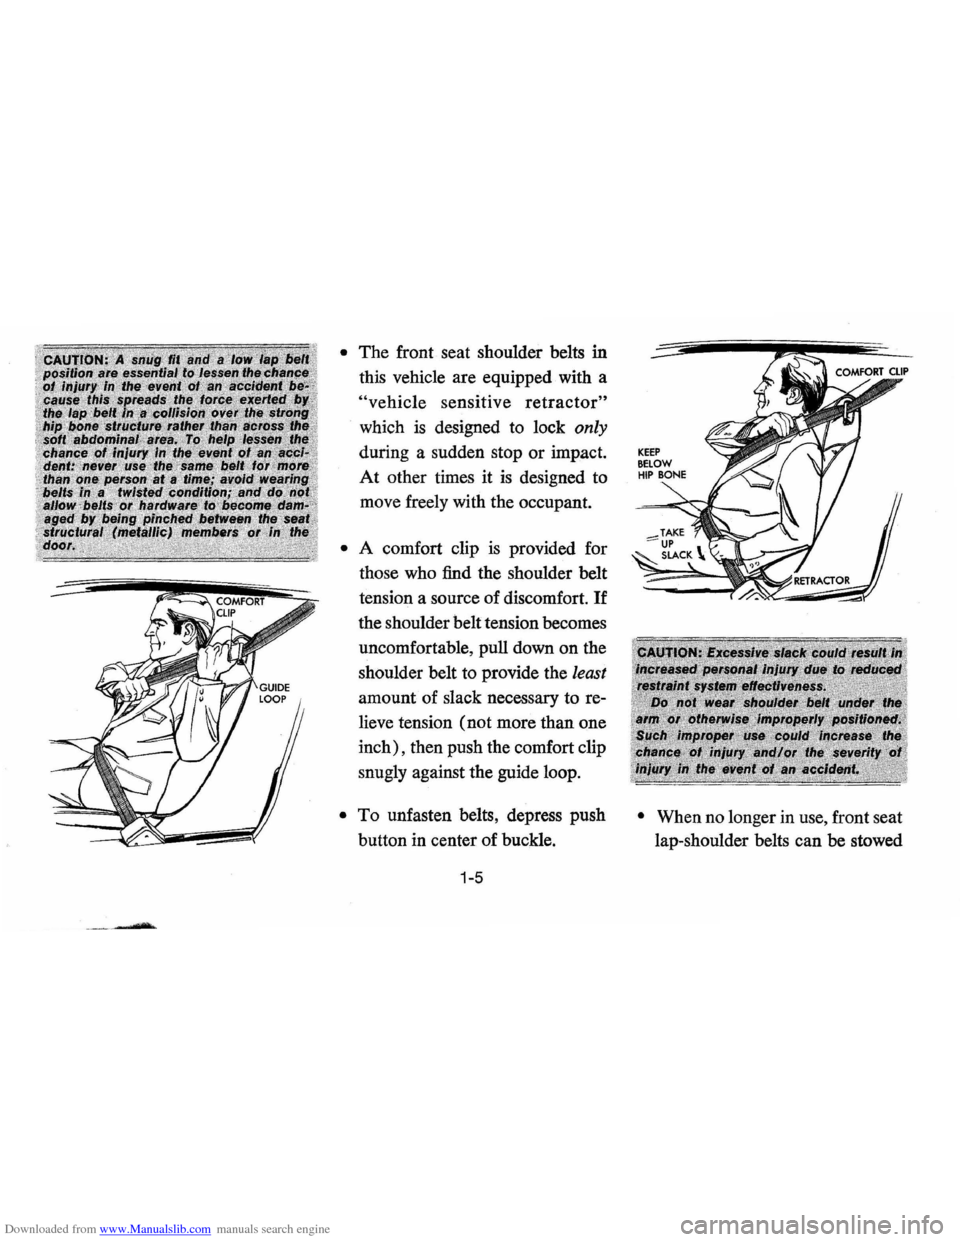
• The front seat shoulder belts in
this vehicle are equipped with a
"vehicle sensitive retractor"
which is designed to lock only
during a sudden stop or impact.
At other times it
is designed to
move freely with the occupant .
• A comfort clip is provided for
those who find the shoulder belt
tension a source of discomfort.
If
the shoulder belt tension becomes
uncomfortable , pull down on the
shoulder belt to provide the
least
amount of slack necessary to re
lieve tension (not more than one
inch), then push the comfort clip
snugly against the guide loop.
• To unfasten belts, depress push
button in center of buckle.
1-5
• When no longer in use, front seat
lap-shoulder belts can be stowed
Page 14 of 87
Downloaded from www.Manualslib.com manuals search engine Trailer Hauling
Since passenger cars are designed
and intended to be used primarily
as passenger conveyances, towing
a trailer will effect handling, dura
bility
and economy. Maximum
safety and satisfaction depends
upon proper use of correct equip
ment and avoiding overloads and
other abusive operation.
The maximum loaded trailer
weight which you can pull with
your car depends on what special
equipment has been installed on
your car. Chevrolet does not rec- ommend
towing any trailer
over
1,000 pounds gross trailer weight.
Information on trailer haul
ing capabilities, special equipment
required, and optional equipment
offered by Chevrolet
is available
from your Chevrolet Dealer or by
writing Chevrolet Motor Division,
Detroit, Michigan 48202
(or in
Canada by writing to General
Motors of Canada Limited,
Owner
Relations Department, Oshawa,
Ontario LlJ 5Z6).
To assist in attaining good han
dling of the car-trailer combination,
it
is important that the trailer
1-9
tongue load be maintained at ap
proximately 10%
of the loaded
trailer weight. Tongue loads can
be adjusted by proper distribution
of the load in the trailer, and can
be checked
by weighing separately
the loaded trailer and then the
tongue.
When towing trailers, tires should
be inflated to the highest inflation
pressures shown on the placard
affixed
to the left front door. The
allowable passenger and cargo
load, also shown on the same pla
card,
is reduced by an amount
eq ual to the trailer tongue load on
the trailer hitch.
Page 15 of 87
Downloaded from www.Manualslib.com manuals search engine Maintenance
More frequent vehicle mainte
nance
is required when using your
car to pull a trailer. Change the:
• Automatic transmission fluid
and filter each
15,000 miles,
(see Trailering brochure for addi
tional information).
• Rear axle fluid each 15,000
miles,
• Engine oil each 90 days or 3,000
miles, whichever occurs first,
• Positive crankcase ventilation
valve each
12 months or 15,000
miles, whichever occurs first.
• See index for important informa
tion on belts, cooling system care
and automatic brake adjustment.
Break-in Schedule
In addition to the new car preak-in
instructions in this manual, it is
recommended that your new car
be operated for
500 miles before
trailer towing.
If it is necessary to
tow during this period, avoid speeds
over
50 MPH and full throttle
starts. The same precautions should
be observed whenever a new en
gine, transmission or axle
is in
stalled in your car.
1-10
Page 18 of 87
Downloaded from www.Manualslib.com manuals search engine STEERING COLUMN CONTROLS
Anti-Theft Steering
Column Lock
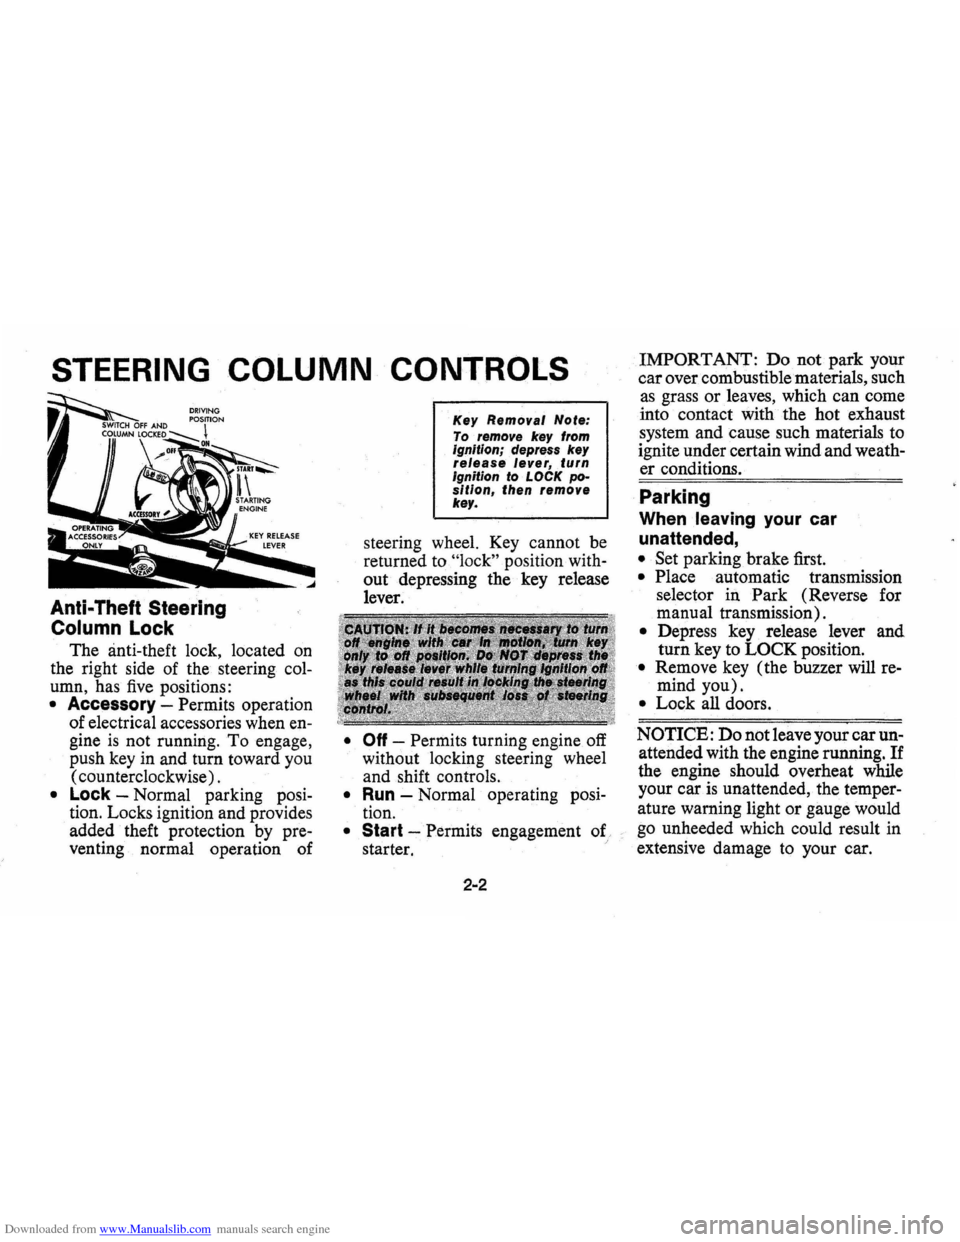
The anti-theft lock, located on
the right side of the steering col
umn, has five positions:
• Accessory -Permits operation
of electrical accessories when
en
gine is not running. To engage,
push
key in and turn toward you
( counterclockwise) .
• Lock -Normal parking posi
tion. Locks ignition and provides
added theft protection
by pre
venting normal operation of
Key Removal Note:
To remove key from ignitionjdepress key release lever, . turn Ignition to LOCK position, then remove key.
steering wheel. Key cannot be
returned to
"lock" position with
out depressing the key release
lever.
• Off -Permits turning engine off
without locking steering wheel
and shift controls.
• Run -Normal operating posi
tion.
• Start -Permits engagement of. :
starter.
2-2
IMPORTANT: Donot park your
car over combustible materials, such
as grass or leaves, which can come
into contact with the hot exhaust
system and cause such materials to
ignite under certain wind and
weath
er conditions.
. Parking
When leaving your car
unattended,
• Set parking brake first.
• Place automatic transmission
selector in
Park (Reverse for
manual transmission).
• Depress key release lever and
turn key to
LOCK position.
• Remove key (the buzzer will re
mind you).
• Lock all doors.
NOTICE: Do not leave your car un
attended with the engine running. If
the engine should overheat while
your
caris unattended, the temper
ature warning light or gauge would
go unheeded which could result in
extensive damage to your car.
Page 32 of 87
Downloaded from www.Manualslib.com manuals search engine • The light is also designed to come
on during engine starting to
verify that the bulb
is operating
properly.
• Have system repaired if light does
not come
on during check.
• This warning light is not a substi
tute for the visual check of brake
fluid level required
as part of
normal maintenance.
If the light comes on:
• The parking brake control is not
fully released, or,
• The service brake system is par
tially inoperative.
What to do:
1. Check that parking brake is re
leased.
If it is . . .
2.
Pull off the road and stop, care
fully-remembering that:
• Stopping distances may be
greater.
• Greater pedal effort may be re
quired.
• Pedal travel may be greater. 3.
Try out brake operation by start
ing and s,topping on road shoul
der-then:
• If you judge such operation to
be safe, proceed cautiously at
a safe speed to nearest dealer
for repair.
• Or have car towed to dealer for
repair.
Continued operation of the car in this
condition
is dangerous.
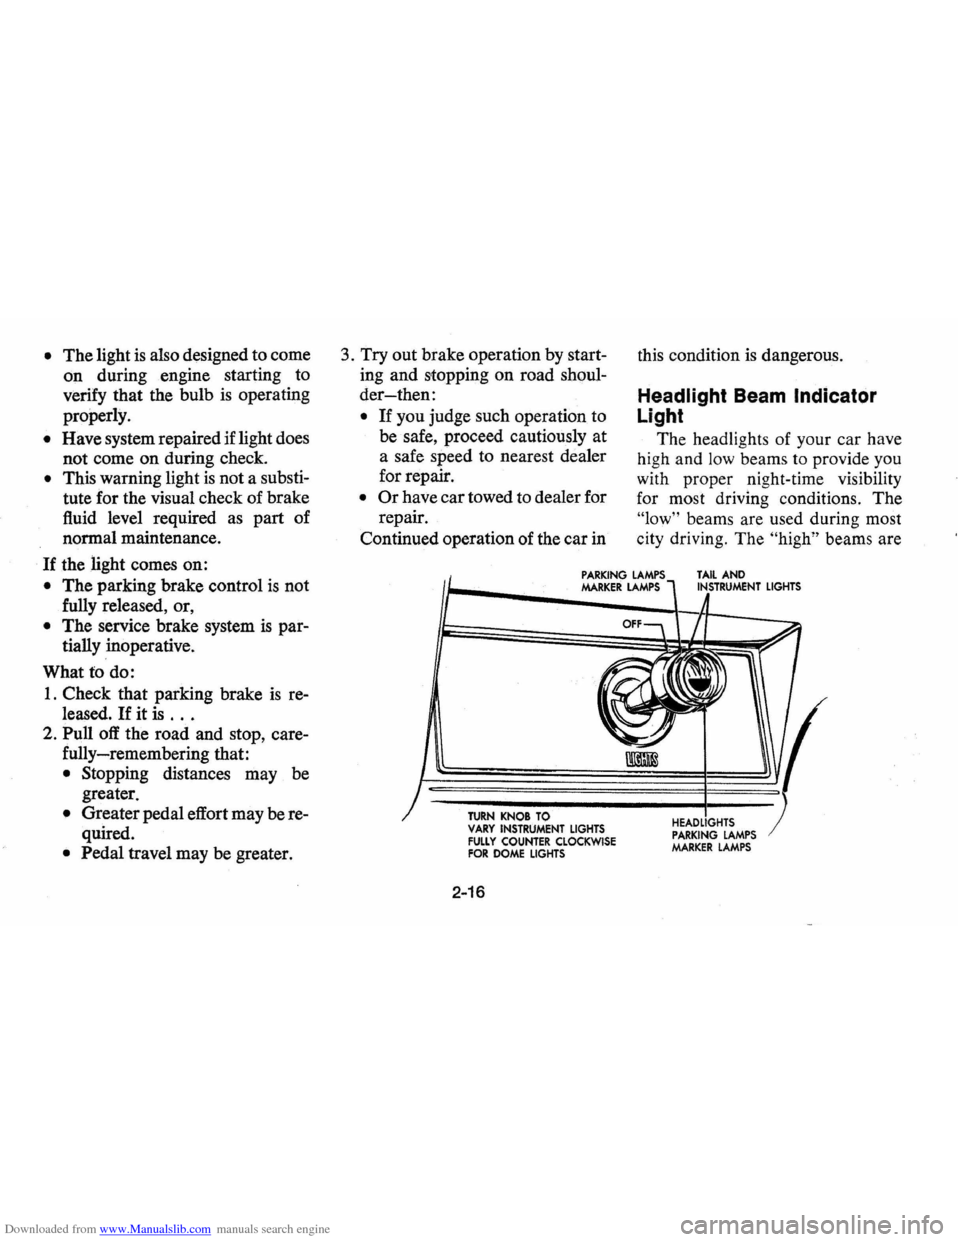
Headlight Beam Indicator
Light
The headlights of your car have
high and
low beams to provide you
with proper night-time visibility
for most driving conditions. The
"low" beams are used during most
city driving. The
"high" beams are
PARKING LAMPS MARKER LAMPS TAIL AND INSTRUMENT LIGHTS
TURN KNOB TO VARY INSTRUMENT LIGHTS FULLY COUNTER CLOCKWISE FOR DOME LIGHTS
2-16
HEADLIGHTS PARKING LAMPS MARKER LAMPS
Page 46 of 87
Downloaded from www.Manualslib.com manuals search engine In Case of Emergency
Four Way Hazard
Warning
Flasher
• Use the warning flasher to warn
other drivers any time your
ve
hicle becomes a traffic hazard,
day or night.
• A void stopping on the roadway
if possible.
• Turn on the hazard warning
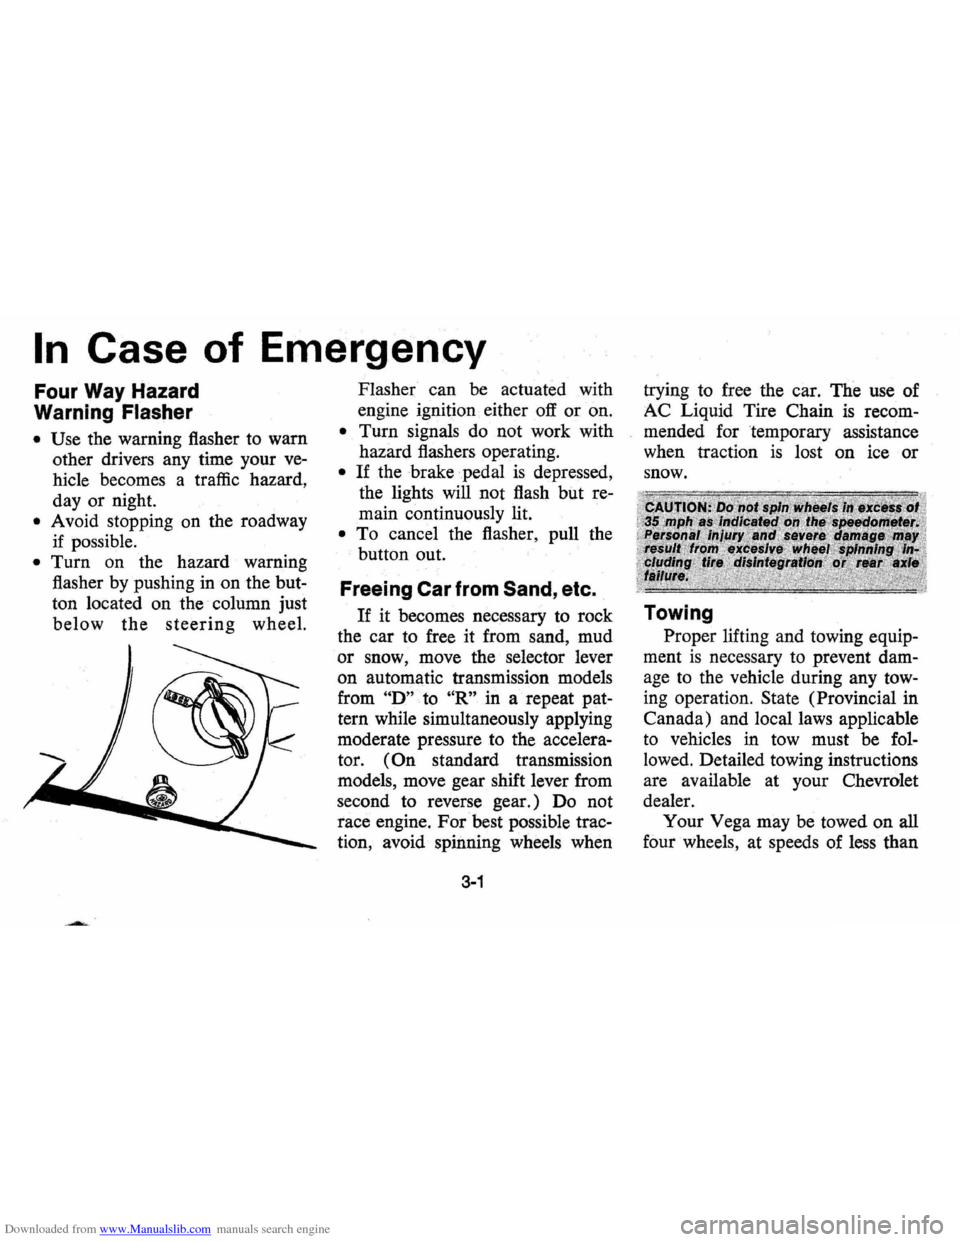
flasher by pushing
in on the but
ton located on the column just
below the steering wheel. Flasher
can
be actuated with
engine ignition either
off or on.
• Turn signals do not work with
hazard flashers operating.
• If the brake pedal is depressed,
the lights will not flash but
re
main continuously lit.
• To cancel the flasher, pull the
button out.
Freeing Car from Sand, etc.
If it becomes necessary to rock
the car to free it from sand, mud
or snow, move the selector lever
on automatic transmission models
from
"D" to "R" in a repeat pat
tern while simultaneously applying
moderate pressure
to the accelera
tor.
(On standard transmission
models, move gear shift lever from
second to reverse gear.) Do not
race engine. For best possible trac
tion, avoid· spinning wheels when
3-1
trying to free the car. The use of
AC Liquid Tire Chain
is recom
mended for temporary assistance
when traction
is lost on ice or
snow.
Towing
Proper lifting and towing equip
ment
is necessary to prevent dam
age to the vehicle during any tow
ing operation. State (Provincial in
Canada) and local laws applicable
to vehicles in tow must be
fol
lowed. Detailed towing instructions
are available at your Chevrolet
dealer. Your Vega may be towed on
all
four wheels, at speeds of less · than
Page 47 of 87
Downloaded from www.Manualslib.com manuals search engine 35 mph, for distances up to 50
miles, provided the driveline, axle,
transmission, and steering system
are otherwise normally operable.
Use only towing equipment specifi
cally designed for
this purpose
following the instructions of the
towing equipment manufacturer.
A separate safety chain system
must
be used for such towing and
steering must be unlocked, trans
mission in neutral and the parking
brake released. Attachments must
be made to main structural mem
bers of the car. Do not attach to
bumpers or associated brackets.
Remember that power brake and
power steering assist will not be
available when engine
is inopera
tive.
Recreational Towing
Vega models with a manual 3-
or 4-speed transmission may be
towed (with propshaft installed) be-hind
another vehicle
as a "dinghy"
at freeway speeds if additional SAE
80
or SAE 90 Gear Lubricant is
added to the transmission. This can
be accomplished · by removing the
filler plug and installing a
900-;.2
inch pipe street elbow fitting and
adding one quart
(2 lbs.) of SAE
80
or 90 Gear Lubricant. Use the
filler plug to cap the elbow fitting.
The additional lubricant will have
no adverse affect to the transmis
sion during normal use of the
ve
hicle and may be left in the trans
mission.
EMERGENCY STARTING
A car with a discharged battery
may
be started by using energy
3-2
from a battery in another car
called "jump starting".
NOTICE: Do not push or tow this
vehicle
to start. Damage to the cata
lytic converter and/or to other parts
of the vehicle may result.
Jump Starting
Jump starting may be dangerous
and should
be attempted only if, the
following three conditions are met.
If they are not,we strongly recom
mend that you leave the starting to
a competent mechanic.
• The battery in the OTHER vehi
cle must
be 12 volt and nega
tively grounded,
like the one in
THIS car. (Check the other car's
owner's manual to
see if it is.)
• The battery in THIS car must be
equipped with flame arrestor
vents (like the original-equip
ment Delco Freedom battery)
Page 52 of 87
Downloaded from www.Manualslib.com manuals search engine NEVER use gasoline, nail polish
remover or acetone, lacquer
thin
ners, bleaches, etc. Some basic
steps should be remembered
l;>efore
the cleaning is attempted:
1. Remove stains as. quickly as pos
sible before they become "set".
2. Use a clean cloth or sponge and
change to a clean area
fre
quently. (A soft brush may be
used if stains persist.)
3. Use solvent type cleaners in a
well ventilated area, also, do not
saturate the stained area.
4.
If a ring should form after spot
cleaning, the entire area of the
trim assembly should be cleaned
immediately.
5. Follow instructions on the label
of the cleaner.
Cleaning General Soilage
or Water Spots from Fabric
Type Trim with Foam Type
Cleaner
G.M. Multi-Purpose Powdered
Cleaner
is excellent for this type
cleaning and for cleaning a panel
section where a minor cleaning ring
may be left from spot cleaning.
Vacuum area thoroughly to
re
move excess loose dirt. ALWAYS
clean a full trim assembly or com
plete trim section-mask adjacent
4-2
trim along stitch or welt liiles. Mix
Multi-Purpose Powdered Cleaner
in strict accordance with directions
on label of container
___ mix propor-
tionally for smaller
quantities/USE
SUDS ONLY ON A CLEAN
SPONGE or SOFT BRISTLE
BRUSH-DO NOT
WET FAB
RIC EXCESSIVELY OR RUB
HARSHL
Y WITH BRUSH. IM
MEDIATELY AFTER CLEAN
ING WIPE OFF ANY CLEANER
RESIDUE WITH SLIGHTLY
DAMP ABSORBENT TOWEL
OR CLOTH.
IMPORTANT
IMMEDIATELY AFTER WIP
ING, FORCE -DRY FABRIC
WITH AIR
HOSE, HEAT DRY
ER OR HEAT LAMP. (Use cau
tion with heat dryer or heat lamp
to prevent damage to fabric. )
When trim materials with a sheen
or luster finish are dry, wipe fabric
lightly with a soft, dry clean cloth
to restore sheen or luster.