1976 CHEVROLET VEGA seats
[x] Cancel search: seatsPage 7 of 87
Downloaded from www.Manualslib.com manuals search engine Door Locks
Front side doors can be locked
from the inside by depressing the
passenger guard door lock buttons
located
on the upper door panel.
All doors can be locked from the
outside by first depressing the door
lock button and closing the door.
The doors can also be locked by
using the key.
All models have as a standard
safety feature overriding door locks.
When the doors are locked, the door
latch mechanism
is inoperative, pre
venting inadvertent opening of the
door by movement of the inside
handle.
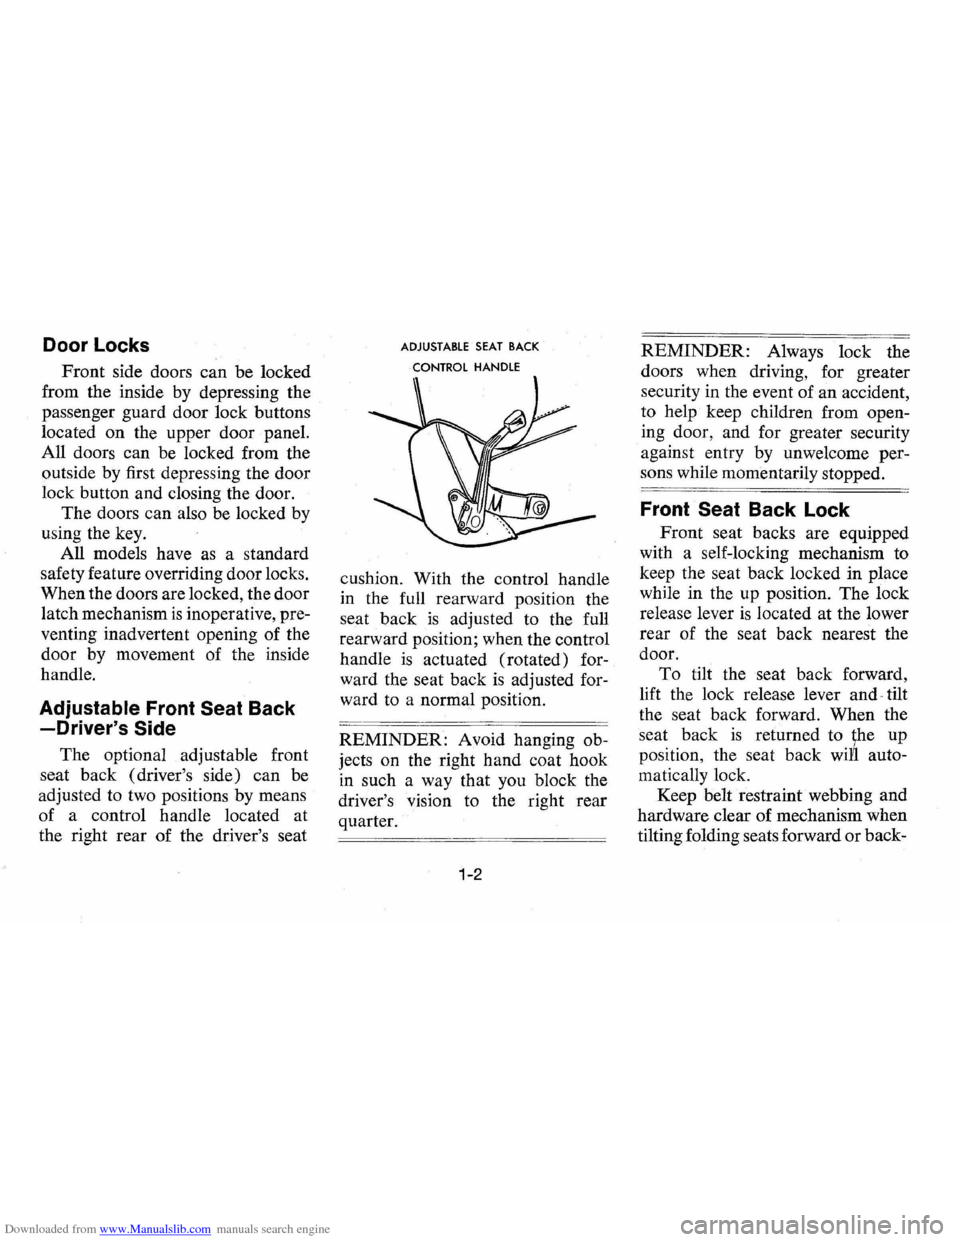
Adjustable Front Seat Back
-Driver's Side
The optional adjustable front
seat back (driver's side) can be
adjusted to two positions by means
of a control handle located at
the right rear of the driver's seat
ADJUSTABLE SEAT BACK
CONTROL HANDLE
cushion. With the control handle
in the full rearward position the
seat back
is adjusted to the full
rearward position; when the control
handle
is actuated (rotated) for
ward the seat back
is adjusted for
ward to a normal position.
REMINDER: Avoid hanging ob
jects on the right hand coat hook
in such a way that you block the
driver's
VISIOn to the right rear
quarter.
1-2
REMINDER: Always lock the
doors when driving, for greater
security in the event of an accident,
to help keep children from open
ing door, and for greater security
against entry by unwelcome per
sons while momentarily stopped.
Front Seat Back Lock
Front seat backs are equipped
with a self-locking mechanism to
keep the seat back locked in place
while in the up position.
The lock
release lever
is located at the lower
rear of the seat back nearest the
door.
To tilt the seat back forward,
lift the lock release lever
and" tilt
the seat back forward. When the
seat back
is returned to ~he up
position, the seat back
wn1 auto
matically lock.
Keep belt restraint webbing and
hardware clear
of mechanism when
tilting folding seats forward
or back-
Page 8 of 87
Downloaded from www.Manualslib.com manuals search engine wards, to help prevent damage to
these belt systems.
Manually Operated
Front
Seats
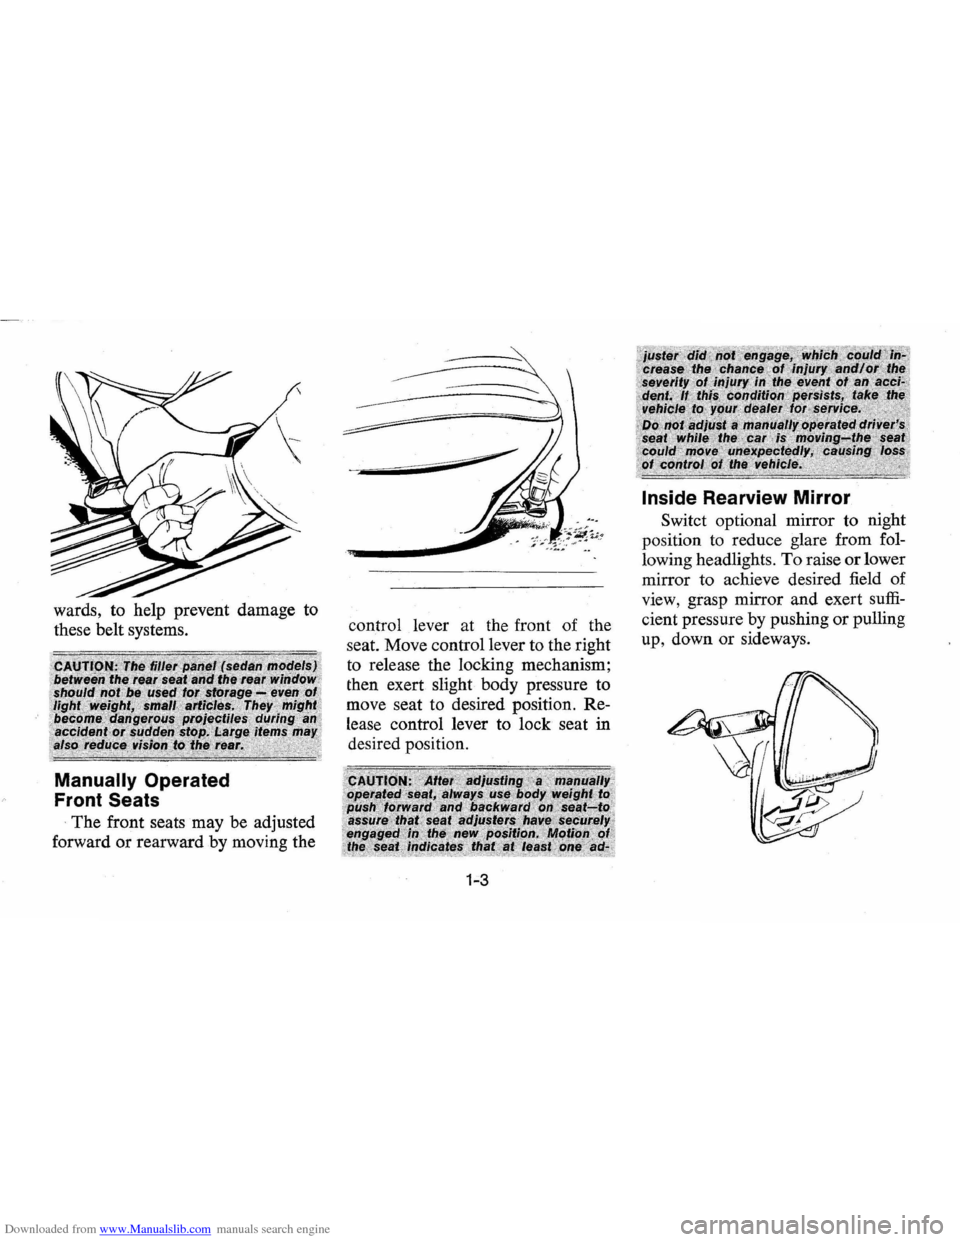
The front seats may be adjusted
forward or rearward by moving the
~---
control lever at the front of the
seat. Move control lever to the right
to release the locking mechanism;
then exert slight body pressure to
move seat to desired position. Re
lease control lever to lock seat
in
desired position.
1-3
Inside Rearview Mirror
Switct optional mirror to night
position to reduce glare from fol
lowing headlights .
To raise or lower
mirror to achieve desired field of
view, grasp mirror and exert
suffi
cient pressure by pushing or pulling
up , down or sideways.
Page 27 of 87
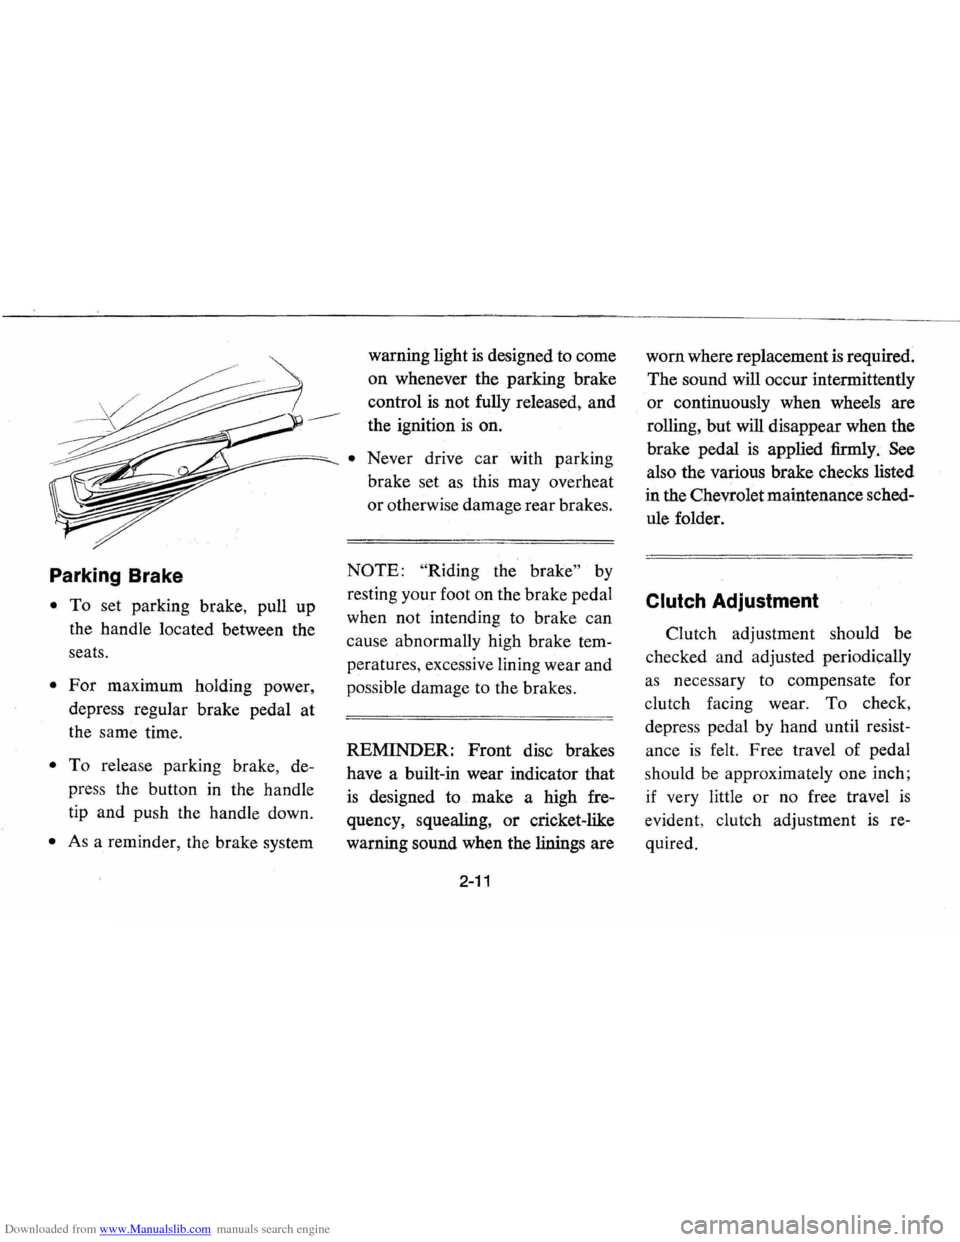
Downloaded from www.Manualslib.com manuals search engine Parking Brake
• To set parking brake, pull up
the handle located between the
seats.
• For maximum holding power,
depress regular brake pedal at
the same time.
• To release parking brake, de
press the button in the handle
tip and push the handle down.
• As a reminder, the brake system warning
light
is designed to come
on whenever the parking brake
control
is not fully released, and
the ignition ·
is on.
• Never drive car with parking
brake set
as this may overheat
or otherwise damage rear brakes.
NOTE: "Riding the brake" by
resting your foot on the brake pedal
when not intending to brake can
cause abnormally high brake tem
peratures, excessive lining wear and
possible damage to the brakes.
REMINDER:
Front disc brakes
have a built-in wear indicator that
is designed to make a high fre
quency, squealing,
or cricket-like
warning sound when the linings are
2-11
worn where replacement is required.
The sound will occur intermittently
or continuously when wheels are
rolling, but will disappear when the
brake pedal
is applied firmly. See
also the various brake checks listed
in the Chevrolet maintenance sched
ule folder.
Clutch Adjustment
Clutch adjustment should be
checked and adjusted periodically
as necessary to compensate for
clutch facing wear.
To check,
depress pedal by hand until resist
ance
is felt. Free travel of pedal
should be approximately one inch;
if very little
or no free travel is
evident , clutch adjustment is re
quired.
Page 45 of 87
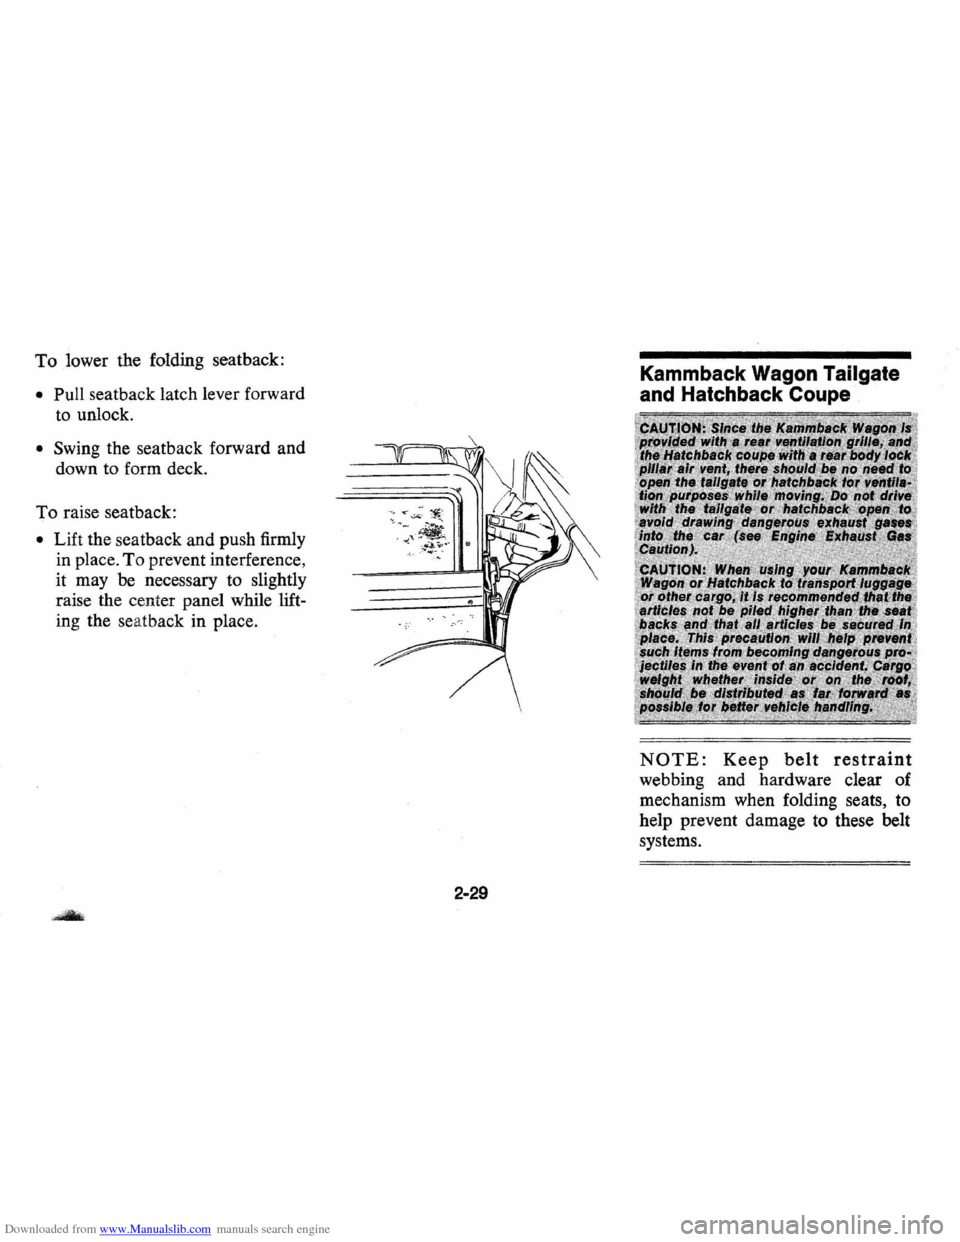
Downloaded from www.Manualslib.com manuals search engine To lower the folding seatback:
• Pull seatback latch lever forward
to unlock.
• Swing the seatback forward and
down to form deck.
To raise seatback:
• Lift the seatback and push firmly
in place . To prevent interference,
it may be necessary to slightly
raise the center panel while lift
ing the seatback in place.
2-29
Kammback Wagon Tailgate
and Hatchback Coupe
NOTE: Keep belt restraint
webbing and hardware clear of
mechanism when folding seats, to
help prevent damage to these belt
systems.
Page 58 of 87
Downloaded from www.Manualslib.com manuals search engine Part Number Size Description Usage
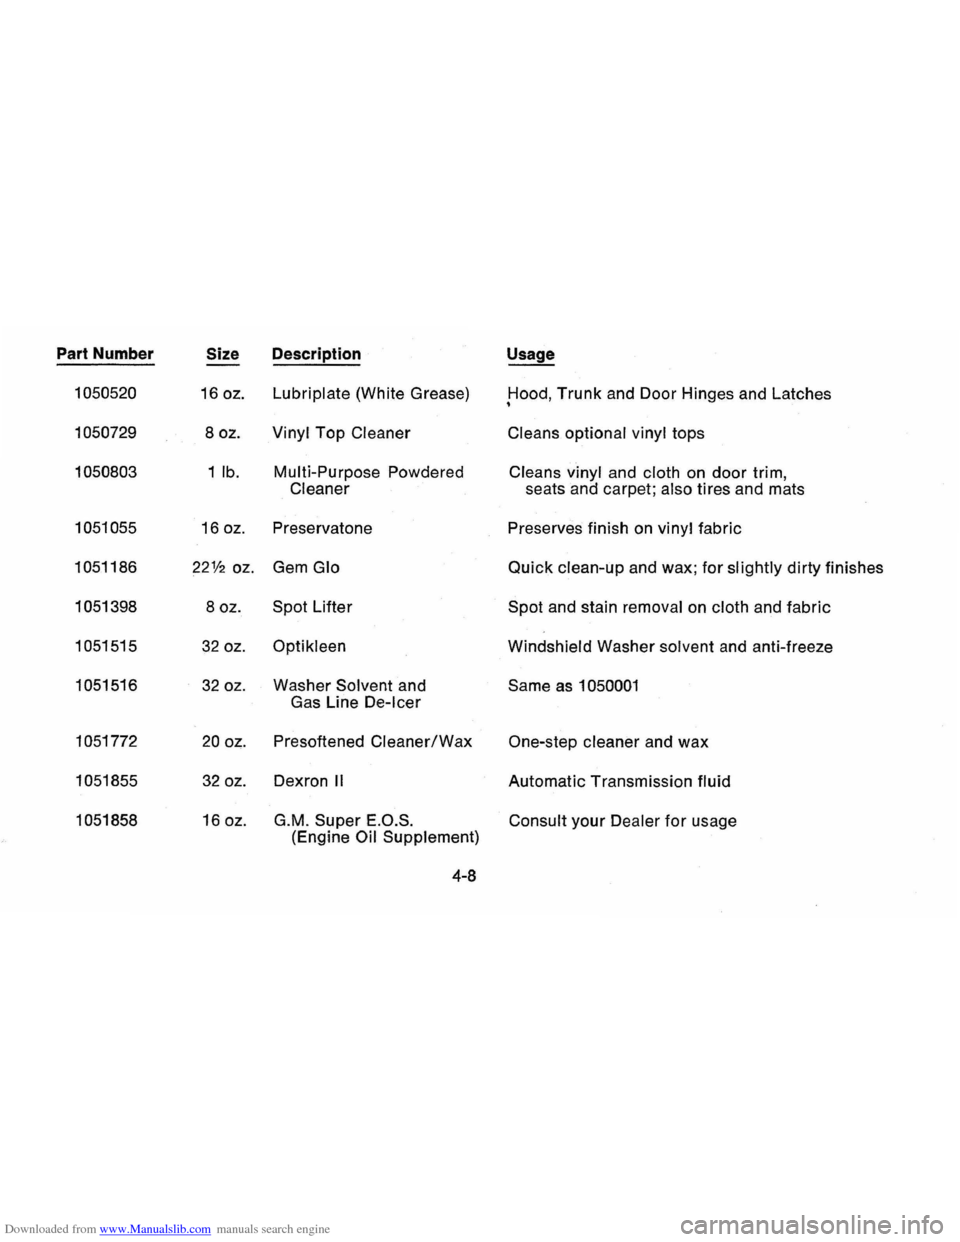
1050520
16 oz. Lubriplate (White Grease) Hood, Trunk and Door Hinges and Latches •
1050729 8 oz. Vinyl Top Cleaner Cleans optional vinyl tops
1050803 1
lb. Multi-Purpose
Powdered
Cleans vinyl and cloth on door trim, Cleaner seats and carpet; also tires and mats
1051055 16 oz.
Preservatone Preserves finish on vinyl fabric
1051186
22112 oz. Gem Glo Quick clean-up and wax; for slightly dirty finishes
1051398 8 oz. Spot Lifter
Spot and stain
removal on cloth and fabric
1051515
32 oz. Optikleen Windshield Washer solvent and anti-freeze
1051516
32 oz. Washer Solvent and
Same as 1050001 Gas Line De-Icer
1051772 20 oz. Presoftened Cleaner/Wax One-step cleaner and wax
1051855
32 oz. Dexron II Automatic Transmission fluid
1051858 16 oz. G.M. Super E.O.S.
(Engine Oil Supplement) Consult your Dealer for usage
4-8
Page 63 of 87
Downloaded from www.Manualslib.com manuals search engine TRANSMISSION ITEMS
Automatic Traiismission
Fluid Level
Recommendations
Use automatic transmission
fluids identified with the mark
DEXRON®-II available from your
Chevrolet dealer or local service
station.
Check the fluid level at each en
gine oil change period.
Automatic transmissions are fre
quently overfilled because the fluid
level
is checked when the fluid is
cold and the dipsick indicates fluid
should
be added. However, the low
reading may be normal since the
fluid level will rise
as the fluid tem
perature increases. A level change
of over
% inch will occur as fluid
temperature rises from
60° F. to
180° F. (16° C. to 82° C.)
Overfilling can cause foaming
and loss of fluid through the vent.
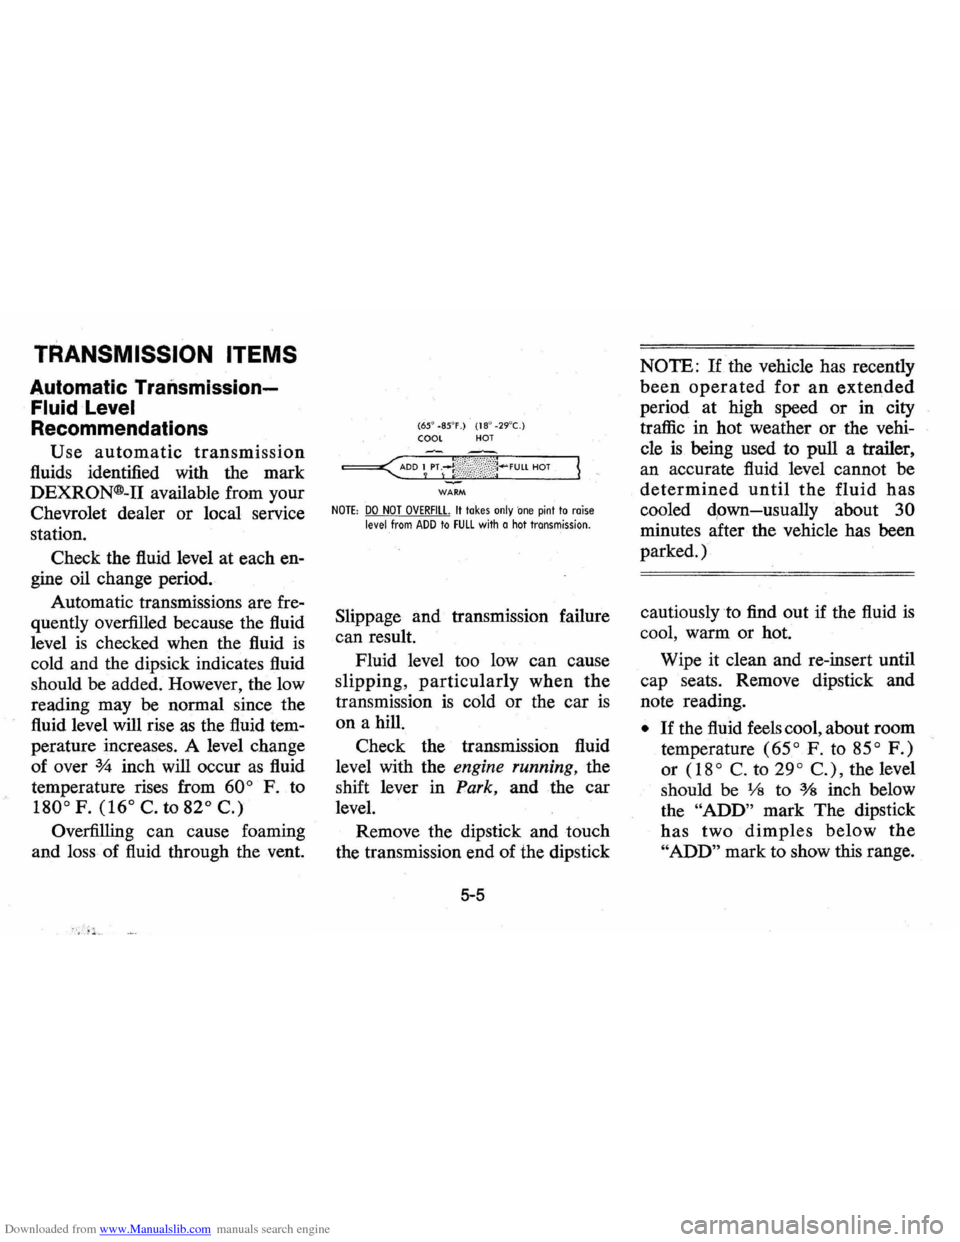
(65' -85'F .) (18 ' -29'C.) COOl HOT
WARM
NOTE: DO NOT OVERFill. It takes only 'one pint to raise level from ADD to FUll with a hot transmission.
Slippage and transmission failure
can result.
Fluid level too low can cause
slipping,
particularly when the
transmission is cold or the car is
on a hill.
Check the transmission fluid
level with the
engine running, the
shift lever in
Park, and the car
level.
Remove the dipstick and touch
the transmission end of the dipstick
NOTE: If the vehicle has recently
been operated for an extended
period at high speed or in city
traffic in hot weather
or the vehi
cle
is being used to pull a trailer,
an accurate fluid level cannot be
determined until the fluid has
cooled dpwn-usually about 30
minutes after the vehicle has been
parked.)
cautiously to find out if the fluid
is
cool, warm or hot.
Wipe it clean and re-insert until
cap seats. Remove dipstick and
note reading.
• If the fluid feels cool, about room
temperature
(65° F. to 85° F.)
or (18° C. to 29° C.), the level
should be
Vs to % inch below
the
"ADD" mark The dipstick
has two dimples below the
"ADD" mark to show this range.