1974 FORD CAPRI bonnet
[x] Cancel search: bonnetPage 49 of 205

:as::.w.'q
48 Chapter 1 Engine
110 Routine '!lain!cnanc!!
At the 1I11Clv"ts specifIed III Ihl! ROutlll!! M"inlcni'lnce sectIon in thO !rom althe mil"l).11 cnlfy out the followmg procedures.
ClwlIgc ollgiflO oil. reflew oi/Ii/fer t/lld clean oil filler cap 1 Rdo, 10 S()C\'OIl 2
Check illld <1r/jllsl vMvc c/c,7f<1nccs 2 Rcfe. 10 Scellon 89
TigMt'lI mll;( IlliIlldold hollS 3 RP.1110VU Ihe ;", Llr:"llcr ;unl lI!Jh1cn the Inlet rlIi'1ll,fotd holts 10 Ill" spccll",d ,ollluO wIlh .oleumc!! to Chapter 3. On comple\lon re lu the au deane.
R(JIII.'w Ihe cmllkc'ISf! l.'mission v,Jlve " Ad", In SIl<:\lUIl 7
41 Major operations \lOssi!>lo with (lilgine in car
T 10" lollow,n!) ""'1111 Ot",,;otlOIlS Illay he r.'If.icd Ollt wlthou, ""''''VIII!lllw';!)!luH!
(.,) /r,·", .. vmy .1",1 "'/'/flll!! III!! ,:ylmd ... , "1.'01(1", (II) {,"'IIIIJVIlIf/ tllld "d'I/IIIO (/1<: /ltmll!l 1I,·.ItS (i:) 11,:IIIIIVIII.'I.IIItI,dll/III!/ /IIt] I!II{/IIIL' 11II1I/11!""I1/III!I~ (II) III'II"'~IIIY .",,1 "-'''/lilly/he Im!lIll~'I!It];,,""" ",;" "'111"'/"'.'1 (,') /{"/IIIIVHI!I .mlf ,,-,"II"'II,IIt] (;;/II'S/l."1
42 M" jot Ollcra lio ns requiring engine removnl
The followll1~lll1alm ope"II'OIiS may be c,lIIlI~d OUI allC! ,cmoval of Ih" !!II!I"W
(01' /r,''''''''''''! ,mlf ,,:III/my llit] fly"'/md (b) 1,'I;"""'III!I ;lIId 1I:"lIiII!! lIlt] II.'''' "';1111 '''.·;IIIIIY vII sl~.ll (,;) f,',:/lWVIII!1 11",1 ,,:hl/myllll" ,:,.mAr:;,.w stlll'p· (,I) 11,·wIIV"'!1 .md It"/tflmyl/t,) 1.-"/II,,.t:I"'!1 tOri 1t~·;"'''!1 (,.) /1,.",,,,.,,,.'1 .md II-,!t/lmylll,) ,,,sl,"'.~ .1111/ ,;ullltL'd"'!1 IUds II) ".,.""",,,,.'1 .lIId tdll/myll"-' "II /lllillfl (.'/) f'"'·"'''V''''f ,11101 td'IIIII,,'''t] (I.mAsh .. ", ;/lul",;,,,, ht];mllYS fli) J,',·IIU1V'It!l .1111111.'1t1/1II!I fl,t, C,lll/.f/"dl 1141.<111."5
A lth""!lh 'I'~ 1)(,·.~d,le 10 1(~II1()~clhe SUI"P W'lh lhc C"gllHlII' the ca'. I! IS 1(":o""",·,,~I,,d thai 101 ,Illy ope"u,olls wh'ch .elt""e Ihe .emov,d 01 IIH: ~""'P. ~,,<:h ;,~ the ,eOllov,ll nf Ihe CI,'nksh;lfl alllll"o c!l(II)c
43 Mctho(ls of engine removal
The ""!I""~ 'n"V he hfWd oul e'the. 0'1 us own u. III u."t wuh Ihe I""'~""!>~'{)" On I1lo.I\lIS l'I1t.'
44 Engi"e -rcmoval
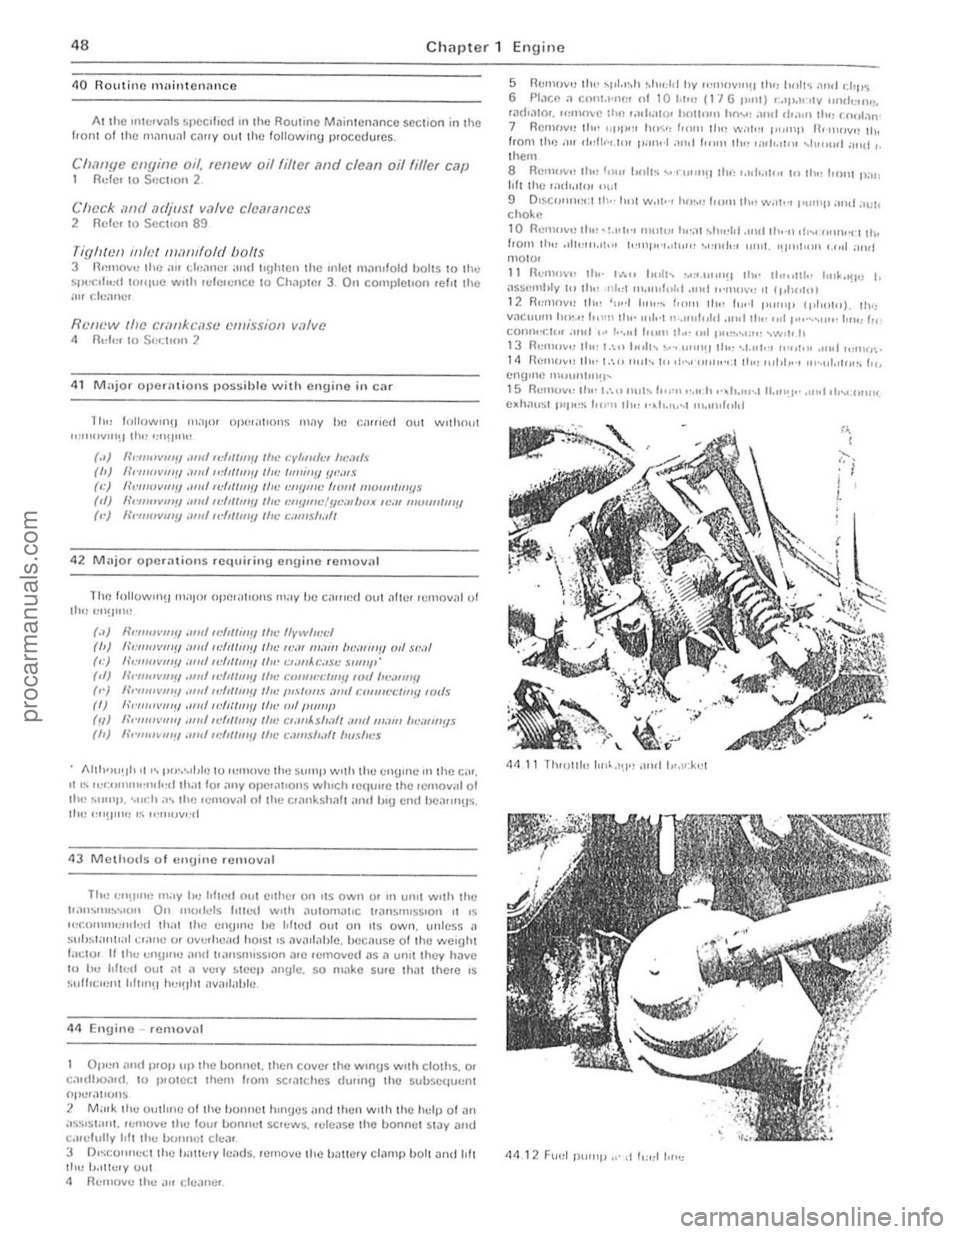
Open imd p.O)) up Ihe bonnet lhen covel Ihe w'ngs w'lh CIOlhs. o~ <:n.(l11O.1,d. 10 Il,olecl Ihcm hom scr
'iI(I'
8 flc"'"~,, Ih., I",,, hllll~ ...... · '"II'!I th", """.11',, til Ih" '''UII Ila" hfl Ihc "1(10,,10, ""t
\) D,sc""''',,:1 Ih,· ',,11 w",.·, hm,,, 1"111' Ih" w"tt·, 1"""11 ;",.t a"I, cho~e
10 fle"",,,,, tht! -l.lI"·' ""'10' h,·;11 ~h,,'ld .11,,1 II"·,, ,I,,, '''''''·'·1 tho I,om Ih" ,,11"""'\0 " t'·IIIt"·'."'"'' '.""d,·, 111"1. "1"'''"11 1./,,1 ;111,* mOIO'
II R"IIl'l"" Ih,· ...... " huh ... "''' ~""'!I th.· 11""nl,· h"k"!IU I,
aSS(lmhly to Ih" .1\1<'1 ",.",,1,,101 .lIlfl "·"If"·,, It Ipl'Il.IIt 1 2 fl'''''
114 12 Fuel j)1""p ". d 1,,0;1 I,"t;
I;" ,
1:-,
!
~ ,
procarmanuals.com
Page 163 of 205

162 Chapte r 10 S uspension and steering
)
Fin· 10.6 Front
@",.,i
, 5
Y 6
hub cOnll)oncnts (Sec 3)
12
1 0,1 seal 7 Diller be,?li/!{J Iwck 2 IIIlIcr bcaring wee 8 GUiN Iwmitlfl filct' 3 Inner bemiJlg /I,?ck 9 ThlllS! wilslwf 4 Screw 10 NIII 5 Disc 11 Sf"il (lin 6 H", 12 01151 C.1jJ
4 Remove the split pin frorn the nul rC\;linCf and undo the adluS\ing nul from the stub a xle. 5 Wilhd,nw the thr ust washer and the outer tapered he,..ing. 6 Pull off the complete hub ;111(1 disc ilsscrnbly ffOIl11hc s tuh tlXlc. 7 To refit locale the huh tlSscmb ly on the stub il~lc <'Ind slide on the outer hc"rinu nnd II1
1 0 Rei" the nut ret;)u)Cr SO th~t the spill pUl holes ~re ~lIg"ed. Fit a
v split pin
2 Cmelully prise out the gre.lse senl Irom the b~ck 01 the hub
Scoop out the grease 110m inside the huh imd wash clea". S Drive the new bearing tr
glease well into th e beiu ings. lully p
Front Suspension strut _ renl0v
Apply the handbrake then jack up the Iro"t of thc car ilnd SuppOrt r ViC S\Jnds, Remove the roadwheel.
.lel1love th e front hub with referen ce to Sec lion 3,
56 Front SllSI',,"~'nll Slrut uppe, moullt"l{j
5.7 Lowellnl) 110" f'o"l SUSrlt''' S'OIl ~lr"tlro"'ll"der the wheel a,ch
I !:'~
!; ... ~
-;;
3 On e~rly n,,,dds. Icmove the "\lI d brake p'pu ""d dew ch Ihe flex'hle hose 1,0 '" the br.1ckct on thu strut (, f neccssilry ruler to Ch"p ll'r 9 ).
4 OlsconneClilHlu.u:k rod l'nd from the steer;ou n'm (Sect ion 14) 5 Extrncllhl' spirt p,,'
tool.
6 Workrng Ul1d'; r Ihe bonnet. un screw the three mounting nuts sec(Jl iog the 51'Ul 10 the wheel arCh (photo). Where applicable note the location 0 1 Ihe ilce ele r" tor cnble Slipporl bracket be ne3th one of the
nulS .
7 Lower the stru t ~ssembly from undl'r the wheel arch (photo).
8 Refll,!n\) '5 i' reve rsal 01 removal. hut ti\)htcn all nuts 10 Ihe
specified torq(,e fl"fe r 10 Section s 14 and 3 as necessary.
6 F ront coil sp ring - removal and refitting
Note: In Off"" /0 ,(:mo ve Ihe corl .~"{!finy ffOIl! the strut it writ be neccssa,y /0 ub/."" .1 sui/able sP"".
Page 174 of 205

Chapter 11 Bodywork and fittings
Contents
i'ldIUS\
Specifications
Torque w rench settings Se.llbel ls :
) pillar .\ lIoor .............. ............. .......... _ ._ ..... .. . Openlnu rcar qUilrter glass tougle 10 C pIllar.
Heal"r cOlllrols removill im(1 rchUrn!! lIemcr Willer villve (heilvy dull' he;II'~r) rcrnoval and rel,ttrng I"tc"or m ,,,or -remov,,1 and refrtllng . LOild spnce I"", pifflel -refl1ov~1 and refillmu M,l,nten;mcc bodywork ,1nd underfr;lflle M;r,nICnnnce • upholstery imd C;Hpets Millo r body dilm
NIH
2010 30 35 10 42 4.5
Ib l It
15 to 22 26 1 0 31 33
41
" 38
" 3 4 G 5 23 ,
22 2 3G 39
" 35
33
27 28
" 11
"nd 19 10
----------------------------
.. !i
procarmanuals.com
Page 177 of 205

)76 Chapter 11 Bodywork and fitting
General description
The body is of all-s teel welded construction with impact ilbsorbing hont Dnd rear sections . Anli-burSllocks nrc lilted 10 the doors, ilnd the
t ailgDte is supponcd by \J
AI the in1erVills speCIfIed in the Routine M"IIl\cnilnCe section in the front 0 1 the nl
Check underbody protective coatiog 5 W,th the CM supponed on i1xle stilnds. check the cond,tlon 01 the un(lelbody protcctivc coating. i1nd wherc neceSSilry clean
M,,;ntcll
Wily to remove any aCCUIllUI,lted mud whIch WIll retillll mOlslu re
Mats and C
very line culling pils te. Finally, opply wax polish. WhNe the scrotch has penctrDt(ld right through to the metill of the bodywork. causing the mowl \0 rust. iI d ifferent repa ir lechnique is
required. Remove any loosc rus t fronl the bottom 01 the scra tch with a penknile. then apply rUSI inhibiting paint 10 prevent the lormation 01 rust in Ihe future. Using n rubber or nylon appliCiltor fill the scratch with bodystopper paste. II requ ired. this paste Ciln be mixed with cellulose thinners to provide a very thin paste which is ideal for filling narrow scratches. Before t he stopper·paSI(l in the scratch hardens. wrilp il piece 01 smooth COllon rJg i1round the lOp 01 J linger. Dip the finger in cellulose thinners and then quickly sweep it i1CIOSS the surlace of the 5topper-pJste in the scratCh: this will ensure tha t the surfilce 01 the stopper,pilste is slightly hollowed. The scratch can now be p
first wsk is to pull the dent out, untrl t he affected bodywork almost
procarmanuals.com
Page 187 of 205

Chapter 11 Bodywork and fitting
ilpphcolble. remove Ihe lugg,1ge COlllpillllllent book. Cilrefully prise ilwilY the trim pnneL 5 Ref,uing is the reverse of the rernovnl p,ocedure, but on cOll1pl elOoll, tighten Ihe semuelt bolt to the specif ied torque.
23 OPI)rlirlg reM qUMter glass ilssembly -removal and refittin g
flemove Ihe trim covers f,olll Ihe 8 -pilnel and the qUilrlCr willdow ~U"O\rr10 (1,un) Where ilpplicilble first remove Ihe reM seillbelt inerl i.) r",,1 (S"r.lro" 36) 1 R(!lllove Ihe two toUUfe rewinrn\j screws ilnd ,emove Ihe tog\jle (,om Ihe le,lI C'p ,lI;u
:I Hemove Ihe WIIlO OW frillllC wemhe'Slrip then d,ive oul Ihe 1"~t~Jlc-(() cill!:h relollnin" pill ilnd remove Ihe IOggle . <1 flr:fnllll!J IS Ihe reverse of the reillovill plOcedure, but luhricale the II p,t L" IUIl!I'! P'VOIS With il SOilP 50ltl1ion prior 10 hHrIlO Ihe Ulass :r~~""'''ty AdJusl Ihe IO!JOlc. or w Cillhe rS H'l) lIan\je. to ilcl\leve 8 to 10 n (03100 <1 In) !Flp hetween Ihe glass olnd the WeillherSlr,p flan\je.
I 'Uhl"" Ihe to!I!Jh ! screws to th e speclfred lorque.
211 Load spa,-e Irim panel -r e 'noval nnd re fitting
H",,,,,v,, Ih" ,(!ar
25 BOil net release c(lble -r e m ova l an d re fitting
I" It", <:v<:nl 01 Ih!) rdcn~e cilhle hreilking. it is posslhle 10 rerilOve Il,,, ,.Hir.llor !II ,lie to Otu""le Ihe lock spring hy hil"d. Grrllc rCrllov,,1 'S oI""tl With II, S,,,:tron 9. hul SUIC(! ii's nOI poss,hle to open Ihe bonnet. II WIlli", 1""11.1 a Iotlle d,lfl(;ull (lilou!lh nOlm,poss,bl(!) 10 WI in ilCCCSS 1011", 111'1>' " "~1aU""\I scrc ws. In """()VI~ II,,! ,,,ICilSC cabl!) II, normal CllcomS I,l n ces . rcn,ov!) Illc ,;,11" "Pl'u, cowl plain :1 I,,,,,, "'s,de IIie ca r. !(!1Il0VC bOlh Ihe cl(!vrs pins and tire sprlllg and ."""cl lire II!h,a se cahle fro", Ihe control le vcr (photo) II Sl;":~,',, 11 1I~ caht(! adJustcr elll"'p and release the cil bl!) /rO'll Ih!) h",k lock ~P""!I !-, n,,,,,,,ve It", c;,IJle "'''I,nn'!) clrps, th(!n plllllh(! cable th'oll!Jh the rI .... 1 1'"",,1 to re"'ove 11. I; n"frltrrl!1 01 Ihe cilhle IS essen li,lll y th(! 'eV(!rse of tir e r(!Ill oval PI(r<:,·rtUI". "dJIJ~t,ng ;1$ "(!cess.l!y. t o rCrilOve any cable slac k. For
•
Fig. 11 .1 4 QUMter windo w fixing screws _ .. rrowed (Sec 23)
lurllH), ,,,fonnatlon ou thiS. [(:1", II) pn,a\jlaph 6 of Ihe follow,,!U Scctron
2 6
Bonn et -removill, refitting and ildjuslnlCnt
Open 11l(! honne t 10 ,ts fulieSI eXlflnl. USrrlU n suiwble nnplemen!.
scrrhn .1 Irne around t he hrn!Jes, Remove Ihe screw seCUflllg Ihe enrlh le.ld where ,1ppircnble (photo).
2
Rcmove Ihe Iwo holts ilnd wnshers secu"no ench SIde of Ihe
bon"el 10 ItS hrnoes (phOIO)_ W'I" ass,swnce, , t C,ln IlOW he lofted off. 3 flefm"'(J IS ,) reve,s.,1 of remov,, 1 jlrocedure Before lullV "ulHenulU Ihe seCllri ll!1 holts, ensule Ih
y .
.. . . . ... .....
," . .. ~c.<
r ,:i~
;
.
' . ,., I ~.
26, 1 Removing bonnet enrth lead 26.2 Remov ing bonnel hinge boilS
procarmanuals.com
Page 199 of 205

)
Index
A
Accelerator cilble removal ilnd refining -14 shnft ilnd pedal removal and refining -75 Air cleaner removill Jnd ref,nrng cal buren or mod cis -68 fuel injecllon models -80
P rnator .,rushes inspecllon. removal and refilling Bosch -202 Femsa -203 Lucas - 202
dismantling and rcassembly -203
removal and refining -201 Antifreeze mixture -60 Automatic transmission descrip tion -122
B
downshift cable removal. refi11ing and adjustment -121 extension housing oil seal renewal -121 faull diagnosis -127
maintenance. routine -123
removal and refOlting -123
selector mechanism ildjustment - 126 rcmovill. overhaul ilnd refl11lng -125 speclflf:iltions -103 SI.1r1er IIlh'bilm/reVerse lamp switch remov
demister
noules reOlov
doms-178.180. 18210 185 face level vents removal and refItting -197 facia panel -188 fuel filler flap -188 heater -192 to 194. 196 10
uphOISlCry
and carpets -176 mirrors
-
192 open rem quarter glass assembly
removal and refitting -186
re~r qllMlcr trim panel removal and refitting -185 repi'lir millor damaue -178 minor damage -176 sent belts -191 seats -192 sunroof-189la 191 lailgate -180. 187. 188 torque wrench scuings -173 windscreen -180 Bodywork repair sequence (colour) -174, 175 Bonnet release c
Camshaft (3.0 litre engine) retitting -54 removal -50 Camshaft and camshaf t bearings examination and renovation 2 _8 litre engine -35
3 .0 litre engine -51 Camshah and front intermediate plate (2.8 litre engine) refilling -41 Capacities. general -6 Carburetlor (Weber) aulomat ic choke
adjustment -71 removal. overhaul and retitting -71
dismantling and reassembly -69 general -68 idling adjustment -73
procarmanuals.com