1974 CHEVROLET CAMARO warning light
[x] Cancel search: warning lightPage 6 of 85

Downloaded from www.Manualslib.com manuals search engine BEFORE DRIVING YOUR CAMAR 0
DRIVER CHECKLIST
Before Entering Car
1. See that windows, mirrors and
lights are clean.
2. Visually note inflation condition
of tires.
3. Check that area to rear is clear
if about to back up.
Before Driving Off
1. Lock all doors.
2. Position seat.
3 . Adjust inside and outside mirrors.
4. Fasten seat belts.
5. Check that warning bulbs light
when key
is turned to start
position.
6. Release parking brake (and see
that brake warning light turns
off) .
7. Be sure you understand your car
and how to operate it safely.
Keys
Two separate keys are provided
for your car. Each key has a differ
ent" cross section so that it can be
inserted only in certain locks.
• Key with square head
(stamped "J") -for ignition
switch only.
• Key with oval head (stamped
"K")-for all other locks.
fIiJJ
~===(iD
ALlOTHER~ LOCKS
3
The code number of each key is
stamped on the "knock out" plug
in the key head. Your Chevrolet
dealer removed these plugs and
placed them with the spare set of
keys in the special key envelope
that was given to 'you at time of
delivery.
For your protection:
• Record the numbers on the key
envelope and discard the key
plugs.
• Keep the key envelope in a safe
place such
as your wallet, Not
In The Car.
In the event the original keys are
lost, duplicates can be made by
your dealer
or a locksmith using
the key code information.
Be sure to lock the glove box or
console compartments and remove
the key from the car whenever it
is
necessary to leave the ignition key
with
an attendant.
Page 24 of 85
Downloaded from www.Manualslib.com manuals search engine FLOOR CONTROLS
Braking System
The service brake system is de
signed for braking performance
under a wide range of driving con
ditions even when the vehicle
is
loaded to its full rated vehicle load.
Power Brakes
• On cars with power brakes if
power assist to the brakes
is in
terrupted due to a stalled engine
or some malfunction, two or
more brake applications nor
mally can be made using reserve
power.
• If the brake pedal is held down,
the system
is designed to bring
the car to a full stop on reserve
power. However, the reserve
power
is partially depleted each
time the brake pedal is applied
and released. Do not pump
brakes when brake power assist
has been interrupted.
• When reserve power is ex
hausted, the vehicle can still be
stopped by applying greater
force to the pedal.
Parking Brake
• To set parking brake, fully de
press foot pedal at far left side.
• For maximum holding power,
depress regular brake pedal with
the other foot at the same time.
• To release parking brake, pull
"BRAKE RELEASE" lever on
lower left instrument panel.
• As a reminder, the brake system
warning light
is designed to glow
whenever the parking brake con-
21
trol is not fully released, and the
ignition
is on.
• Never drive car with parking
brake set
as this may overheat or
otherwise damage rear brakes.
NOTE: "Riding the brake" by rest
ing your foot on the brake pedal
when not intending to brake can
cause abnormally high brake tem
peratures, excessive lining wear
and possible damage to the brakes.
Page 25 of 85
Downloaded from www.Manualslib.com manuals search engine REMINDER: Cars equipped with
front disc brakes have a built-in
wear indicator that
is designed to
make a high frequency, squealing,
or cricket-like warning sound when
the linings are worn to where re
placement
is required. The sound
will occur intermittently or con
tinuously when wheels are rolling,
but will change or cease completely
when the brake pedal
is applied
firmly.
See also the various brake
checks listed in the Chevrolet main
tenance schedule folder.
Automatic Brake Adjusters
• Brakes on this car (except for
the parking brake) are self
adjusting, designed to eliminate
periodic brake adjustments .
• Drum brake adjustment is made
automatically
as the brakes are
applied while car
is moving
backwards .
• Disc brake adjustment is made
automatically with each brake
application.
• If excess brake pedal travel de
velops, drive alternately back
ward and forward several times
and apply brakes firmly in each
direction.
• See your dealer if normal pedal
travel
is not restored, or if there
is a rapid increase in pedal travel,
which could be a sign of other
brake
trOUble.
Clutch Adjustment
Clutch adjustment should be
checked and adjusted periodically
as necessary to compensate for
22
clutch facing wear. To check, de
press pedal by hand until resistance
is felt. Free travel of pedal should
be approximately one inch; if very
little or no free travel
is evident,
clutch adjustment
is required.
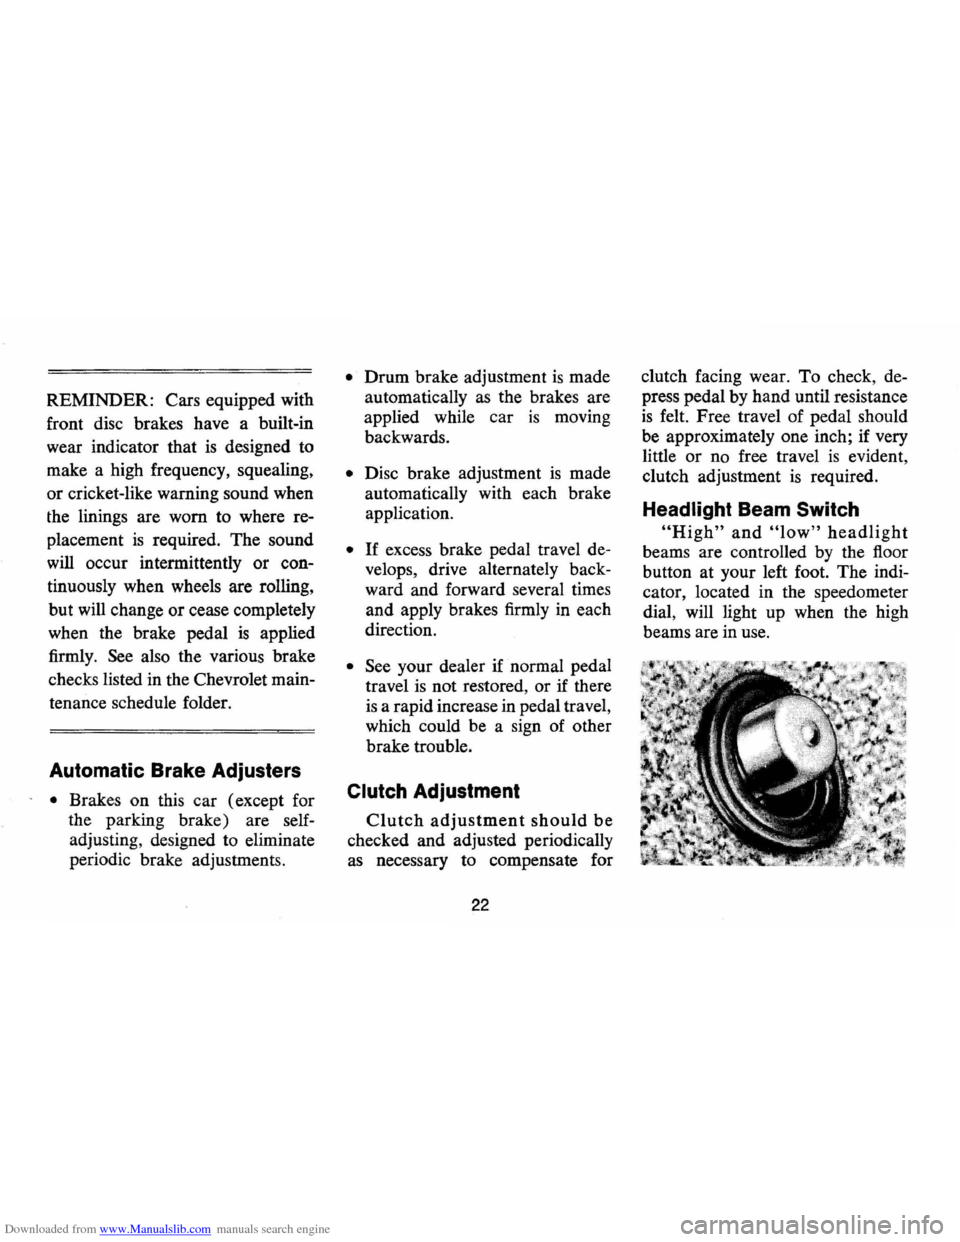
Headlight Beam Switch
"High" and "low" headlight
beams are controlled by the floor
button at your left foot. The indi
cator, located in the speedometer
dial, will light up when the high
beams are in use.
Page 26 of 85
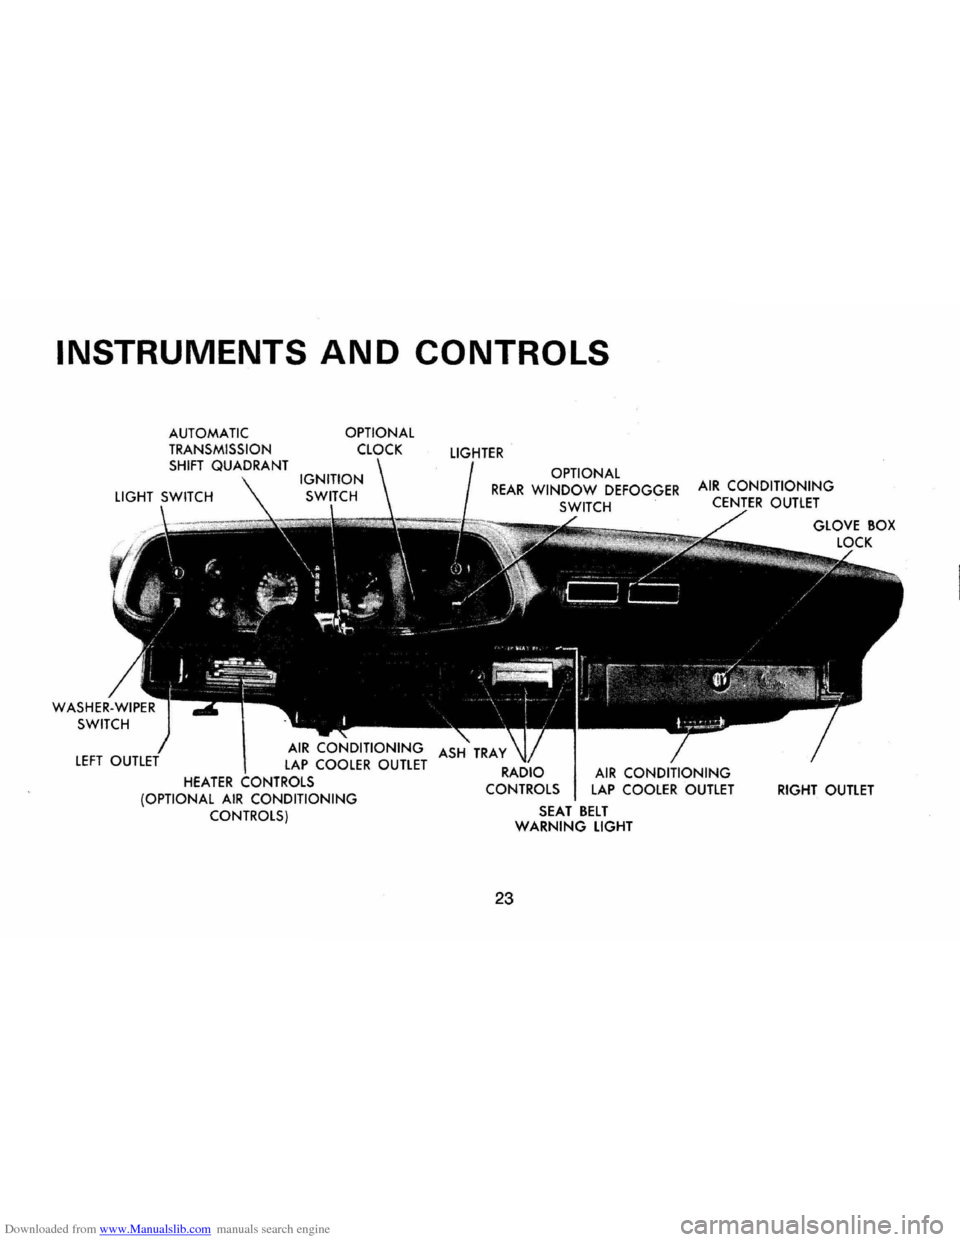
Downloaded from www.Manualslib.com manuals search engine INSTRUMENTS AND CONTROLS
AUTOMATIC TRANSMISSION
SHIFT QUADRANT
HEATER ,-,.., ... ,T,,,,",'
OPTIONAL
CLOCK
(OPTIONAL
AIR CONDITIONING CONTROLS)
LIGHTER
OPTIONAL REAR WINDOW DEFOGGER AIR CONDITIONING SWITCH CENTER OUTLET
ASH TRAY
RADIO
CONTROLS
23
SEAT BELT WARNING LIGHT
GLOVE BOX
RIGHT
OUTLET
Page 28 of 85
Downloaded from www.Manualslib.com manuals search engine Generator Indicator Light
The red light will go on when
the ignition key
is in the "on" posi
tion, but before the engine
is
started. After the engine starts, the
light should
go out and remain out.
If the light remains on when engine
is running, have your Authorized
Chevrolet Dealer locate and correct
the trouble
as soon as possible.
Engine Temperature
Indicator Light
This indicator light is provided
in the instrument cluster to quickly
warn of an overheated engine. With
the ignition switch in the START
position, the red
TEMP indicator
will light to let you know that it
is
operating properly.
When the engine
is started, the
red light will go out immediately.
It will light up at no other time
unless for some reason the engine
reaches a dangerously high oper
ating temperature.
If the light comes on
during extreme driving condi
tions, such as an extended idle, turn
off the air conditioner (if used) and
run the engine slightly faster than
idle speed with the transmission in
neutral gear.
If the light does not
go off within a short period of time
(1-2 minutes), then turn the engine
off until the cause of the overheat
ing
is corrected. Glance at the in
strument cluster frequently
as you
drive to see
if this light is on.
Brake System Warning
Light
The service brake system is de
signed so that half of the brake
system will provide some braking
action in the event of a hydraulic
leak in the other half of the sys
tem .
If the warning light labeled
"BRAKE, " located at lower left of
instrument cluster (speedometer
face), glows continuously when the
ignition
is on and after the brakes
have been firmly applied it may in-
25
dicate that there is a malfunction
in one half of the brake hydraulic
system .
On cars equipped with
front drum brakes, the light will
go out when foot is removed from
brake pedal.
• As a check on bulb condition
the light should glow with the
parking brake applied and the
ignition on. (Light
is also a
reminder to release parking
brake).
• The light should glow during
engine starting to verify that the
bulb
is operating properly.
• Have system repaired if light
does not come on during check.
• This warning light is not a sub
stitute for the visual check of
brake fluid level required as part
of normal maintenance.
If the light glows red:
• The parking brake control is not
fully released or,
• The service brake system is par
tially inoperative.
Page 39 of 85
Downloaded from www.Manualslib.com manuals search engine I n Case of Emergency
Four-Way Hazard
Warning
Flasher
• Use the warning flasher to warn
other drivers any time your
vehicle becomes a traffic hazard,
day
or night.
• Avoid stopping on the roadway
if possible.
• Turn on the hazard warning
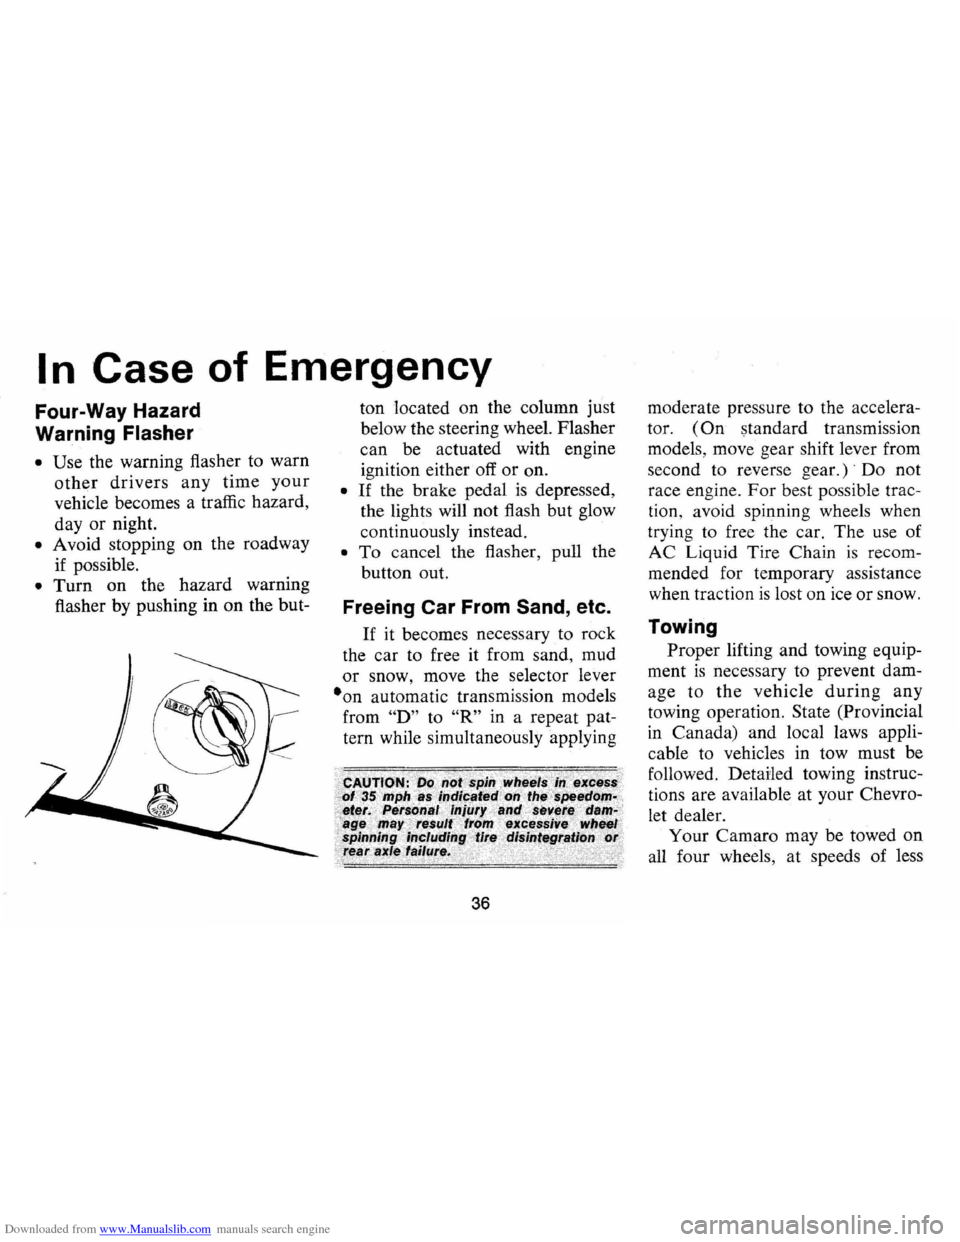
flasher by pushing in on the but- ton
located on the column just
below the steering wheel. Flasher
can be actuated with engine
ignition either off
or on.
• If the brake pedal is depressed,
the lights will not flash but glow
continuously instead.
• To cancel the flasher, pull the
button out.
Freeing Car From Sand, etc.
If it becomes necessary to rock
the car to free it from sand, mud
or snow, move the selector lever
·on automatic transmission models
from
"D" to "R" in a repeat pat
tern while simultaneously applying
36
moderate pressure to the accelera
tor.
(On standard transmission
models, move gear shift lever from
second to reverse
gear.)' Do not
race engine.
For best possible trac
tion, avoid spinning wheels when
trying to free the car. The use of
AC Liquid Tire Chain
is recom
mended for temporary assistance
when traction
is lost on ice or snow.
Towing
Proper lifting and towing equip
ment
is necessary to prevent dam
age to
the vehicle during any
towing operation. State (Provincial
in Canada) and local laws appli
cable to vehicles in tow must be
followed. Detailed towing instruc
tions are available at your Chevro
let dealer.
Your Camaro may be towed on
all four wheels, at speeds of less
Page 76 of 85
Downloaded from www.Manualslib.com manuals search engine FUSES AND CIRCUIT BREAKER:
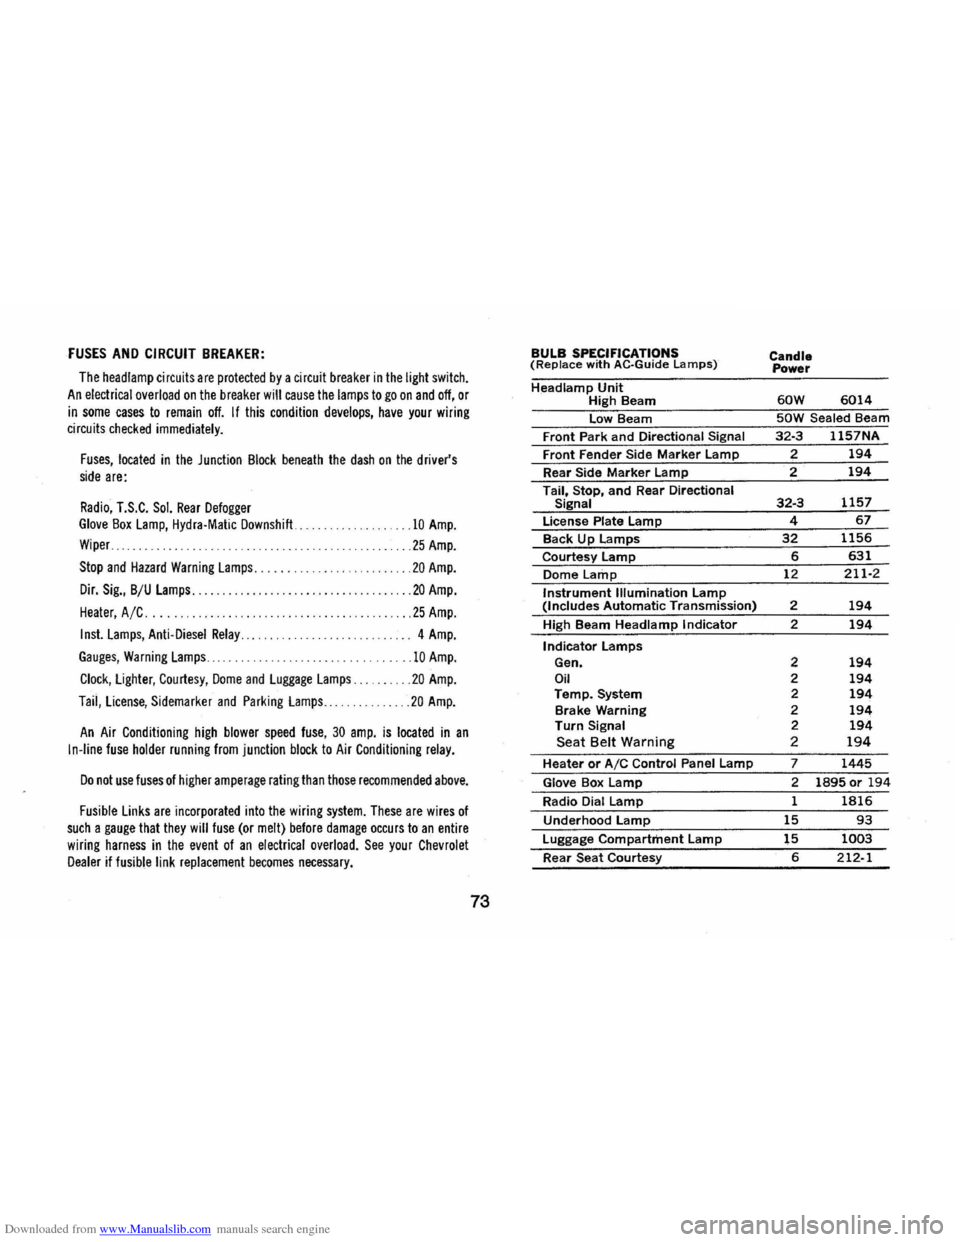
The head lamp circuit s are protected by a circuit breaker in the light switch.
An electrical overload on the breaker will cause the lamps to go on and off, or
in some cases to remain off. If this condition develops, have your wiring circuits checked immediately.
Fuses, located in the Junction Block beneath the dash on the driver's side are:
Radio, T.S.C. Sol. Rear Defogger Glove Box Lamp, Hydra·Matic Downshift ...
Wiper ..
.10 Amp.
... 25 Amp.
Stop and Hazard Warning Lamps. . . . . . ... . ........ 20 Amp.
Dir. Sig., B/U Lamps........... ............. ... .. . ... 20 Amp.
Heater, A /C .... . .25 Amp.
Inst. Lamps, Anti-Diesel Relay............. ....... . .. 4 Amp.
Gauges, Warning Lamps ......................... 10 Amp.
Clock, Lighter, Courtesy, Dome and Luggage Lamps. . .20 Amp.
Taii, License, Sidemarker and Parking Lamps ... ..... 20 Amp.
An Air Conditioning high blower speed fuse, 30 amp. is located in an
In-line fuse holder running from junction block to Air Conditioning relay.
Do not use fuses of higher amperage rating than those recommended above.
Fusible Links are incorporated into the wiring system. These are wires of such a gauge that they will fuse (or melt) before damage occurs to an entire
wiring harness in the event of an electrical overload. See your Chevrolet Dealer if fusible link replacement becomes necessary.
73
BULB SPECIFICATIONS (Replace with AC·Guide Lamps)
Headlamp Unit High Beam
low Beam
Front Park
and Directional Signal
Front Fender Side Marker lamp
Rear Side Marker lamp
Tail, Stop, and Rear Directional Signal
license Plate lamp
Back Up lamps
Courtesy lamp
Dome Lamp
Instrument Illumination lamp (Includes Automatic Transmission)
High Beam
Headlamp Indicator
Indicator lamps Gen. Oil Temp. System
Brake Warning
Turn Signal Seat Belt Warning
Heater or AIC Control Panel lamp
Glove Box lamp
Radio Dial lamp
Underhood lamp
luggage Compartment lamp
Rear Seat Courtesy
Candle
Power
60W 6014
50W Sealed Beam
32·3 1157NA
? 194
2 194
32·3 1157
4 67
32 1156
6 631
12 211·2
2 194
2 194
2 194 2 194 2 194 2 194 2 194 2 194
7 1445
2 1895 or 194
1 1816
15 93
15 1003
6 212-1
Page 81 of 85
Downloaded from www.Manualslib.com manuals search engine INDEX
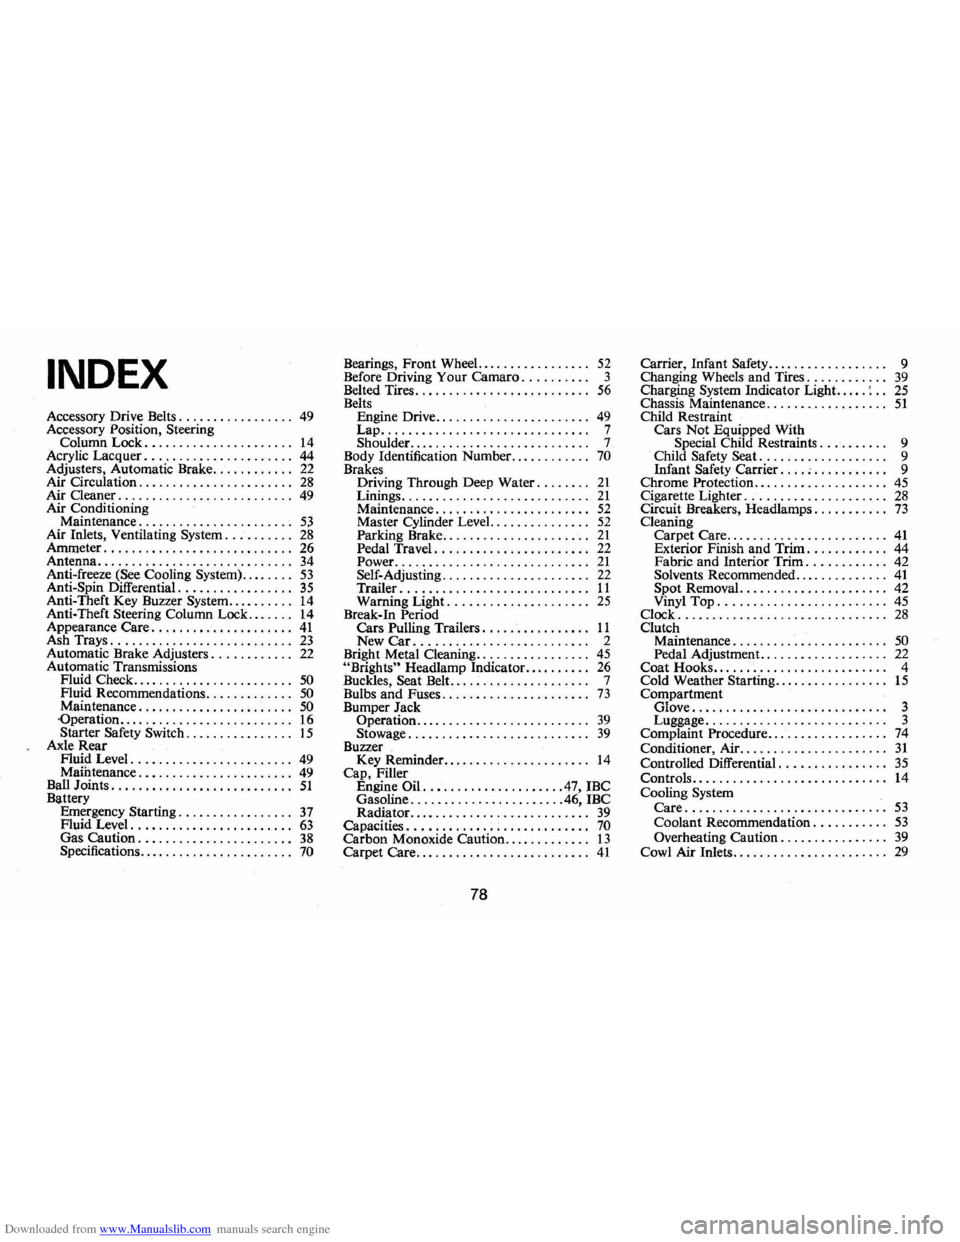
Accessory Drive Belts. . . . . . . . . . . . . . . .. 49 Accessory Position, Steering
Column Lock. . . . . . . . . . . . . . . . . . . . .. 14 Acrylic Lacquer ...................... 44 Adjusters, Automatic Brake. . . . . . . . . . .. 22 Air Circulation. . . . . . . . . . . . . . . . . . . . . .. 28 Air Cleaner. . . . . . . . . . . . . . . . . . . . . . . . .. 49 Air Conditioning
Maintenance. . . . . . . . . . . . . . . . . . . . . .. 53 Air Inlets, Ventilating System. . . . . . . . .. 28 Ammeter ............................ 26
Antenna ............................. 34 Anti-freeze (See Cooling System) ........ 53 Anti-Spin Differential. . . . . . . . . . . . . . . .. 35 Anti-Theft Key Buzzer System .......... 14 Anti-Theft Steering Column Lock ....... 14 Appearance Care ..................... 41 Ash Trays. . . . . . . . . . . . . . . . . . . . . . . . . .. 23 Automatic Brake Adjusters. . . . . . . . . . .. 22 Automatic Transmissions
Fluid Check ........................ 50 Fluid Recommendations ............. 50 Maintenance. . . . . . . . . . . . . . . . . . . . . .. 50 -Operation ...... _ ... _ ...... _ ........ 16 Starter Safety Switch _ . . . . . . . . . . . . . .. 15 Axle Rear Flu!? Level. ....................... 49 Mamtenance. . . . . . . . . . . . . . . . . . . . . .. 49 Ball Joints. . . . . . . . . . . . . . . . . . . . . . . . . .. 51 Battery
Emergency Starting ................. 37 Fluid Level. . . . . . . . . . . . . . . . . . . . . . .. 63 Gas Caution. . . . . . . . . . . . . . . . . . . . . .. 38 Specifications. . . . . . . . . . . . . . . . . . . . . .. 70
Bearings, Front Wheel. . . . . . . . . . . . . . . .. 52 Before Driving Your Camaro.......... 3
Belted Tires. . . . . . . . . . . . . . . . . . . . . . . . .. 56 Belts
Engine Drive. . . . . . . . . . . . . . . . . . . . . .. 49 Lap ............................... 7 Shoulder........................... 7
Body Identification Number ............ 70 Brakes
D.riying Through Deep Water. . . . . . .. 21 Lmmgs ............................ 21 Maintenance. . . . . . . . . . . . . . . . . . . . . .. 52 Master Cylinder Level. .............. 52 Parking Brake. . . . . . . . . . . . . . . . . . . . .. 21 Pedal Travel ....................... 22
Power. ............................ 21 Self-Adjusting. . . . . . . . . . . . . . . . . . . . .. 22
Trailer ............................ 11 Warning Light. .................... 25 Break-In Period
Cars Pulling Trailers. . . . . . . . . . . . . . .. 11 New Car .......................... 2
Bright Metal Cleaning ................. 45 "Brights" Headlamp Indicator .......... 26 Buckles, Seat Belt. . . . . . . . . . . . . . . . . . . . . 7
Bulbs and Fuses. . . . . . . . . . . . . . . . . . . . . . 73 Bumper Jack
Operation.. . . . . . . . . . . . . . . . . . . . . . . .. 39 Stowage ........................... 39 Buzzer
Key Reminder. . . . . . . . . . . . . . .. . . . . .. 14 Cap, Filler
Engine Oil. ................... .47, IBC
Gasoline ....................... 46, IBC
Radiator. . . . . . . . . . . . . . . . . . . . . . . . . .. 39 Capacities. . . . . . . . . . . . . . . . . . . . . . . . . .. 70 Carbon Monoxide Caution.. . . . . . . . . . .. 13 Carpet Care .......................... 41
78
Carrier, Infant Safety.... . . . . . . . . . . . . .. 9
Changing Wheels and Tires. . . . . . . . . . .. 39 Charging System Indicator Light. .... : .. 25 Chassis Maintenance. . . . . . . . . . . . . . . . .. 51 Child Restraint
Cars Not Equipped With Special Child Restraints. . . . . . . . .. 9
Child Safety Seat. . . . . . . . . . . . . . . . . .. 9
Infant Safety Carrier .... ; . . . . . . . . . .. 9
Chrome Protection .................... 45 Cigarette Lighter ..................... 28 Circuit Breakers, Headlamps. . . . . . . . . .. 73 Cleaning
Carpet Care. . . . . . . . . . . . . . . . . . . . . . .. 41 Exterior Finish and Trim. . . . . . . . . . .. 44
Fabric and Interior Trim. . . . . . . . . . .. 42
Solvents Recommended .......... , ... 41 Spot Removal. . . . . . . . . . . . . . . . . . . . .. 42
Vinyl Top. . . . . . . . . . . . . . . . . . . . . . . .. 45 Clock ............................... 28 Clutch Maintenance. . . . . . . . . . . . . . . . . . . . . .. 50 Pedal Adjustment. . . . . . . . . . . . . . . . . .. 22 Coat Hooks. . . . . . . . . . . . . . . . . . . . . . . . .. 4
Cold Weather Starting ................. 15 Compartment Glove............................. 3 Luggage........................... 3
Complaint Procedure .................. 74 Conditioner, Air ...................... 31 Controlled Differential. . . . . . . . . . . . . . .. 35 Controls ............................. 14 Cooling System Care .............................. 53 Coolant Recommendation. . . . . . . . . .. 53 Overheating Caution. . . . . . . . . . . . . . .. 39 Cowl Air Inlets ....................... 29