1974 CHEVROLET CAMARO stop start
[x] Cancel search: stop startPage 5 of 85

Downloaded from www.Manualslib.com manuals search engine YOUR CAR'S FIRST
FEW HUNDRED MILES OF DRIVING
You can operate your new car from
its very first mile without adhering
to a formal
"break-in" schedule.
However, during the first
few hun
dred miles of driving you can, by
observing a
few simple precautions,
add to the future performance and
economy of your car.
It is recommended that your speed
during the first
500 miles
be confined to a maximum of
60
M.P.H.,
but do not drive for ex
tended periods at
anyone constant
speed, either fast
or slow. Dur
ing this period, avoid full throttle
starts and, if possible, avoid hard
stops especially during the first
200
miles of operation since brake mis- use
during this period will destroy
much future
bnlke efficiency.
Always drive at moderate speed
until the engine has completely
warmed up.
If you plan to use your new car
for trailer hauling see additional
information on page 11.
SEE PAGE 64 for ADDITIONAL INFORMATION ON
HOW TO IMPROVE YOUR GAS M,ILEAGE.
2
Page 10 of 85
Downloaded from www.Manualslib.com manuals search engine trouble is not likely to be due to
the starter interlock system.
If the
starter will crank, this indicates the
interlock
is not causing interfer
ence.
Front Seat Lap-Shoulder
Belt
Combination
• Adjust front seat to satisfaction
of driver and sit erect and well
back in seat.
• In a single motion , pull the lap
shoulder belt webbing across lap
far enough
to permit inserting
metal latch plate end of belt into
the buckle, until a snap
is heard.
If webbing is not pulled out far
enough to reach buckle, let lap
belt rewind into its retractor to
release lock mechanism,
so belt
can be pulled out to the proper
length.
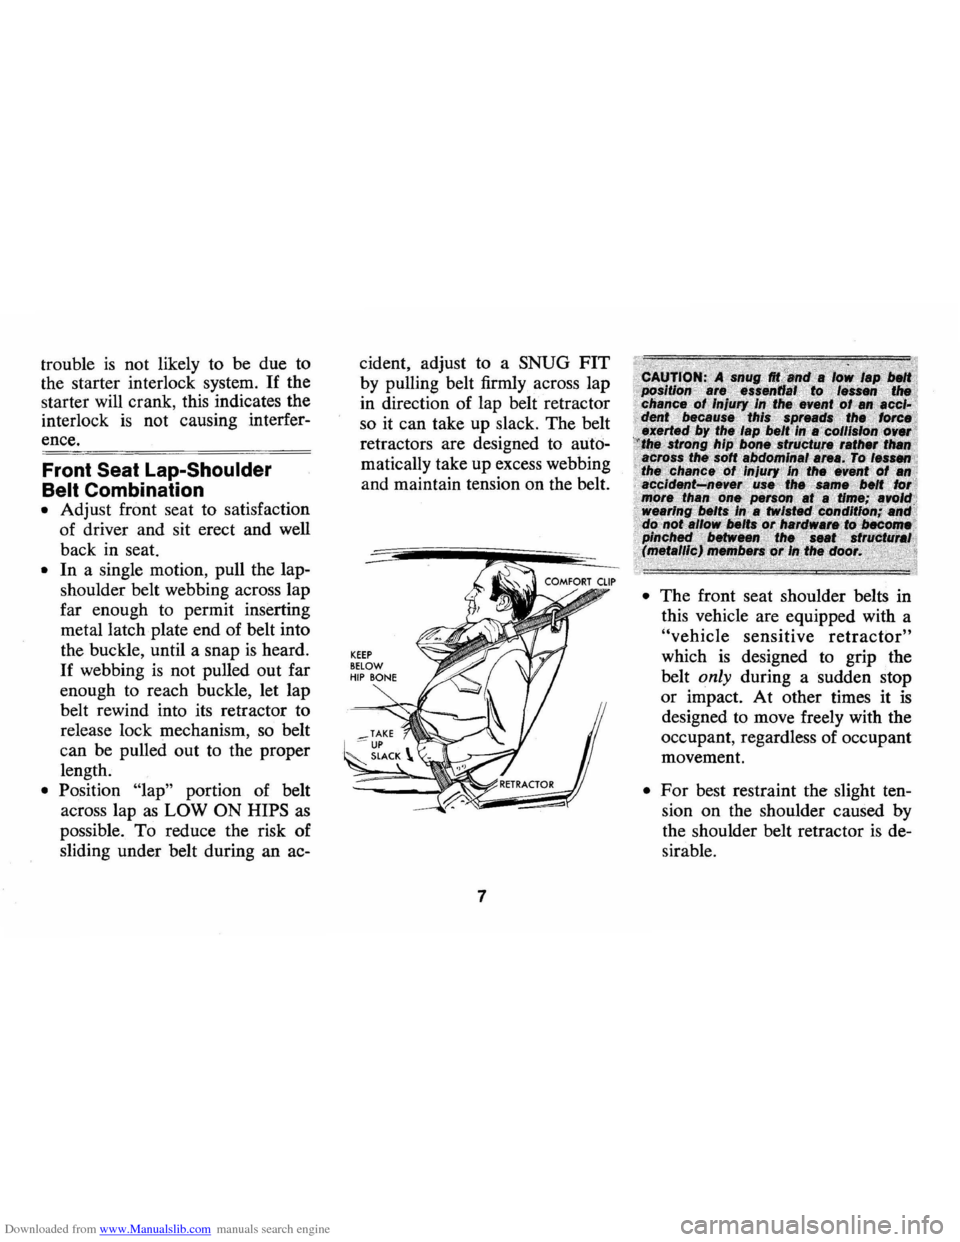
• Position "lap" portion of belt
across lap
as LOW ON HIPS as
possible. To reduce the risk of
sliding under belt during an
ac-
cident, adjust to a SNUG FIT
by pulling belt firmly across lap
in direction of lap belt retractor
so it can take up slack. The belt
retractors are designed to
auto
matically take up excess webbing
and maintain tension on the belt.
KEEP BELOW HIP BONE
7
• The front seat shoulder belts in
this vehicle are equipped with a
"vehicle sensitive retractor"
which is designed to grip the
belt
only during a sudden stop
or impact. At other times it
is
designed to move freely with the
occupant, regardless of occupant
movement.
• For best restraint the slight ten
sion on the shoulder caused by
the shoulder belt retractor
is de
sirable.
Page 12 of 85
Downloaded from www.Manualslib.com manuals search engine Seat Belt Buzzer/Light
Reminder
• The front seat belts are linked to
a buzzer and light which remind
occupants to fasten their belts.
• The buzzer and light are de
signed to come on when any
outboard front seat occupant's
belt
is not fastened, while at
tempting to start the engine; or
if any front seat belt
is un
fastened while driving in any
forward gear.
• The reminders do not come on
when the engine
is running and
a front belt
is unbuckled if the
transmission
is in Park or neu
tral (automatic and column
shift transmission cars), or if the
parking brake
is engaged (floor
shift transmission cars).
If seat belt system , ignition in
terlock system, or reminder system
does not work
as described , see
your dealer for information and assistance.
Lap Belts (For
Rear Seat
Passengers)
• Seating positions next to side
windows have retractors which
are designed to automatically
take up excess webbing and
maintain tension on the lap belt.
These belts should be positioned
and secured
as described above
under
"Lap-Shoulder Belt Com
bination.
"
Seat Belt Inspection
• Periodically inspect belts,
buckles, adjustable latch plates,
retractors, interlock and re
minder systems, guide loops,
clips, and anchors for damage
that could lessen the effective
ness of the restraint system.
• Keep sharp edges and damaging
objects away from belts, and
other parts of restraint system.
• Replace belts if cut, weakened,
9
frayed, or subjected to collision
loads.
• Check that anchor mounting
bolts are tight.
• Have questionable parts re
placed.
• Keep seat belts clean and dry.
• Clean only with mild soap solu
tion and lukewarm water.
• Do not bleach or dye belts since
this may severely weaken belts.
Child Restraint
Children in automobiles should
be restrained to lessen the risk of
injury in accidents, sudden stops
or other hazardous situations. Gen
eral Motors dealers offer restraint
systems designed specifically for
use with infants and with small
children. The GM
"Infant Love
Seat" is designed for babies up to
20 pounds. The GM "Child Love
Seat" is designed for children
weighing 20 to 40 pounds, up to 3
Page 16 of 85
Downloaded from www.Manualslib.com manuals search engine STARTING AND OPERATING
Engine Exhaust Gas Caution (Carbon Monoxide)
AvoId Inhaling exhaust gases because
they contain carbon monoxide, which by
itself is colorless and odorless. Carbon
monoxide is
a dangerous gas that can
cause unconsciousness and is potentially
lethal.
" at any time you suspect that exhaust fumes are entering the passenger com
partment, have the cause determined and
corrected as soon as
possible. If you
must drive under these conditions, drive
only with aU windows fully open.
The best protection against carbon
monoxIde entry Into the car body Is a
properly maintained engine exhaust sys
tem, car body and body ventilation system.
It is recommended that the exhaust sys
tem and body Is Inspected by a competent
mechanic:
• Each time the vehicle Is raised for 011
change.
• Whenever a change is noticed in the
sound
of the exhaust system.
• Whenever the exhaust system, under
body or rear of the vehicle Is damaged.
See your Maintenance Schedule folder
for inspection
procedure.
To aI/ow proper operation of the car's
ventilation system, keep front ventilation
inlet
grille clear of snow, leaves or other
obstruction at al/ tImes.
SITTING IN A PARKED CAR WITH
ENGINE RUNNING
FOR AN EXTENDED
PERIOD IS NOT RECOMMENDED.
Do not run engIne In confined areas such as garages any more than needed
to
move vehicle in or out of area. When
vehicle is stopped in
an UNCONFINED
area with the engine running for any more
than
a short period, adjust heating or
cooling system to force outside air into
car as follows:
13
1. On cars not equipped with air condi
tioning, set fan to medium or high
speed and upper control lever to any
position
except OFF.
2. On cars equipped with air condition-• ing, set fan to medium or high speed
and upper control lever to any position
except OFF or MAX •
The trunk lid should be closed while
driving to help prevent inadvertently
drawing
exhaust gases into the car. It is
unwise
to drive at high speeds for long
durations with the trunk
lid open. However, if for some reason the trunk must
remain open for
a perIod while moving,
or electrical wiring or other cable con
nections to a trailer must pass through
the seal between
trunk lid and body, the
following precautions should
be observed:
• Close all windows.
• Adjust heating or COOling system to
force outside air into car as described
in items 1 and 2 above but with fan set
at high speed.
• On cars equipped with outside air vents
in or under instrument panel, open
vents fully.
Page 27 of 85
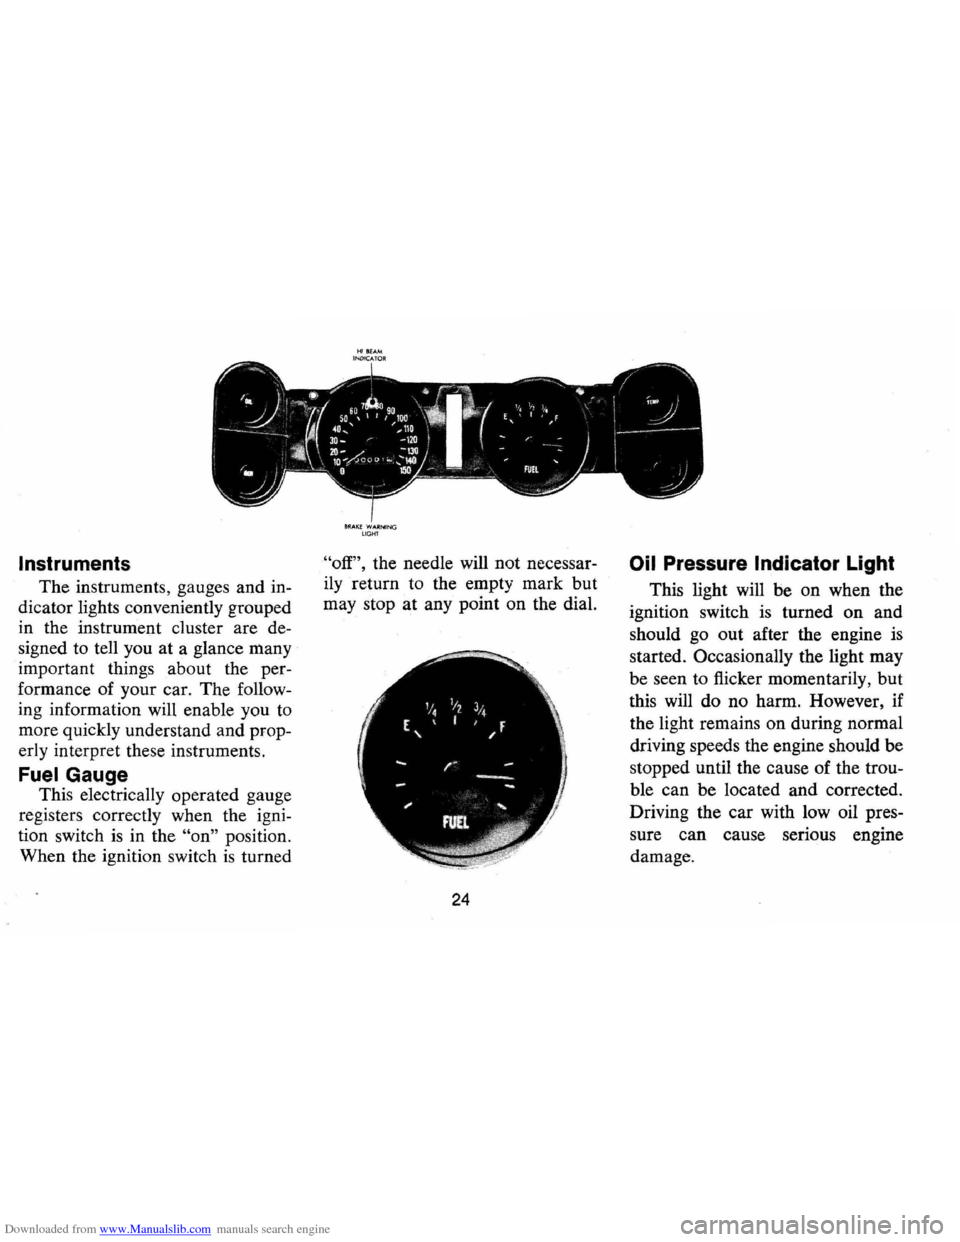
Downloaded from www.Manualslib.com manuals search engine Instruments
The instruments, gauges and in
dicator lights conveniently grouped
in the instrument cluster are de
signed to tell you
at a glance many
important things about the per
formance of your car. The follow
ing information will enable you to
more quickly understand and prop
erly interpret these instruments.
FuelGauge
This electrically operated gauge
registers correctly when the igni
tion switch
is in the "on" position.
When the ignition switch
is turned
8RAI(E WARNIN G LIGHT
"off", the needle will not necessar
ily return to the empty mark but
may stop at any point on the dial.
24
Oil Pressure Indicator Light
This light will be on when the
ignition switch
is turned on and
should go out after the engine
is
started. Occasionally the light may
be seen to flicker momentarily, but
this will do no harm. However , if
the light remains on during normal
driving speeds the engine should be
stopped until the cause of the trou
ble can be located and corrected .
Driving the car with low oil pres
sure can cause serious engine
damage.
Page 29 of 85

Downloaded from www.Manualslib.com manuals search engine What to do:
1. Check that the parking brake is
released. If it is ...
2. Pull off the road and stop, care
fully-remembering that:
• Stopping distances may be
greater.
• Greater pedal effort may be re
quired.
• Pedal travel may be greater.
3.
Tryout brake operation by
starting and stopping on road
shoulder-then:
• If you judge such operation to
be safe, proceed cautiously at a
safe speed to nearest dealer for
repair.
• Or have car towed to dealer for
repair.
Continued operation of the car
in this condition
is dangerous .
. Headlight Beam Indicator
Light
The headlights of your car have
high and low beams to provide you with
proper night-time visibility
for most driving conditions. The
"low" beams are used during most
city driving. The
"high" beams are
especially useful when driving on
dark roads since they provide ex
cellent long range illumination.
The headlight beam indicator will
be on whenever the high beams or
"brights" are in use. The Headlight
Beam
Switch controls the headlight
beams (see Page 22) .
Light Switch
The three position light switch
controls the headlights, taillights,
parking lights, side marker lights,
instrument lights and dome lights
as shown. The headlamp circuit is
protected by a circuit breaker in the
light switch. An overload on the
breaker will cause the lamps
to
"flicker" on and off. If this condi
tion develops, have your headlamp
wiring checked immediately.
PARKING LAMPS
MARKER LAMPS
TURN KNOB TO
VARY INSTRUMENT LIGHTS
FULL Y COUNTER CLOCKWISE FOR DOME LIGHTS
26
HEADLIGHTS PARKING LAMI'S
MARKER LAMPS
Page 53 of 85
Downloaded from www.Manualslib.com manuals search engine first, check lubricant level and add
lubricant, if necessary, to
fill to
level of filler plug hole.
Use SAE
80
or SAE 90 GL-S Gear Lubri
cant.
(For vehicles normally 0per
ated in Canada use SAE 80 GL-S
Gear Lubricant.)
Positraction -Drain and refill
after the first
12,000 miles then
maintain same
as standard axle but
use only the special positraction
lubricanf
available from your
Chevrolet Dealer.
Manual Transmissions
3-Speed and 4-Speed -Every
6,000 miles or 4 months-Check
at operating temperature and
fill
as necessary to level of filler plug
hole with
SAE 80 or SAE 90 GL
S Gear Lubricant.
(For vehicles
normally operated in Canada use
SAE 80 GL-S Gear Lubricant.)
If temperatures of below 32°F.
are expected, use SAE 80 GL-S Gear
Lubricant only.
Clutch Cross-Shaft -Every
36,000 miles or sooner if neces
sary -Remove the plug, install a
lubrication fitting and lubricate
with water resistant
EP Chassis
Lubricant which meets GM
Speci
fication 6031 M.
Automatic Transmission
Fluid Recommendations
Use only automatic transmis
sion fluids identified with the
mark
DEXRON@ II or DEX
RON®. These fluids have been spe
cially formulated and tested for use
in your automatic transmission,
and are available from your Chev
rolet dealer or local service station.
Check the fluid level at each
engine oil change period. To make
an accurate fluid level check:
Check the fluid level at each en
gine oil change period.
To make an
accurate fluid level check:
50
1. Drive car several miles, making
frequent starts and stops, to
bring transmission up to normal
operating temperature (approxi
mately
180-190° F.).
2. Park car on a level surface.
3. Place selector level in "Park"
and leave engine running.
4. Remove dipstick and wipe clean.
S . Reinsert dipstick until
cap seats.
6. Remove dipstick and note read
ing.
If fluid level is at or below the
ADD mark, add sufficient fluid to
raise the level to the
FULL mark.
One pint raises the level from ADD
to FULL.
Do not overfill.
Under normal driving condi
tions, the transmission fluid should
be changed every 24,000 miles. If
your car is driven extensively in
heavy city traffic during hot weather,
or
is used to pull a trailer , change
fluid every
12,000 miles. Likewise,
operators of cars in commercial use
Page 67 of 85
Downloaded from www.Manualslib.com manuals search engine Important Facts You Should
Know About Gasoline
Mileage and How to
Improve It
How you drive, where you drive,
and when you drive
all have an
effect on how many miles you can
get from a gallon of gasoline. The
careful attention you give your car
as far as maintenance and repairs
are concerned will also contribute
importantly to fuel economy.
Fuel Selection
Your vehicle is designed to op
erate on unleaded or low-lead fuels
>of at least 91 Research Octane.
These fuels minimize spark plug
fouling and emission system
de
terioration. Your engine does not
require premium fuel. Therefore,
its use would be an unnecessary
additional expense.
If the service
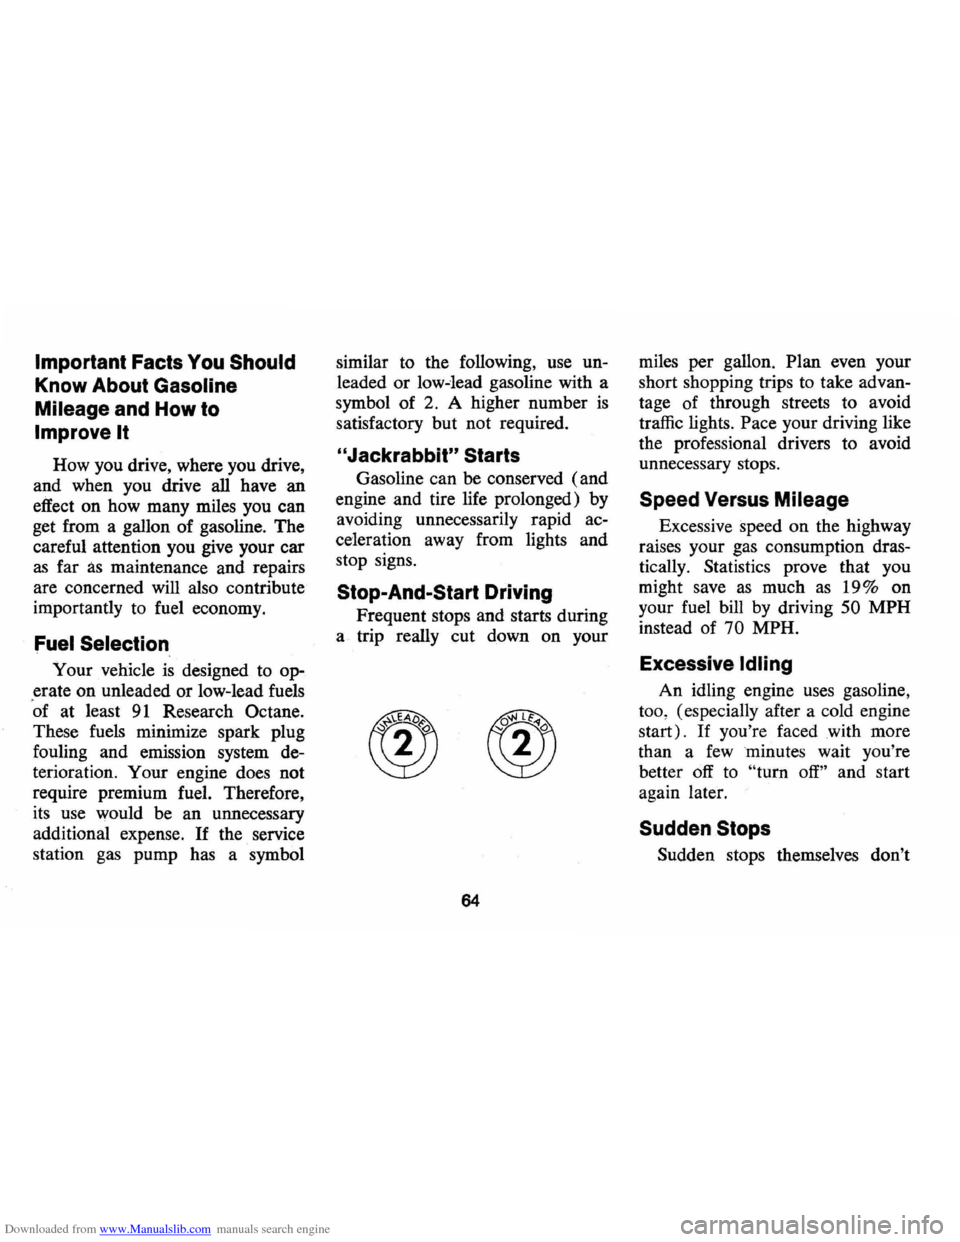
station gas pump has a symbol similar
to the following, use
un
leaded or low-lead gasoline with a
symbol of 2. A higher number
is
satisfactory but not required.
"Jackrabbit" Starts
Gasoline can be conserved (and
engine and tire life prolonged) by
avoiding unnecessarily rapid
ac
celeration away from lights and
stop signs.
Stop-And-Start Driving
Frequent stops and starts during
a. trip really cut down on your
64
miles per gallon. Plan even your
short shopping trips to take
advan
tage of through streets to avoid
traffic lights.
Pace your driving like
the professional drivers to avoid
unnecessary stops.
Speed Versus Mileage
Excessive speed on the highway
raises your gas consumption
dras
tically. Statistics prove that you
might save
as much as 19% on
your fuel bill by driving
50 MPH
instead of 70 MPH.
Excessive Idling
An idling engine uses gasoline,
too, (especially after a cold engine
start).
If you're faced with more
than a
few minutes wait you're
better
off to "turn off" and start
again later.
Sudden Stops
Sudden stops themselves don't