1973 CHEVROLET CAMARO warning light
[x] Cancel search: warning lightPage 6 of 84
Downloaded from www.Manualslib.com manuals search engine BEFORE DRIVING YOUR CAMAR 0
DRIVER CHECKLIST
Before Entering Car
1. See that windows, mirrors and
lights are clean.
2. Visually note inflation condition
of tires.
3. Check that area to rear is clear
if about to back up.
Before Driving Off
1. Lock all doors.
2. Position seat.
3 . Adjust inside and outside mirrors.
4. Fasten seat belts.
5. Check that warning bulbs light
when key
is turned to start
position.
6. Release parking brake (and
see
that brake warning light turns
off) .
7. Be sure you understand your car
and how to operate it safely.
Keys
Two separate keys are provided
for your car. Each key has a differ
ent cross section
so that it can be
inserted only in certain locks.
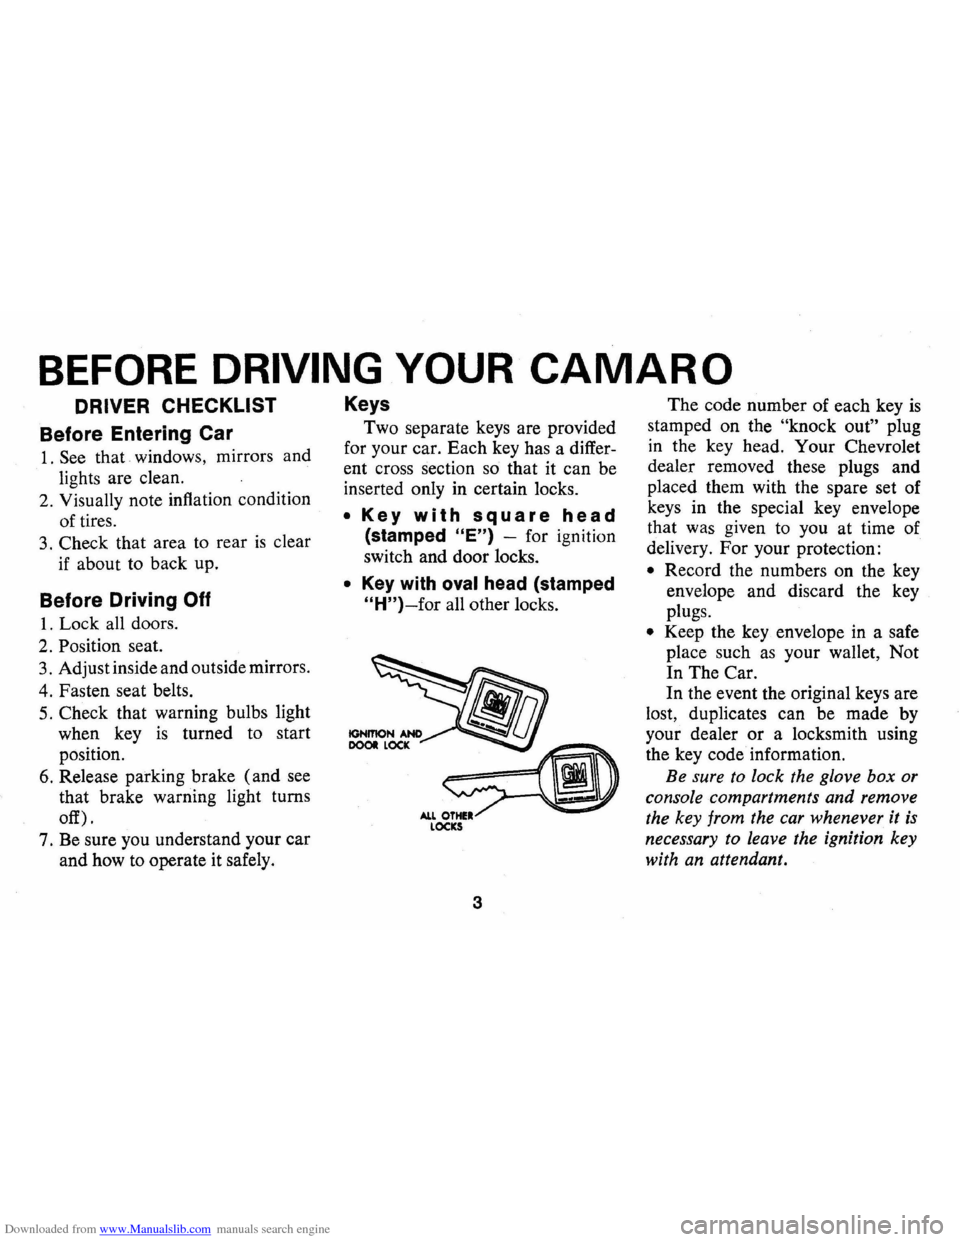
• Key with square head
(stamped "E") -for ignition
switch and door locks.
• Key with oval head (stamped
"H")-for all other locks.
3
The code number of each key is
stamped on the "knock out" plug
in the key head. Your Chevrolet
dealer removed these plugs and
placed them with the spare set of
keys in the special key envelope
that was given to you at time of
delivery. For your protection:
• Record the numbers on the key
envelope and discard the key
plugs.
• Keep the key envelope in a safe
place such
as your wallet, Not
In The Car.
In the event the original keys are
lost, duplicates can be made by
your dealer
or a locksmith using
the key code information.
Be sure
to lock the glove box or
console compartments and remove
the key from the car whenever it
is
necessary to leave the ignition key
with an attendant.
Page 23 of 84
Downloaded from www.Manualslib.com manuals search engine FLOOR CONTROLS
Braking System
The service brake system is de
signed for braking performance
under a wide range of driving con
ditions even when the vehicle
is
loaded to its full rated vehicle load.
Power Brakes
On cars with power brakes if
power assist to the brakes
is inter
rupted due to a stalled engine
or
some malfunction, two or more
brake applications can be made
using reserve power.
• If the brake pedal is held down.
the system
is designed to bring
the
car to a full stop on reserve
power. However, the reserve
power
is partially depleted each
time the brake pedal
is applied
and released.
• When reserve power is exhausted,
vehicle
can still be stopped by ap
plying greater force to the pedal.
Parking Brake
• To set parking brake, fully de
press foot pedal
at far left side.
• For maximum holding power.
depress regular brake pedal with
the other foot at the same time.
• To release parking brake, pull
"BRAKE RELEASE" lever on
lower left instrument panel.
• As a reminder, the brake system
warning light
is designed to glow
whenever the parking brake con
trol ·
is not fully released , and the
ignition
is on.
• Never drive car with parking
20
brake set as this may overheat or
otherwise damage rear brakes.
NOTE: "Riding the brake" by rest
ing your foot on the brake pedal
when not intending to brake can
cause abnormally high brake tem
peratures, excessive lining wear
and possible damage to the brakes.
Page 25 of 84
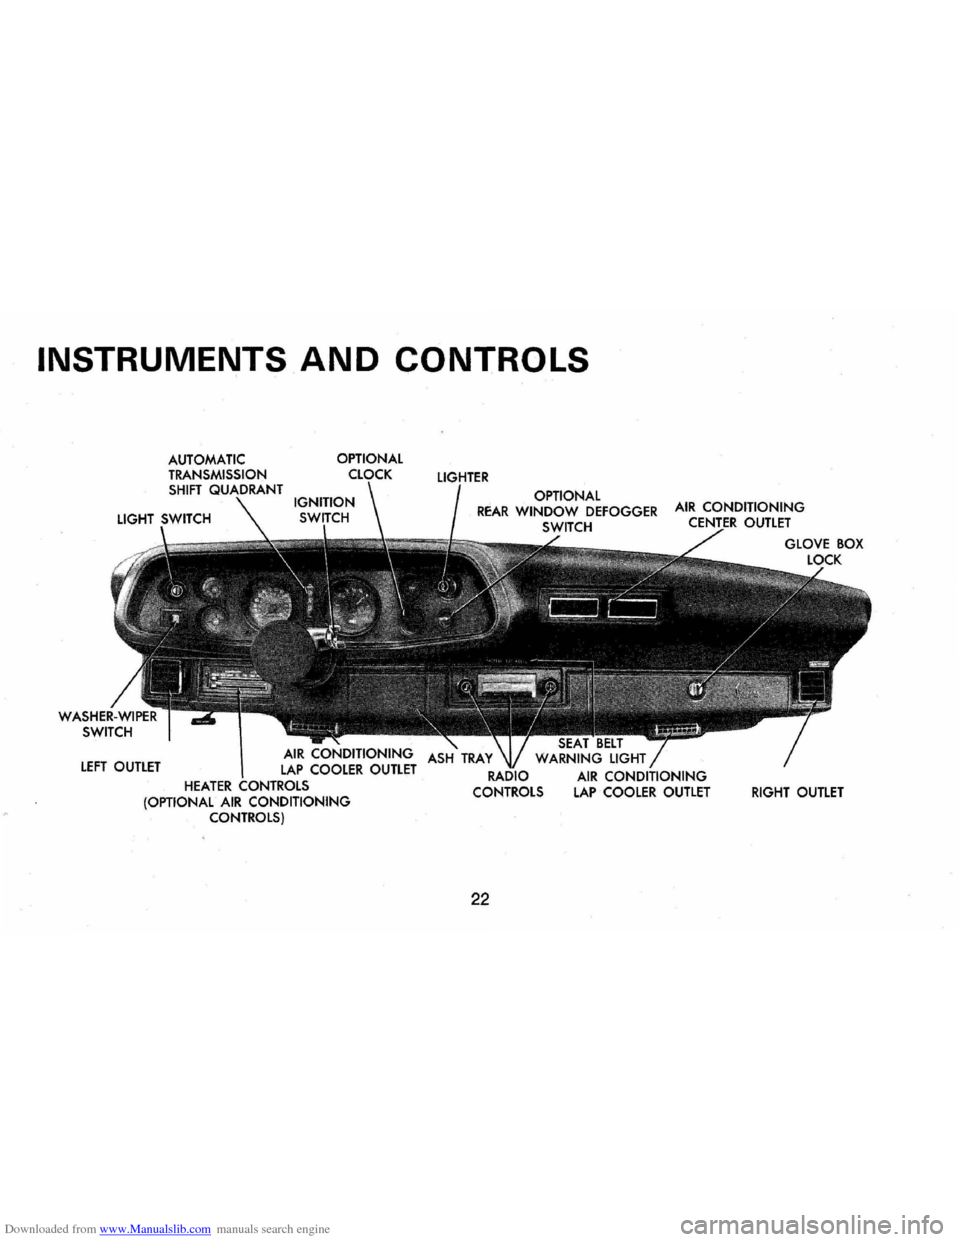
Downloaded from www.Manualslib.com manuals search engine INSTRUMENTS AND CONTROLS
OPTIONAL
LEFT OUTLET
HEATER (OPTIONAL AIR CONDITIONING CONTROLS) OPTIONAL
REAR WINDOW DEFOGGER SWITCH
22
WARNING LIGHT
AIR CONDITIONING LAP COOLER OUTLET RIGHT OUTLET
Page 26 of 84
Downloaded from www.Manualslib.com manuals search engine Instruments
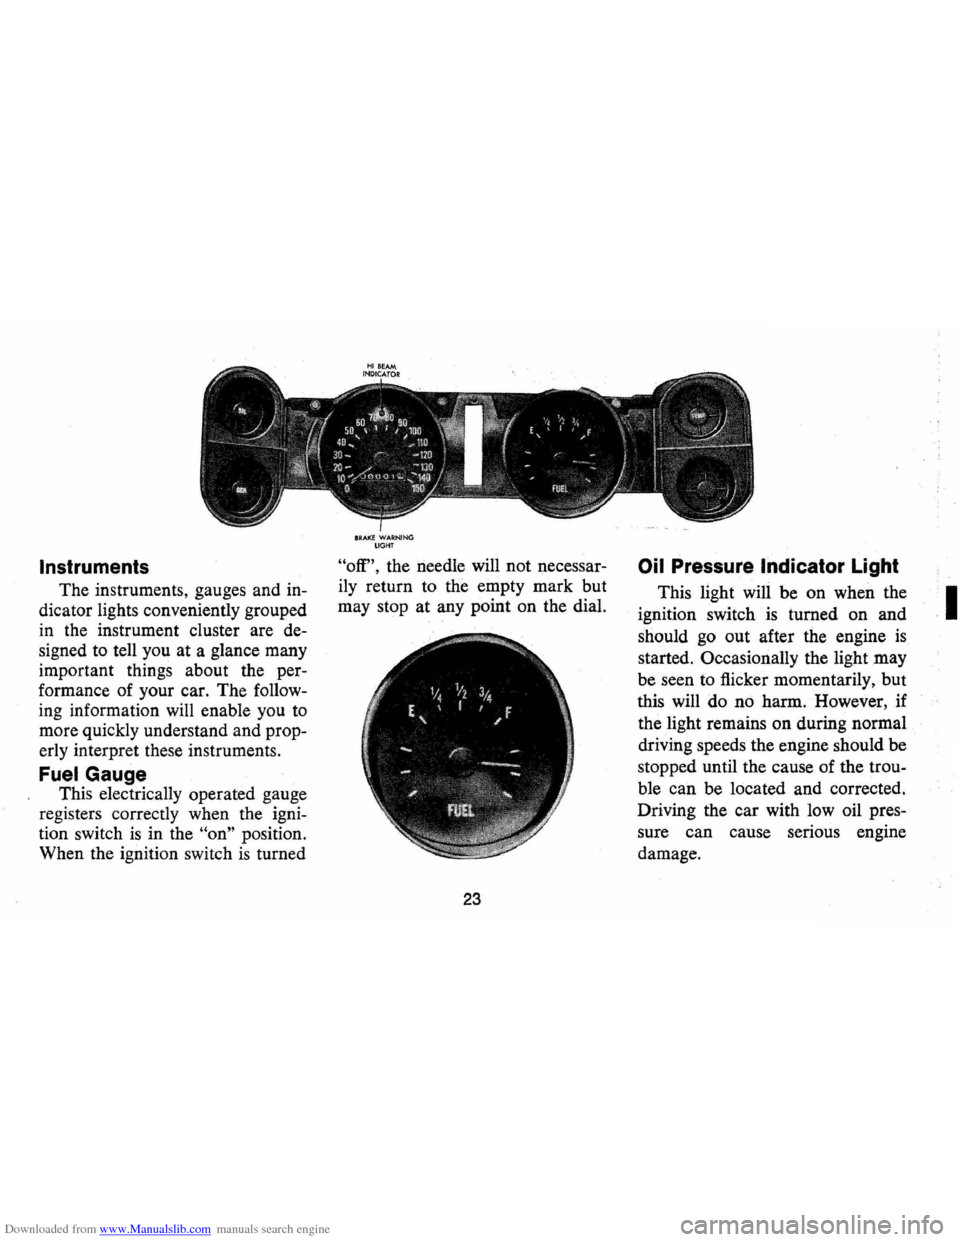
The instruments, gauges and in
dicator lights conveniently grouped
in the instrument cluster are de
signed to tell you at a glance many
important things about the per
formance of your car. The follow
ing information will enable you to
more quickly understand and prop
erly interpret these instruments .
Fuel Gauge
This electrically operated gauge
registers correctly when the igni
tion switch
is in the "on" position.
When the ignition switch
is turned
SRAKE WARNING UGHT
"off", the needle will not necessar
ily return to the empty mark but
may stop at any point on the dial.
23
Oil Pressure Indicator Light
This light will be on when the
ignition switch
is turned on and
should
go out after the engine is
started. Occasionally the light may
be seen to flicker momentarily, but
this will do no harm. However, if
the light remains on during normal
driving speeds the engine should be
stopped until the cause of the trou
ble can be located and corrected.
Driving the car with low oil pres
sure can cause serious engine
damage.
I
Page 27 of 84
Downloaded from www.Manualslib.com manuals search engine Generator Indicator Light
The red light will go on when
the ignition key
is in the "on" posi
tion, but before the engine
is
started. After the engine starts, the
light should go out and remain out.
If the light remains on when engine
is running, have your Authorized
Chevrolet Dealer locate and correct
the trouble as soon
as possible.
Engine Temperature
Indicator Light
This indicator light is provided
in the instrument cluster to quickly
warn of an overheated engine. With
,the ignition switch in the START
position, the red
TEMP indicator
will light to let you know that it
is
operating properly.
When the engine
is started, the
red light will go out immediately.
It will light up at no other time
unless for some reason the engine reaches
a dangerously high oper
ating temperature.
If the red light
should come on, the engine must be
stopped until the cause of the over
heating
is corrected. Glance at in
strument cluster frequently
as you
drive to see if this light
is on.
Brake System Warning
Light
The service brake system is de
signed
so that half of the brake sys
tem will provide some braking ac
tion in the event of a hydraulic leak
in the other half of the system.
If
the warning light located at lower
left of instrument cluster (speed
ometer face), glows continuously
when the ignition
is on and after
the brakes have been firmly applied
it may indicate that there
is a mal
function in one half of the brake
hydraulic system.
On cars equipped
with front drum brakes, the light
24
will go out when foot is removed
from brake pedal.
• As a check on bulb condition
the light should glow with the
parking brake applied and the
ignition on. (Light
is also a re
minder to release parking brake.)
• Have system repaired if light
does not come
on during check.
• This warning light is. not a' sub
stitute for the visual check of
brake fluid level required
as part
of normal maintenance.
If the light glows red:
• The parking brake control is not
fully released or,
• The service brake system is par
tially inoperative.
What to do:
1. Check that the parking brake is
released. If it is ...
2. Pull off the road and stop, care
fully-remembering that:
Page 39 of 84
Downloaded from www.Manualslib.com manuals search engine .1 n Case of Emergency
Four Way Hazard
Warning Flasher
• Use the warning flasher to warn
other drivers any time your
ve·
hicle becomes a traffic hazard,
day or night.
• Avoid stopping on the roadway
if possible.
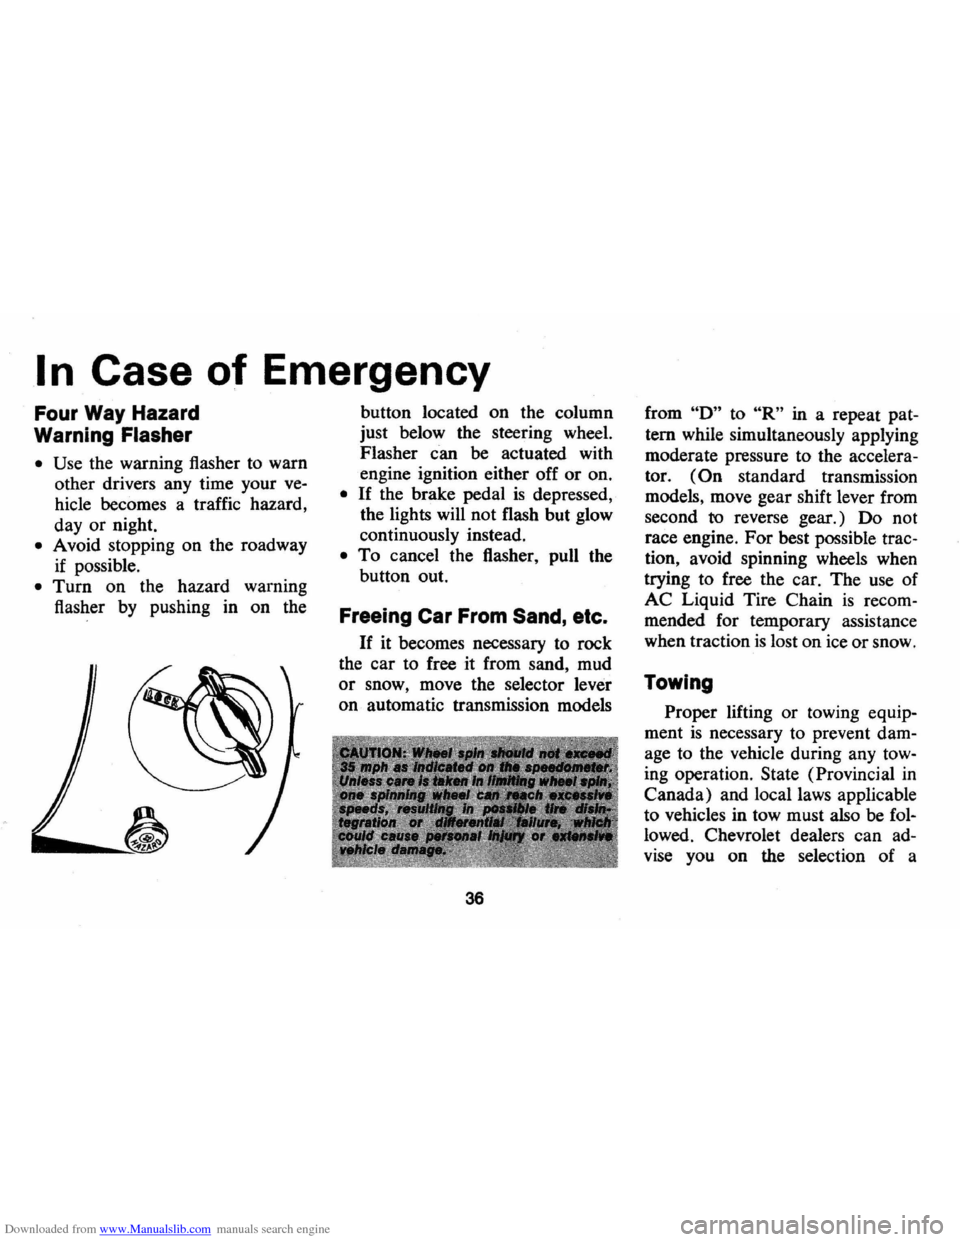
• Turn on the hazard warning
flasher
by pushing in on the
.---~
button located on the column
just below the steering wheel.
Flasher can be actuated with
engine ignition either off or on.
• If the brake pedal is depressed,
the lights will not flash but glow
continuously instead.
• To cancel the flasher, pull the
button out.
Freeing Car From Sand, etc.
If it becomes necessary to rock
the car to free it from sand, mud
or snow, move the selector lever
on automatic transmission models
36
from "0" to "R" in a repeat pat·
tern while simultaneously applying
moderate pressure to the
accelera
tor. (On standard transmission
models, move gear shift lever from
second
to reverse gear.) 00 not
race engine.
For best possible trac
tion, avoid spinning wheels when
trying to free the car. The use of
AC Liquid Tire Chain is recom
mended for temporary assistance
when traction
is lost on ice or snow.
Towing
Proper lifting or towing equip
ment is necessary to prevent dam
age to the vehicle during any tow
ing operation. State (Provincial in
Canada) and local laws applicable
to vehicles in tow must also be
fol
lowed . Chevrolet dealers can ad
vise you on the selection of a
Page 43 of 84
Downloaded from www.Manualslib.com manuals search engine • Activate hazard warning flasher.
• Block both the front and back
of the wheel diagonally opposite
the jack position.
Remove
hubcap or wheel cover
with flat end of wheel
nut wrench
and loosen wheel nuts slightly.
Set
lever on jack to UP position.
Properly position load rest which
engages bumper by moving base of
NOTE: Base of jack column
should be slightly angled in toward
car since it will straighteri
as car is
raised.
jack slightly under car and engage
tang of
bracket in bumper notch,
then bring jack base back toward
upright position. Check that
l~ad
rest is positioned before operatmg
jack.
40
Jack Operation
After jack is positioned as noted
above use
wheel nut wrench as . ,
jack handle and raise car until tire
clears ground. Remove wheel nuts
and wheel, install spare and tighten
wheel nuts. Move jack lever to
DOWN and install hub cap or
wheel cover.
Page 72 of 84
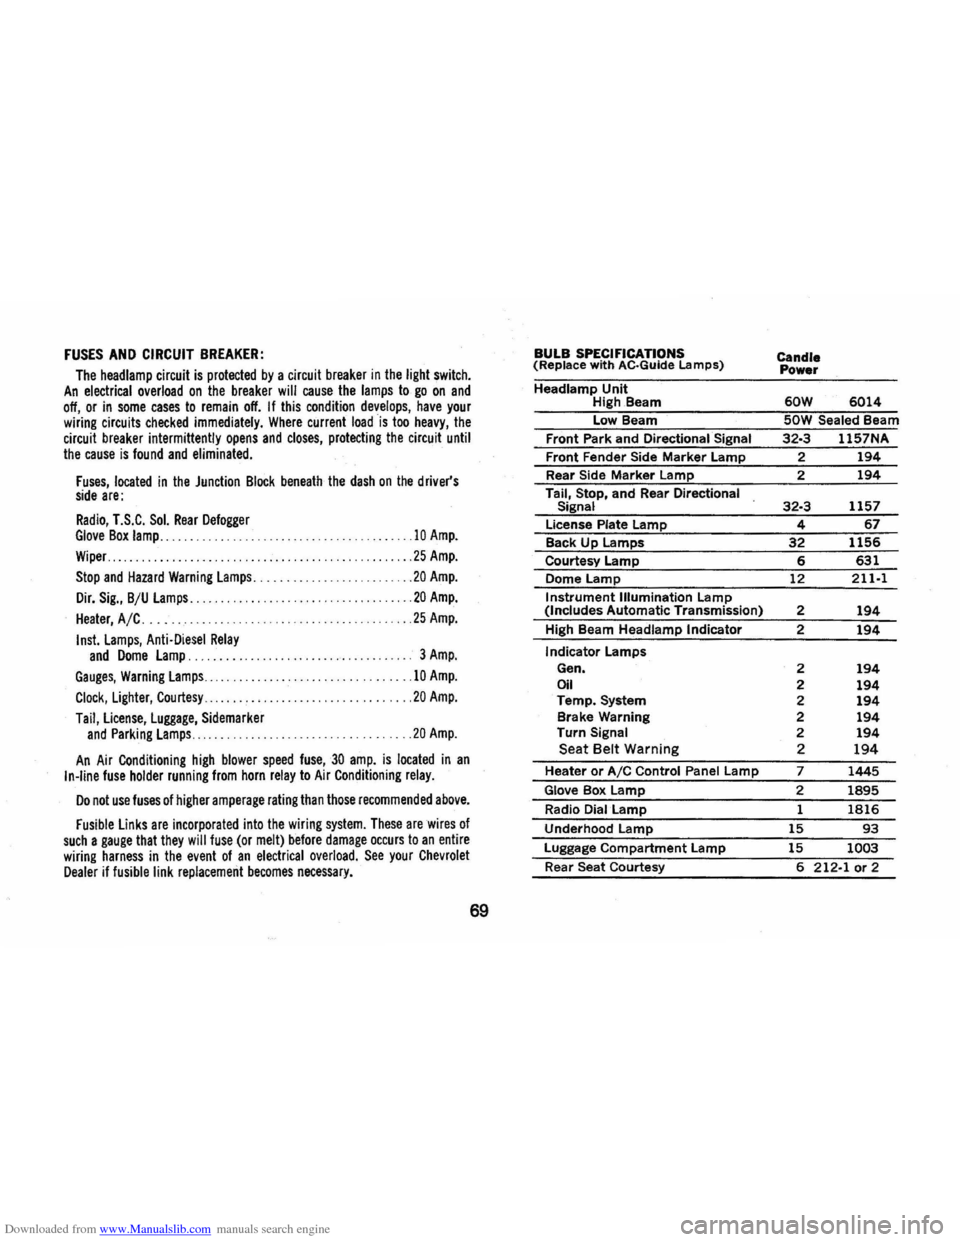
Downloaded from www.Manualslib.com manuals search engine FUSES AND CIRCUIT BREAKER:
The headlamp circuit is protected by a circuit breaker in the light switch. An electrical overload on the breaker will cause the lamps to go on and off, or in some cases to remain off. If this condition develops, have your wiring circuits checked immediately. Where current load is too heavy, the circuit breaker intermittently opens and closes, protecting the circuit until the cause is found and eliminated.
Fuses, located in the Junction Block beneath the dash on the driver's side are:
Radio, T.S.C. Sol. Rear Defogger Glove Box lamp .......................... .
Wiper .................. . .
..
10 Amp.
25 Amp.
Stop and Hazard Warning lamps .................. ... ..... 20 Amp.
Dir. Sig., B/U lamps .................... ............ .... 20 Amp.
Heater, A/C. . . . .. .. . .. .. . .. . .. .. .. .. . . .. .. .. .. . .. ... 25 Amp.
Insl. lamps, Anti·Diesel Relay and Dome lamp. 3 Amp.
Gauges, Warning lamps.. .. .
. .. .. . .. .... . . .. . .. .. . . .. .. .10 Amp.
Clock, lighter, Courtesy.. .. .. . . . . .. . .. ... .. .. . .20 Amp.
Tail, license, luggage, Sidemarker and Parking lamps ...... . .20 Amp.
An Air Conditioning high blower speed fuse,30 amp. is located in an In·line fuse holder running from horn relay to Air Conditioning relay.
Do not use fuses of higher amperage rating than those recommended above.
Fusible links are incorporated into the wiring system. These are wires of such a gauge that they will fuse (or melt) before damage occurs to an entire wiring harness in the event of an electrical overload. See your Chevrolet Dealer if fusible link replacement becomes necessary.
69
BULB SPECIFICATIONS (Replace with AC·Guide Lamps)
Headlamp Unit High.Beam
Low Beam
Front Park and
Directional Signal
Front Fender Side Marker Lamp
Rear Side
Marker Lamp
Tail, Stop, and Rear
Directional
Signal
License Plate Lamp
Back Up Lamps
Courtesy Lamp
Dome
Lamp
Instrument Illumination Lamp (Includes Automatic Transmission)
High Beam
Headlamp Indicator
Indicator Lamps
Gen.
Oil Temp. System
Brake Warning
Turn
Signal Seat Belt Warning
Heater or AIC Control Panel Lamp
Glove Box Lamp
Radio Dial Lamp
Underhood
Lamp
Luggage Compartment Lamp
Rear Seat Courtesy
Candle Power
60W 6014
SOW Sealed Beam
32·3 1157NA
2 194
2 194
32·3 1157
4 67
32 1156
6 631
12
211·1
2 194
2 194
2 194 2 194 2 194 2 194 2 194 2 194
7 1445
2 1895
1 1816
15 93
15 1003
6 212·1 or 2