1973 CHEVROLET CAMARO page 51
[x] Cancel search: page 51Page 4 of 84
Downloaded from www.Manualslib.com manuals search engine 1973 CAMARO
OWNER'S
MANUAL
CHEVROLET MOTOR
DIVISION
GENERAL MOTORS CORPORATION DETROIT, MICHIGAN 48202
All information. illu$trations and specifications contained in this manual are based on the latest product
information available at the time of publication. The right is reserved to make changes at any time without notice .
For vehicles
sold in Canada. substitute the name
General Motors of Canada. wherever the name
Chevrolet Motor Division appears in this manual.
ST 309-73
©GENERAL MOTORS CORPORATION 1972
Table of Contents
Section
1 Before Driving Your Camaro ...
Page
3
2 Starting and Operating. . . . . . . . . . . . . . . . . . . . . . . . . . . . . . . . . . . . . .. 12
Steering Column Controls. . . . . . . . . . . . . . . . . . . . . . . . . . . . . . . .. 13
Starting Engine. . . . . . . . . . . . . . . • . . . . . . . . . . . . . . . . . . . . . . . . .. 13
Floor Controls. . . . . . . . . . . . . . . . . . • . . . . . . . . . . . . . . . . . . . . . . . .. 20
Instrument Panel.. . . . . . . . . . . . . . . . . . . . . . . . . . . . . . . . . . . . . . . .. 22
Other Controls and Features. . . . . . . . . . . . . . . . . . . . . . . . . . . . . . .. 35
3 In Case of Emergency ........................................ 36
4 Appearance Care ............................................. 41
5 Service and Maintenance ........................ " . . . . . . . . .. 45
6 Minor Trouble Shooting ...................................... 62
7
Specifications, Owner Assistance, Service Manuals, Index, Gas Station Information ........................................ " 66
1
Page 5 of 84
Downloaded from www.Manualslib.com manuals search engine YOUR CAR'S FIRST
FEW HUNDRED MILES OF DRIVING
You can operate your new car from
its very first mile without adhering
to a formal
"break-in" schedule.
However, during the first
few hun
dred miles of driving you can, by
observing a few simple precautions,
add to the future performance and
economy of your car.
It is recommended that your speed
during the first
500 miles
be confined to a maximum of
60
M.P.H., but do not drive for ex
tended periods at
anyone constant
speed, either fast
or slow. Dur
ing this period, avoid full throttle
starts and, if possible, avoid hard
stops especially during the first
200
miles of operation since brake mis-
2 use
during this period will destroy
much future brake efficiency.
Always drive
at moderate speed
until the engine has completely
warmed up.
If you plan to use your new car
for trailer hauling see additional
information on page
10.
Page 22 of 84
Downloaded from www.Manualslib.com manuals search engine Parking Your Car
Always engage the parking brake
and place the automatic transmis
sion selector lever in
"Park" posi
tion when leaving your
car unat
tended. Also with automatic trans
missions, never park for prolonged
periods with engine idling and
transmission in gear, especially if
your car
is equipped with air con
ditioning. This practice
is detri
mental to the transmission, due to
overheating.
Horn
The horn on your Camaro is
actuated by firmly pressing on the
horn button in the center of the
steering wheel.
Tilt Steering Wheel
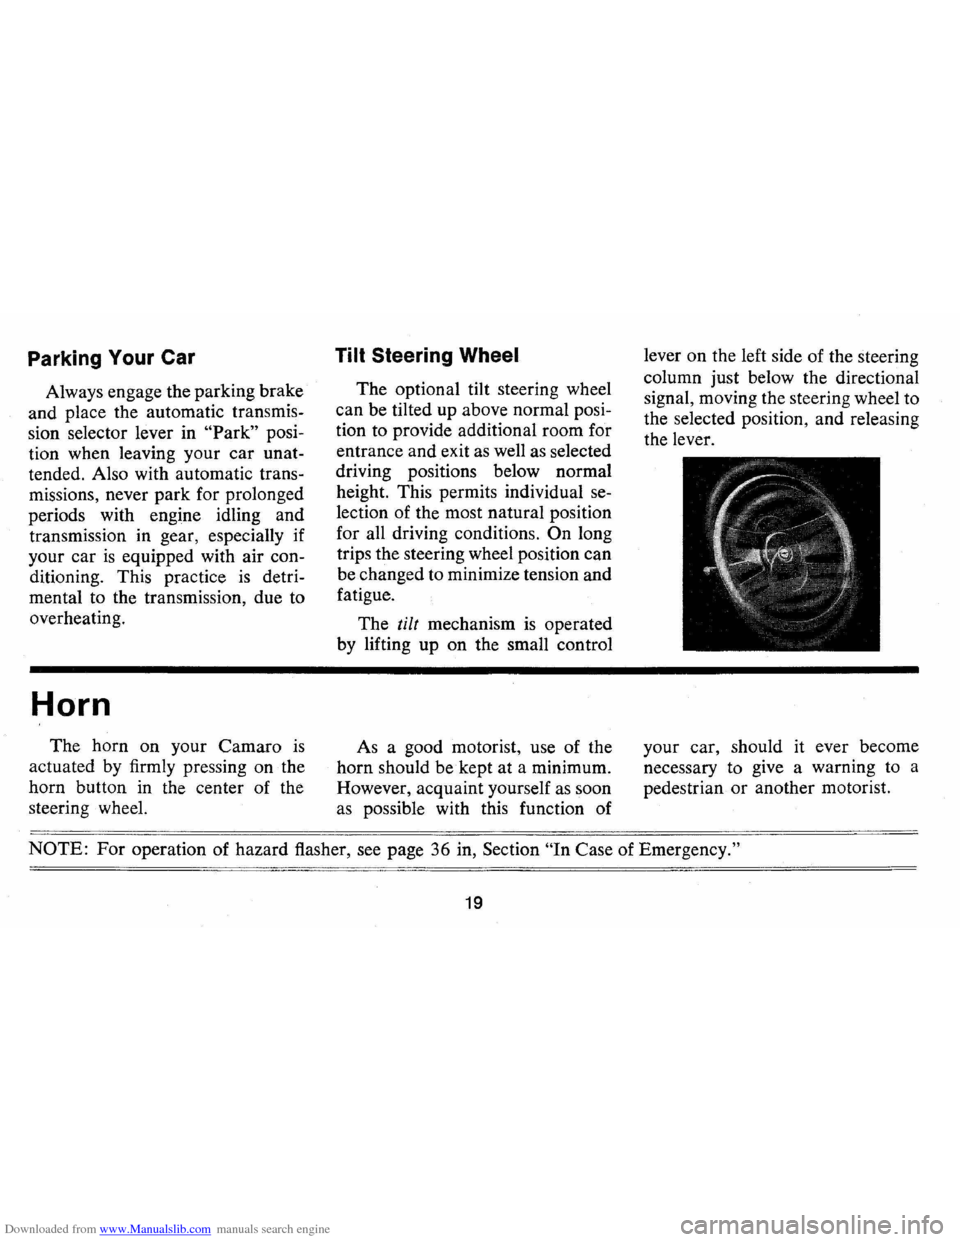
The optional tilt steering wheel
can be tilted up above normal posi
tion to provide additional room for
entrance and exit as well as selected
driving positions below normal
height. This permits individual
se
lection of the most natural position
for all driving conditions.
On long
trips the steering wheel position can
be changed to minimize tension and
fatigue.
The
tilt mechanism is operated
by lifting up on the small control
As a good motorist, use of the
horn should be kept at a minimum.
However, acquaint yourself as soon
as possible with this function of lever
on the left side of the steering
column just below the directional
signal, moving the steering wheel to
the selected position, and releasing
the lever.
your car, should it ever become
necessary to give a warning to a
pedestrian or another motorist.
NOTE: For operation of hazard flasher, see page 36 in, Section "In Case of Emergency."
19
Page 28 of 84
Downloaded from www.Manualslib.com manuals search engine • Stopping distances may be
greater.
• Greater pedal effort may be re
quired .
• Pedal travel may be greater.
3.
Tryout brake operation by
starting and stopping on road
shoulder-then:
• If you judge such operation to
be safe, proceed cautiously at a
safe speed to nearest dealer for
repair.
• Or have car towed to dealer for
repair.
Continued operation of the car
in this condition
is dangerous.
Headlight Beam Indicator
Light
The headlights of your car have
high and low
beams to provide you with
proper night-time visibility
for most driving conditions. The
"low" beams are used during most
city driving. The
"high" beams are
especially useful when driving on
dark roads since
they' provide ex
cellent long range illumination.
The headlight beam indicator will
be on whenever the high beams
or
"brights" are in use. The Headlight
Beam Switch controls the headlight
beams (see Page
21).
Light Switch
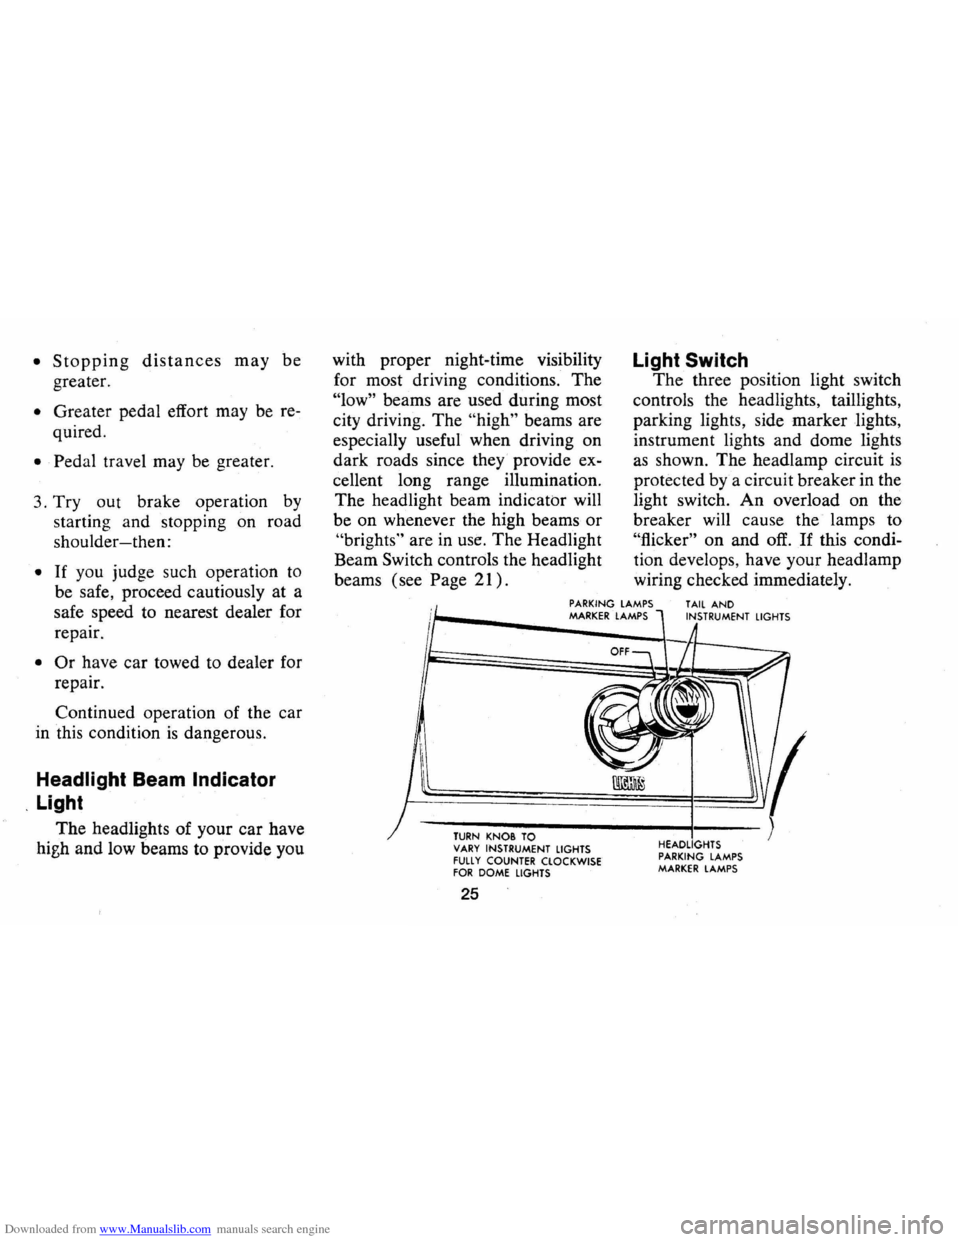
The three position light switch
controls the headlights, taillights,
parking lights, side marker lights,
instrument lights and dome lights
as shown. The headlamp circuit is
protected by a circuit breaker in the
light switch.
An overload on the
breaker will cause the lamps to
"flicker" on and off. If this condi
tion develops, have your headlamp
wiring checked immediately.
PARKING LAMPS MARKER LAMPS TAIL AND INSTRUMENT LIGHTS
TURN KN08 TO VARY INSTRUMENT LIGHTS FUll Y COUNTER CLOCKWISE FOR DOME LIGHTS
25
HEADLIGHTS
PARKING LAMPS MARKER LAMPS
Page 29 of 84
Downloaded from www.Manualslib.com manuals search engine k)
2530 35404550
15 55
10 60
5 65 RPM/tOO 70 Illm
Optional Instruments and Gauges
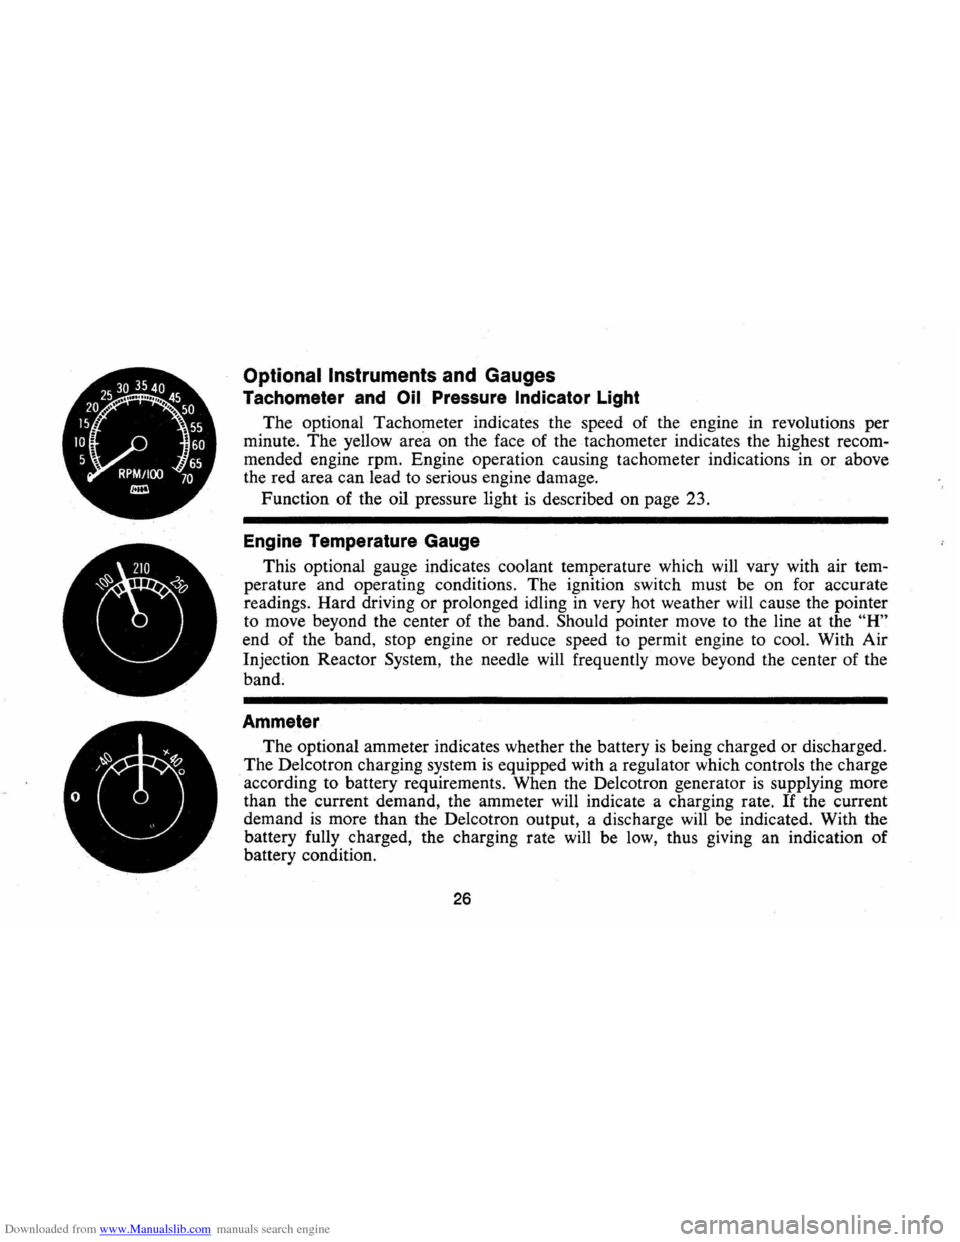
Tachometer and Oil Pressure Indicator Light
The optional Tachometer indicates the speed of the engine in revolutions per
minute . The yellow are'a on the face of the tachometer indicates the highest recom
mended engine rpm. Engine operation causing tachometer indications in
or above
the red area can lead to serious engine damage.
Function of the oil pressure light
is described on page 23.
Engine Temperature Gauge
This optional gauge indicates coolant temperature which will vary with air tem
perature and operating conditions. The ignition switch must be on for accurate
readings. Hard driving or prolonged idling in very hot weather will cause the pointer
to move beyond the center of the band. Should pointer move to the line at the
"H"
end of the band, stop engine or reduce speed to permit engine to cool. With Air
Injection Reactor System, the needle will frequently move beyond the center of the
band.
Ammeter
The optional ammeter indicates whether the battery is being charged or discharged.
The Delcotron charging system
is equipped with a regulator which controls the charge
according to battery requirements. When the Delcotron generator
is supplying more
than the current demand, the ammeter will indicate a charging rate.
If the current
demand
is more than the Delcotron output, a discharge will be indicated. With the
battery fully charged, the charging rate will be low, thus giving an indication of
battery condition.
26
Page 48 of 84
Downloaded from www.Manualslib.com manuals search engine SERVICE AND MAINTENANCE
The time or mileage intervals on
the following pages are intended
as
a guide for establishing regular
maintenance and lubrication
periods for your car. Sustained
heavy duty
or high speed operations
or operation under adverse condi
tions may necessitate more frequent
servicing. To determine specific
recommendations for conditions
under which you use your car, con-
Fuel
Requirements
Your Camaro is designed to op
erate on a good quality fuel of
ap
proximately 91 Research Octane
Number or higher, commonly sold
in the United
States and Canada.
Use of a fuel which is too low in
suIt your Authorized Chevrolet
Dealer.
Maintenance Schedule
For owner convenience, a sep
arate maintenance folder has been
provided with your car which con
tains a complete schedule and
brief explanation of the safety,
emission control, lubrication and
anti-knock quality will result
in
"spark knock", a metallic rapping
noise generated during the
com
bustion process. It should be noted
that Research
Octane Number
does not completely describe fuel
octane quality. Therefore ,
if you
hear knock in your engine you
may wish
to try a different gaso
line.
If knocking persists consult
45
general maintenance it requires.
The maintenance folder informa
tion
is supplemented by this sec
tion of the
Owner's Manual, as
well as the separate emission con
trol systems folder also furnished
with your car. Read all three
pub
lications for a full understanding
of vehicle maintenance require
ments.
your authorized Chevrolet dealer.
In any case, continuous
or exces-
sive knocking may result in engine
.1
damage and constitutes misuse of
the engine for which Chevrolet
Motor Division
is not responsible
under the terms of the
New Vehi-
cle Warranty.
General Motors recommends
the
use of unleaded or low-lead (0
Page 66 of 84
Downloaded from www.Manualslib.com manuals search engine The chart on the previous page, and the, information on the pages
which follow, contains information designed to aid the average
driver to discover, and possibly correct, conditions resulting in minor
mechanical difficulties
in his car. The chart, designed to point out
possible solutions to several
of the most common automotive malfunctions and point out a logical checking sequence, will lead step
by step to the most
likely causes and corrective procedures. If, after
making the checks and adjustments suggested, the source of the
trouble
has not been found and corrected, it is strongly recom
mended that an Authorized Chevrolet Dealer inspect the vehicle and make whatever repairs or adjustments are necessary.
FUEL SYSTEM AND ENGINE
If the ignition switch will cause the engine to "turn over" or
"crank" but the car will not start, check Steps A through 0 below.
NOTE: If continual ··f1ooding··, of the carburetor is evidenced by a
carburetor wet with fuel or black exhaust smoke, perform the
operation suggested in paragraph D only.
(A) The first and most obvious, and one of the most frequently
overlooked, items to check when
you have difficulty in starting your car is the amount of fuel in the
tank. Make it a habit to check the
FUEL GAUGE regularly and most
especially at a time when the engine will "turn over" but will not
start.
(8)
If the fuel tank is not empty,
you may check further to see
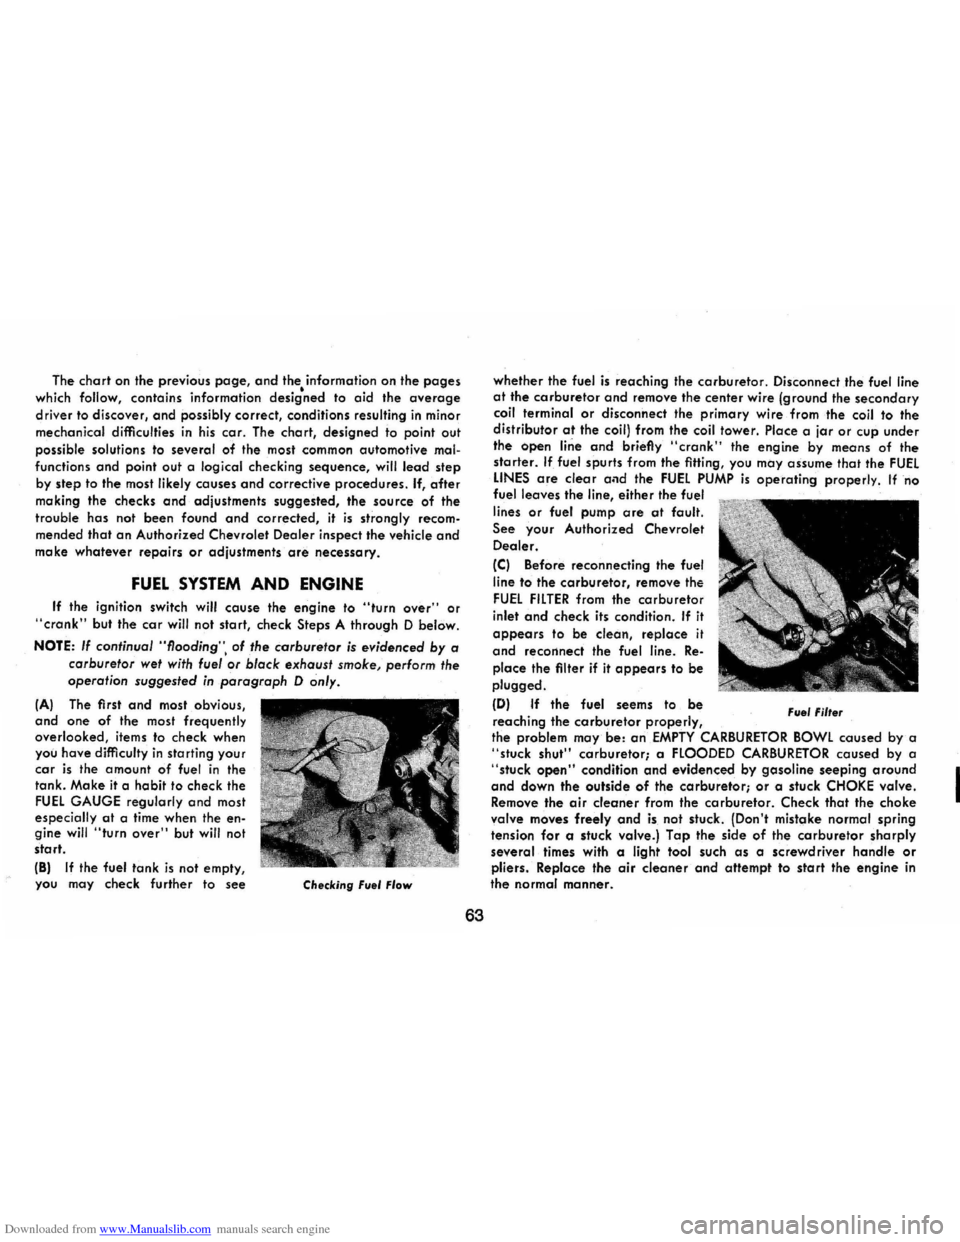
Checking Fuel Flow
63
whether the fuel is reaching the carburetor. Disconnect .the fuel line at the carburetor and remove the center wire (ground the secondary coil terminal or disconnect the primary wire from the coil to the
distributor at the coil) from the coil tower. Place a jar or cup under
the open line and briefly "crank" the engine by means of the
starter. If fuel spurts from the fitting, you may assume that the FUEL LINES are clear and the FUEL PUMP is operating properly. If no
fuel leaves the line, either the fuel
lines
or fuel pump are at fault.
See your Authorized Chevrolet
Dealer.
(C) Before reconnecting the fuel
line to the carburetor, remove
the
FUEL FILTER from the carburetor
inlet and check its condition. If it
appears to be clean, replace it
and recorinect the fuel line. Re
place the filter if it appears to be
plugged.
(D) If the fuel seems to be
reaching the carburetor properly, Fuel Filter
the problem may be: an EMPTY CARBURETOR BOWL caused by a "stuck shut" carburetor; a FLOODED CARBURETOR caused by a "stuck open" condition and evidenced by gasoline seeping around and down the outside of the carburetor; or a stuck CHOKE valve.
Remove the air cleaner from the carburetor. Check that the choke
valve moves freely and is not stuck. (Don't mistake normal spring
tension for a stuck valve.) Tap the side of the carburetor sharply
several times with a light tool such as a screwdriver handle or pliers. Replace the air cleaner and attempt to start the engine in the normal manner.
I
Page 70 of 84
Downloaded from www.Manualslib.com manuals search engine SPECIFICATIONS (Cont'dl
Cooling System: 250 L-6
307 V-8
350 V-8
U.S. Measure (qts.)
12.5
15.5·
Imperial Measure (qts.)
10.5 13·
·with air condo add 1 qt. U.S. measure (3,4 qt. Imperial meas.)
Thermostat
All engines (Exc. RPO L-82, Z28) .............. .... 1950
RPO L-82, Z28 ........................... 1800
Radiator Pressure Cap ......................... 15 lb.
67
Air Conditioning System
Compressor
oil (525 vis.) .................... , .. 11 oz.
Refrigerant-R-l 2
Four
Seasons . . . . . . . . . . . . . . . . . . . . . . . .. 3 lb. 12 oz.
Turbo Hydramatic U.S. Measure
350. . . . . . . . . . . . . . . . . . . . . . . . . . . . . . . . . . . ... 10.0 qts.
400. . . . . . . . . . . . . . . . . . . . . . . . . . . . . . . . . . . . . 11.0 qts.
TURN SIGNAL FLASHER:
Imperial Measure
8.25 qts.
9.25 qts.
Type .................................... Capacity
All .................................. 2 lamp (LL)
Hazard Warning Flasher, All ................. .4 lamp
TIRE INFORMATION:
Complete tire information will be found on pages 55, 56, 57, 58,59,60 and 61.
I