1971 CHEVROLET CAMARO clutch
[x] Cancel search: clutchPage 16 of 88
Downloaded from www.Manualslib.com manuals search engine Starting Engine
Automatic Transmission
Models
1. Apply the foot brake.
2. Place transmission selector
in "P" or "N" (UP" preferred).
A starter safety switch prevents
starter operation while the trans
mission selector
is in any drive
position.
(If it is necessary to
re-start the engine with the car
moving, place the selector lever
in
"N".)
3. Depress accelerator pedal and
activate starter
as outlined be
low for different conditions.
• Cold Engine -Fully de
press
accelerator pedal and
slowly release.
With foot off
the pedal,
crank the engine
by turning the ignition key
to the Start position-release
when engine starts.
If engine starts, but fails to
run, repeat this procedure.
When engine is running
smoothly, the idle speed may
be reduced by slightly de
pressing the accelerator pedal
and then slowly releasing.
• Warm Engine -Depress ac
celerator
pedal about halfway
and hold while cranking the
engine.
• Extremely Cold Weather
(Below
0° F.) Or After Car
Has Been Standing Idle
Several
Days-
Fully depress and release
accelerator pedal two
or three
times before cranking the
engine.
With foot off the ac
celerator pedal,
crank the
engine by turning the key to
the Start position and release
when engine starts.
13
Manual Transmission Models
1. Apply parking brake and shift
transmission to neutral.
2.
Hold clutch pedal to floor
throughout the starting proce
dure. A starter interlock pre
vents starter operation when
clutch
is not fully depressed.
3.
Operate accelerator pedal and
starter
as outlined in step 3
(under Automatic Transmission
Models).
Engine Flooded
Depress accelerator pedal and
hold to floor while starting until
engine
is cleared of excess fuel
and
is running smoothly. Never
"pump" the accelerator pedal.
Warm-Up
Always let the engine idle for
20 to 30 seconds after starting
and drive at moderate speeds for
several miles, especially during
cold weather.
Page 17 of 88

Downloaded from www.Manualslib.com manuals search engine Driving with the Chevrolet Automatic Transmissions
The Powerglide and the Turbo
Hydra-matic 350 and 400 are com
pletely automatic transmissions.
All replace the standard clutch
and
transmission.
Powerglide, Turbo Hydra
Malic
350 and Turbo Hydra
Matic
400
After starting the engine with the
selector lever in N (Neutral)
or P
(Park) position select the range de- sired
(see tables)
and depress the
accelerator.
All Automatic Transmissions
A gradual start with a steady in
crease in accelerator pressure will
result in best possible fuel economy.
Rapid acceleration for fast starts
will result in greater fuel consump
tion.
Automatic transmission shift
quadrants of all OM cars continue
the uniform sequence of selector positions.
This particularly benefits
multicar families
and those who
occasionally drive other cars.
Shift
indicators are arranged with "Park"
position at one end, followed in se
quence by
"Reverse", "Neutral"
and the forward driving ranges.
All automatic transmission are
POWERGLIDE
P-PARK Use only when car Is stopped.
R-REVERSE
N-NEUTRAL
D-DRIVE
L-LOW
For backing car-from stop.
For standing (Brakes Applied)
For forward driving.
Depress accelerator
to floor for extra acceleration at speeds
(depending on engine, axle and tire combinations) as high as 40 to 60 mph.
For hard pulling through sand, snow or mud, and for climbing or descending steep grades. Do not shift to Labove 40 mph.
14
Page 19 of 88

Downloaded from www.Manualslib.com manuals search engine Driving with Manual Transmissions
The 3-speed manual transmis
sion shift positions follow the
stan
dard pattern shown on the illustra
tion. The 4-speed transmission shift
lever, extending from the floor,has
its special shift pattern diagram
lo
cated on the knob or floor plate.
Depress the clutch pedal fully
be
fore attempting to shift to a differ
ent gear, then release the pedal to
move in that gear. Shifting into 2nd
and 3rd gear
as soon as possible
will add appreciably to your fuel
economy.
Both transmissions, being fully
synchronized, may be downshifted
into 1st gear at any speed below
20
m.p.h. Shift into Reverse gear only
after the car has stopped. Always depress
and release the clutch pedal
fully when shifting.
On Four-Speed
transmission the shift linkage may
be adjusted to allow
"short stroke"
shift lever operation. See your
Chevrolet Dealer.
Also, shift into
"Reverse" before
shutting
off engine. This will permit
the ignition key to be turned to the
"Lock" position.
REMINDER: Before descending a
steep or long grade, down a moun
tain or hillside, reduce speed and
shift into a lower gear (for either
automatic or manual transmission
cars).
Use the brakes sparingly to
prevent them from overheating and
thus reducing brake effectiveness.
16
Turn Signals and Lane
Change Feature
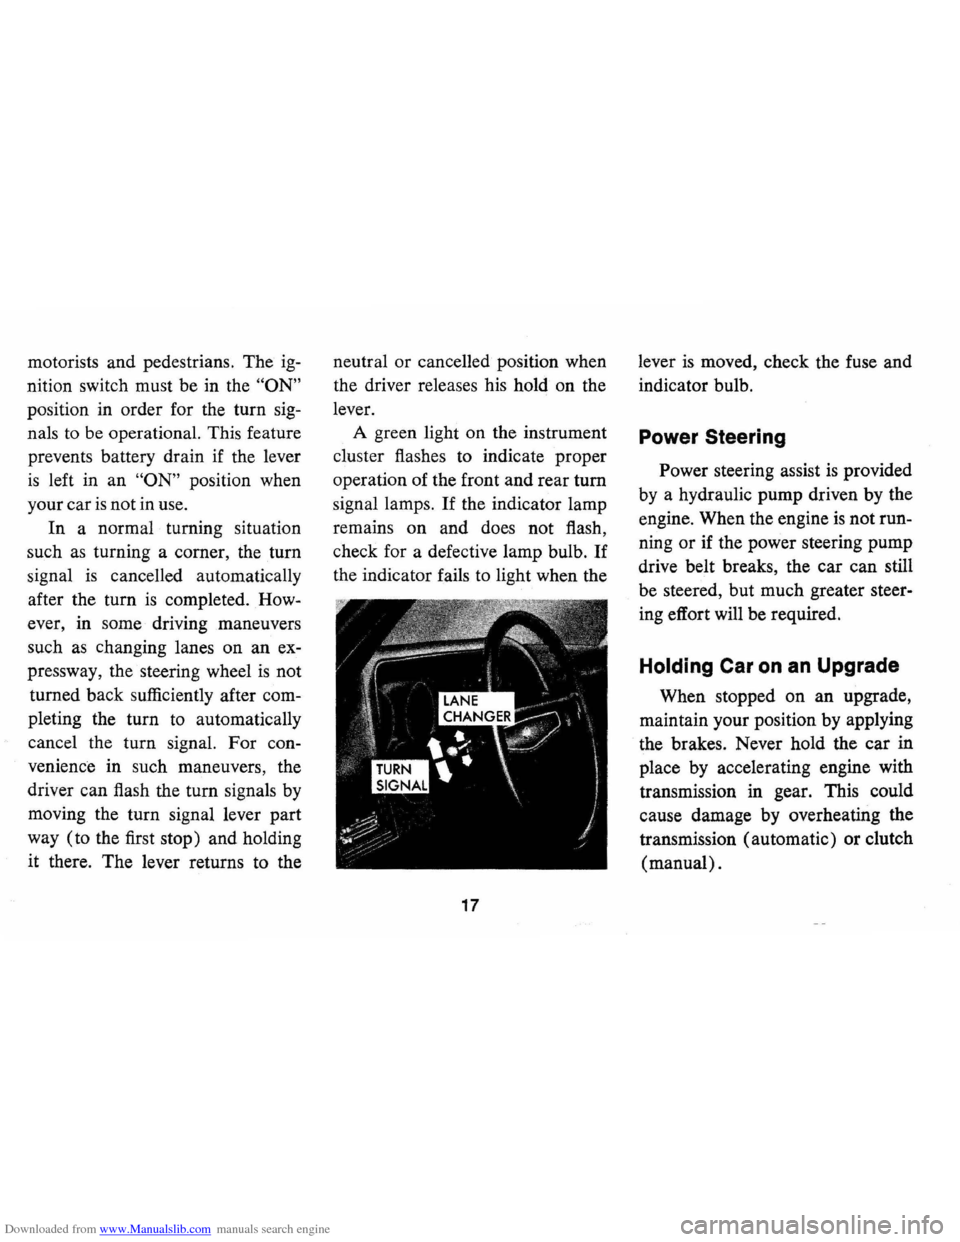
The turn signal lever is located
on the left side of the steering
col
umn immediately under the steer
ing wheel. The lever is moved up
ward to signal a right turn and '
downward to signal a left turn.
Lamps on the front and rear of the
car transmit this signal to other
Page 20 of 88
Downloaded from www.Manualslib.com manuals search engine motorists and pedestrians. The ig
nition switch must be in the "ON"
position in order for the turn sig
nals to be operational. This feature
prevents battery drain if the lever
is left in an "ON" position when
your car
is not in use.
In a normal turning situation
such
as turning a corner, the turn
signal is cancelled automatically
after the turn
is completed. How
ever, in some driving maneuvers
such
as changing lanes on an ex
pressway, the steering wheel
is not
turned back sufficiently after com
pleting the turn to automatically
cancel the turn signal. For con
venience in such maneuvers, the
driver can flash the turn signals by
moving the turn signal lever part
way (to the first stop) and holding
it there. The lever returns to the neutral
or cancelled position when
the driver releases his hold on the
lever.
A green light on the instrument
cluster flashes to indicate proper
operation of the front and rear
tum
signal lamps. If the indicator lamp
remains on and does not flash,
check for a defective lamp bulb.
If
the indicator fails to light when the
17
lever is moved, check the fuse and
indicator bulb.
Power Steering
Power steering assist is provided
by a hydraulic pump driven by the
engine. When the engine
is not run
ning
or if the power steering pump
drive belt breaks, the car can still
be steered, but much greater steer
ing effort will be required.
Holding Car on an Upgrade
When stopped on an upgrade,
maintain your position by applying
the brakes. Never hold the car in
place by accelerating engine with
transmission in gear. This could
cause damage by overheating the
transmission (automatic) or clutch
(manual).
Page 35 of 88
Downloaded from www.Manualslib.com manuals search engine • Drum brake adjustment is made
automatically
as the brakes are
applied while car
is moving back
wards.
• Disc brake adjustment is made
automatically with each brake
application.
• If excess brake pedal travel de
velops, drive alternately back
ward and forward (several
times) and apply brakes firmly
in each direction.
• See your dealer if normal pedal
travel
is not restored, or if there
is a
rapid increase in pedal
travel, which could be a sign of
other brake trouble.
Clutch Adjustment
Clutch adjustment should be
checked and adjusted periodically
as necessary to compensate for
clutch facing wear. To check,
de
press pedal by hand until resistance
is felt. Free travel of pedal should
be approximately one inch; if very little
or no free travel
is evident,
clutch adjustment
is required.
Headlight Beam Switch
"High" and "low" headlight
beams are controlled by the floor
button at your left foot. The
indi
cator, located in the speedometer
dial, will light up when the high
beams are in use.
OTHER CONTROLS AND FEATURES
Positraction Rear Axle
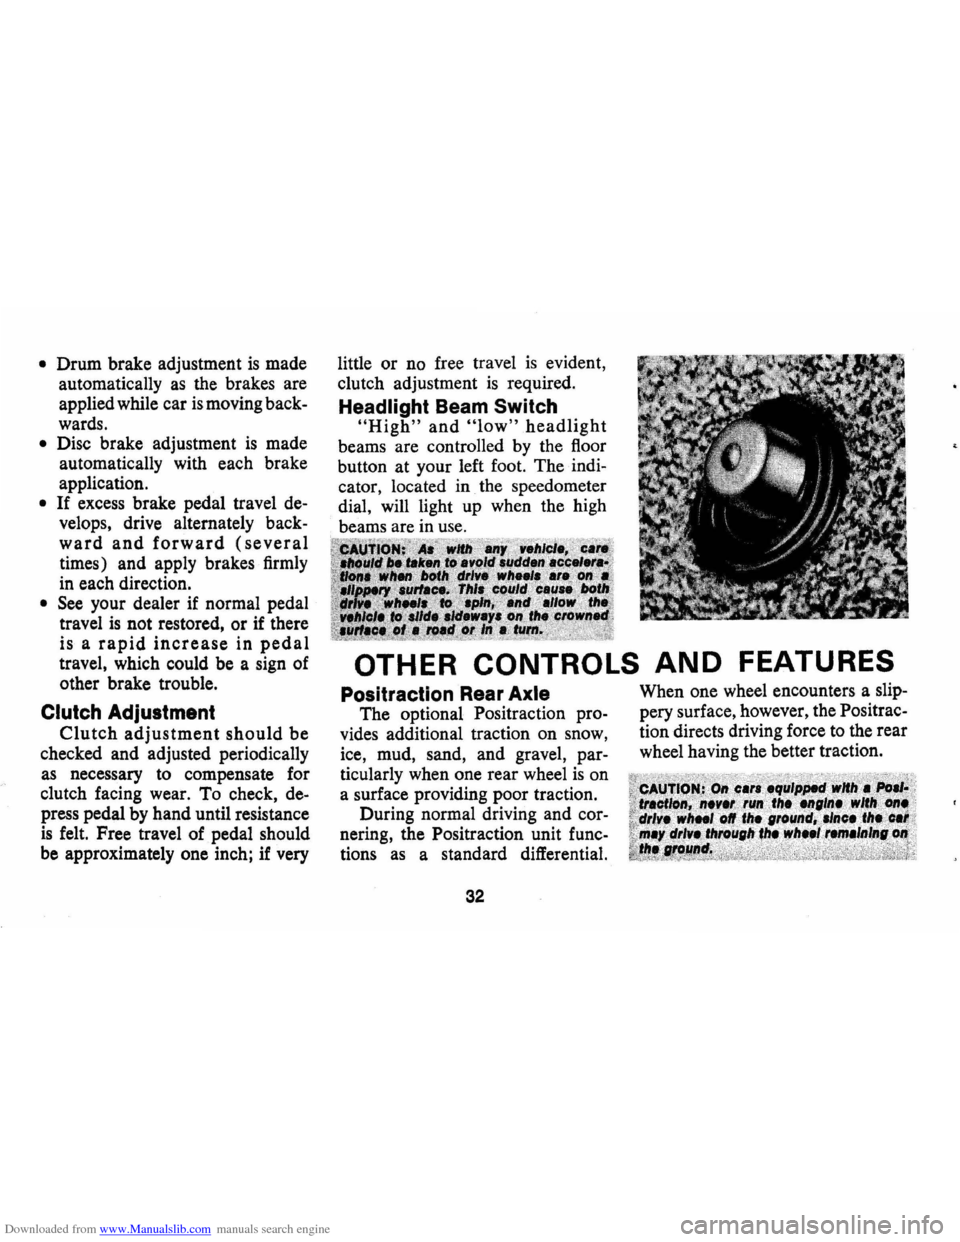
The optional Positraction pro
vides additional traction on snow,
ice, mud, sand, and gravel,
par
ticularly when one rear wheel is on
a surface providing poor traction.
During normal driving and
cor
nering, the Positraction unit func
tions as a standard differential.
32
When one wheel encounters a slip
pery surface, however, the Positrac
tion directs driving force to the rear
wheel having the better traction.
Page 40 of 88

Downloaded from www.Manualslib.com manuals search engine lights, turn signals, backup lamps, and hazard
warning flashers. Have someone observe operation
of each light while you activate the controls.
• Starter Safety Switch (Automatic Transmis
sion Cars)
CAUTION: Before making the following check, be sure to have a clear distance ahead and behind the car, set the parking brake and firmly apply the foot brake. Do not depress accelerator pedal. Be prepared to turn ott ignition switch immediately if engine should start.
Check starter safety switch by placing the transmis
sion in each of the driving gears while attempting to
start the engine. The starter should operate only in the
Park ("P") or Neutral ("N") positions.
• Starter Interlock (Manual Transmission Cars)
-To check a manual transmission equipped car,
depress the clutch halfway, place the transmission
in neutral, and attempt to start.
The starter should
operate only when clutch
is fully depressed.
• Transmission Shift Indicator-Check to be sure
shift indicator accurately indicates the shift posi
tion selected.
• Horn-Blow the horn occasionally to be sure that
it works.
37
• Seat Back LatcheS-Check to see that seat bac k
latches are holding by pulling forward on the seat
back top.
• Rearview Mirrors and Sun Visors-Check that
friction joints are properly adjusted so mirrors and
sun visors stay in the selected position.
• Door LatcheS-Check for positive closing, la tch
ing and locking.
• Hood Latches-Check to make sure hood closes
firmly . Check also for broken , d amaged or missing
parts which might prevent secure latching.
• Fluid LeakS-Check for fuel, water, oil or other
fluid leaks by observing the ground beneath the
vehicle after it has been parked for a while . (Water
dripping from air conditioning system after use
is
normal). If gasoline fumes are noticed at any time,
the cause should be determined
and corrected with
out delay because of the possibility of fire.
• Exhaust System-See engine exhaust gas caution
at beginning of starting and operating section of
this manual for suggested driver observations and
checks.
Page 59 of 88
Downloaded from www.Manualslib.com manuals search engine Distributor Cam Lubricator
6 Cylinder Engine -Rotate cam
lubricator
1800 at 12,000 mile in
tervals -Replace at
24,000 mile
intervals.
8 Cylinder Engine-Change cam
lubricator end for end at
12,000
mile intervals-Replace at 24,000
mile intervals.
Rear Axle
Standard -Every 4 months or
6,000 miles, whichever occurs
first, check lubricant level and add
lubricant, if necessary, to
fill to
level of filler plug hole.
Use SAE
80 or SAE 90 GL-5 Gear Lubri
cant.
Positraction -Same as standard
axle
but use only the special posi
traction lubricant available from
your Chevrolet Dealer.
Manual Transmissions
3-Speed and 4-Speed -Every
6,000 miles or 4 months-Check
at operating temperature and fill
as necessary to level of filler plug
hole with SAE
80 or SAE 90 GL-
5 Gear Lubricant.
Clutch Cross-Shaft -Every
36,000 miles or sooner if neces
sary -Remove the plug, install a
lubrication fitting
and lubricate
with water resistant
EP Chassis
Lubricant which meets
GM Speci
fication 6031M.
Automatic Transmission
Fluid Recommendations
General Motors DEXRON®
Automatic Transmission Fluid,
part no. 1050568 and United
Delco DEXRON® Automatic
Transmission Fluid, part no. 301-
RD, which have been especially
formulated and tested for use in
your automatic transmission are
recommended.
Other automatic
transmission fluids identified with
the
mark DEXRON@ are also
recommended.
56
Check the fluid level at each
engine oil change period.
To make
an accurate fluid level check:
1. Drive car several miles, making
frequent starts and stops, to
bring transmission up to normal
operating temperature (ap
proximately 180-190 OF) .
2.
Park car on a level surface.
3. Place selector lever
in "Park"
and leave engine running.
4. Remove dipstick and
WIpe
clean.
5. Reinsert dipstick until cap seats.
6. Remove dipstick and note read
ing.
If oil level is at or below the
"ADD" mark on the dipstick, oil
should be added as necessary.
One pint raises the level from ADD
to FULL.
Do not overfill.
Under normal driving condi
tions, the transmission fluid should
Page 70 of 88

Downloaded from www.Manualslib.com manuals search engine Interval
First 12,000 miles Every 12
months
or 12,000 miles
Every
24,000 miles
Service To Be Performed
• Rotate distributor cam lubricator. See 24,000 mile recommendation.
• Insp .ect air cleaner element, if satisfactory
rotate 1800 from original position and reinstall. See 24,000 mile recommendation.
• Inspect brake linings and check system for
leaks
• Inspect parking brake and throttle linkage. • Engine tune-up.
Replace carburetor 'Inlet fuel filter element. • Check emission control items. • Inspect AIR drive belt.
Evaporation Control System-Replace filter in
base of canister and inspect canister. • Check headlamp aiming.
• Repack front wheel bearings.
• Replace distributor cam lubricator. • Drain automatic transmission sump and add
fresh fluid (normal passenger car service).' Adjust Powerglide low band at first fluid
change.
• Replace crankcase ventilation filter (located
within air cleaner).
• Replace Turbo Hydra-Matic sump filter.
Interval Service To Be Performed
Every 2 years • Drain radiator coolant, flush and refill system.
Every
24 months· Replace PCV Valve. Inspect all hoses and or 24,(100 miles fittings.
Every
36,000 • Check steering gear for seal leakage (actual
miles solid grease-not just oily film).
• Lubricate clutch cross shaft (sooner if necessary), remove plug and install lube fittIng.
During Winter
• Check operation of air conditioning system.
months
Periodically • Check battery liquid leve/.
• Inspect seat belts, buckles, retractors and
anchors.
• Check all lights for proper operation.
As Required
• Check wheel alignment and balancing.
'Service more often during severe operating conditions as outlined under Service and Maintenance.
67