1965 DODGE POLARA light
[x] Cancel search: lightPage 4 of 46

fOR MORE INfORMATION SEND THIS POSTCARD
If you would like more information about the use. care and maintenance of your new Coronet. Dart or Dodge Polara. 880. Monaco, the following Shop Manuals are available . Please check appropri ate box .
o 1965 Dodge Coronet and Dart Combined Technical Service Manual, 81-270-5250
o 1965 Dodge PoIara, 880, Monaco Technical Service Manual, 81-270-5280
(15.00 ElIch , PO&t~id in U.S .A .) . Send check or Please allow 30 money order (no stamps , please) with this card to: days for delivery.
CHIYSlEI COIt'OIATION , DODGE DIVISION, SEIVICE DEPAITMENT
P .O . lOX 1259, DETIOIT , MICHIGAN 41231
You,nam.~ ____________________________________________________________ ___
Addr"I~ ____________________________________________________________ _
City Zone State
Perhaps you have a friend or relative who would like to receive literature about the beautiful new Dart. Dodge Coronet or Dodge PolaTa . 880 . Monaco . If so. please give his name and address and check the appropriate box. You, Deal.,'. Nam. ________________________________ Name ______________________________ __
AddnK.L-_____________________________ Add,~~ __________________________ ___
Oty ____________ ~UM'Ie___Stote Oty ______________ ~ ... e___S tClte ________ _
[J DODGE DAIT 0 DODGE CORONET 0 DODGE POlAIA, 880, MONACO
page I. 14 ~ Closing Controls .......... 15 oar locks ........... 15 r locks ........ 15 ompartment lock. . .. 15 Dr locks.. .......... 15 ontrol .... 16 ow control ......... 16 dow ............... 16
fort and ce Features t adjustment ...... 17 d wipers and washer. 17 partment ........ 17 e steering wheel. . . .. 19
mirrors at adjustment.. .. rake warning signal .. y warning flasher. ... er ..
17 18
18
19 19
19
19
19
s 20 ........... 20
page refueling . ... . . 20 Cool Aire air conditioning 20 radios. . . . 21 rear seat speaker........ . .. 21 reverberator . .. . . 21 remote·control outside mirror. 21 Heater Operation . ..... .. 22 Air Conditioner Operation 23 Station Wagon Features seat storage ...... 26 tailgate and rear window ... . 27 jack and spare tire storage ... 28 Convertible Top-Operation and Maintenance 29 How to Increase Tire life 30 The Safe Way to Change a Wheel 31 Appearance Care . . 32 Service Ti ps .... ... ... 35 Specifications, Capacities & Data license data .. 41 fluid capacities 41 light bulbs 41 light fuses. 41 engine specifications .. 41
1
Page 5 of 46
![DODGE POLARA 1965 3.G Owners Manual YOULL WANT
TO KNOW
TillS manual Includes oper~tln\~ In
struetlons lor all equipment ..hether
stlldMd, optional, or specl;]1 avail
able at tile time tillS r1i.1 11 U.1 I ,.~S
approved for pr DODGE POLARA 1965 3.G Owners Manual YOULL WANT
TO KNOW
TillS manual Includes oper~tln\~ In
struetlons lor all equipment ..hether
stlldMd, optional, or specl;]1 avail
able at tile time tillS r1i.1 11 U.1 I ,.~S
approved for pr](/manual-img/12/5700/w960_5700-4.png)
YOU'LL WANT
TO KNOW
TillS manual Includes oper~tln\~ In
struetlons lor all equipment .'.hether
st'lldMd, optional, or specl;]1 avail
able at tile time tillS r1i.1 11 U.1 I ,'.~S
approved for prlllting. Cilryslrl Cor
poratloll reserves ti'e r',111 10 rmke
(Ilanges 111 deSign and speuflcallolls,
.1nd or, to make additions to or
Illlprovcmcllts III Its produCI ,'.Ii iloul
ImposlIl,
.111\' OIJII,~IIOIlS UpOIl Itself
10 Illslall tile'" all lis produrts
previously nlililuidclured
page Warranty. . . . . . .. . ........ , . 2 Explanation of Warranty. . . . . . .. 3 Service Schedule .... ' ..... , 4 Owner's Required Services Record. . . 6 Let's Get AcqUainted keys. .. ............ ,. 7 manual seat adjustment. . . . .. 7 rear-view mirror. . . .. .. .. . . .. 7 Driver-Centered Instrumentation 8 I nstrument Cluster Details. , 9 Starting the Engine neutral. . .. .,.............. 10 ignition lock. . . . • . . .. 10 parking brake. . . .. ....•.... 10 break-in information ......... 11 Transmission automatic transmission operation and ranges ....... 12 manual transmission operation. 13 Ughts-I nside and Out head light switch ............. 14 interior lights ........ , . , ..... 14 head light beam selector. . . . 14 back-up lights. . . . . . . . . . . . . .. 14 turn signal .. , . . . . . . . . . . . . . .. 14 glove compartment light. . . . .. 14
page trunk light.. .. . .. , .... ,... 14 Opening and Closing Controls hood lock .... " ......... , 15 outside door locks . ,. ., ... 15 inside door locks, .. .,...... 15 luggage compartment lock. . .. 15 power door locks. , .. . . . . . . . .. 15 window control . .. . _ . . .. 16 vent window control.. . . . . . . .. 16 power window. , ... ' . . . . . . 16
Safety, Comfort and Convenience Features power seat adjustment 17 windshield wipers and washer. 17 glove compartment. . . . . . . . . . . 17 adjustable steering whee\. .... 19 sun visors... . . . . .. .. ....... 17 clock .................... 18 seat belts. ...... ... 18 rear view mi rrors .. .. . .. , 19 custom seat adjustment. . , .... 19 parking brake warning signal., 19 emergency warning Hasher. . . 19 ash receiver ................ 19 coat hooks .. .. . .. .. .. .. ... 20 Auto Pilot. ............. , 20
page refueling . . 20 Cool Aire air conditioning 20 radios .. , .... ,.... .. 21 rear seat speaker ............ 21 reverberator . 21 remote-control outside mirror .. 21 Heater Operation . . 22 Air Conditioner Operation . 23 Station Wagon Features seat storage.. .... .... . 26 tailgate and rear window .. .. 27 jack and spare tire storage .... 28 Convertible Top-Operation and Maintenance ... , . . , ., 29 How to Increase Tire Life .... . 30 The Safe Way to Change a WheeL ........... ,.... . .. 31 Appearance Care ... ' . 32 Service Tips, . . . . . . 35 Specifications, Capacities & Data license data , .. , ............ 41 fluid capacities. 41 light bulbs. . . . . . . . 41 lightfuses. . . . . .. .. . 41 engine specifications. 41
Page 14 of 46

INSTRUMENT CLUSTER DETAILS
Your instruments provide Inlormation about whars happening under the hood. That's why It 's a good idea lor you to check them frequently as you drive. Eye-ease paint is applied to the instrument cluster area to eliminate glare.
1. SPEEDOMETER-Located directly 10 front of you for easy visibility. At night the speedometer is softly lighted and glareless.
2. GASOLINE GAUGE-With ignition key in ON posillon the pointer will indicate the amount of fuel \0 gasoline tank.
3. ODOMETER-This group of numbers tells you tolal mileage the car has been driven in miles and tenths of miles.
4. TEMPERATURE GAUGE-Indicates engine coolant temperature. Pointer will normally slay near center while driving. If the pointer rises suddenly or remains on " H " while driving, stop car, turn oft engine and do not operate car until cause is located and corrected.
S. OIL PRESSURE LlGHT-A red glow informs you immediately if engine oil
pressure drops below normal. This light is
positive and unvarying, and catches your attention at once. Red light should not be on except momentarily when engine is first started or is operating at idle. If light stays on while driving, do not operate car until cause of low oil pressure is located and corrected. Light indicates lack of oil pressure, not the amount of oil in the crankcase.
6. ALTERNATOR INDICATOR-Indicates whether battery is being charged (" e ") or discharged (" 0") . Pointer will normally stay centered while driving when battery is fully charged and no lights or accessories are in use.
7. TURN SIGNAL INDICATORS-Light flashes in unison with outside lights when turn signal is applied. On Monaco models the turn signal indicators are located, instead on the front edge of each front fender.
9
Page 17 of 46
AUTOMATIC TRANSMISSION '
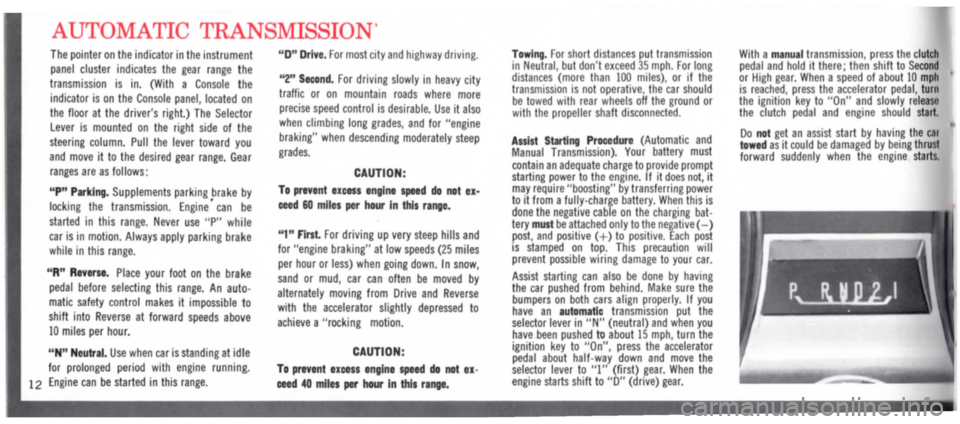
The pointer on the indicator in the instrument panel cluster indicates the gear range the
transmission is in. (With a Console the
indicator is on the Console panel, located on the floor at the driver's right.) The Selector Lever is mounted on the right side of the
steering column. Pull the lever toward you and move it to the desired gear range. Gear
ranges are as follows:
"P" Parking. Supplements parking brake by
locking the transmission. Engine' can be
started in this range. Never use " P " while
car is in motion. Always apply parking brake while in this range.
"R" Reverse. Place your foot on the brake
pedal before selecting this range. An auto· matic safety control makes it impossible to
shift into Reverse at forward speeds above 10 miles per hour.
"N " Neutral. Use when car is standing at idle for prolonged period with engine running.
12 Engine can be started in this range.
"0 " Drive. For most city and highway driving.
"2" Second. For driving slowly in heavy city
traffic or on mountain roads where more precise speed control is desirable. Use it also when climbing long grades, and for "engine
braking" when descending moderately steep grades.
CAUTION:
To prevent IICes s engine speed do not ex·
ceed 60 miles per hour In this range.
" 1" First. For driving up very steep hills and for "engine braking" at low speeds (25 miles
per hour or less) when going down. In snow,
sand or mud, car can often be moved by alternately moving from Drive and Reverse with the accelerator slightly depressed to
achieve a "rocking motion.
CAUTION:
To prevent excess engine speed do not ex
ceed 40 miles per hour In this range.
Towing. For short distances put transmission in Neutral, but don't exceed 35 mph. For long distances (more than 100 miles), or If the transmiSSion is not operative, the car should be towed with rear wheels off the ground or with the propeller shaft disconnected.
Assist Starting Procedure (Automatic and Manual Transmission). Your battery must contain an adequate charge to provide prompt starting power to the engine. If it does not, it may require "boosting" by transferring power t o it from a fully-charge battery. When this is done the negative cable on the charging battery must be attached only to the negative (- ) post, and positive (+ ) to positive. Each post IS stamped on top. This precaution will prevent possible wiring damage to your car.
Assist starting can also be done by having the car pushed from behind. Make sure the bumpers on both cars align properly. If you have an automatic transmission put the selector lever in "N" (neutral) and when you have been pushed to about 15 mph, turn the ignition key to "On", press the accelerator pedal about half-way down and move the selector lever to "I" (first) gear. When the engine starts shift to "0" (drive) gear.
With a m anual transmission, press the clutch pedal and hold it there; then shift to Second or High gear. When a speed of about 10 mph is reached, press the accelerator pedal, turn the ignition key to "On" and slowly release the clutch pedal and engine should start.
Do not get an assist start by having t h e cal towed as it could be damaged by being thrust forward suddenly when the engine starts.
Page 24 of 46
Resulting color mav rub off and webbing strength may be affected.
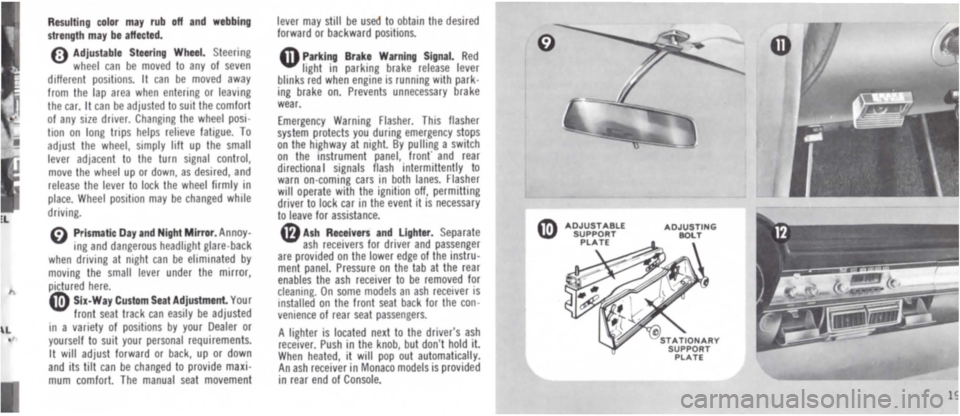
o Adjustable Steering Wheel. Steering wheel can be moved to any of seven different positions. It can be moved away from the lap area when entering or leaving the car. It can be adjusted to suit the comfort of any SIZe driver. Changing the wheel position on long trips helps relieve fatigue. To adjust the wheel, simply hft up the small lever adjacent to the turn signal control, move the wheel up or down, as desired, and release the lever to lock the wheel firmly in place. Wheel position may be changed while driving.
~ Prismatic Day and Night Mirror. Annoy-ing and dangerous headlight glare-back when driving at night can be elimmated by moving the small lever under the mirror, pictured here. o Six-Way Custom Seat Adjustment. Your front seat track can easily be adjusted In a variety of positions by your Dealer or yourself to suit your personal requirements. It will adjust forward or back, up or down and its tilt can be changed to provide maximum comfort. The manual seat movement
lever may still be used to obtain the desired forward or backward positions.
Q Parking Brake Warning S ignal. Red light in parking brake release lever blinks red when engine is running with parking brake on. Prevents unnecessary brake wear.
Emergency Warning Flasher. This flasher system protects you during emergency stops on the highway at night. By pu lIing a switch on the instrument panel, front' and rear directiona I signals flash intermittently to warn on-coming cars in both lanes. Flasher will operate with the ignition off, permitting driver \0 lock car in the event it is necessary to leave for assistance.
41) Ash Receivers and Lighter. Separate ash receivers for driver and passenger are provided on the lower edge of the instrument panel. Pressure on the tab at the rear enables the ash receiver to be removed for cleaning. On some models an ash receiver is Installed on the front seat back lor the convenience of rear seat passengers.
A lighter is located next to the driver's ash receiver. Push in the knob, but don't hold it. When heated, it will pop out automatically. An ash receiver in Monaco models is provided in rear end of Console.
AOJUSTING BOLT
1
Page 32 of 46
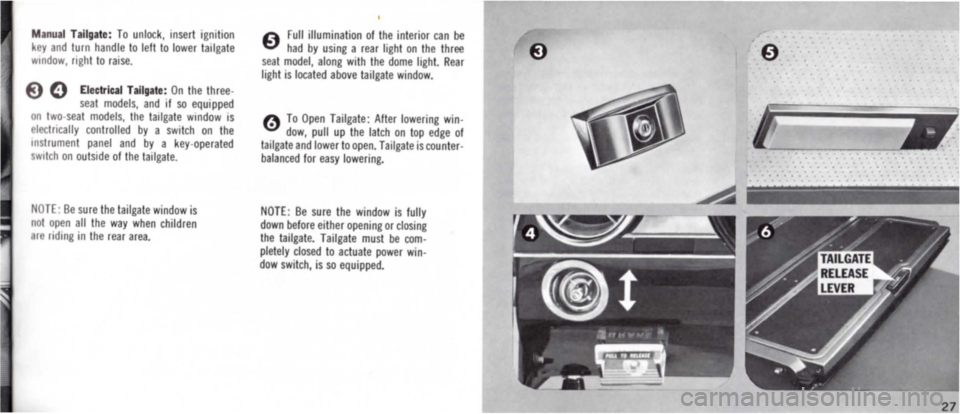
Manual Tailgate : To unlock, Insert ignition key and turn handle to left to lower tailgate window, nght to raise.
E) 0 Electrical Tailgate: On the three-seat models, and If so equipped on two seat models, the tailgate window IS electncally controlled by a switch on the mstrument panel and by a key·operated sWitch on outside of the tailgate.
NOTE: Be sure the tailgate window is not open all the way when children r ndmg in the rear area.
A Full illumination of the interior can be .::1 had by using a rear light on the three seat model, along with the dome light. Rear light is located above tailgate window.
o To Open Tailgate: After lowering window, pull up the latch on top edge of tailgate and lower to open. Tailgate is counterbalanced for easy lowering.
NOTE: Be sure the window is fully down before either opening or closing the tailgate. Tailgate must be completely closed to actuate power window switch, is so equipped.
--------------
2 7
Page 33 of 46
28
TATION WAG N
AN
JACK TORA PARE
WHEEL
E
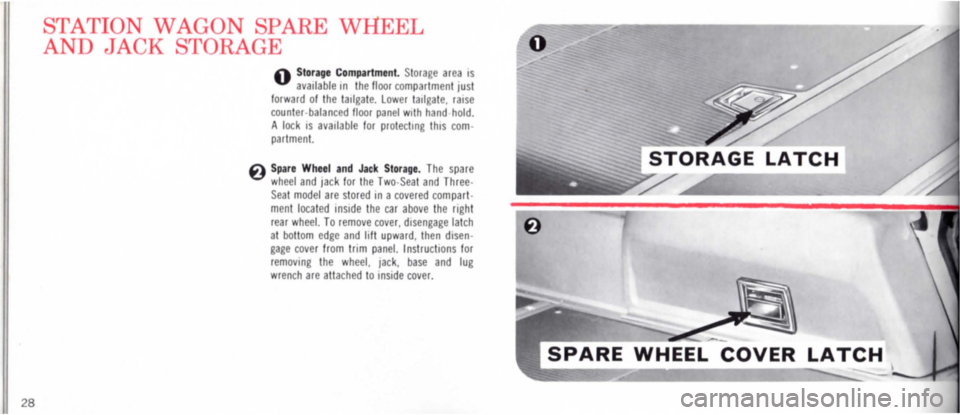
o Storage Compartment. Storage area IS available In the floor compartment lust forward of the tailgate. lower tailgate, raise counter· balanced floor panel with hand hold.
A lock IS available for protectrng this com· partment.
E) Spare Wheel and Jack Storage. The spare wheel and Jack for the Two·Seat and Three· Seat model are stored rn a covered compart· ment located Inside the car above the light rear wheel. To remove cover, disengage latch at bottom edge and hft upward, then dlsen· gage cover from tllm panel. Instructrons for removing the wheel, Jack, base and lug wrench are attached to inside cover.
SPARE WHEEL COVER LATCH
Page 34 of 46
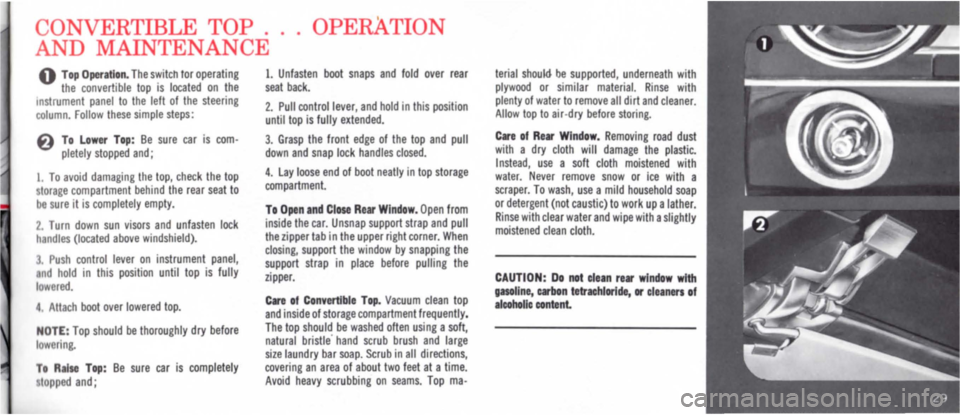
CONVERTmLE TOP . . . OPERATION
AND MAINTENANCE
o Top Operation. The switch lor operating the convertible top is located on the Instrument panel to the left of the steering column. Follow these simple steps:
6 To Lower Top: Be sure car is com· pletely stopped and;
1. To avoid damaging the top, check the top storage compartment behind the rear seat to be sure it is completely empty.
2. Turn down sun visors and unfasten lock handles (located above windshield).
3. Push control lever on instrument panel, nd hold in this position until top is fully lowered.
4 .
Attach boot over lowered top.
NOTE: Top should be thoroughly dry before lowering.
To R.lse Top: Be sure car is completely topped and;
1. Unfasten boot snaps and fold over rear seat back.
2. Pull control lever, and hold in this position until top is fully extended.
3. Grasp the front edge of the top and pull down and snap lock handles closed.
4. Lay loose end of boot neatly in top storage compartment.
To Open and Close Rear Window. Open from inside the car. Unsnap support strap and pull the zipper tab in the upper right corner. When closing, support the window by snapping the support strap in place before pulling the zipper.
Care of Convertible Top. Vacuum clean top and inside of storage compartment frequently. The top should be washed otten using a soft, natural bristle' hand scrub brush and large size laundry bar soap. Scrub in all directions, covering an area of about two feet at a time. Avoid heavy scrubbing on seams. Top mao
terial should be supported, underneath with plywood or similar material. Rinse with plenty of water to remove all dirt and cleaner. Allow top to air-dry before storing.
Care of Rear Window. Removing road dust with a dry cloth will damage the plastic. Instead, use a soft cloth moistened with water. Never remove snow or ice with a scraper. To wash, use a mild household soap or detergent (not caustic) to work up a lather. Rinse with clear water and wipe with a slightly moistened clean cloth.
CAUTION: Do not clean rear window with gasoline, carbon tetrachloride, or cleaners of lcoholic content.