2024 CHEVROLET SILVERADO EV warning
[x] Cancel search: warningPage 24 of 429
Chevrolet Silverado EV Owner Manual (GMNA-Localizing-U.S./Canada-
16702912) - 2024 - CRC - 1/23/23
Keys, Doors, and Windows 23
3. Check to make sure the hood is latchedcompletely. Push down on the hood to
latch if it does not latch completely.
Repeat this step with additional force if
necessary.
When the hood is not latched, a message
will display on the Driver Information Center
(DIC) and the vehicle will not be able to
shift out of P (Park). To override this
function, press and hold the shift button
and brake pedal until the DIC message
shifter unlock complete is displayed. The
vehicle’s speed will be limited to 42 km/h
(26 mph) when the hood is not completely
closed.
If the vehicle has lost power, and the hood
is open when the power is restored, the
power hood and power closing latch will not
operate. To allow powered hood operation
again, the hood must be manually closed
and fully latched.
{Warning
Do not drive the vehicle if the hood is
not latched completely. The hood could
open fully, block your vision, and cause a (Continued)
Warning (Continued)
crash. You or others could be injured.
Always close the hood completely before
driving.
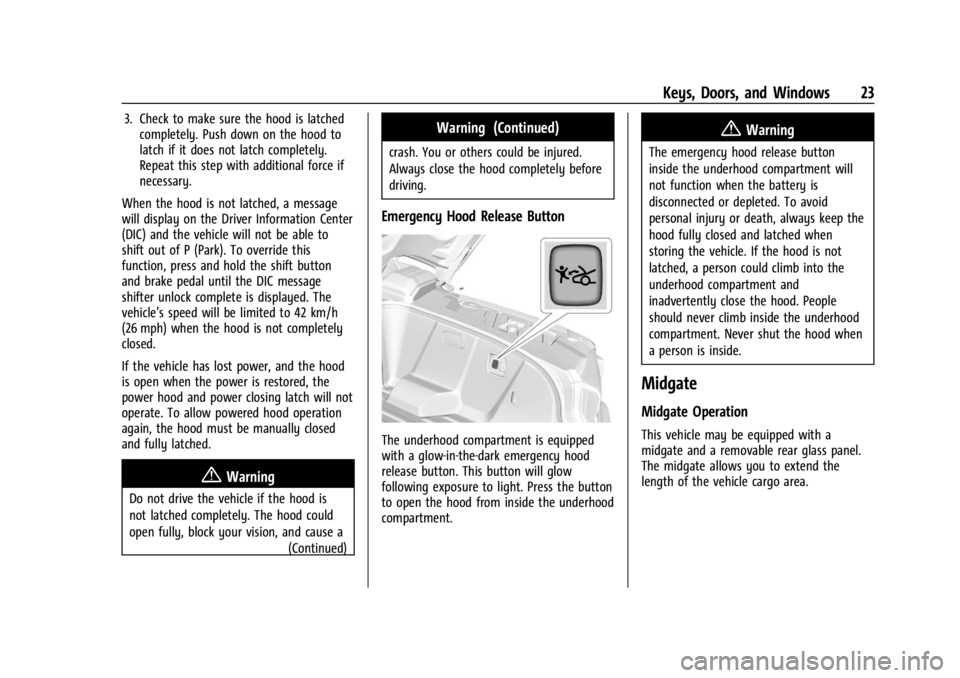
Emergency Hood Release Button
The underhood compartment is equipped
with a glow-in-the-dark emergency hood
release button. This button will glow
following exposure to light. Press the button
to open the hood from inside the underhood
compartment.
{Warning
The emergency hood release button
inside the underhood compartment will
not function when the battery is
disconnected or depleted. To avoid
personal injury or death, always keep the
hood fully closed and latched when
storing the vehicle. If the hood is not
latched, a person could climb into the
underhood compartment and
inadvertently close the hood. People
should never climb inside the underhood
compartment. Never shut the hood when
a person is inside.
Midgate
Midgate Operation
This vehicle may be equipped with a
midgate and a removable rear glass panel.
The midgate allows you to extend the
length of the vehicle cargo area.
Page 25 of 429
Chevrolet Silverado EV Owner Manual (GMNA-Localizing-U.S./Canada-
16702912) - 2024 - CRC - 1/23/23
24 Keys, Doors, and Windows
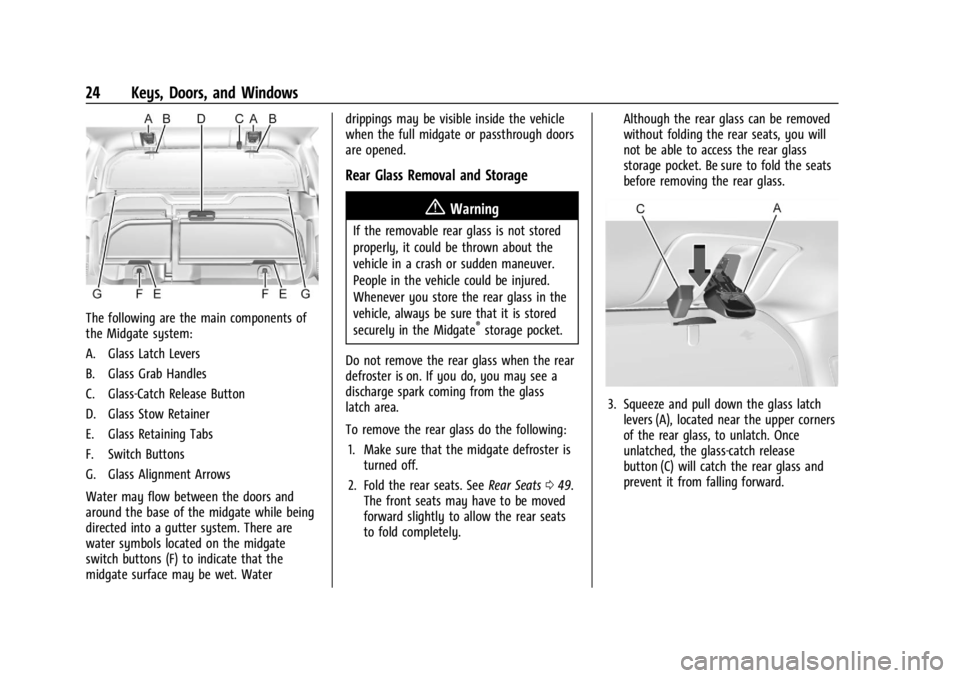
The following are the main components of
the Midgate system:
A. Glass Latch Levers
B. Glass Grab Handles
C. Glass-Catch Release Button
D. Glass Stow Retainer
E. Glass Retaining Tabs
F. Switch Buttons
G. Glass Alignment Arrows
Water may flow between the doors and
around the base of the midgate while being
directed into a gutter system. There are
water symbols located on the midgate
switch buttons (F) to indicate that the
midgate surface may be wet. Waterdrippings may be visible inside the vehicle
when the full midgate or passthrough doors
are opened.
Rear Glass Removal and Storage
{Warning
If the removable rear glass is not stored
properly, it could be thrown about the
vehicle in a crash or sudden maneuver.
People in the vehicle could be injured.
Whenever you store the rear glass in the
vehicle, always be sure that it is stored
securely in the Midgate
®storage pocket.
Do not remove the rear glass when the rear
defroster is on. If you do, you may see a
discharge spark coming from the glass
latch area.
To remove the rear glass do the following: 1. Make sure that the midgate defroster is turned off.
2. Fold the rear seats. See Rear Seats049.
The front seats may have to be moved
forward slightly to allow the rear seats
to fold completely. Although the rear glass can be removed
without folding the rear seats, you will
not be able to access the rear glass
storage pocket. Be sure to fold the seats
before removing the rear glass.
3. Squeeze and pull down the glass latch
levers (A), located near the upper corners
of the rear glass, to unlatch. Once
unlatched, the glass-catch release
button (C) will catch the rear glass and
prevent it from falling forward.
Page 29 of 429
Chevrolet Silverado EV Owner Manual (GMNA-Localizing-U.S./Canada-
16702912) - 2024 - CRC - 1/23/23
28 Keys, Doors, and Windows
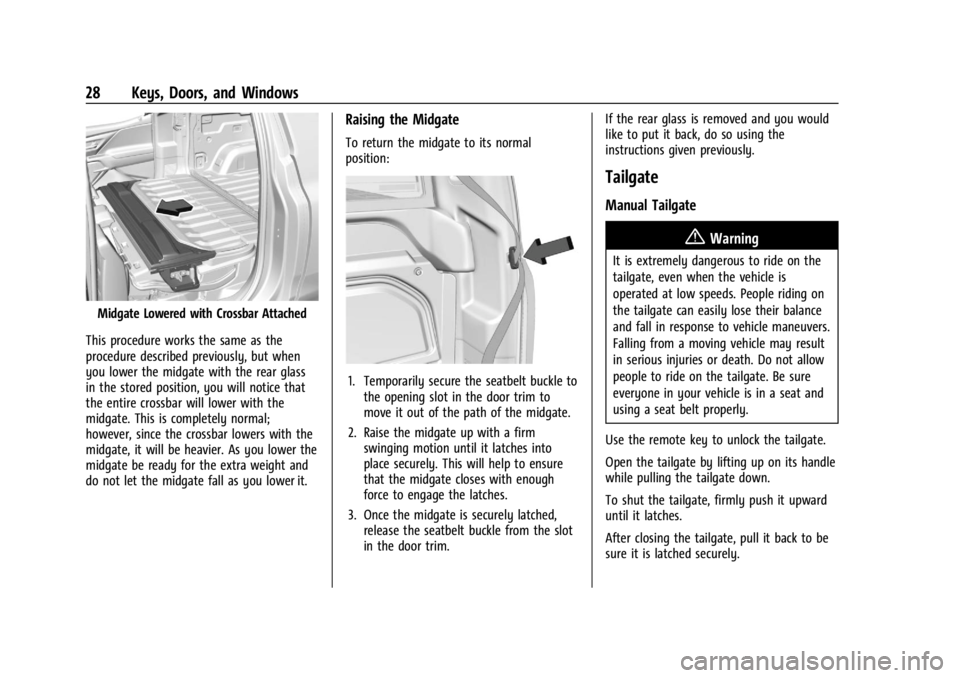
Midgate Lowered with Crossbar Attached
This procedure works the same as the
procedure described previously, but when
you lower the midgate with the rear glass
in the stored position, you will notice that
the entire crossbar will lower with the
midgate. This is completely normal;
however, since the crossbar lowers with the
midgate, it will be heavier. As you lower the
midgate be ready for the extra weight and
do not let the midgate fall as you lower it.
Raising the Midgate
To return the midgate to its normal
position:
1. Temporarily secure the seatbelt buckle to the opening slot in the door trim to
move it out of the path of the midgate.
2. Raise the midgate up with a firm swinging motion until it latches into
place securely. This will help to ensure
that the midgate closes with enough
force to engage the latches.
3. Once the midgate is securely latched, release the seatbelt buckle from the slot
in the door trim. If the rear glass is removed and you would
like to put it back, do so using the
instructions given previously.
Tailgate
Manual Tailgate
{Warning
It is extremely dangerous to ride on the
tailgate, even when the vehicle is
operated at low speeds. People riding on
the tailgate can easily lose their balance
and fall in response to vehicle maneuvers.
Falling from a moving vehicle may result
in serious injuries or death. Do not allow
people to ride on the tailgate. Be sure
everyone in your vehicle is in a seat and
using a seat belt properly.
Use the remote key to unlock the tailgate.
Open the tailgate by lifting up on its handle
while pulling the tailgate down.
To shut the tailgate, firmly push it upward
until it latches.
After closing the tailgate, pull it back to be
sure it is latched securely.
Page 30 of 429
Chevrolet Silverado EV Owner Manual (GMNA-Localizing-U.S./Canada-
16702912) - 2024 - CRC - 1/23/23
Keys, Doors, and Windows 29
Some tailgates electronically control if the
tailgate is locked or unlocked. If the battery
is disconnected or has low voltage, and the
tailgate is locked, the tailgate will not open.
The tailgate will resume operation when the
battery is reconnected or recharged.
MultiFlex Tailgate
{Warning
Make sure there is no one in the way of
the power tailgate as it is opening and
closing, and keep hands away from the
tailgate hinges when in use. You or
others could be injured if caught in the
path of the power tailgate or tailgate
hinges.
Caution
To avoid damage to the tailgate, make
sure the area behind the tailgate is clear
before opening it.In the case of a dead battery, the tailgate
can be opened manually. Contact your
dealer or Roadside Assistance.
Use the remote key to lock or unlock the
tailgate. See
Remote Key Operation 09.
The vehicle must be in P (Park).
Switches in the inner tailgate prevent the
primary tailgate from being opened when
the inner tailgate is not fully closed. When
the primary or inner tailgate are open, a
message may display on the Driver
Information Center (DIC).
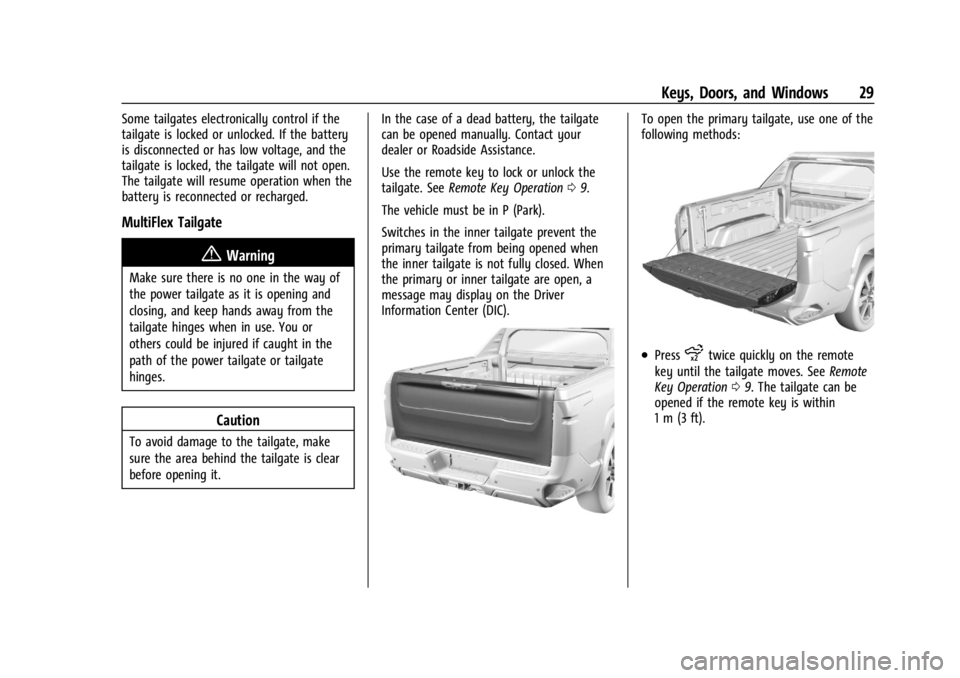
To open the primary tailgate, use one of the
following methods:
.Pressxtwice quickly on the remote
key until the tailgate moves. See Remote
Key Operation 09. The tailgate can be
opened if the remote key is within
1 m (3 ft).
Page 32 of 429
Chevrolet Silverado EV Owner Manual (GMNA-Localizing-U.S./Canada-
16702912) - 2024 - CRC - 1/23/23
Keys, Doors, and Windows 31
Caution
To avoid vehicle damage, do not open
the inner tailgate when the primary
tailgate is open if there is not enough
distance to the attached hitch ball or
trailer.
To close the inner tailgate with the primary
tailgate closed, firmly push or pull it upward
until it latches. Pull or push it back to be
sure it is latched securely.
To close the inner tailgate with the primary
tailgate open:
.Hold the primary tailgate and firmly close
the inner tailgate.
.Raise the inner tailgate so it meets the
primary tailgate and close together at the
same time.
When using the tailgate step as a load stop,
the load must be secured as the load could
shift. See Cargo Tie-Downs 094.
Tailgate Step (Step Mode)
{Warning
To avoid personal injury, keep hands
away from the hinges when operating
the tailgate step.
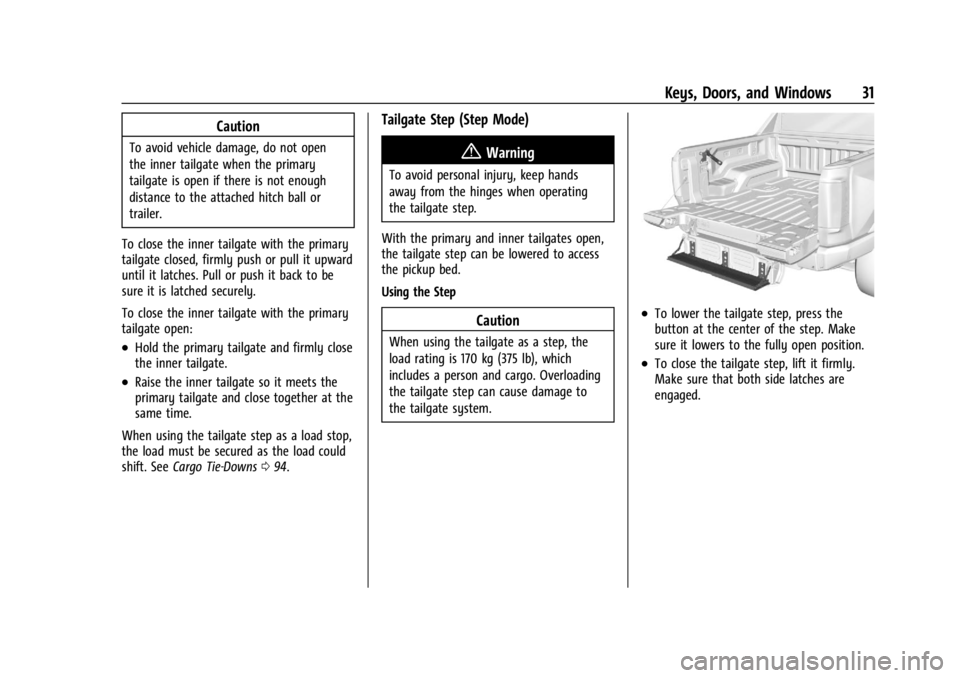
With the primary and inner tailgates open,
the tailgate step can be lowered to access
the pickup bed.
Using the Step
Caution
When using the tailgate as a step, the
load rating is 170 kg (375 lb), which
includes a person and cargo. Overloading
the tailgate step can cause damage to
the tailgate system.
.To lower the tailgate step, press the
button at the center of the step. Make
sure it lowers to the fully open position.
.To close the tailgate step, lift it firmly.
Make sure that both side latches are
engaged.
Page 39 of 429
Chevrolet Silverado EV Owner Manual (GMNA-Localizing-U.S./Canada-
16702912) - 2024 - CRC - 1/23/23
38 Keys, Doors, and Windows
{Warning
The Rear Camera Mirror (RCM) has a
limited view. Portions of the road,
vehicles, and other objects may not be
seen. Do not drive or park the vehicle
using only this camera. Objects may
appear closer than they are. Check the
outside mirrors or glance over your
shoulder when making lane changes or
merging. Failure to use proper care may
result in injury, death, or vehicle damage.
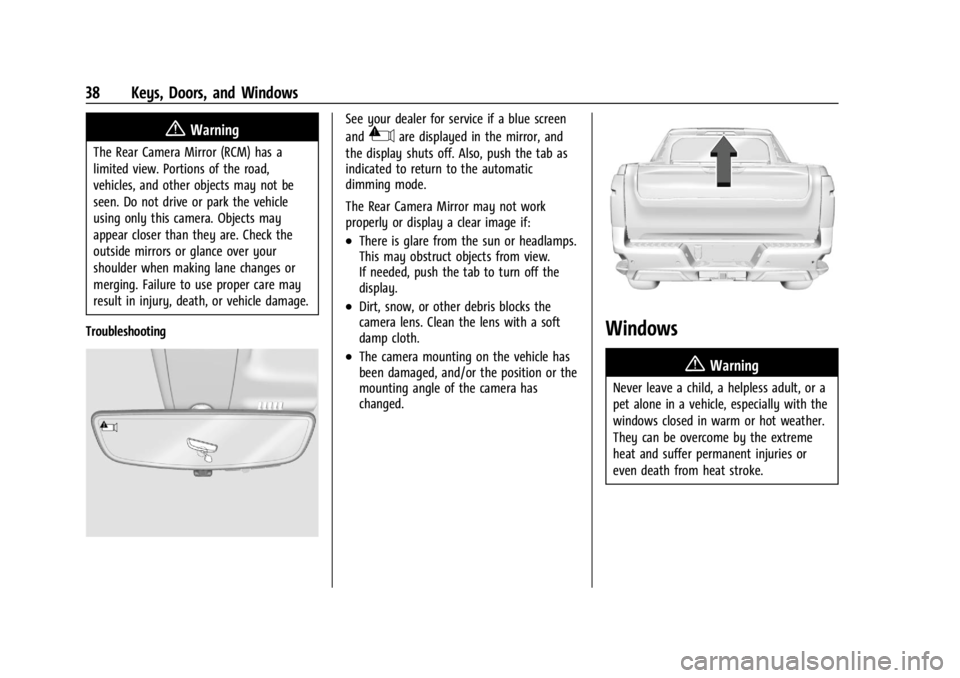
Troubleshooting
See your dealer for service if a blue screen
and
3are displayed in the mirror, and
the display shuts off. Also, push the tab as
indicated to return to the automatic
dimming mode.
The Rear Camera Mirror may not work
properly or display a clear image if:
.There is glare from the sun or headlamps.
This may obstruct objects from view.
If needed, push the tab to turn off the
display.
.Dirt, snow, or other debris blocks the
camera lens. Clean the lens with a soft
damp cloth.
.The camera mounting on the vehicle has
been damaged, and/or the position or the
mounting angle of the camera has
changed.
Windows
{
Warning
Never leave a child, a helpless adult, or a
pet alone in a vehicle, especially with the
windows closed in warm or hot weather.
They can be overcome by the extreme
heat and suffer permanent injuries or
even death from heat stroke.
Page 40 of 429
Chevrolet Silverado EV Owner Manual (GMNA-Localizing-U.S./Canada-
16702912) - 2024 - CRC - 1/23/23
Keys, Doors, and Windows 39
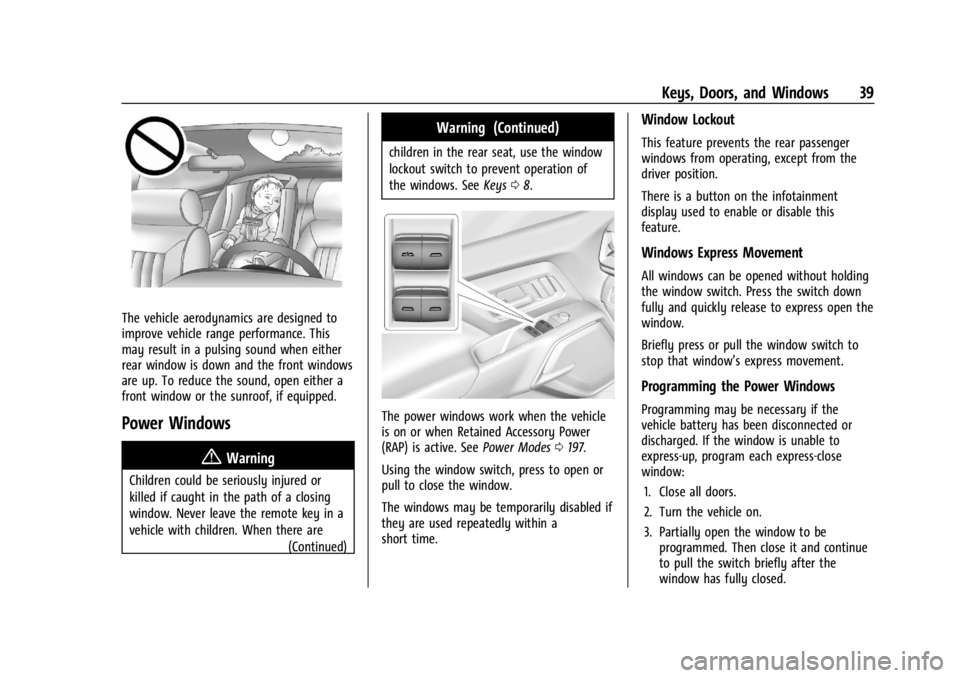
The vehicle aerodynamics are designed to
improve vehicle range performance. This
may result in a pulsing sound when either
rear window is down and the front windows
are up. To reduce the sound, open either a
front window or the sunroof, if equipped.
Power Windows
{Warning
Children could be seriously injured or
killed if caught in the path of a closing
window. Never leave the remote key in a
vehicle with children. When there are(Continued)
Warning (Continued)
children in the rear seat, use the window
lockout switch to prevent operation of
the windows. SeeKeys08.
The power windows work when the vehicle
is on or when Retained Accessory Power
(RAP) is active. See Power Modes0197.
Using the window switch, press to open or
pull to close the window.
The windows may be temporarily disabled if
they are used repeatedly within a
short time.
Window Lockout
This feature prevents the rear passenger
windows from operating, except from the
driver position.
There is a button on the infotainment
display used to enable or disable this
feature.
Windows Express Movement
All windows can be opened without holding
the window switch. Press the switch down
fully and quickly release to express open the
window.
Briefly press or pull the window switch to
stop that window’s express movement.
Programming the Power Windows
Programming may be necessary if the
vehicle battery has been disconnected or
discharged. If the window is unable to
express-up, program each express-close
window: 1. Close all doors.
2. Turn the vehicle on.
3. Partially open the window to be programmed. Then close it and continue
to pull the switch briefly after the
window has fully closed.
Page 42 of 429
Chevrolet Silverado EV Owner Manual (GMNA-Localizing-U.S./Canada-
16702912) - 2024 - CRC - 1/13/23
Seats and Restraints 41
Seats and Restraints
Head Restraints
Head Restraints . . . . . . . . . . . . . . . . . . . . . . . . . 41
Front Seats
Seat Adjustment . . . . . . . . . . . . . . . . . . . . . . . . 43
Power Seat Adjustment . . . . . . . . . . . . . . . . 43
Reclining Seatbacks . . . . . . . . . . . . . . . . . . . . . 43
Lumbar Adjustment . . . . . . . . . . . . . . . . . . . . 45
Memory Seats . . . . . . . . . . . . . . . . . . . . . . . . . . 45
Heated and Ventilated Front Seats . . . . . 47
Rear Seats
Rear Seats . . . . . . . . . . . . . . . . . . . . . . . . . . . . . . 49
Heated Rear Seats . . . . . . . . . . . . . . . . . . . . . . 51
Seat Belts
Seat Belts . . . . . . . . . . . . . . . . . . . . . . . . . . . . . . 52
Buckle To Drive . . . . . . . . . . . . . . . . . . . . . . . . . 53
How to Wear Seat Belts Properly . . . . . . 54
Lap-Shoulder Belt . . . . . . . . . . . . . . . . . . . . . . . 56
Seat Belt Use During Pregnancy . . . . . . . . 58
Seat Belt Extender . . . . . . . . . . . . . . . . . . . . . . 59
Safety System Check . . . . . . . . . . . . . . . . . . . 59
Seat Belt Care . . . . . . . . . . . . . . . . . . . . . . . . . . 59
Replacing Seat Belt System Parts after aCrash . . . . . . . . . . . . . . . . . . . . . . . . . . . . . . . . . 59
Airbag System
Airbag System . . . . . . . . . . . . . . . . . . . . . . . . . 60
Where Are the Airbags? . . . . . . . . . . . . . . . . 61
When Should an Airbag Inflate? . . . . . . . . 62
What Makes an Airbag Inflate? . . . . . . . . . 63
How Does an Airbag Restrain? . . . . . . . . . 63
What Will You See after an AirbagInflates? . . . . . . . . . . . . . . . . . . . . . . . . . . . . . . 64
Passenger Sensing System . . . . . . . . . . . . . 65
Servicing the Airbag-Equipped Vehicle . . . . . . . . . . . . . . . . . . . . . . . . . . . . . . . 68
Adding Equipment to the Airbag-Equipped Vehicle . . . . . . . . . . . . . . 68
Airbag System Check . . . . . . . . . . . . . . . . . . . 69
Replacing Airbag System Parts after a Crash . . . . . . . . . . . . . . . . . . . . . . . . . . . . . . . . . 69
Child Restraints
Older Children . . . . . . . . . . . . . . . . . . . . . . . . . . 70
Infants and Young Children . . . . . . . . . . . . . 71
Child Restraint Systems . . . . . . . . . . . . . . . . . 73
Where to Put the Restraint . . . . . . . . . . . . . 75
Lower Anchors and Tethers for Children(LATCH System) . . . . . . . . . . . . . . . . . . . . . . . 76
Replacing LATCH System Parts After a Crash . . . . . . . . . . . . . . . . . . . . . . . . . . . . . . . . . 85
Securing Child Restraints (With the Seat Belt in the Rear Seat) . . . . . . . . . . . . . . . . 86
Securing Child Restraints (With the Seat Belt in the Front Passenger Seat) . . . . . 88
Head Restraints
{
Warning
With head restraints that are not
installed and adjusted properly, there is a
greater chance that occupants will suffer
a neck/spinal injury in a crash. Do not
drive until the head restraints for all
occupants are installed and adjusted
properly.
Front Seats
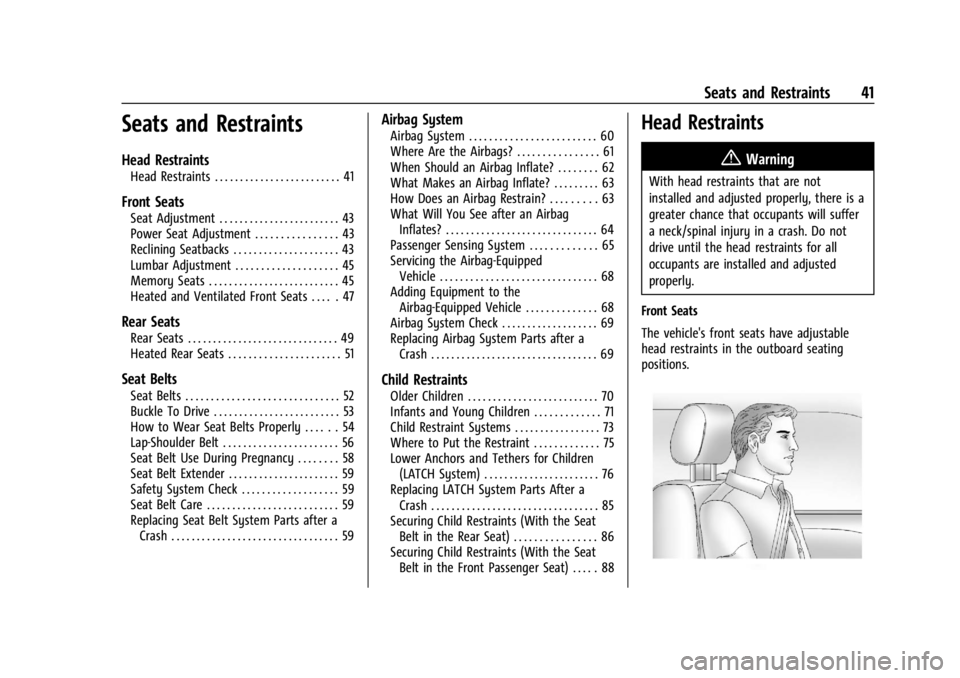
The vehicle's front seats have adjustable
head restraints in the outboard seating
positions.