2024 CHEVROLET CORVETTE tow
[x] Cancel search: towPage 20 of 362
Chevrolet Corvette Owner Manual (GMNA-Localizing-U.S./Canada/Mexico-
17272984) - 2024 - CRC - 2/20/23
Keys, Doors, and Windows 19
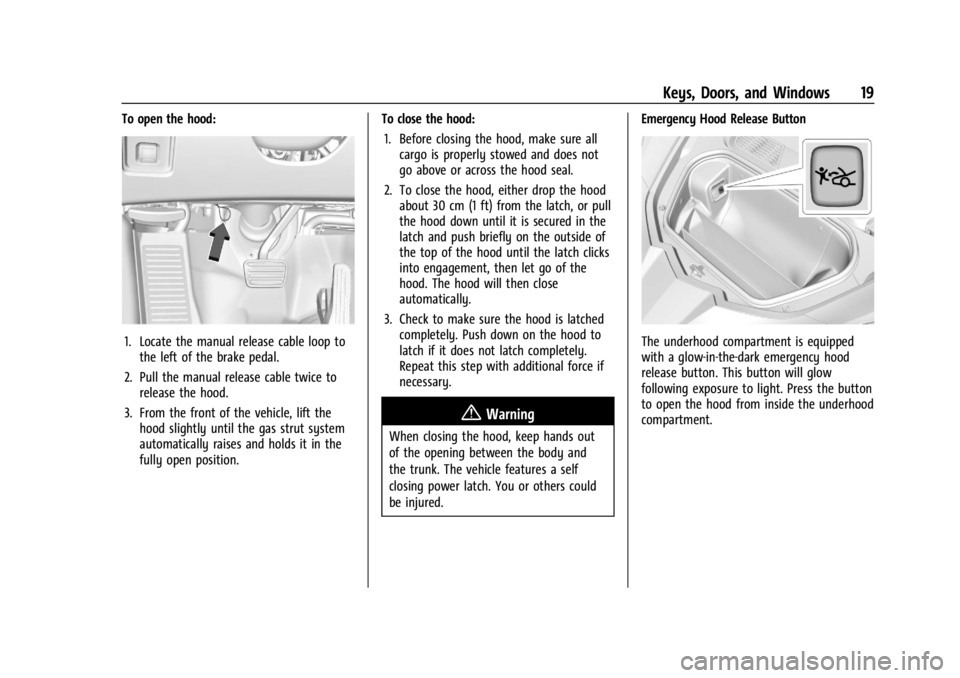
To open the hood:
1. Locate the manual release cable loop tothe left of the brake pedal.
2. Pull the manual release cable twice to release the hood.
3. From the front of the vehicle, lift the hood slightly until the gas strut system
automatically raises and holds it in the
fully open position. To close the hood:
1. Before closing the hood, make sure all cargo is properly stowed and does not
go above or across the hood seal.
2. To close the hood, either drop the hood about 30 cm (1 ft) from the latch, or pull
the hood down until it is secured in the
latch and push briefly on the outside of
the top of the hood until the latch clicks
into engagement, then let go of the
hood. The hood will then close
automatically.
3. Check to make sure the hood is latched completely. Push down on the hood to
latch if it does not latch completely.
Repeat this step with additional force if
necessary.
{Warning
When closing the hood, keep hands out
of the opening between the body and
the trunk. The vehicle features a self
closing power latch. You or others could
be injured. Emergency Hood Release Button
The underhood compartment is equipped
with a glow-in-the-dark emergency hood
release button. This button will glow
following exposure to light. Press the button
to open the hood from inside the underhood
compartment.
Page 21 of 362
Chevrolet Corvette Owner Manual (GMNA-Localizing-U.S./Canada/Mexico-
17272984) - 2024 - CRC - 2/20/23
20 Keys, Doors, and Windows
Storing Your Vehicle
{Warning
The emergency hood release button
inside the underhood compartment will
not function when the battery is
disconnected or depleted. To avoid
personal injury or death, always keep the
hood fully closed and latched when
storing the vehicle. If the hood is not
latched, a person could climb into the
underhood compartment and
inadvertently close the hood. People
should never climb inside the underhood
compartment. Never shut the hood when
a person is inside.
See “Opening The Hood When There Is No
Electrical Power,” earlier in this section.
Hatch (Trunk)
{Warning
Components under the hatch, hatch
vents, and glass can get hot from running
the engine. To help avoid the risk of
burning unprotected skin, never touch
these components until they have cooled,
and always use a glove or towel to avoid
direct skin contact.
{Warning
Turn the vehicle off before opening the
hatch. If the engine is running with the
hatch open, you or others could be
injured.
Hatch/Trunk Release
The vehicle must be in P (Park).
{Warning
When closing the hatch/trunk, keep
hands out of the opening between the
body and the trunk. The vehicle features
a self closing power latch. You or others
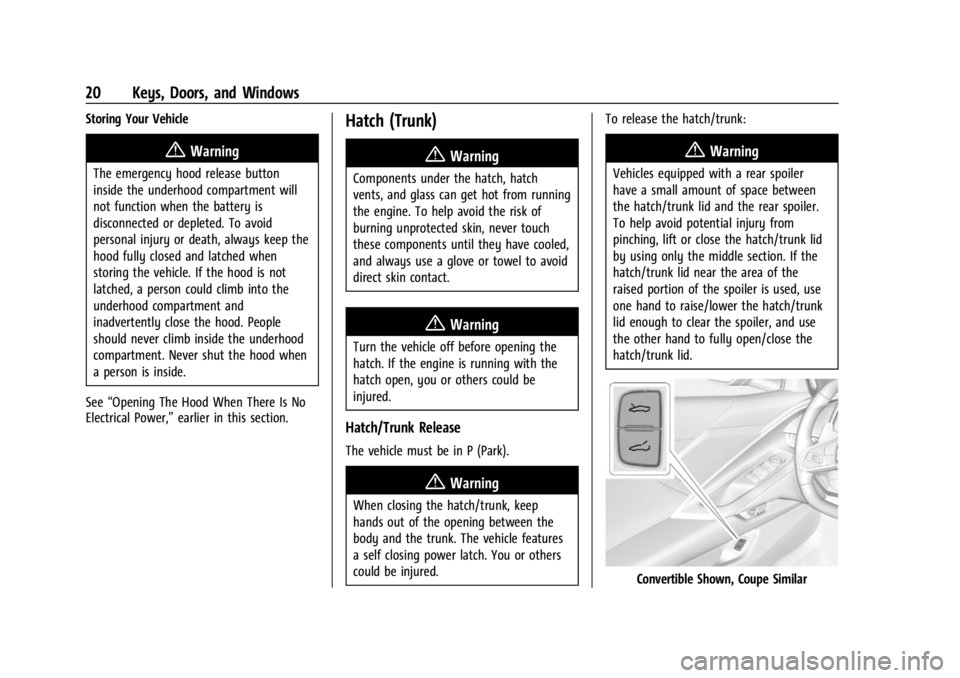
could be injured. To release the hatch/trunk:
{Warning
Vehicles equipped with a rear spoiler
have a small amount of space between
the hatch/trunk lid and the rear spoiler.
To help avoid potential injury from
pinching, lift or close the hatch/trunk lid
by using only the middle section. If the
hatch/trunk lid near the area of the
raised portion of the spoiler is used, use
one hand to raise/lower the hatch/trunk
lid enough to clear the spoiler, and use
the other hand to fully open/close the
hatch/trunk lid.
Convertible Shown, Coupe Similar
Page 26 of 362
Chevrolet Corvette Owner Manual (GMNA-Localizing-U.S./Canada/Mexico-
17272984) - 2024 - CRC - 2/20/23
Keys, Doors, and Windows 25
Power Mirrors
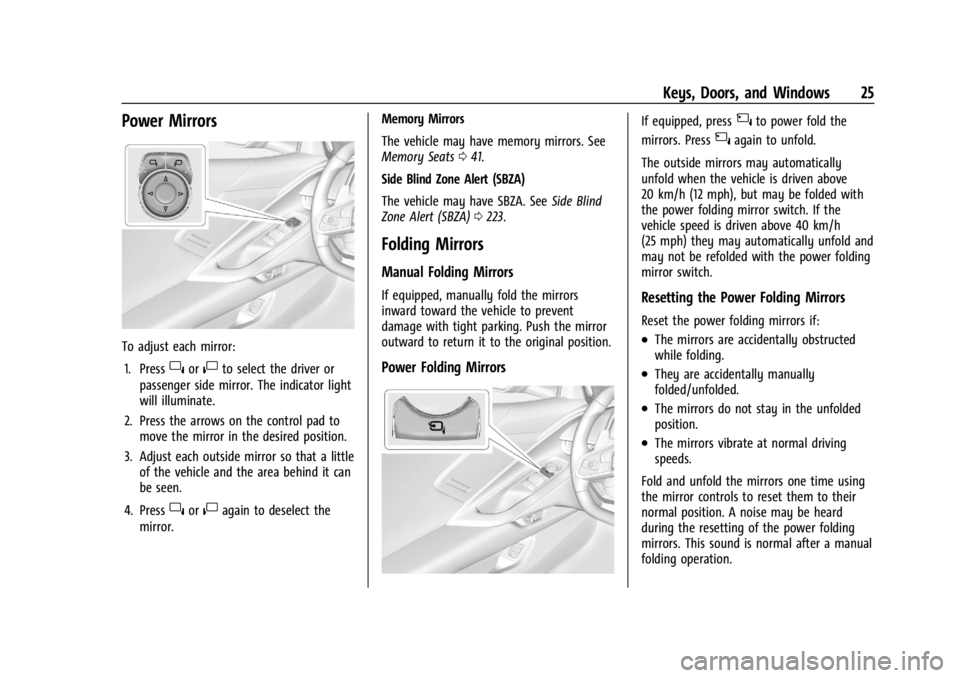
To adjust each mirror:1. Press
}or|to select the driver or
passenger side mirror. The indicator light
will illuminate.
2. Press the arrows on the control pad to move the mirror in the desired position.
3. Adjust each outside mirror so that a little of the vehicle and the area behind it can
be seen.
4. Press
}or|again to deselect the
mirror. Memory Mirrors
The vehicle may have memory mirrors. See
Memory Seats
041.
Side Blind Zone Alert (SBZA)
The vehicle may have SBZA. See Side Blind
Zone Alert (SBZA) 0223.
Folding Mirrors
Manual Folding Mirrors
If equipped, manually fold the mirrors
inward toward the vehicle to prevent
damage with tight parking. Push the mirror
outward to return it to the original position.
Power Folding Mirrors
If equipped, press{to power fold the
mirrors. Press
{again to unfold.
The outside mirrors may automatically
unfold when the vehicle is driven above
20 km/h (12 mph), but may be folded with
the power folding mirror switch. If the
vehicle speed is driven above 40 km/h
(25 mph) they may automatically unfold and
may not be refolded with the power folding
mirror switch.
Resetting the Power Folding Mirrors
Reset the power folding mirrors if:
.The mirrors are accidentally obstructed
while folding.
.They are accidentally manually
folded/unfolded.
.The mirrors do not stay in the unfolded
position.
.The mirrors vibrate at normal driving
speeds.
Fold and unfold the mirrors one time using
the mirror controls to reset them to their
normal position. A noise may be heard
during the resetting of the power folding
mirrors. This sound is normal after a manual
folding operation.
Page 27 of 362

Chevrolet Corvette Owner Manual (GMNA-Localizing-U.S./Canada/Mexico-
17272984) - 2024 - CRC - 2/20/23
26 Keys, Doors, and Windows
Remote Mirror Folding
If equipped with power folding mirrors and
the mirrors have not been folded with the
power folding mirror switch and the vehicle
is in P (Park), they may be automatically
folded/unfolded as follows:1. If doors are locked by double pressing
H
on the remote key, the mirrors may fold.
If doors are unlocked by double pressing
Ion the remote key, the mirrors may
unfold. See Remote Key Operation 07.
2. If doors are locked by pressing the door handle button, the mirrors will fold.
If doors are unlocked by pressing the
driver door handle button, the mirrors
may unfold. See “Keyless Unlocking/
Locking from the Driver Door” inRemote
Key Operation 07.
3. If passive locking is enabled and doors are locked by that feature, the mirrors
may fold. See “Passive Locking” in
Remote Key Operation 07.
If equipped with power folding mirrors,
remote mirror folding is on, and the mirrors
have been folded with the power folding
mirror switch, they may not be
automatically unfolded. To view available settings from the infotainment screen, touch
Settings > Vehicle > Comfort and
Convenience.
Heated Mirrors
1:
Press to heat the mirrors.
See “Rear Window Defogger” underDual
Automatic Climate Control System 0150.
Automatic Dimming Mirror
If equipped, the driver side mirror
automatically adjusts for the glare of
headlamps from behind.
Reverse Tilt Mirrors
If equipped with reverse tilt mirrors and
memory seats, the passenger and/or driver
mirror tilts to a preselected position when
the vehicle is in R (Reverse). This allows the
curb to be seen when parallel parking.
The mirror(s) may move from their tilted
position when:
.The vehicle is shifted out of R (Reverse) or
remains in R (Reverse) for about
30 seconds.
.The vehicle is turned off.
.The vehicle is driven in R (Reverse) above
a set speed.
To view available settings from the
infotainment screen, touch Settings >
Vehicle > Comfort and Convenience.
Interior Mirrors
Interior Rearview Mirrors
Adjust the rearview mirror for a clear view
of the area behind your vehicle.
Do not spray glass cleaner directly on the
mirror. Use a soft towel dampened with
water.
Automatic Dimming Rearview
Mirror
If equipped, automatic dimming reduces the
glare of headlamps from behind. The
dimming feature comes on when the vehicle
is started.
Page 32 of 362
Chevrolet Corvette Owner Manual (GMNA-Localizing-U.S./Canada/Mexico-
17272984) - 2024 - CRC - 2/20/23
Keys, Doors, and Windows 31
Sun Visors
Pull the sun visor down to block glare.
Detach the sun visor from the center mount
to pivot to the side window and,
if equipped, extend along the rod.
Roof
Roof Panel
If equipped with a removable roof panel,
use the following procedures to remove or
install it.
Caution
If a roof panel is dropped or rested on its
edges, the roof panel, paint, and/or
weatherstripping may be damaged.
(Continued)
Caution (Continued)
Always place the roof panel in the
stowage receivers after removing it from
the vehicle.
Caution
Use care when storing and removing the
roof panel. The roof panel pins and
vehicle finish could be damaged if the
roof contacts the rear of the vehicle.
Removing the Roof Panel
{Warning
Do not remove a roof panel while the
vehicle is moving. The panel could fall
into the vehicle and strike an occupant
and cause you to lose control. It could
also fly off and strike another vehicle.
Remove the roof panel only when the
vehicle is parked.
It may be necessary to have help removing
the roof panel. To remove:
1. Shift transmission into P (Park).
2. Turn the ignition off and set the parking brake.
3. Lower both sun visors.
4. Open the rear hatch/trunk and remove any items that may interfere with proper
storage of the roof panel.
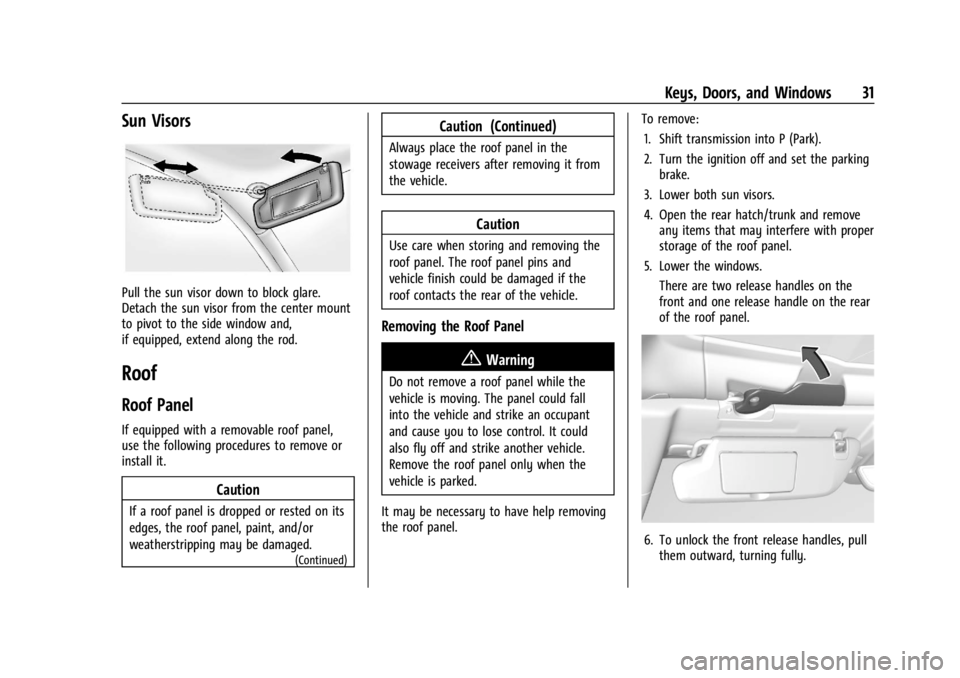
5. Lower the windows. There are two release handles on the
front and one release handle on the rear
of the roof panel.
6. To unlock the front release handles, pullthem outward, turning fully.
Page 33 of 362
Chevrolet Corvette Owner Manual (GMNA-Localizing-U.S./Canada/Mexico-
17272984) - 2024 - CRC - 2/20/23
32 Keys, Doors, and Windows
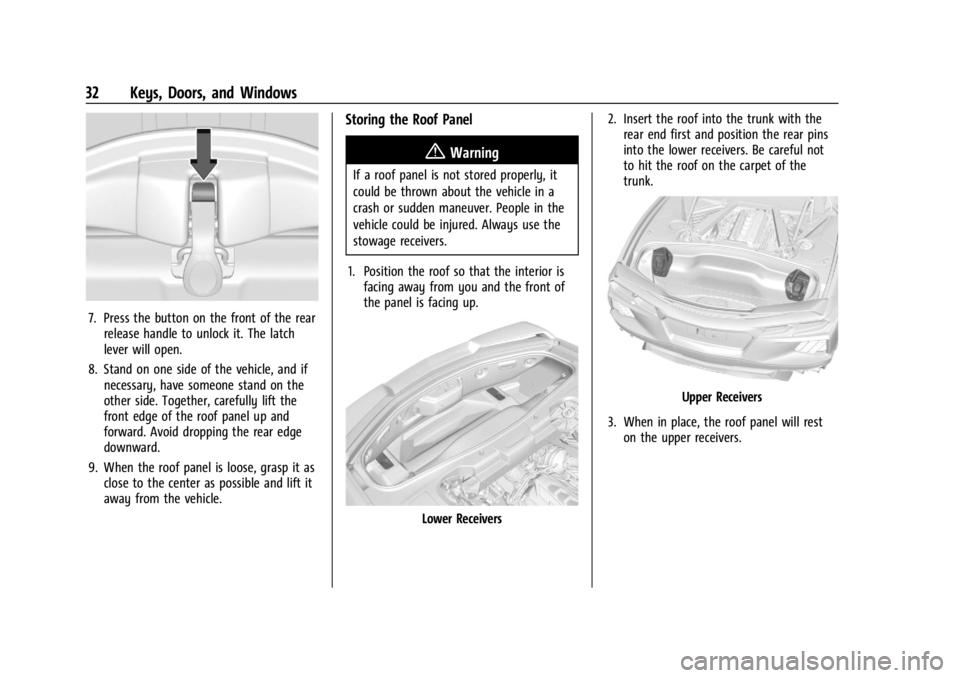
7. Press the button on the front of the rearrelease handle to unlock it. The latch
lever will open.
8. Stand on one side of the vehicle, and if necessary, have someone stand on the
other side. Together, carefully lift the
front edge of the roof panel up and
forward. Avoid dropping the rear edge
downward.
9. When the roof panel is loose, grasp it as close to the center as possible and lift it
away from the vehicle.
Storing the Roof Panel
{Warning
If a roof panel is not stored properly, it
could be thrown about the vehicle in a
crash or sudden maneuver. People in the
vehicle could be injured. Always use the
stowage receivers.
1. Position the roof so that the interior is facing away from you and the front of
the panel is facing up.
Lower Receivers 2. Insert the roof into the trunk with the
rear end first and position the rear pins
into the lower receivers. Be careful not
to hit the roof on the carpet of the
trunk.
Upper Receivers
3. When in place, the roof panel will rest on the upper receivers.
Page 34 of 362
Chevrolet Corvette Owner Manual (GMNA-Localizing-U.S./Canada/Mexico-
17272984) - 2024 - CRC - 2/20/23
Keys, Doors, and Windows 33
{Warning
Do not push from the sides of the roof
panel when seating the panel into the
upper receivers for storage. Pushing from
the sides may result in injury from
pinched fingers. Only push along the top
edge of the roof panel.
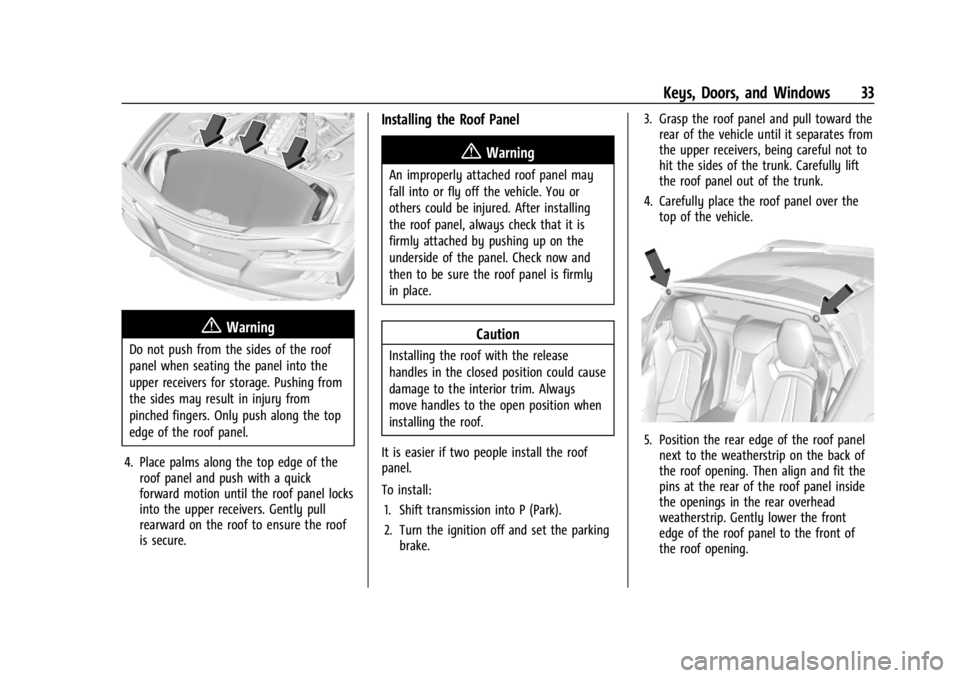
4. Place palms along the top edge of the roof panel and push with a quick
forward motion until the roof panel locks
into the upper receivers. Gently pull
rearward on the roof to ensure the roof
is secure.
Installing the Roof Panel
{Warning
An improperly attached roof panel may
fall into or fly off the vehicle. You or
others could be injured. After installing
the roof panel, always check that it is
firmly attached by pushing up on the
underside of the panel. Check now and
then to be sure the roof panel is firmly
in place.
Caution
Installing the roof with the release
handles in the closed position could cause
damage to the interior trim. Always
move handles to the open position when
installing the roof.
It is easier if two people install the roof
panel.
To install: 1. Shift transmission into P (Park).
2. Turn the ignition off and set the parking brake. 3. Grasp the roof panel and pull toward the
rear of the vehicle until it separates from
the upper receivers, being careful not to
hit the sides of the trunk. Carefully lift
the roof panel out of the trunk.
4. Carefully place the roof panel over the top of the vehicle.
5. Position the rear edge of the roof panelnext to the weatherstrip on the back of
the roof opening. Then align and fit the
pins at the rear of the roof panel inside
the openings in the rear overhead
weatherstrip. Gently lower the front
edge of the roof panel to the front of
the roof opening.
Page 35 of 362

Chevrolet Corvette Owner Manual (GMNA-Localizing-U.S./Canada/Mexico-
17272984) - 2024 - CRC - 2/20/23
34 Keys, Doors, and Windows
6. Check that the weatherstripping on eachside of the roof panel is under the panel.
7. Make sure the front release handles are in the fully open position.
8. Push the roof firmly downward to engage the pins.
9. Turn the front release handles inward so that they fully latch in the closed
position. It is critical that the handles
fully latch.
10. Push back and up on the rear release handle to insert the hook in the loop.
11. Push and pull the roof panel up and down and side to side to ensure the roof
panel is securely installed.
Maintaining the Roof Panel
Caution
Using glass cleaner on a painted roof
panel could damage the panel. The
repairs would not be covered by the
vehicle warranty. Do not use glass
cleaner on the painted roof panel.
When cleaning, removing, and/or storing the
roof panel:
.Flush with water to remove dust and dirt,
then dry the panel.
.Do not use abrasive cleaning materials on
the panel.
Convertible Top
If equipped with a convertible top, review
the following before operating:
{Warning
Components under the tonneau, close to
the engine, can get hot from running the
engine. To help avoid the risk of burning
unprotected skin, never touch these
components until they have cooled, and
always use a glove or towel to avoid
direct skin contact.
{Warning
While opening or closing the convertible
top, people can be injured by the moving
parts of the tonneau cover or convertible
top. Maintain visual contact with the top
while it is being operated.
Caution
Follow these guidelines when operating
the convertible top or damage can occur:
.Remove all items from the roof, trunk
lid, or tonneau cover before operating.
.Remove all objects that may contact
the convertible top when it is
operated.
.Do not leave the vehicle with the
convertible top open.
.Do not exceed 50 km/h (31 mph) until
the top has completely closed or
opened.
.Do not open or close the top while
driving in high wind conditions.
(Continued)