2024 CHEVROLET CORVETTE fuel
[x] Cancel search: fuelPage 9 of 362

Chevrolet Corvette Owner Manual (GMNA-Localizing-U.S./Canada/Mexico-
17272984) - 2024 - CRC - 2/20/23
8 Keys, Doors, and Windows
H:Press to lock both doors and the fuel
door. The turn signal indicators may flash
and/or the horn may sound on the second
press to indicate locking. To view available
settings from the infotainment screen, touch
Settings > Vehicle > Remote Lock, Unlock,
Start.
Pressing
Hmay also arm the
theft-deterrent system. See Vehicle Alarm
System 022.
If equipped with remote folding mirrors,
double pressing and holding
Hfor
one second may fold the mirrors. See
Folding Mirrors 025.
I:Press to unlock the driver door and the
fuel door. Press again within five seconds to
unlock both doors. When remotely unlocking
the vehicle at night, the headlamps and
taillamps may come on for about
30 seconds to light your approach to the
vehicle depending on the settings. To view
available settings from the infotainment
screen, touch Settings > Vehicle > Remote
Lock, Unlock, Start. The turn signal indicators
may flash to indicate unlocking.
Pressing
Iwill disarm the theft-deterrent
system. See Vehicle Alarm System 022.
If equipped with remote window operation,
double press
Iand hold for three seconds
to remotely open the windows, if enabled.
To view available settings from the
infotainment screen, touch Settings >
Vehicle > Remote Lock, Unlock, Start.
If equipped with remote folding mirrors,
double pressing and holding
Ifor
one second may unfold the mirrors. See
Folding Mirrors 025.
S:Press twice to start the engine from
outside the vehicle using the remote key.
See Remote Vehicle Start 012. The vehicle
can not be driven during a remote start. To drive the vehicle, press the brake pedal, then
press ENGINE START/STOP, with the remote
key in the vehicle.
7:
Press and release to initiate vehicle
locator. The exterior lamps flash and the
horn chirps three times. Press
7and hold
for approximately three seconds to sound
the panic alarm. The horn sounds and the
turn signal lamps flash for 30 seconds,
or until
7is pressed again or the vehicle is
started.
D: Press twice to release the hatch/
trunk. The vehicle must be in P (Park).
E: Press twice and continue holding
following the second press until the hood
releases. The vehicle must be in P (Park).
M: If equipped, press and releaseI,
then immediately press and hold
M
continuously to open the convertible top all
the way. Release the button to stop
movement. This button will only open the
convertible top.
If equipped, press and release
Hthen
immediately press and hold
Mto open
the engine compartment.
Page 10 of 362
Chevrolet Corvette Owner Manual (GMNA-Localizing-U.S./Canada/Mexico-
17272984) - 2024 - CRC - 2/20/23
Keys, Doors, and Windows 9
Convertible Top
.Do not try to start the vehicle while using
the remote key to open the convertible
top. Release both the remote key button
and ENGINE START/STOP and wait a few
seconds before starting the vehicle
normally.
Keyless Access Operation
This Keyless Access system allows you to
unlock and unlatch the doors and hatch/
trunk without removing the remote key
from your pocket, purse, briefcase, etc. The
remote key must be within 1 m (3 ft) of the
trunk or door being opened. A touchpad is
located on the door handle.
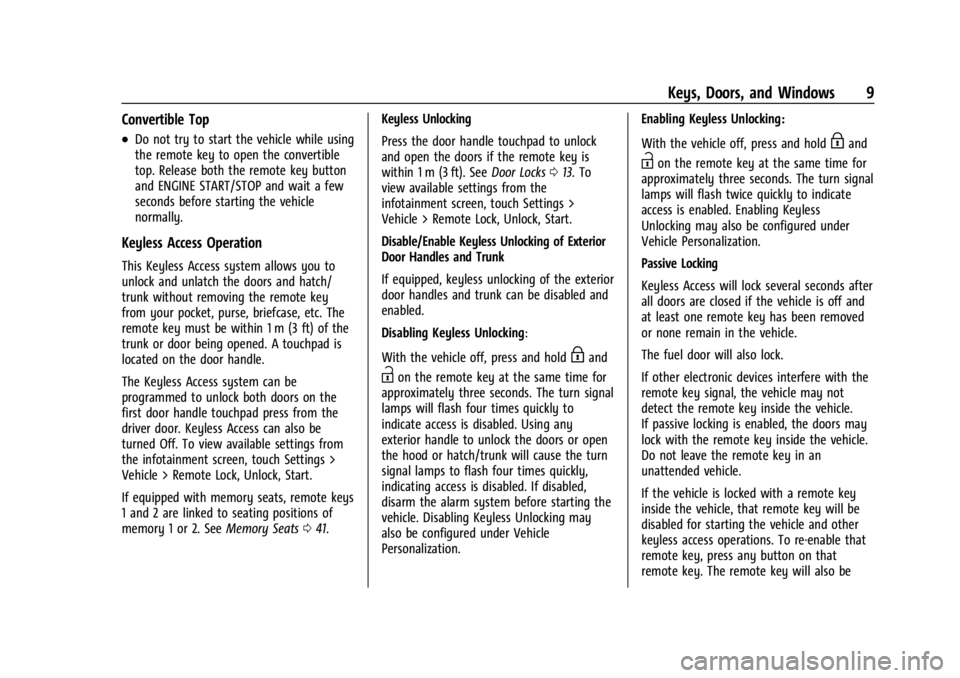
The Keyless Access system can be
programmed to unlock both doors on the
first door handle touchpad press from the
driver door. Keyless Access can also be
turned Off. To view available settings from
the infotainment screen, touch Settings >
Vehicle > Remote Lock, Unlock, Start.
If equipped with memory seats, remote keys
1 and 2 are linked to seating positions of
memory 1 or 2. SeeMemory Seats041. Keyless Unlocking
Press the door handle touchpad to unlock
and open the doors if the remote key is
within 1 m (3 ft). See
Door Locks013. To
view available settings from the
infotainment screen, touch Settings >
Vehicle > Remote Lock, Unlock, Start.
Disable/Enable Keyless Unlocking of Exterior
Door Handles and Trunk
If equipped, keyless unlocking of the exterior
door handles and trunk can be disabled and
enabled.
Disabling Keyless Unlocking:
With the vehicle off, press and hold
Hand
Ion the remote key at the same time for
approximately three seconds. The turn signal
lamps will flash four times quickly to
indicate access is disabled. Using any
exterior handle to unlock the doors or open
the hood or hatch/trunk will cause the turn
signal lamps to flash four times quickly,
indicating access is disabled. If disabled,
disarm the alarm system before starting the
vehicle. Disabling Keyless Unlocking may
also be configured under Vehicle
Personalization. Enabling Keyless Unlocking:
With the vehicle off, press and hold
Hand
Ion the remote key at the same time for
approximately three seconds. The turn signal
lamps will flash twice quickly to indicate
access is enabled. Enabling Keyless
Unlocking may also be configured under
Vehicle Personalization.
Passive Locking
Keyless Access will lock several seconds after
all doors are closed if the vehicle is off and
at least one remote key has been removed
or none remain in the vehicle.
The fuel door will also lock.
If other electronic devices interfere with the
remote key signal, the vehicle may not
detect the remote key inside the vehicle.
If passive locking is enabled, the doors may
lock with the remote key inside the vehicle.
Do not leave the remote key in an
unattended vehicle.
If the vehicle is locked with a remote key
inside the vehicle, that remote key will be
disabled for starting the vehicle and other
keyless access operations. To re-enable that
remote key, press any button on that
remote key. The remote key will also be
Page 14 of 362
Chevrolet Corvette Owner Manual (GMNA-Localizing-U.S./Canada/Mexico-
17272984) - 2024 - CRC - 2/20/23
Keys, Doors, and Windows 13
If your vehicle is low on fuel, do not use the
remote start feature. The vehicle may run
out of fuel.
The remote key range may be shorter while
the vehicle is running.
Other conditions can affect the performance
of the remote key. SeeRemote Key07.
You have a total of 30 minutes of engine
running time. The maximum run time of a
single start is 15 minutes, and it will shut off
automatically. You could do three 10 minute
starts if you manually shut off after
10 minutes. The last 10 minute start would
shut off automatically as your total
30 minutes will have been used.
Starting the Engine Using Remote Start
1. Press
Stwice on the remote key. The
turn signal lamps will flash. The lamps
flash to confirm the request to remote
start the vehicle has been received.
During the remote start, the parking
lamps will remain on as long as the
engine is running.
2. The engine will shut off after 15 minutes or after the remainder of the 30 minute
total running time is used, unless you stop the remote start before engine
running has completed or the ignition is
turned on.
3. Press the brake pedal and turn the ignition on to drive the vehicle.
Total Engine Run Time
Remote start can be used for up to
30 minutes of total engine run time.
After two remote starts of 15 minutes,
or multiple shorter time starts totaling
30 minutes have been used, the vehicle's
ignition must be turned on and then off
before the remote start can be used again.
Canceling a Remote Start
To cancel a remote start, do any of the
following:.PressS. The parking lamps will turn off.
.Turn on the hazard warning flashers.
.Turn the vehicle on and then back off.
Conditions in Which Remote Start Will
Not Work
The remote start will not operate if any of
the following occur:
.The ignition is in any mode other
than off.
.A remote key is in the vehicle.
.The hatch/trunk is not closed.
.The convertible top is not fully open or
closed.
.The tonneau cover is not closed.
.The hazard warning flashers are on.
.There is an emission control system
malfunction.
.The engine coolant temperature is
too high.
.The oil pressure is low.
.The 30 minutes of engine run time have
been used.
.The vehicle is not in P (Park).
Door Locks
{Warning
Unlocked doors can be dangerous.
.Passengers, especially children, can
easily open the doors and fall out of a
moving vehicle. The doors can be
unlocked and opened while the vehicle
is moving. The chance of being thrown
out of the vehicle in a crash is
increased if the doors are not locked. (Continued)
Page 16 of 362
Chevrolet Corvette Owner Manual (GMNA-Localizing-U.S./Canada/Mexico-
17272984) - 2024 - CRC - 2/20/23
Keys, Doors, and Windows 15
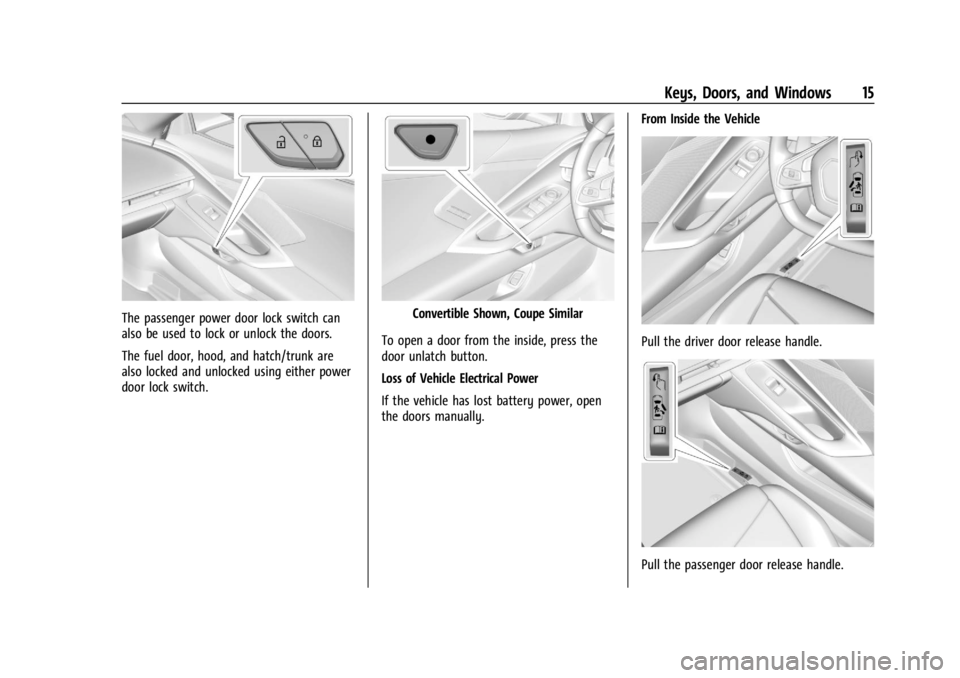
The passenger power door lock switch can
also be used to lock or unlock the doors.
The fuel door, hood, and hatch/trunk are
also locked and unlocked using either power
door lock switch.Convertible Shown, Coupe Similar
To open a door from the inside, press the
door unlatch button.
Loss of Vehicle Electrical Power
If the vehicle has lost battery power, open
the doors manually. From Inside the Vehicle
Pull the driver door release handle.
Pull the passenger door release handle.
Page 57 of 362
Chevrolet Corvette Owner Manual (GMNA-Localizing-U.S./Canada/Mexico-
17272984) - 2024 - CRC - 2/20/23
56 Seats and Restraints
How Does an Airbag Restrain?
In moderate to severe frontal collisions, even
belted occupants can contact the steering
wheel or the instrument panel. In moderate
to severe side collisions, even belted
occupants can contact the inside of the
vehicle.
Airbags supplement the protection provided
by seat belts by distributing the force of the
impact more evenly over the
occupant's body.
But airbags would not help in many types
of collisions, primarily because the
occupant's motion is not toward those
airbags. SeeWhen Should an Airbag Inflate?
0 55.
Airbags should never be regarded as
anything more than a supplement to seat
belts.
What Will You See after an
Airbag Inflates?
After the frontal and seat-mounted side
impact airbags inflate, they quickly deflate,
so quickly that some people may not even
realize the airbags inflated. Some components of the airbag module may be
hot for several minutes. For location of the
airbags, see
Where Are the Airbags? 054.
The parts of the airbag that come into
contact with you may be warm, but not too
hot to touch. There may be some smoke
and dust coming from the vents in the
deflated airbags. Airbag inflation does not
prevent people from leaving the vehicle.
{Warning
When an airbag inflates, there may be
dust in the air. This dust could cause
breathing problems for people with a
history of asthma or other breathing
trouble. To avoid this, everyone in the
vehicle should get out as soon as it is
safe to do so. If you have breathing
problems but cannot get out of the
vehicle after an airbag inflates, then get
fresh air by opening a window or a door.
If you experience breathing problems
following an airbag deployment, you
should seek medical attention. The vehicle has a feature that may
automatically unlock the doors, turn on the
interior lamps and hazard warning flashers,
and shut off the fuel system after the
airbags inflate. The feature may also
activate, without airbag inflation, after an
event that exceeds a predetermined
threshold. After turning the vehicle off and
then on again, the fuel system will return to
normal operation; the doors can be locked,
the interior lamps can be turned off, and
the hazard warning flashers can be turned
off using the controls for those features.
If any of these systems are damaged in the
crash they may not operate as normal.
In the event of a crash with airbag inflation,
a vehicle equipped with a hybrid drive unit
(E-Ray) propulsion system will be disabled to
prevent the risk of electrical shock. The
vehicle will not be drivable and must be
towed to a dealership for repair.
{Warning
A crash severe enough to inflate the
airbags may have also damaged
important functions in the vehicle, such
as the fuel, electrical, braking and
steering systems.
(Continued)
Page 75 of 362

Chevrolet Corvette Owner Manual (GMNA-Localizing-U.S./Canada/Mexico-
17272984) - 2024 - CRC - 2/20/23
74 Instruments and Controls
Instruments and Controls
Controls
Steering Wheel Adjustment . . . . . . . . . . . . . 75
Heated Steering Wheel . . . . . . . . . . . . . . . . . 75
Horn . . . . . . . . . . . . . . . . . . . . . . . . . . . . . . . . . . . . 75
Windshield Wiper/Washer . . . . . . . . . . . . . . 75
Compass . . . . . . . . . . . . . . . . . . . . . . . . . . . . . . . 76
Clock . . . . . . . . . . . . . . . . . . . . . . . . . . . . . . . . . . . 76
Power Outlets . . . . . . . . . . . . . . . . . . . . . . . . . . 77
Wireless Charging . . . . . . . . . . . . . . . . . . . . . . 78
Warning Lights, Gauges, and Indicators
Warning Lights, Gauges, andIndicators . . . . . . . . . . . . . . . . . . . . . . . . . . . . 80
Instrument Cluster . . . . . . . . . . . . . . . . . . . . . . 81
Speedometer . . . . . . . . . . . . . . . . . . . . . . . . . . . 85
Odometer . . . . . . . . . . . . . . . . . . . . . . . . . . . . . . 85
Trip Odometer . . . . . . . . . . . . . . . . . . . . . . . . . . 85
Tachometer . . . . . . . . . . . . . . . . . . . . . . . . . . . . 85
Battery Gauge (High Voltage) . . . . . . . . . . 86
Stealth Drive Mode Capability Gauge . . . . . . . . . . . . . . . . . . . . . . . . . . . . . . . . 86
Fuel Gauge . . . . . . . . . . . . . . . . . . . . . . . . . . . . . 86
Hybrid Battery Charging Light (Charge+) . . . . . . . . . . . . . . . . . . . . . . . . . . . . . 87
Power Indicator Gauge . . . . . . . . . . . . . . . . . 87
Engine Coolant Temperature Gauge . . . . 87
Transmission Temperature Gauge . . . . . . 88
Seat Belt Reminders . . . . . . . . . . . . . . . . . . . . 88 Airbag Readiness Light . . . . . . . . . . . . . . . . . 88
Passenger Airbag Status Indicator . . . . . . 89
Charging System Light (12-Volt
Battery) . . . . . . . . . . . . . . . . . . . . . . . . . . . . . . 90
Malfunction Indicator Lamp (Check
Engine Light) . . . . . . . . . . . . . . . . . . . . . . . . . 90
Front Lift System Light . . . . . . . . . . . . . . . . . 91
Brake System Warning Light . . . . . . . . . . . 92
Electric Parking Brake Light . . . . . . . . . . . . . 92
Service Electric Parking Brake Light . . . . . 92
Antilock Brake System (ABS) Warning Light . . . . . . . . . . . . . . . . . . . . . . . . . . . . . . . . . . 93
Performance Transmission Active . . . . . . . 93
All-Wheel-Drive Light . . . . . . . . . . . . . . . . . . . 93
Lane Keep Assist (LKA) Light . . . . . . . . . . . 94
Automatic Emergency Braking (AEB) Disabled Light . . . . . . . . . . . . . . . . . . . . . . . . 94
Vehicle Ahead Indicator . . . . . . . . . . . . . . . . 94
Pedestrian Ahead Indicator . . . . . . . . . . . . . 94
Traction Off Light . . . . . . . . . . . . . . . . . . . . . . 95
Traction Control System (TCS)/Electronic Stability Control Light . . . . . . . . . . . . . . . . 95
Electronic Stability Control (ESC) Off Light . . . . . . . . . . . . . . . . . . . . . . . . . . . . . . . . . . 95
Engine Coolant Temperature Warning Light . . . . . . . . . . . . . . . . . . . . . . . . . . . . . . . . . 96
Driver Mode Control Light . . . . . . . . . . . . . . 96
Tire Pressure Light . . . . . . . . . . . . . . . . . . . . . . 97
Engine Oil Pressure Light . . . . . . . . . . . . . . . 97
Low Fuel Warning Light . . . . . . . . . . . . . . . . 97 Auto Stop Indicator . . . . . . . . . . . . . . . . . . . . 98
Traffic Sign Indicator . . . . . . . . . . . . . . . . . . . 98
Security Light . . . . . . . . . . . . . . . . . . . . . . . . . . 98
High-Beam On Light . . . . . . . . . . . . . . . . . . . . 98
Lamps On Reminder . . . . . . . . . . . . . . . . . . . . 99
Cruise Control Light . . . . . . . . . . . . . . . . . . . . 99
Door Ajar Light . . . . . . . . . . . . . . . . . . . . . . . . . 99
Information Displays
Driver Information Center (DIC) . . . . . . . . 99
Head-Up Display (HUD) . . . . . . . . . . . . . . . . 102
Vehicle Messages
Vehicle Messages . . . . . . . . . . . . . . . . . . . . . . 105
Engine Power Messages . . . . . . . . . . . . . . . 106
Vehicle Speed Messages . . . . . . . . . . . . . . . 106
Universal Remote System
Universal Remote System . . . . . . . . . . . . . 106
Universal Remote System
Programming . . . . . . . . . . . . . . . . . . . . . . . . 106
Universal Remote System Operation . . . . . . . . . . . . . . . . . . . . . . . . . . . 108
Page 82 of 362
Chevrolet Corvette Owner Manual (GMNA-Localizing-U.S./Canada/Mexico-
17272984) - 2024 - CRC - 2/20/23
Instruments and Controls 81
Instrument Cluster
English Tour Mode Shown, Others and Metric Similar
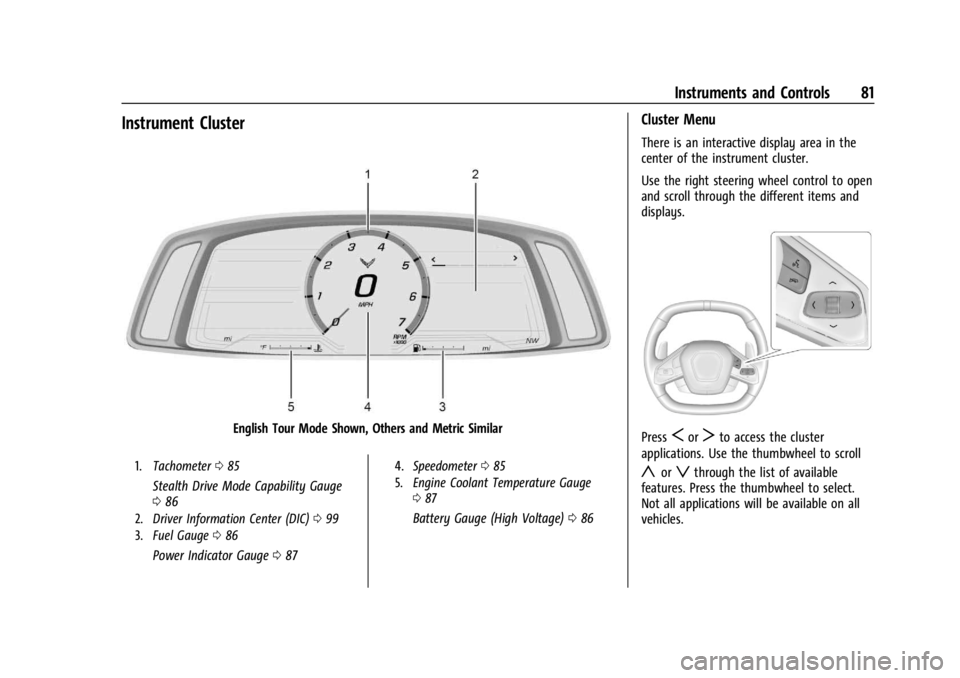
1.Tachometer 085
Stealth Drive Mode Capability Gauge
086
2. Driver Information Center (DIC) 099
3. Fuel Gauge 086
Power Indicator Gauge 087
4. Speedometer 085
5. Engine Coolant Temperature Gauge
087
Battery Gauge (High Voltage) 086
Cluster Menu
There is an interactive display area in the
center of the instrument cluster.
Use the right steering wheel control to open
and scroll through the different items and
displays.
PressSorTto access the cluster
applications. Use the thumbwheel to scroll
yorzthrough the list of available
features. Press the thumbwheel to select.
Not all applications will be available on all
vehicles.
Page 83 of 362
Chevrolet Corvette Owner Manual (GMNA-Localizing-U.S./Canada/Mexico-
17272984) - 2024 - CRC - 2/20/23
82 Instruments and Controls
.Trip Computer/Performance/Maintenance:
The selected Driver Information Center
(DIC) displays can be viewed. SeeDriver
Information Center (DIC) 099.
.Audio
.Options
.Simplify
Info Tiles
The following is the list of all possible info
tiles that is shown on the left side of the
speedometer. Depending on the vehicle,
some may not be available. Information
displayed here can be customized from the
Options menu. See “Options”below.
Time & Temperature : Displays the current
time and the current outside air
temperature.
Instant Fuel Economy/Economy Trend :
Displays the current fuel economy in liters
per 100 kilometers (L/100 km) or miles per
gallon (mpg). This number reflects only the
approximate fuel economy and changes
frequently as driving conditions change.
This display cannot be reset. Shows history of the Average Fuel Economy
from the last 100 km (62 mi). Each bar
represents about 5 km (3 mi) of driving.
When driving, the bars shift to reflect the
most recent distance on the right side.
G-force :
Gives the driver an indication of
the vehicle performance in cornering. The
G-force gauge will show as an info tile on
the left side of the cluster, if selected.
Oil Temperature : Shows the current oil
temperature in either degrees Celsius (°C) or
degrees Fahrenheit (°F).
Oil Pressure : Shows the current oil pressure
in either kilopascal (kPa) or in pounds per
square inch (psi).
Battery Voltage : Shows the current 12-Volt
battery voltage.
Transmission Fluid Temperature : Shows the
temperature of the transmission fluid in
either degrees Celsius (°C) or degrees
Fahrenheit (°F).
Tire Status : Shows individual tire pressures
and overall temperature as either Cold, Cool,
Normal, Warm, or Hot. Normal is typical for
normal driving while Warm is typical for
spirited driving. Unknown may be displayed
if tire temperature information is
unavailable. Tire Pressure shows the approximate
pressures of all four tires. Tire pressure is
displayed in either kilopascal (kPa) or in
pounds per square inch (psi). If the pressure
is low, the value for that tire is shown in
amber. See
Tire Pressure Monitor System
0 288 and
Tire Pressure Monitor Operation 0289.
eLSD : If equipped, displays the amount of
rear differential coupling when the Electronic
Limited-Slip Differential (eLSD) is active and
functioning during vehicle operation.
A reading of 1% is an open differential and
100% is locked. It is normal for the value to
make small or large changes due to driving
conditions and driver inputs. See Limited-Slip
Differential 0211.
Wheel Slip : Shows the wheel
slip percentage of the vehicle.
Front Lift : During a driver requested Front
Lift (if equipped), the driver may
"remember" using the
S, or dismiss the
display by pressing the thumbwheel. When
the Front Lift is Raised due to location, the
driver may delete that stored location using
the
S, or dismiss the display by pressing
the thumbwheel.
See Front Lift System 0205.