2024 CHEVROLET CORVETTE horn
[x] Cancel search: hornPage 276 of 362

Chevrolet Corvette Owner Manual (GMNA-Localizing-U.S./Canada/Mexico-
17272984) - 2024 - CRC - 2/20/23
Vehicle Care 275
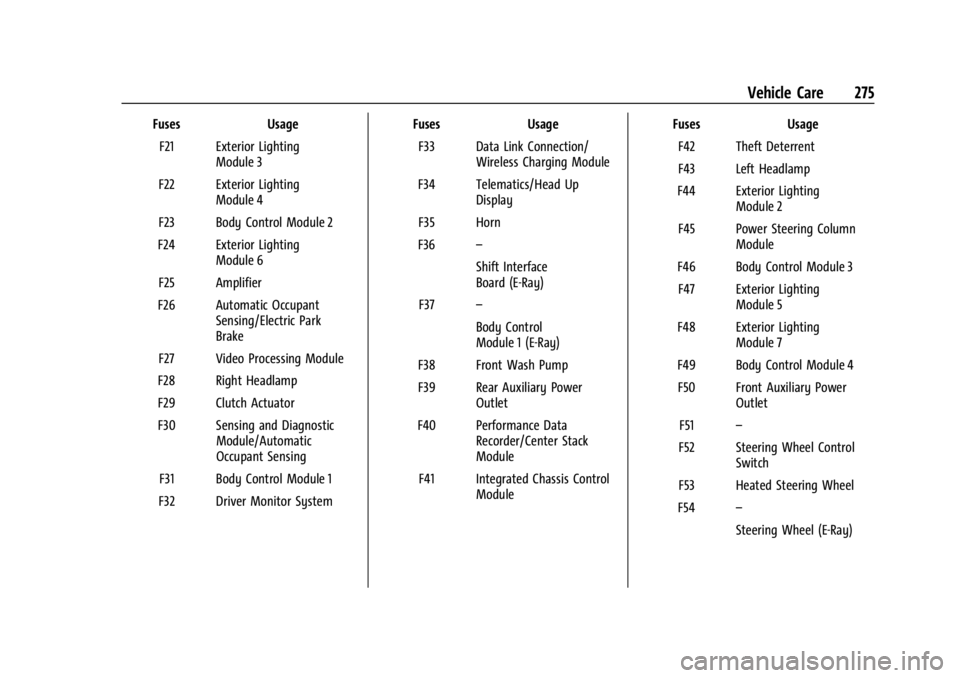
FusesUsage
F21 Exterior Lighting Module 3
F22 Exterior Lighting Module 4
F23 Body Control Module 2
F24 Exterior Lighting Module 6
F25 Amplifier
F26 Automatic Occupant Sensing/Electric Park
Brake
F27 Video Processing Module
F28 Right Headlamp
F29 Clutch Actuator
F30 Sensing and Diagnostic Module/Automatic
Occupant Sensing
F31 Body Control Module 1
F32 Driver Monitor System Fuses
Usage
F33 Data Link Connection/ Wireless Charging Module
F34 Telematics/Head Up Display
F35 Horn
F36 –
Shift Interface
Board (E-Ray)
F37 –
Body Control
Module 1 (E-Ray)
F38 Front Wash Pump
F39 Rear Auxiliary Power Outlet
F40 Performance Data Recorder/Center Stack
Module
F41 Integrated Chassis Control Module Fuses
Usage
F42 Theft Deterrent
F43 Left Headlamp
F44 Exterior Lighting Module 2
F45 Power Steering Column Module
F46 Body Control Module 3 F47 Exterior Lighting Module 5
F48 Exterior Lighting Module 7
F49 Body Control Module 4 F50 Front Auxiliary Power Outlet
F51 –
F52 Steering Wheel Control Switch
F53 Heated Steering Wheel
F54 –
Steering Wheel (E-Ray)
Page 277 of 362

Chevrolet Corvette Owner Manual (GMNA-Localizing-U.S./Canada/Mexico-
17272984) - 2024 - CRC - 2/20/23
276 Vehicle Care
RelaysUsage
K1 –
K2 Glove Box Relay
K3 Horn Relay
K4 Front Wash Relay K5 Retained Accessory Power/Accessory Relay
K6 Front Trunk Release Relay 1
K7 –
K8 –
K9 Front Trunk Release Relay 2
K10 Wiper RelayRear Compartment Fuse Block
The rear compartment fuse block is in the
rear of the vehicle in between the seats.
To Access: 1. Open top cover.
2. Remove the top cover by pushing inward on the latch.
3. Pull the cover upward.
To Install: 1. Insert the tabs on the back of the cover into the slots in the rear compartment.
2. Align the clip with the slots in the instrument panel.
3. Press the cover into place.
See your dealer if additional assistance is
needed.
Page 292 of 362

Chevrolet Corvette Owner Manual (GMNA-Localizing-U.S./Canada/Mexico-
17272984) - 2024 - CRC - 2/20/23
Vehicle Care 291
When the low tire pressure warning light
comes on:1. Park the vehicle in a safe, level place.
2. Set the parking brake firmly.
3. Place the vehicle in P (Park).
4. Add air to the tire that is underinflated. The turn signal lamp will flash.
When the recommended pressure is
reached, the horn sounds once. If the tire
being inflated is a front tire, then the
front turn signal lamp closest to the tire
being inflated will stop flashing and
briefly turn solid. If the tire being
inflated is a rear tire, then the rear turn
signal lamp closest to the tire being
inflated will stop flashing.
Repeat these steps for all underinflated tires
that have illuminated the low tire pressure
warning light.
{Warning
Overinflating a tire could cause the tire
to rupture and you or others could be
injured. Do not exceed the maximum
pressure listed on the tire sidewall. See
Tire Sidewall Labeling 0282 and
Vehicle Load Limits 0174. If the tire is overinflated by more than
35 kPa (5 psi), the horn will sound multiple
times and the turn signal lamp will continue
to flash for several seconds after filling
stops. To release and correct the pressure,
while the turn signal lamp is still flashing,
briefly press the center of the valve stem.
When the recommended pressure is reached,
the horn sounds once.
If the turn signal lamp does not flash within
15 seconds after starting to inflate the tire,
the tire fill alert has not been activated or is
not working.
If the hazard warning flashers are on, the
tire fill alert visual feedback will not work
properly.
The TPMS will not activate the tire fill alert
properly under the following conditions:
.There is interference from an external
device or transmitter.
.The air pressure from the inflation device
is not sufficient to inflate the tire.
.There is a malfunction in the TPMS.
.There is a malfunction in the horn or turn
signal lamps.
.The identification code of the TPMS
sensor is not registered to the system.
.The battery of the TPMS sensor is low. If the tire fill alert does not operate due to
TPMS interference, move the vehicle about
1 m (3 ft) back or forward and try again.
If the tire fill alert feature is not working,
use a tire pressure gauge.
TPMS Sensor Matching Process
—Auto
Learn Function
Each TPMS sensor has a unique
identification code. The identification code
needs to be matched to a new tire/wheel
position after rotating the tires or replacing
one or more of the TPMS sensors. When a
tire is installed, the vehicle must be
stationary for about 20 minutes before the
system recalculates. The following relearn
process takes up to 10 minutes, driving at a
minimum speed of 20 km/h (12 mph).
A dash (-) or pressure value will display in
the DIC. See Driver Information Center (DIC)
0 99. A warning message displays in the
DIC if a problem occurs during the relearn
process.
Tire Inspection
We recommend that the tires, including
the spare tire, if the vehicle has one, be
inspected for signs of wear or damage
at least once a month.
Page 320 of 362

Chevrolet Corvette Owner Manual (GMNA-Localizing-U.S./Canada/Mexico-
17272984) - 2024 - CRC - 2/20/23
Service and Maintenance 319
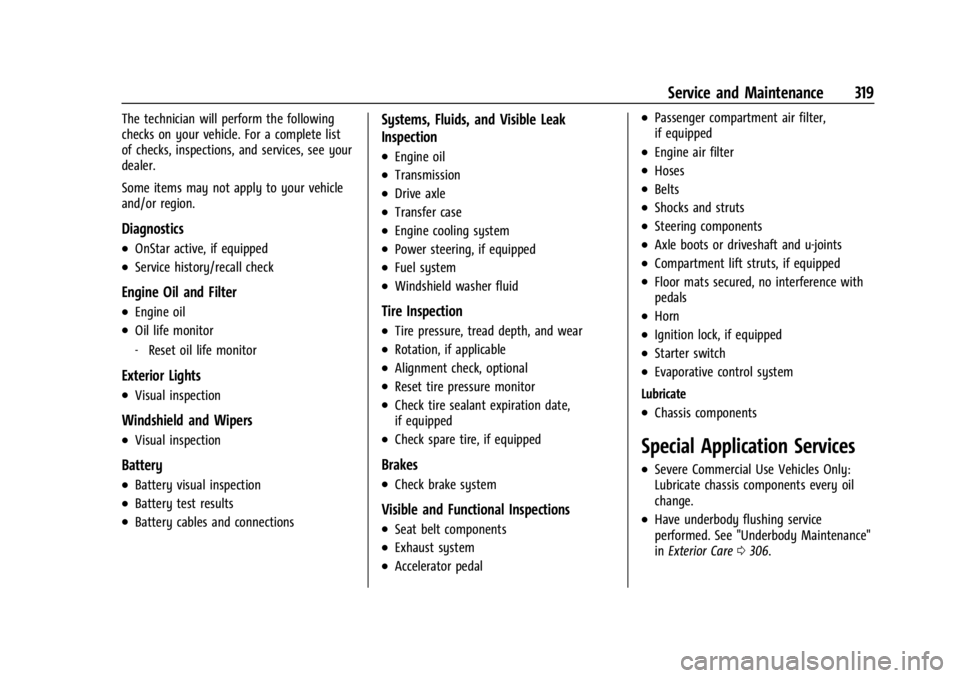
The technician will perform the following
checks on your vehicle. For a complete list
of checks, inspections, and services, see your
dealer.
Some items may not apply to your vehicle
and/or region.
Diagnostics
.OnStar active, if equipped
.Service history/recall check
Engine Oil and Filter
.Engine oil
.Oil life monitor
‐Reset oil life monitor
Exterior Lights
.Visual inspection
Windshield and Wipers
.Visual inspection
Battery
.Battery visual inspection
.Battery test results
.Battery cables and connections
Systems, Fluids, and Visible Leak
Inspection
.Engine oil
.Transmission
.Drive axle
.Transfer case
.Engine cooling system
.Power steering, if equipped
.Fuel system
.Windshield washer fluid
Tire Inspection
.Tire pressure, tread depth, and wear
.Rotation, if applicable
.Alignment check, optional
.Reset tire pressure monitor
.Check tire sealant expiration date,
if equipped
.Check spare tire, if equipped
Brakes
.Check brake system
Visible and Functional Inspections
.Seat belt components
.Exhaust system
.Accelerator pedal
.Passenger compartment air filter,
if equipped
.Engine air filter
.Hoses
.Belts
.Shocks and struts
.Steering components
.Axle boots or driveshaft and u-joints
.Compartment lift struts, if equipped
.Floor mats secured, no interference with
pedals
.Horn
.Ignition lock, if equipped
.Starter switch
.Evaporative control system
Lubricate
.Chassis components
Special Application Services
.Severe Commercial Use Vehicles Only:
Lubricate chassis components every oil
change.
.Have underbody flushing service
performed. See "Underbody Maintenance"
in Exterior Care 0306.
Page 348 of 362

Chevrolet Corvette Owner Manual (GMNA-Localizing-U.S./Canada/Mexico-
17272984) - 2024 - CRC - 2/20/23
Connected Services 347
Ensuring Security
.Change the default passwords for the
Wi-Fi hotspot and myChevrolet mobile
application. Make these passwords
different from each other and use a
combination of letters and numbers to
increase the security.
.Change the default name of the SSID
(Service Set Identifier). This is your
network’s name that is visible to other
wireless devices. Choose a unique name
and avoid family names or vehicle
descriptions.
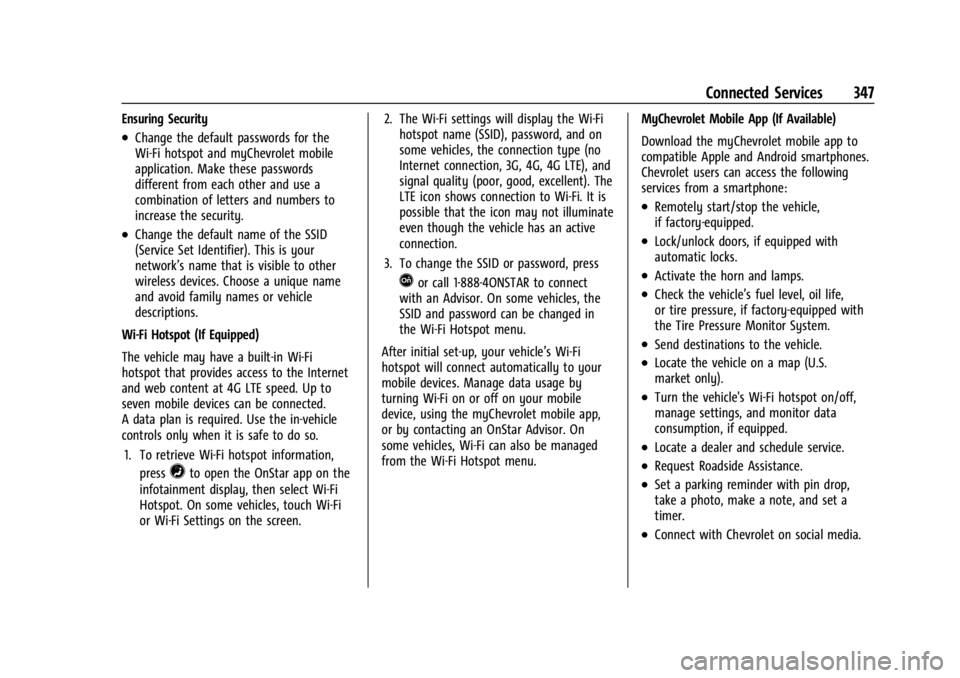
Wi-Fi Hotspot (If Equipped)
The vehicle may have a built-in Wi-Fi
hotspot that provides access to the Internet
and web content at 4G LTE speed. Up to
seven mobile devices can be connected.
A data plan is required. Use the in-vehicle
controls only when it is safe to do so. 1. To retrieve Wi-Fi hotspot information, press
=to open the OnStar app on the
infotainment display, then select Wi-Fi
Hotspot. On some vehicles, touch Wi-Fi
or Wi-Fi Settings on the screen. 2. The Wi-Fi settings will display the Wi-Fi
hotspot name (SSID), password, and on
some vehicles, the connection type (no
Internet connection, 3G, 4G, 4G LTE), and
signal quality (poor, good, excellent). The
LTE icon shows connection to Wi-Fi. It is
possible that the icon may not illuminate
even though the vehicle has an active
connection.
3. To change the SSID or password, press
Qor call 1-888-4ONSTAR to connect
with an Advisor. On some vehicles, the
SSID and password can be changed in
the Wi-Fi Hotspot menu.
After initial set-up, your vehicle’s Wi-Fi
hotspot will connect automatically to your
mobile devices. Manage data usage by
turning Wi-Fi on or off on your mobile
device, using the myChevrolet mobile app,
or by contacting an OnStar Advisor. On
some vehicles, Wi-Fi can also be managed
from the Wi-Fi Hotspot menu. MyChevrolet Mobile App (If Available)
Download the myChevrolet mobile app to
compatible Apple and Android smartphones.
Chevrolet users can access the following
services from a smartphone:
.Remotely start/stop the vehicle,
if factory-equipped.
.Lock/unlock doors, if equipped with
automatic locks.
.Activate the horn and lamps.
.Check the vehicle’s fuel level, oil life,
or tire pressure, if factory-equipped with
the Tire Pressure Monitor System.
.Send destinations to the vehicle.
.Locate the vehicle on a map (U.S.
market only).
.Turn the vehicle's Wi-Fi hotspot on/off,
manage settings, and monitor data
consumption, if equipped.
.Locate a dealer and schedule service.
.Request Roadside Assistance.
.Set a parking reminder with pin drop,
take a photo, make a note, and set a
timer.
.Connect with Chevrolet on social media.
Page 349 of 362

Chevrolet Corvette Owner Manual (GMNA-Localizing-U.S./Canada/Mexico-
17272984) - 2024 - CRC - 2/20/23
348 Connected Services
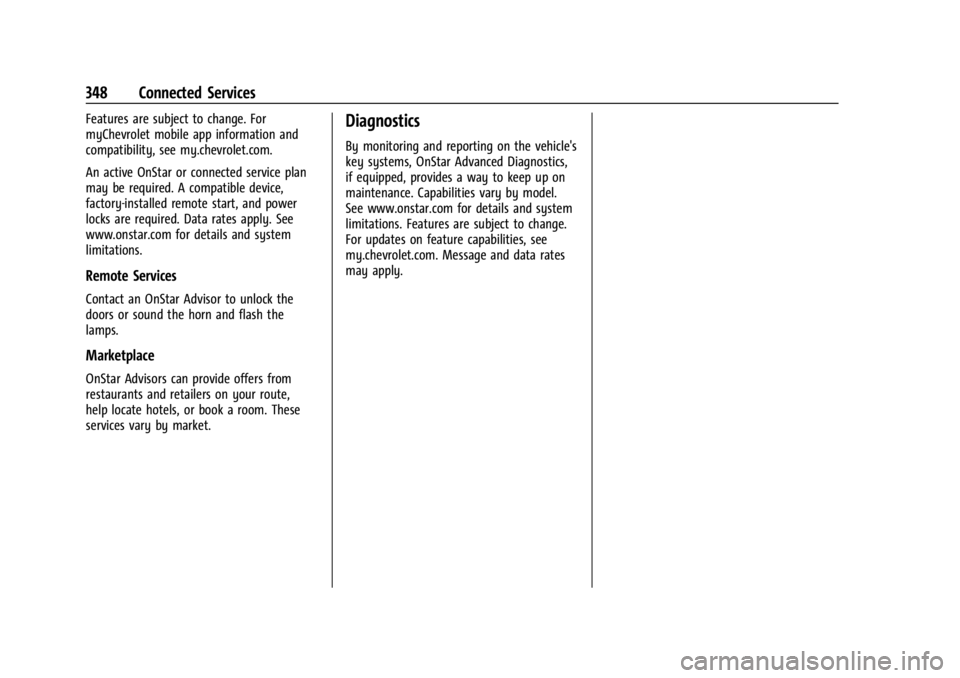
Features are subject to change. For
myChevrolet mobile app information and
compatibility, see my.chevrolet.com.
An active OnStar or connected service plan
may be required. A compatible device,
factory-installed remote start, and power
locks are required. Data rates apply. See
www.onstar.com for details and system
limitations.
Remote Services
Contact an OnStar Advisor to unlock the
doors or sound the horn and flash the
lamps.
Marketplace
OnStar Advisors can provide offers from
restaurants and retailers on your route,
help locate hotels, or book a room. These
services vary by market.
Diagnostics
By monitoring and reporting on the vehicle's
key systems, OnStar Advanced Diagnostics,
if equipped, provides a way to keep up on
maintenance. Capabilities vary by model.
See www.onstar.com for details and system
limitations. Features are subject to change.
For updates on feature capabilities, see
my.chevrolet.com. Message and data rates
may apply.
Page 355 of 362

Chevrolet Corvette Owner Manual (GMNA-Localizing-U.S./Canada/Mexico-
17272984) - 2024 - CRC - 2/20/23
354 Index
Heated (cont'd)Ventilated Front Seats . . . . . . . . . . . . . . . . . . 44
Heating . . . . . . . . . . . . . . . . . . . . . . . . . . . . . . . . . . 150
High Voltage Battery Gauge . . . . . . . . . . . . . . 86
High-Beam On Light . . . . . . . . . . . . . . . . . . . . . . 98
High-Speed Operation . . . . . . . . . . . . . . . . . . . 287
Hill Rollback Control . . . . . . . . . . . . . . . . . . . . . . . 196
Hill and Mountain Roads . . . . . . . . . . . . . . . . . 171
Hill Start Assist (HSA) . . . . . . . . . . . . . . . . . . . . 194
Hood . . . . . . . . . . . . . . . . . . . . . . . . . . . . . . . . . . . . . . 17
Horn . . . . . . . . . . . . . . . . . . . . . . . . . . . . . . . . . . . . . . .75
How to Wear Seat Belts Properly . . . . . . . . . 46
HVAC . . . . . . . . . . . . . . . . . . . . . . . . . . . . . . . . . . . . 150
Hybrid Battery Charging Light . . . . . . . . . . . . . . . . . . . . . . . . . . 87
I
Ignition Positions . . . . . . . . . . . . . . . . . . . . . . . . .178
Immobilizer . . . . . . . . . . . . . . . . . . . . . . . . . . . . . . . .23
IndicatorAuto Stop . . . . . . . . . . . . . . . . . . . . . . . . . . . . . . 98
Pedestrian Ahead . . . . . . . . . . . . . . . . . . . . . . . 94
Traffic Sign . . . . . . . . . . . . . . . . . . . . . . . . . . . . . 98
Vehicle Ahead . . . . . . . . . . . . . . . . . . . . . . . . . . 94
Indicators
Warning Lights and Gauges . . . . . . . . . . . . . 80
Infants and Young Children, Restraints . . . . 63 Information
Publication Ordering . . . . . . . . . . . . . . . . . . . 337
Infotainment Using the System . . . . . . . . . . . . . . . . . . . . . . 120
Infotainment System . . . . . . . . . . . . . . . . . . . . 340
Inspection Multi-Point Vehicle . . . . . . . . . . . . . . . . . . . . 318
Instrument Cluster . . . . . . . . . . . . . . . . . . . . . . . . .81
Instrument Panel Overview . . . . . . . . . . . . . . . . 4
Interior Rearview Mirrors . . . . . . . . . . . . . . . . . 26
Introduction . . . . . . . . . . . . . . . . . . . . . . . . . . . 2, 116
J
Jack Auxiliary . . . . . . . . . . . . . . . . . . . . . . . . . . . . . . . 125
Jump Starting - North America . . . . . . . . . . . . . . . 299
K
Keys . . . . . . . . . . . . . . . . . . . . . . . . . . . . . . . . . . . . . . . 6
Remote . . . . . . . . . . . . . . . . . . . . . . . . . . . . . . . . . . 7
Remote Operation . . . . . . . . . . . . . . . . . . . . . . . 7
L
Labeling, Tire Sidewall . . . . . . . . . . . . . . . . . . . 282
LampsCourtesy . . . . . . . . . . . . . . . . . . . . . . . . . . . . . . . . 113
Daytime Running (DRL) . . . . . . . . . . . . . . . . . 111
Engine Compartment . . . . . . . . . . . . . . . . . . . 114 Lamps (cont'd)
Exterior Controls . . . . . . . . . . . . . . . . . . . . . . . 109
Exterior Lamps Off Reminder . . . . . . . . . . 110
Exterior Lighting Battery Saver . . . . . . . . . 115
Flash-to-Pass . . . . . . . . . . . . . . . . . . . . . . . . . . . . 111
High/Low Beam Changer . . . . . . . . . . . . . . 110
Malfunction Indicator (Check
Engine) . . . . . . . . . . . . . . . . . . . . . . . . . . . . . . . 90
On Reminder . . . . . . . . . . . . . . . . . . . . . . . . . . . 99
Reading . . . . . . . . . . . . . . . . . . . . . . . . . . . . . . . . . 113
Lane Keep Assist Light . . . . . . . . . . . . . . . . . . . . . . . 94
Lap-Shoulder Belt . . . . . . . . . . . . . . . . . . . . . . . . . 48
LATCH, Lower Anchors and Tethers for Children . . . . . . . . . . . . . . . . . . . . . . . . . . . . . . . . . 67
LED Lighting . . . . . . . . . . . . . . . . . . . . . . . . . . . . . . 271
Leveling Control
Headlamp . . . . . . . . . . . . . . . . . . . . . . . . . . . . . . 112
Lifting the Vehicle, Tires . . . . . . . . . . . . . . . . . 232
Lighting Entry . . . . . . . . . . . . . . . . . . . . . . . . . . . . . . . . . . . 114
Exit . . . . . . . . . . . . . . . . . . . . . . . . . . . . . . . . . . . . . 114
Illumination Control . . . . . . . . . . . . . . . . . . . . 113
LED . . . . . . . . . . . . . . . . . . . . . . . . . . . . . . . . . . . . . 271
Lights Airbag Readiness . . . . . . . . . . . . . . . . . . . . . . . 88
All-Wheel-Drive . . . . . . . . . . . . . . . . . . . . . . . . . 93