2024 CHEVROLET CORVETTE display
[x] Cancel search: displayPage 227 of 362

Chevrolet Corvette Owner Manual (GMNA-Localizing-U.S./Canada/Mexico-
17272984) - 2024 - CRC - 2/20/23
226 Driving and Operating
{Warning
LKA will not alert the driver if a towed
trailer crosses into an adjacent lane of
travel. Serious injury or property damage
may occur if the trailer moves into
another lane. Always monitor the trailer
position while towing to make sure it is
within the same lane as the tow vehicle.
How the System Works
LKA uses a camera sensor installed on the
windshield ahead of the rearview mirror to
detect lane markings. It may provide brief
steering assist if it detects an unintended
lane departure. It may further provide an
audible alert or the driver seat may pulse
indicating that a lane marking has been
crossed. The system does not provide an
LDW when intentionally steering across a
lane marker.
To turn LKA on and off, press
Aon the
overhead console. If equipped, the indicator
light on the button comes on when LKA is
on and turns off when LKA is disabled. In
some vehicles, you must press the button
for more than three seconds to turn LKA off. When attempting to enable LKA in any of
the above conditions, LKA UNAVAILABLE will
display.
When on,
Ais white, if equipped,
indicating that the system is not ready to
assist.
Ais green if LKA is ready to
assist. LKA may assist by gently turning the
steering wheel if the vehicle approaches a
detected lane marking.
Ais amber when
assisting. It may also provide a Lane
Departure Warning (LDW) alert by flashing
Aamber if the vehicle crosses a
detected lane marking. Additionally, there
may be three beeps, or the driver seat may
pulse three times, on the right or left,
depending on the lane departure direction.
Take Steering
The LKA system does not continuously steer
the vehicle. If LKA does not detect active
driver steering, an alert and chime may be
provided. Steer the vehicle to dismiss. LKA
may become temporarily unavailable after
repeated take steering alerts.
When the System Does Not Seem to
Work Properly
The system performance may be
affected by:
.Close vehicles ahead.
.Sudden lighting changes, such as when
driving through tunnels.
.Banked roads.
.Roads with poor lane markings, such as
two-lane roads.
If the LKA system is not functioning
properly when lane markings are clearly
visible, cleaning the windshield may help.
A camera blocked message may display if
the camera is blocked. Some driver
assistance systems may have reduced
performance or not work at all. An LKA or
LDW unavailable message may display if the
systems are temporarily unavailable. This
message could be due to a blocked camera.
The LKA system does not need service. Clean
the outside of the windshield behind the
rearview mirror.
LKA assistance and/or LDW alerts may occur
due to tar marks, shadows, cracks in the
road, temporary or construction lane
markings, or other road imperfections. This
Page 254 of 362
Chevrolet Corvette Owner Manual (GMNA-Localizing-U.S./Canada/Mexico-
17272984) - 2024 - CRC - 2/20/23
Vehicle Care 253
How to Reset the Engine Oil Life System
Reset the system whenever the engine oil is
changed so that the system can calculate
the next engine oil change. To reset the
system:1. Scroll through the DIC Info Pages menu until the remaining Engine Oil
percentage is displayed. See Driver
Information Center (DIC) 099.
2. Press and hold the thumbwheel on the DIC while the Oil Life display is active.
When prompted, confirm reset. The oil
life will change to 100%.
If the CHANGE ENGINE OIL SOON message
comes back on when the vehicle is started,
the engine oil life system has not reset.
Repeat the procedure.
Dual Clutch Transmission Fluid
How to Check Dual Clutch Transmission
Fluid
It is not necessary to check the transmission
fluid level. A transmission fluid leak is the
only reason for fluid loss. If a leak occurs,
take the vehicle to the dealer and have it
repaired as soon as possible. The vehicle is not equipped with a
transmission fluid level dipstick. There is a
special procedure for checking and changing
the transmission fluid. Because this
procedure is difficult, this should be done at
the dealer. Contact the dealer for additional
information or the procedure can be found
in the service manual. To purchase a service
manual, see
Publication Ordering
Information 0337.
Caution
Use of the incorrect transmission fluid
may damage the vehicle, and the
damage may not be covered by the
vehicle warranty. Always use the correct
transmission fluid. See Recommended
Fluids and Lubricants 0320.
Change the fluid and external canister filter
at the proper intervals. See Maintenance
Schedule 0316. Be sure to use the correct
fluid. See Recommended Fluids and
Lubricants 0320.
Dual Clutch Transmission Fluid Life
System
When to Change the Dual Clutch
Transmission Fluid
This vehicle has a computer that indicates
when to change the transmission fluid. This
is based on a combination of factors which
include temperature and miles driven. Based
on driving conditions, the mileage at which
a fluid change is indicated can vary
considerably. For the fluid life system to
work properly, the system must be reset
every time the fluid is changed. When the
system has calculated that fluid life has
been diminished, it indicates that a fluid
change is necessary. A CHANGE
TRANSMISSION FLUID SOON message comes
on. Change the fluid as soon as possible
within the next 1 000 km (600 mi). Failure
to change transmission fluid at required
intervals could lead to suboptimal
transmission performance. Your dealer has
trained service technicians who will change
the fluid and reset the system. If the system
is ever reset accidentally, the fluid must be
changed 72 000 km (45,000 mi) after the
last fluid change.
Page 255 of 362
Chevrolet Corvette Owner Manual (GMNA-Localizing-U.S./Canada/Mexico-
17272984) - 2024 - CRC - 2/20/23
254 Vehicle Care
When to Replace the Dual Clutch
Transmission Fluid Filter
This vehicle has a computer that indicates
when to change the transmission external
canister fluid filter. This is based on the
number of miles driven as outlined in the
Service and Maintenance section. For the
fluid filter life system to work properly, the
system must be reset every time the filter is
replaced. When the system has calculated
that the external canister filter is near the
mileage interval, a REPLACE TRANSMISSION
OIL FILTER SOON message comes on. Replace
the external canister filter before the
indicator reaches 0%.
Failure to replace the transmission filter at
required intervals could lead to suboptimal
transmission performance. Your dealer has
trained service technicians who will replace
the external canister filter and reset the
system. If the system is ever reset
accidentally, the filter should be replaced
according to the service intervals indicated
in the Service and Maintenance section until
the next filter change. If the next filter
change is the first, follow the service
interval until the second filter change,
resetting the filter life system at each filter
change.
How to Reset the Dual Clutch
Transmission Fluid and Filter Life System
Reset the respective system whenever the
transmission fluid or external canister filter
is replaced so that the system can calculate
the next service interval.
To reset:1. Place the vehicle in P (Park).
2. Select Transmission Fluid Life or Transmission Oil Filter Life on the DIC
menu. See Driver Information Center
(DIC) 099.
3. Press the thumbwheel to move to the Reset submenu. Select Reset
Transmission Fluid or Reset Transmission
Oil Filter. A confirmation page will be
displayed, press the thumbwheel again
to confirm the reset.
4. When the Transmission Fluid/Filter Life System is successfully reset, 100%
remaining life will be displayed.
Engine Air Filter Life System
If equipped, this feature provides the engine
air filter’s remaining life and best timing for
a change. The timing to change an engine
air filter depends on driving and
environmental conditions.
When to Change Engine Air Filter
When the Driver Information Center (DIC)
displays a message to replace the engine air
filter at the next oil change, follow this
timing.
When the DIC displays a message to replace
the engine air filter soon, replace the engine
air filter at the earliest convenience.
The system must be reset after the engine
air filter is changed.
If the DIC displays a message to check the
engine air filter system, see your dealer.
How to Reset Engine Air Filter Life
System
Reset the system whenever the engine air
filter is replaced so that the system can
calculate the next engine air filter change.
To reset:
1. Place the vehicle in P (Park).
2. Display the Air Filter Life on the DIC. See Driver Information Center (DIC) 099.
3. Press the thumbwheel on the steering wheel to move to the Reset/Disable
display area. Select Reset and press the
thumbwheel for several seconds.
4. Press the thumbwheel to confirm reset.
Page 262 of 362
Chevrolet Corvette Owner Manual (GMNA-Localizing-U.S./Canada/Mexico-
17272984) - 2024 - CRC - 2/20/23
Vehicle Care 261
by your dealer. The high voltage cooling
system reservoirs have tamper- resistant
pressure caps. The coolant should only be
serviced by a qualified technician.
Engine Overheating
The vehicle has several indicators to warn of
engine overheating.
There is an engine coolant temperature
gauge on the instrument cluster. SeeEngine
Coolant Temperature Gauge 087. The
vehicle may also display a message on the
Driver Information Center (DIC).
If the decision is made not to lift the hatch
but to get service help right away, see
Roadside Assistance Program 0332.
If the decision is made to lift the hatch,
make sure the vehicle is parked on a level
surface.
Then check to see if the engine cooling fans
are running. There are two cooling fans
located in the front (one at each corner) and
two cooling fans in the rear (one on each
side of the engine). If the engine is
overheating, the fans should be running.
If they are not, do not continue to run the
engine, and have the vehicle serviced.
Caution
Do not run the engine if there is a leak
in the engine cooling system. This can
cause a loss of all coolant and can
damage the system and vehicle. Have
any leaks fixed right away.
If Steam Is Coming from the Engine
{Warning
Steam and scalding liquids from a hot
cooling system are under pressure.
Turning the pressure cap, even a little,
can cause them to come out at high
speed and you could be burned. Never
turn the cap when the cooling system,
including the pressure cap, is hot. Wait
for the cooling system and pressure cap
to cool.
If Steam Is Coming from the Engine
Compartment with no Overheat Warning
Water from rain and car washes could enter
the engine compartment and contact hot
surfaces. If steam is coming from the engine
compartment with no accompanying
overheat warning, no service is needed.
If No Steam Is Coming from the Engine
If an engine overheat warning is displayed
but no steam can be seen or heard, the
problem may not be too serious. Sometimes
the engine can get a little too hot when the
vehicle:
.Climbs a long hill on a hot day.
.Stops after high-speed driving.
.Idles for long periods in traffic.
If the overheat warning is displayed with no
sign of steam: 1. Turn the air conditioning off.
2. Turn the heater on to the highest temperature and to the highest fan
speed. Open the windows as necessary.
3. When it is safe to do so, pull off the road, shift to P (Park) or N (Neutral), and
let the engine idle.
If the engine coolant temperature gauge is
no longer in the shaded area or an overheat
warning no longer displays, the vehicle can
be driven. Continue to drive the vehicle
slowly for about 10 minutes. Keep a safe
vehicle distance from the vehicle in front.
If the warning does not come back on,
Page 263 of 362
Chevrolet Corvette Owner Manual (GMNA-Localizing-U.S./Canada/Mexico-
17272984) - 2024 - CRC - 2/20/23
262 Vehicle Care
continue to drive normally and have the
cooling system checked for proper fill and
function.
If the warning continues, pull over safely,
and park the vehicle right away.
If there is no sign of steam, idle the engine
for three minutes while parked. If the
warning is still displayed, turn off the
engine until it cools down.
Washer Fluid
What to Use
When the vehicle needs windshield washer
fluid, be sure to read the manufacturer
instructions before use. If the vehicle will be
operating in an area where the temperature
may fall below freezing, use a fluid that has
sufficient protection against freezing.
Adding Washer Fluid
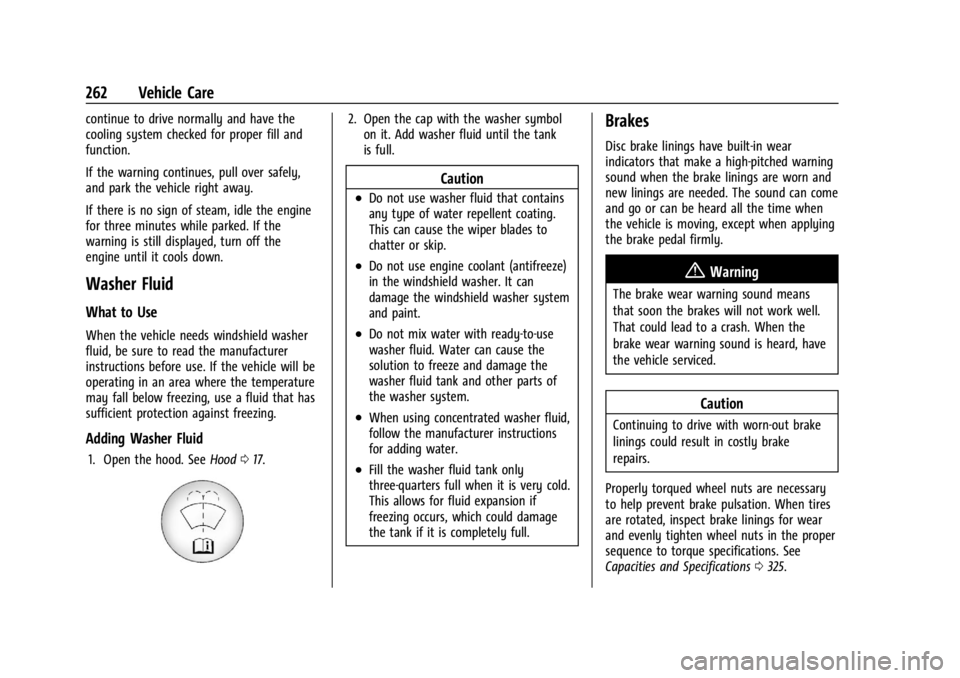
1. Open the hood. SeeHood017.
2. Open the cap with the washer symbol
on it. Add washer fluid until the tank
is full.
Caution
.Do not use washer fluid that contains
any type of water repellent coating.
This can cause the wiper blades to
chatter or skip.
.Do not use engine coolant (antifreeze)
in the windshield washer. It can
damage the windshield washer system
and paint.
.Do not mix water with ready-to-use
washer fluid. Water can cause the
solution to freeze and damage the
washer fluid tank and other parts of
the washer system.
.When using concentrated washer fluid,
follow the manufacturer instructions
for adding water.
.Fill the washer fluid tank only
three-quarters full when it is very cold.
This allows for fluid expansion if
freezing occurs, which could damage
the tank if it is completely full.
Brakes
Disc brake linings have built-in wear
indicators that make a high-pitched warning
sound when the brake linings are worn and
new linings are needed. The sound can come
and go or can be heard all the time when
the vehicle is moving, except when applying
the brake pedal firmly.
{Warning
The brake wear warning sound means
that soon the brakes will not work well.
That could lead to a crash. When the
brake wear warning sound is heard, have
the vehicle serviced.
Caution
Continuing to drive with worn-out brake
linings could result in costly brake
repairs.
Properly torqued wheel nuts are necessary
to help prevent brake pulsation. When tires
are rotated, inspect brake linings for wear
and evenly tighten wheel nuts in the proper
sequence to torque specifications. See
Capacities and Specifications 0325.
Page 265 of 362
Chevrolet Corvette Owner Manual (GMNA-Localizing-U.S./Canada/Mexico-
17272984) - 2024 - CRC - 2/20/23
264 Vehicle Care
the mass limit. Carbon ceramic brake rotors
inspection and weighing methods can be
found in the service manual.
Z51/Z06 Cast Iron Rotor System Brake
Burnish Procedure for Corrosion Cleanup
Corrosion spotting and grooving on the
brake rotor surface may appear after the
vehicle sits for an extended period of time,
especially in high humidity. This corrosion
may result in brake pulsation and noise. To
help restore optimal braking performance
and reduce noise, complete the following
procedure:
Caution
Performing the brake burnish procedure
on a base brake system can result in
brake damage.
Perform this procedure only on dry
pavement, in a safe manner, and in
compliance with all local and state
ordinances/laws regarding motor vehicle
operation.
Caution
The new vehicle break-in period should be
completed before performing the brake
burnishing procedure or damage may
occur to the powertrain/engine. See New
Vehicle Break-In 0177.
Caution
Brake fade can occur during this burnish
procedure and can cause brake pedal
travel and force to increase. This could
extend stopping distance until the brakes
are fully burnished.
Completing the following procedure as
instructed will not damage the brakes. The
brake pads may smoke and produce an
odor. The braking force and pedal travel
may increase. After the procedure, the brake
pads may appear white at the rotor contact. 1. Using the Friction Bubble gauge, apply the brakes 10 times starting at 100 km/h
(60 mph) to 50 km/h (30 mph) while
decelerating at 0.4g. This is a medium
brake application. Drive for at lest 0.5 km
(0.3 mi) between applying the brakes. 2. If further cleanup of the brake discs is
needed, repeat this procedure with 0.7g
applications.
As with all high performance brake systems,
some amount of brake squeal is normal.
Brake Pad Life System
(If Equipped)
When to Change Brake Pads
If equipped, this system estimates the
remaining life of the front and rear brake
pads. Brake Pad Life is displayed in the
Driver Information Center (DIC), along with
a percentage for each axle. The system must
be reset every time the brake pads are
changed.
When the system has determined that the
brake pads need to be replaced, a message
displays, which may include mileage
remaining.
Brake pads should always be replaced as
complete axle sets.
Page 266 of 362

Chevrolet Corvette Owner Manual (GMNA-Localizing-U.S./Canada/Mexico-
17272984) - 2024 - CRC - 2/20/23
Vehicle Care 265
How to Reset the Brake Pad Life System
The system will automatically detect when
significantly worn brake pads are replaced.
When the ignition is turned on after new
pads and wear sensors are installed, a
message will display. Follow the prompts to
reset the system.
The brake pad life system can also be
manually reset:1. Display Brake Pad Life on the DIC. See Driver Information Center (DIC) 099.
2. Select the Brake Pad Life menu.
3. Select front or rear pads as appropriate.
4. Select YES on the confirmation message. Repeat for the pads on the other axle if
they were also replaced.
How to Disable the Brake Pad Life
System
The brake pad life system can be turned off.
This may be necessary if aftermarket brake
pads without wear sensors are installed.
When the system is turned off, the front
and rear brake pad life percentages will not
display. However, the built-in wear
indicators that make a high-pitched warning sound when the brake pads are worn can
still determine when the pads should be
replaced. See
Brakes0262.
To turn off the brake pad life system: 1. Display Brake Pad Life on the DIC. See Driver Information Center (DIC) 099.
2. Select the Brake Pad Life menu.
3. Select DISABLE.
To turn the brake pad life system back on,
follow the above steps but select ENABLE in
Step 2.
Electronic Brake Pad Sensor System
(Z06/Z07/E-Ray with J57 Carbon Ceramic
Brake Rotors)
The brake pads have electronic brake pad
wear sensors, when the brake pads need to
be replaced, a message displays in the
Driver Information Center (DIC) which says
“Service Brakes Worn”.
When the message displays, install new
brake pads and brake pad wear sensors on
the vehicle.
When the ignition is turned on after new
brake pads and brake pad wear sensors are
installed, the message should no longer
display. The brake pad sensor system can only be
reset by replacing the brake pads and brake
pad wear sensors.
Brake Fluid
The brake master cylinder reservoir is filled
with GM approved DOT 4 brake fluid as
indicated on the reservoir cap. See
Underhood Compartment Overview
0235 for
the location of the reservoir.
Checking Brake Fluid
With the vehicle in P (Park) on a level
surface, the brake fluid level should be
between the minimum and maximum marks
on the brake fluid reservoir.
There are only two reasons why the brake
fluid level in the reservoir may go down:
.Normal brake lining wear. When new
linings are installed, the fluid level goes
back up.
Page 268 of 362
Chevrolet Corvette Owner Manual (GMNA-Localizing-U.S./Canada/Mexico-
17272984) - 2024 - CRC - 2/20/23
Vehicle Care 267
12-Volt Lithium-Ion Battery (E-Ray)
{Warning
WARNING:Battery posts, terminals and
related accessories can expose you to
chemicals including lead and lead
compounds, which are known to the
State of California to cause cancer and
birth defects or other reproductive harm.
Wash hands after handling. For more
information go to
www.P65Warnings.ca.gov.
See California Proposition 65 Warning 01.
Charging the 12-volt Lithium-ion battery
The 12-volt lithium-ion battery can be
charged using a GM approved charger
designed for lithium-Ion batteries. Follow the
instructions that come with the GM
approved charger.
{Warning
Use only GM approved jump start boxes
and charging tools. Use of unapproved
jump start boxes, charging tools, a loose
battery, or battery charger may cause
personal injury, death, or damage to the (Continued)
Warning (Continued)
vehicle. For GM approved jump start
boxes or charging tools, see
https://gmdesolutions.com.
Use the Battery Voltage info tile to
determine if your battery is low and needs
to be charged. See Instrument Cluster081
under the “Info Tiles” section for more
information.
GM recommends charging your 12-volt
lithium-ion battery when storing your
vehicle for long periods of time. See “Vehicle
Storage” later on in this section.
If the vehicle isn’t starting and the 12-volt
lithium-ion battery has run down, charging
the 12-volt lithium-ion battery may solve the
issue. See Jump Starting - North America
0 299.
High Voltage Battery (E-Ray)
Only a trained service technician should
inspect, test, or replace the high voltage
battery. The dealer has information on
how to recycle the high voltage battery.
There is also information available at
https://www.recyclemybattery.com.
{Warning
Damage to the high voltage battery or
high voltage system can create a risk of
electric shock, overheating, or fire.
If the vehicle is damaged from a
moderate to severe crash, flood, fire,
or other event, the vehicle should be
inspected as soon as possible. Until the
vehicle has been inspected, store it
outside at least 15 m (50 ft) from any
structure or anything that can burn.
Ventilate the vehicle by opening a
window or a door.
Contact Customer Assistance as soon as
possible to determine whether an
inspection is needed. See Customer
Assistance Offices 0331.
If the vehicle is in a crash, the sensing
system may shut down the high voltage
system. When this occurs, the high voltage
battery is disconnected and the vehicle will
not start. The SERVICE VEHICLE SOON
message in the Driver Information Center
(DIC) will display. Before the vehicle can