2023 TOYOTA YARIS CROSS change wheel
[x] Cancel search: change wheelPage 312 of 698

310
Owners Manual_Europe_M52N75_en
4-5. Using the driving support systems
be displayed, and then parking
assistance will end.
If the seat belt is unfastened or
door opened before putting the
shift lever into P, a buzzer
sounds, and a message is dis-
played on the multimedia screen.
Also, if the driver’s seat is unfas-
tened and brake pedal released,
the horn will sound. Shift the shift
lever to P and end the assis-
tance.
If you select on the multime-
dia display, the vehicle dis-
played on the parking assist
completion screen will rotate.
■If you feel that the vehicle is
approaching close to a surround- ing vehicle, object, person, or gut-ter
Depress the brake pedal to stop the vehicle and then change the shift posi-tion to change the direction of travel of
the vehicle. At this time, assist will be suspended. However, if the “Start” but-ton is selected, assist will resume and
the vehicle will move in the direction cor- responding to the selected shift position.
■Function description
The parallel parking function can be
used if the target parking space can
be detected when the vehicle is
stopped close and aligned with the
center of the parking space. Also,
depending on the condition of the
parking space, etc., if it is neces-
sary to change the direction of
travel of the vehicle, it will assist in
turning back the steering wheel, as
well.
NOTICE
■When using the perpendicular parking function
●Make sure that there are no obstructions within the yellow guide lines and between the vehicle and
target parking spot. If there are any obstructions between the vehicle and the target parking space, or
between the yellow guide lines, cancel the perpendicular parking function.
●As the target parking space will not be able to be set correctly if the sur-
face of the parking space is on a slope or has differences in height, the vehicle may stray from the tar-
get parking space or be slanted. Therefore, do not use the perpen-dicular parking function for this kind
of parking spot.
●When parking in a narrow parking
space, the vehicle may closely approach an adjacent parked vehi-cle. If a collision seems likely,
depress the brake pedal to stop the vehicle.
Parallel parking function
Page 317 of 698

315
4
Owners Manual_Europe_M52N75_en
4-5. Using the driving support systems
Driving
■If you feel that the vehicle is approaching close to a surround-
ing vehicle, object, person, or gut- ter
Depress the brake pedal to stop the
vehicle and then change the shift posi- tion to change the direction of travel of the vehicle. At this time, assist will be
suspended. However, if the “Start” but- ton is selected, assist will resume and the vehicle will move in the direction cor-
responding to the selected shift position.
■Parallel parking departure function
●While assistance is operating, if the
driver determines that the vehicle can depart from the parking space and operates the steering wheel, assis-
tance will be end at that position.
●Do not use parallel parking departure
function in any situation other than when departing a parallel parking spot. If assistance is started uninten-
tionally, depress the brake pedal and stop the vehicle, then press the Advanced Park main switch to cancel
assistance.
■Situations in which the parallel parking departure function will not operate
In situations such as the following, the parallel parking departure function will
not operate:
●When vehicles waiting at a traffic sig-
nal in the departure direction
●When a vehicle is stopped in the area
behind where the vehicle will depart
●When a wall, column, or person is
detected near a front or rear side sen- sor
●When the vehicle has been parked on a curb and a side sensor detects the road surface
●When a vehicle is not parked in front of the vehicle
●When there is excessive space between the front of the vehicle and a
parked vehicle
■Function description
The memory function can be used
to park in a previously registered
parking space, even if there are no
parking space box or adjacent
parked vehicles.
Memory function
Page 322 of 698

320
Owners Manual_Europe_M52N75_en
4-5. Using the driving support systems
■Assistance will be canceled
when
In situations such as the following,
Advanced Park operation will be
canceled.
Firmly hold the steering wheel and
depress the brake pedal to stop the
vehicle.
As system operation has been can-
celed, begin the operation again or con-
tinue parking manually, using the
steering wheel.
The Advanced Park main switch
is pressed
The shift position has been
changed to P
The parking brake is engaged
A door is opened
The driver’s seat belt is unfas-
tened
The outside rear view mirrors are
folded
The TRC or VSC is turned off
The TRC, VSC or ABS operates
The power switch is pushed
The system determines assis-
tance cannot be continued in the
current parking environment
The system malfunctions
■Assistance will be suspended
when
In situations such as the following,
Advanced Park operation will be
suspended.
Assistance can be started again by fol-
lowing the directions displayed on the
center display.
The steering wheel is operated
The accelerator pedal is
depressed
The shift lever has been oper-
ated
Brake control operates
The PCS (Pre-Collision System)
has operates
NOTICE
• When a camera lens is dirty or cov- ered with water droplets
If assistance is ended during registra- tion, perform registration again.
●When registering a parking space to the memory function, if the road
surface cannot be detected “No available parking space to register” will be displayed.
●When using the memory function, stop the vehicle directly beside the
space where it desired to be stopped. Otherwise the parking space may not be able to be
detected correctly and assistance may not be provided to the point that the vehicle is fully parked.
●Do not use the memory function if a camera has been subjected to a
strong impact or images of the pan- oramic view monitor are mis-aligned.
●If a camera has been replaced, as the installation angle of the camera
will have changed, it will be neces- sary to reregister parking spaces of the memory function.
Advanced Park cancel-
ation/suspension
Page 325 of 698

323
4
Owners Manual_Europe_M52N75_en
4-5. Using the driving support systems
Driving
provide quick, powerful acceleration.
Making it suitable for when agile driving
response is desired, such as when driv-
ing on roads with many curves.
When the Power mode is selected,
Power mode indicator comes on.
3 Eco drive mode
Helps the driver accelerate in an eco-
friendly manner and improve fuel econ-
omy through moderate throttle charac-
teristics and by controlling the operation
of the air conditioning system (heat-
ing/cooling).
When the Eco drive mode is selected,
Eco drive mode indicator comes on.
■Operation of the air conditioning system in Eco drive mode
Eco drive mode controls the heat- ing/cooling operations and fan speed of the air conditioning system to enhance
fuel efficiency. To improve air condition- ing performance, perform the following operations:
●Turn off air conditioning eco mode ( P.342)
●Adjust the fan speed (P.343)
●Turn off Eco drive mode
■Automatic deactivation of Power mode
If the power switch is turned off after
driving in power mode, the drive mode will be changed to normal mode.
Trail Mode (AWD vehi-
cles)
Trail Mode is designed to con-
trol the spinning of the drive
wheels by integratedly con-
trolling AWD, brake and drive
force control systems. Use the
Trail Mode when driving
bumpy roads, etc.
WARNING
■Before using Trail Mode
Make sure to observe the following
precautions.Failure to observe these precautions may result in an unex-pected accident.
●Trail mode is intended for use when driving on rough roads.
●Check that the Trail Mode indicator is illuminated before driving.
●Trail Mode is not intended to expand the limits of the vehicle. Thoroughly check the road condi-
tions and drive with caution.
NOTICE
■I n o rd e r t o e n su re t h a t Trai l M o de operates properly
Do not continuously use the Trail
Mode for a long period of time. Depending on the driving conditions, the load on related parts increases
and the system may not operate prop- erly.
Page 395 of 698

393
6
Owners Manual_Europe_M52N75_en
6-3. Do-it-yourself maintenance
Maintenance and care
■How to change the unit
1 Park the vehicle in a safe place
and turn the power switch off.
Changing the unit cannot be performed
while the vehicle is moving.
2 Turn the power switch to ON.
3 Press / (7-inch display)
or / (4.2-inch display) of
the meter control switch to
select .
4 Press / (7-inch display)
or / (4.2-inch display) to
select “Vehicle Settings” and
then press and hold .
5 Press / to select “TPWS
setting” and then press .
6 Press / to select “Setting
Unit”.
7 Press / to select the
desired unit and then press .
■Routine tire inflation pressure checks
The tire pressure warning system does not replace routine tire inflation pressure checks. Make sure to check tire inflation
pressure as part of your routine of daily vehicle checks.
■Tire inflation pressure
●It may take a few minutes to display the tire inflation pressure after the power switch is turned to ON. It may
also take a few minutes to display the tire inflation pressure after inflation pressure has been adjusted.
●Tire inflation pressure changes with temperature. The displayed values
may also be different from the values measured using a tire pressure gauge.
■Situations in which the tire pres-
sure warning system may not oper- ate properly
●In the following cases, the tire pres-sure warning system may not operate properly.
• If non-genuine Toyota wheels are used.• A tire has been replaced with a tire
that is not an OE (Original Equipment) tire.• A tire has been replaced with a tire
that is not of the specified size. • Tire chains, etc. are equipped.
• An auxiliary-supported run-flat tire is equipped.• If a window tint that affects the radio
wave signals is installed. • If there is a lot of snow or ice on the vehicle, particularly around the wheels
or wheel housings. • If the tire inflation pressure is extremely higher than the specified
level. • If tires not equipped with tire pressure warning valves and transmitters are
used. • If the ID code on the tire pressure warning valves and transmitters is not
registered in the tire pressure warning
Page 396 of 698

394
Owners Manual_Europe_M52N75_en
6-3. Do-it-yourself maintenance
computer.
●Performance may be affected in the following situations.
• Near a TV tower, electric power plant, gas station, radio station, large dis-play, airport or other facility that gen-
erates strong radio waves or electrical noise.• When carrying a portable radio, cellu-
lar phone, cordless phone or other wireless communication device.
●When the vehicle is parked, the time taken for the warning to start or go off could be extended.
●When tire inflation pressure declines rapidly for example when a tire has
burst, the not to able detect.
■Warning performance of the tire pressure warning system
The warning of the tire pressure warning
system will change in accordance with driving conditions. For this reason, the system may give a warning even if the
tire pressure does not reach a low enough level, or if the pressure is higher than the pressure that was adjusted to
when the system was initialized.
When replacing tires or wheels, tire
pressure warning valves and trans-
mitters must also be installed.
When new tire pressure warning
valves and transmitters are
installed, new ID codes must be
registered in the tire pressure warn-
ing computer and the tire pressure
warning system must be initialized.
Have tire pressure warning valves
and transmitter ID codes regis-
tered any authorized Toyota retailer
or Toyota authorized repairer, or
any reliable repairer. ( P.397)
■Replacing tires and wheels
If the ID code of the tire pressure warn- ing valve and transmitter is not regis-tered, the tire pressure warning system
will not work properly. After driving for about 10 minutes, the tire pressure warning light blinks for 1 minute and
stays on to indicate a system malfunc- tion.
Installing tire pressure warn-
ing valves and transmitters
NOTICE
■Repairing or replacing tires,
wheels, tire pressure warning valves, transmitters and tire valve caps
●When removing or fitting the wheels, tires or the tire pressure warning valves and transmitters,
contact any authorized Toyota retailer or Toyota authorized repairer, or any reliable repairer as
the tire pressure warning valves and transmitters may be damaged if not handled correctly.
●Make sure to install the tire valve caps. If the tire valve caps are not
installed, water could enter the tire pressure warning valves, corrode the valve, and cause sticking and
air leaks.
●When replacing tire valve caps, do
not use tire valve caps other than those specified. The cap may become stuck.
Page 397 of 698

395
6
Owners Manual_Europe_M52N75_en
6-3. Do-it-yourself maintenance
Maintenance and care
■The tire pressure warning sys-
tem must be init ialized in the
following circumstances:
When rotating front and rear tires
which have different tire inflation
pressures.
When changing the tire size.
When the tire inflation pressure
is changed such as when chang-
ing traveling speed or load
weight.
When changing between two
registered wheel sets.
When the tire pressure warning
system is initialized, the current tire
inflation pressure is set as the
benchmark pressure.
■How to initialize the tire pres-
sure warning system
1 Park the vehicle in a safe place
and turn the power switch off,
wait for approximately 15 min-
utes or more, and then perform
the procedure.
2 Adjust the tire inflation pressure
to the specified cold tire inflation
pressure level. ( P.490)
Make sure to adjust the tire pressure to the specified cold tire inflation pressure
level. The tire pressure warning system will operate based on this pressure level.
3 Turn the power switch to ON.
Initialization cannot be performed while the vehicle is moving.
4 Press / (7-inch display)
or / (4.2-inch display) of
the meter control switch to
select .
5 Press / (7-inch display)
or / (4.2-inch display) to
select “Vehicle Settings” and
then press and hold .
6 Press / to select “TPWS
setting” and then press .
7 Press / to select “Setting
Pressure”. Then press and hold
until the tire pressure warn-
ing light blinks 3 times.
Then a message will be displayed on the multi-information display. “--” will be
displayed on the multi-information dis- play for the inflation pressure of each tire while initialization is being per-
NOTICE
■To avoid damage to the tire pres-sure warning valves and trans-
mitters
When a tire is repaired with liquid sealants, the tire pressure warning
valve and transmitter may not operate properly. If a liquid sealant is used, contact any authorized Toyota retailer
or Toyota authorized repairer, or any reliable repairer as soon as possible. Make sure to replace the tire pressure
warning valve and transmitter when replacing the tire. ( P.394)
Initializing the tire pressure
warning system
Page 401 of 698

399
6
Owners Manual_Europe_M52N75_en
6-3. Do-it-yourself maintenance
Maintenance and care
●If ID code registration cannot be com-
pleted after performing the above pro- cedure, contact any authorized Toyota retailer or Toyota authorized repairer,
or any reliable repairer.
Your vehicle is equipped with tire
pressure warning system with the
function to have ID codes regis-
tered for a second wheel set, for
example a winter set, by any autho-
rized Toyota retailer or Toyota
authorized repairer, or any reliable
repairer.
After registration of a second wheel
set, either of these two wheel sets
can be selected for usage with the
tire pressure warning system.
■Operating conditions for the
function
This function will perform the
change of wheel set only if a sec-
ond wheel set has been regis-
tered. If no second wheel set has
been registered, the ID cannot
be changed even if “Identifying
Each Wheel & Position” is
selected in the multi-information
display and waiting for 2 min-
utes.
Only a change between both
registered wheel set is possible,
mixing between these wheel sets
is not supported.
■How to change between wheel
sets
1 Have the vehicle fitted with the
preferred wheel set.
2 Press / (7-inch display)
or / (4.2-inch display) of
the meter control switch to
select .
3 Press / (7-inch display)
or / (4.2-inch display) to
select “Vehicle Settings” and
then press .
4 Press / to select “TPWS
setting” and then press .
5 Press / to select “Identi-
fying Each Wheel & Position”.
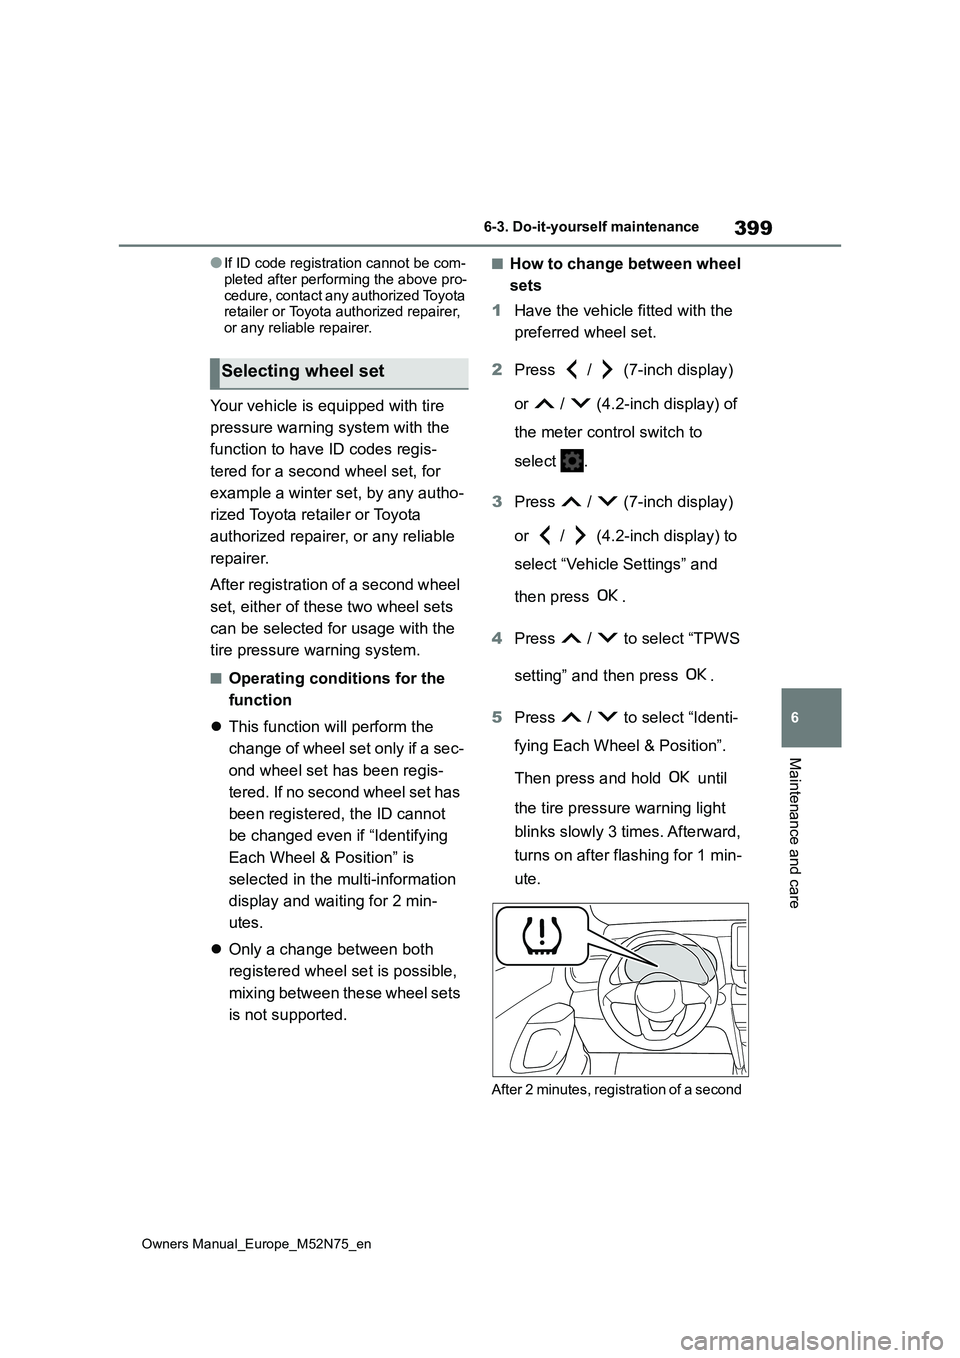
Then press and hold until
the tire pressure warning light
blinks slowly 3 times. Afterward,
turns on after flashing for 1 min-
ute.
After 2 minutes, registration of a second
Selecting wheel set