2023 TOYOTA VENZA HYBRID change time
[x] Cancel search: change timePage 329 of 560
3295-1. Using the air conditioning system and defogger
5
Interior features
“A/C” switch
■Adjusting the temperature
setting
Press of the temperature
control switches to increases
the temperature.
Press of the temperature
control switches to decreases
the temperature.
If the switch is pr essed and held or
selected and held, the temperature
will continuously change.
If the indicator on the “A/C” switch
does not illuminate , the system will
blow ambient temperature air or
heated air.
■Setting the fan speed
Press the fan speed increase
switch to increase the fan
speed.
Press the fan speed decrease
switch to decrease the fan
speed.
Press the “OFF” switch to turns off
the fan.
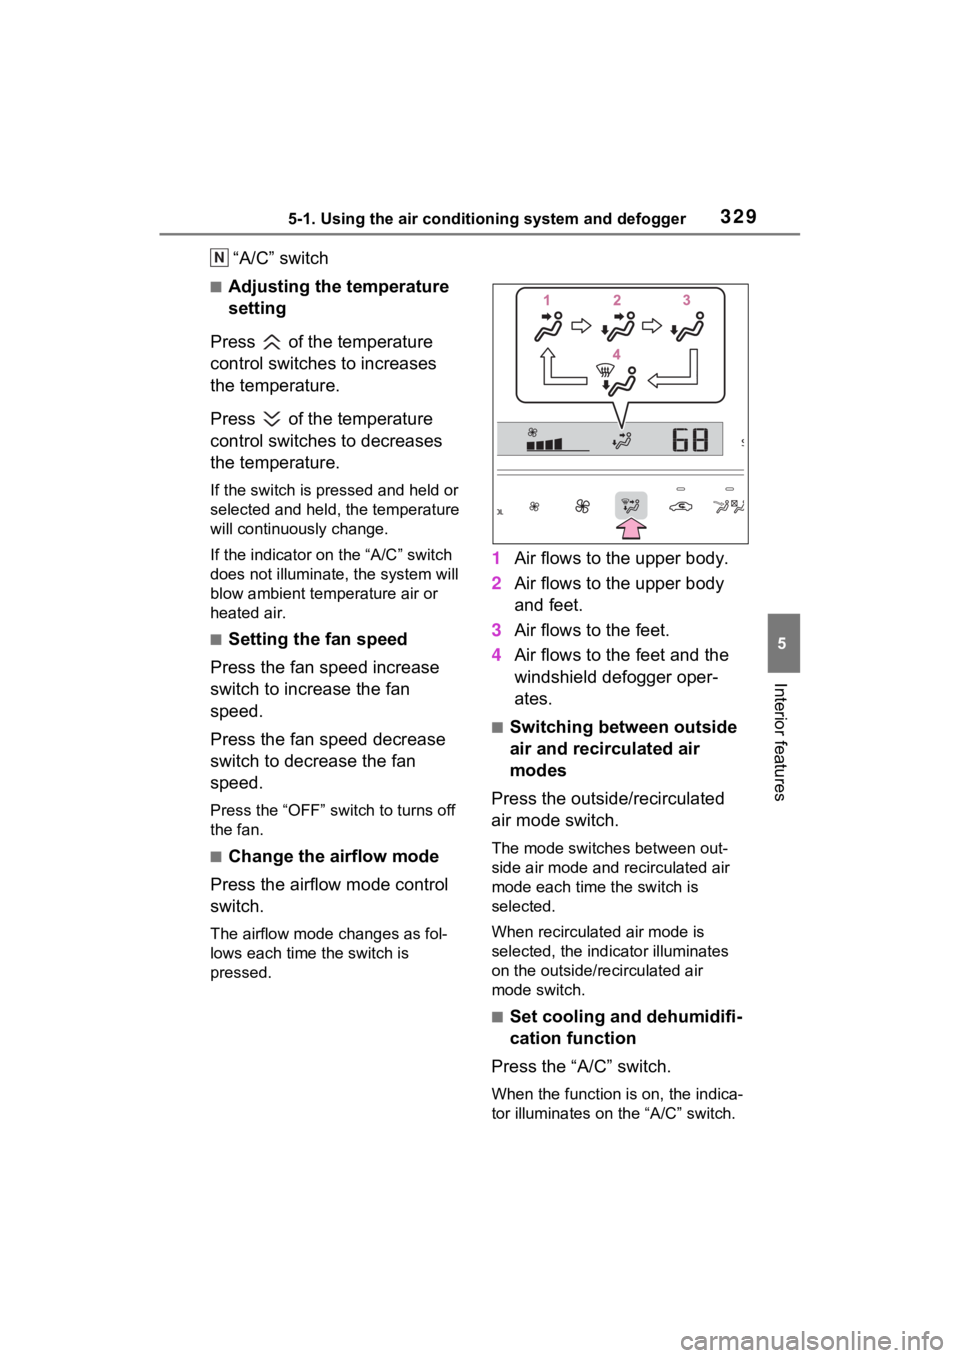
■Change the airflow mode
Press the airflow mode control
switch.
The airflow mode changes as fol-
lows each time the switch is
pressed.
1 Air flows to the upper body.
2 Air flows to the upper body
and feet.
3 Air flows to the feet.
4 Air flows to the feet and the
windshield defogger oper-
ates.
■Switching between outside
air and recirculated air
modes
Press the outside/recirculated
air mode switch.
The mode switches between out-
side air mode and recirculated air
mode each time the switch is
selected.
When recirculated air mode is
selected, the indicator illuminates
on the outside/recirculated air
mode switch.
■Set cooling and dehumidifi-
cation function
Press the “A/C” switch.
When the function is on, the indica-
tor illuminates on the “A/C” switch.
N
Page 332 of 560
3325-1. Using the air conditioning system and defogger
• CDs, DVDs or other media
●If your hand is near or touching
the air conditioning control panel
when the power switch is turned to
ACC or ON, non-response may
occur. If so, withdraw your hand
from the air conditioning control
panel and wait approximately 10
seconds before touching the air
conditioning control panel again.
■When non-response from touch
switch operation
When the air conditioning control
panel is dirty, non-response may
occur.
Clean the touch panel frequently.
■When cleaning the air condi-
tioning control panel
Touch switches may respond when
cleaning. Turn the power switch to
OFF before proceeding with clean-
ing.
■Ventilation and air conditioning
odors
●To let fresh air in, set the air condi-
tioning system to the outside air
mode.
●During use, various odors from
inside and outside the vehicle may
enter into and a ccumulate in the
air conditioning system. This may
then cause odor to be emitted
from the vents.
●In order to suppress odors that
occur when the a ir conditioning
system starts, the air flow mode
may change to blow air to the feet
or air may stop blowing for a short
period of time immediately after
the air conditioning system is
started in automatic mode.
●When parking, the system auto-
matically switches to outside air
mode to encourage better air cir-
culation throughout the vehicle,
helping to reduce odors that occur
when starting the vehicle.
■Using the Intelligent Assistant
(if equipped)
Air conditioning system can be
operated using the Intelligent Assis-
tant. For details reg arding the Intelli-
gent Assistant, refer to the
“MULTIMEDIA OWNER’S MAN-
UAL”.
■Air conditioning filter
P.415
■Air conditioning system refrig-
erant
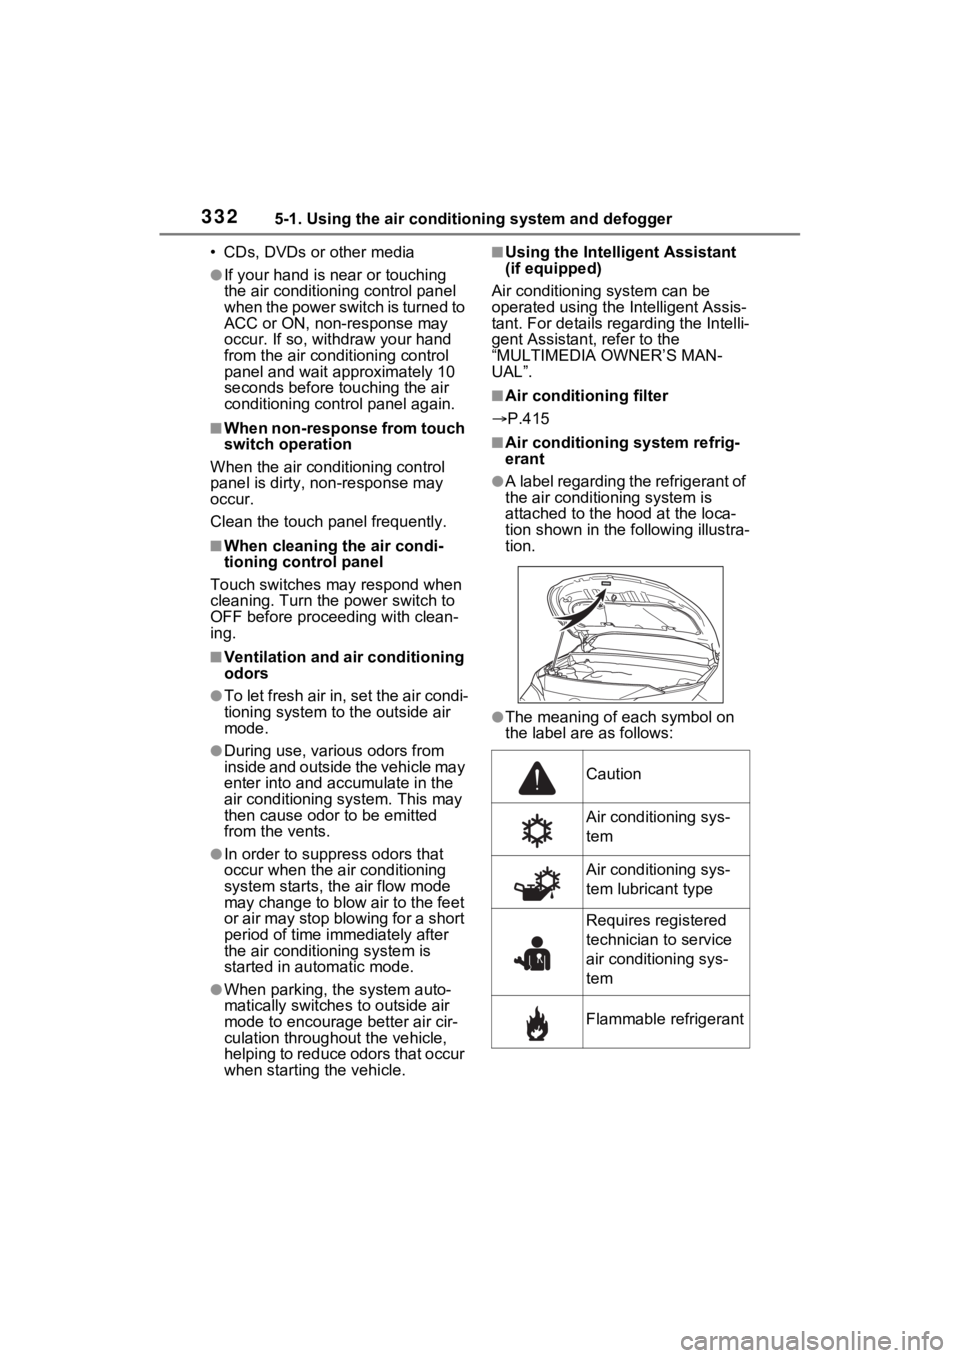
●A label regarding the refrigerant of
the air conditioning system is
attached to the h ood at the loca-
tion shown in the following illustra-
tion.
●The meaning of each symbol on
the label are as follows:
Caution
Air conditioning sys-
tem
Air conditioning sys-
tem lubricant type
Requires registered
technician to service
air conditioning sys-
tem
Flammable refrigerant
Page 333 of 560
3335-1. Using the air conditioning system and defogger
5
Interior features
■Changing the air conditioning
control panel touch switch
response
The amount of time takes for a
switch to respond can be changed
through the following operations:
The air conditioning system cannot
be operated while these operations
are performed.
1 Press and hold both the fan
speed decrease switch and auto-
matic mode switch at the same
time for approximately 3 sec-
onds.
A number from “01” to “05” will
be displayed on the driver’s side
temperature section in the
screen.
2 Each time rear window and out-
side rear view mirror defoggers
switch is pressed, the response
time changes as follows:
01 0203 04 05
The smaller the number the quicker
the response time becomes, and
the larger the number the slower the
response time becomes. If touch
operations are not performed for
approximately 5 seconds with the
desired setting displayed, the
screen returns to the normal driver’s
side temperature display and the
setting change completes. After the
setting change completes, all dis-
plays in the monitor section will illu-
minate for a short time. Do not turn
off the power switch during this time.
Setting contents will be erased.
■Turning the air conditioning
control panel touch switch
operation sounds on or off
Operation sounds produced when a
switch is touched can be turned on
or off through the following opera-
tions:
The air conditioning system cannot
be operated while these operations
are performed. 1
Press and hold both the fan
speed increase switch and
“OFF” switch at the same time
for approximately 3 seconds.
“On” or “OFF” will be displayed
on the driver’s side temperature
section in the screen.
2 Each time rear window and out-
side rear view mirror defoggers
switch is pressed, the function
switches between on and off.
If touch operations are not per-
formed for approximately 5 sec-
onds with “On” or “OFF” displayed,
the screen returns to the normal
driver’s side temperature display
and the setting change completes.
After the setting change completes,
all displays in the monitor section
will illuminate for a short time. Do
not turn off the power switch during
this time. Setti ng contents will be
erased.
■Customization
Some functions can be customized.
(Customizable features: P.513)
WARNING
■To prevent the windshield
from fogging up
Do not use the windshield defog-
ger switch during cool air opera-
tion in extremely humid weather.
The difference between the tem-
perature of the outside air and
that of the windshield can cause
the outer surface of the wind-
shield to fog up, blocking your
vision.
■When the outside rear view
mirror defoggers are operat-
ing
Do not touch the rear view mirror
surfaces when the outside rear
view mirror def oggers are on.
Page 335 of 560
3355-1. Using the air conditioning system and defogger
5
Interior features
seats can be switched via switch
operation. When the mode has
been switched manually, auto-
matic airflow control stops oper-
ating.
Press the on the air condi-
tioning operation panel and
switch the airflow.
Indicator illuminated: Airflow
to the front seats only
Indicator off: Airflow to the all
seats
■Operation of automatic airflow
control
●In order to maintain a comfortable
interior, airflow may be directed to
seats without passengers immedi-
ately after the hybrid system is
started and at other times depend-
ing on the outside temperature.
●After the hybrid system is started,
if passengers move around inside
or enter/exit the vehicle, the sys-
tem cannot accurately detect the
presence of passengers and auto-
matic airflow cont rol will not oper-
ate.
■Operation of manual airflow
control
Even if the function is manually
switched to directing airflow to only
the front seats, whe n a rear seat is
occupied, it may automatically direct
airflow to all seats.
■To return to auto matic airflow
control
1 With the indicator off, turn the
power switch to OFF.
2 After 60 minutes or more elapse,
turn the power switch to ON.
This feature is used to prevent
ice from building up on the wind-
shield and wiper blades.
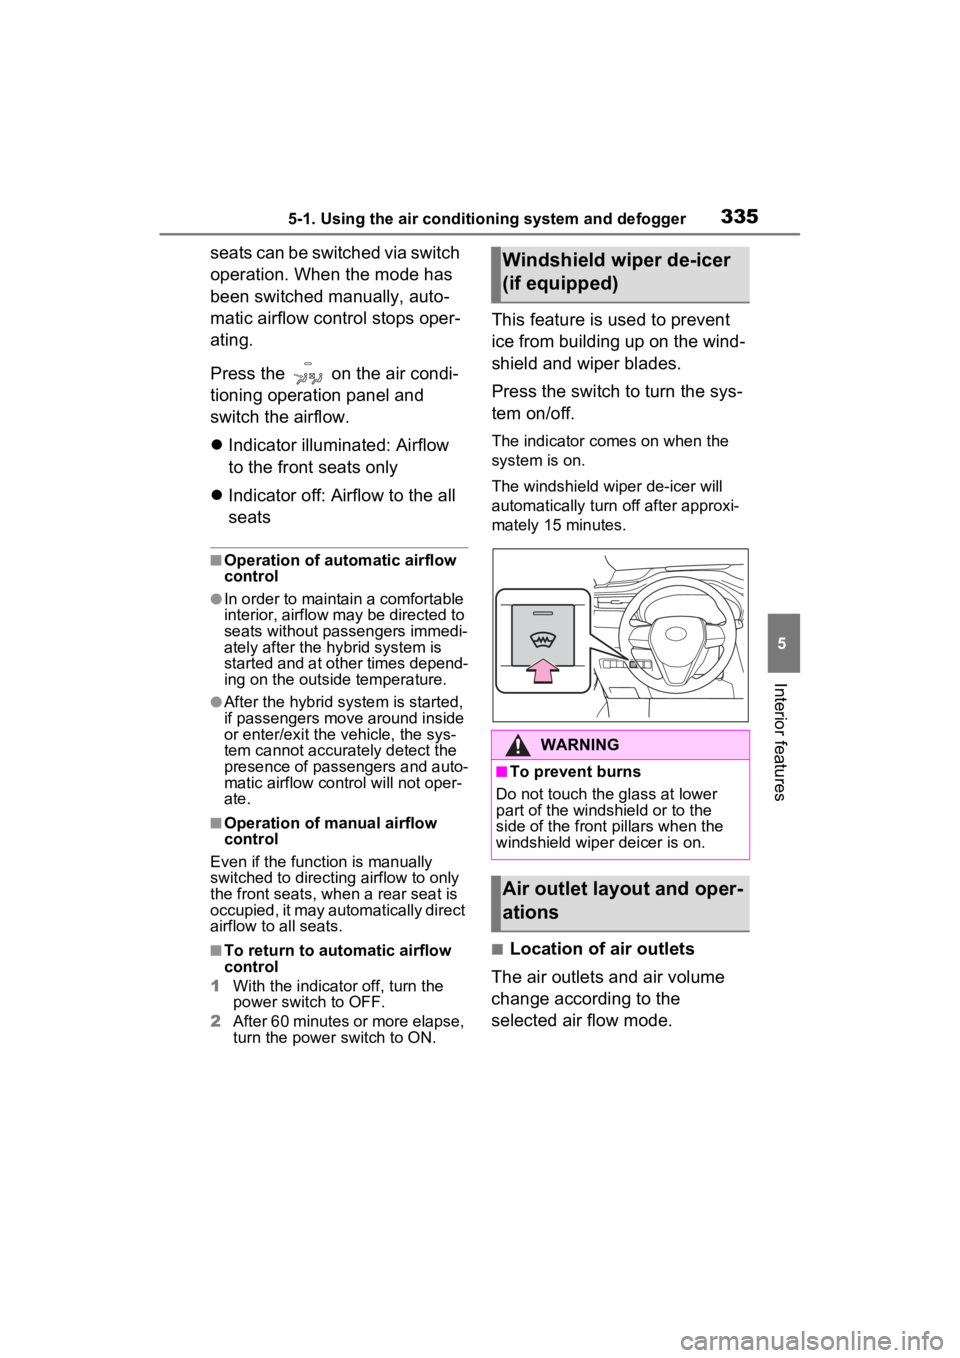
Press the switch to turn the sys-
tem on/off.
The indicator comes on when the
system is on.
The windshield wiper de-icer will
automatically turn off after approxi-
mately 15 minutes.
■Location of air outlets
The air outlets and air volume
change according to the
selected air flow mode.
Windshield wiper de-icer
(if equipped)
WARNING
■To prevent burns
Do not touch the glass at lower
part of the windshield or to the
side of the front p illars when the
windshield wiper deicer is on.
Air outlet layout and oper-
ations
Page 338 of 560
3385-1. Using the air conditioning system and defogger
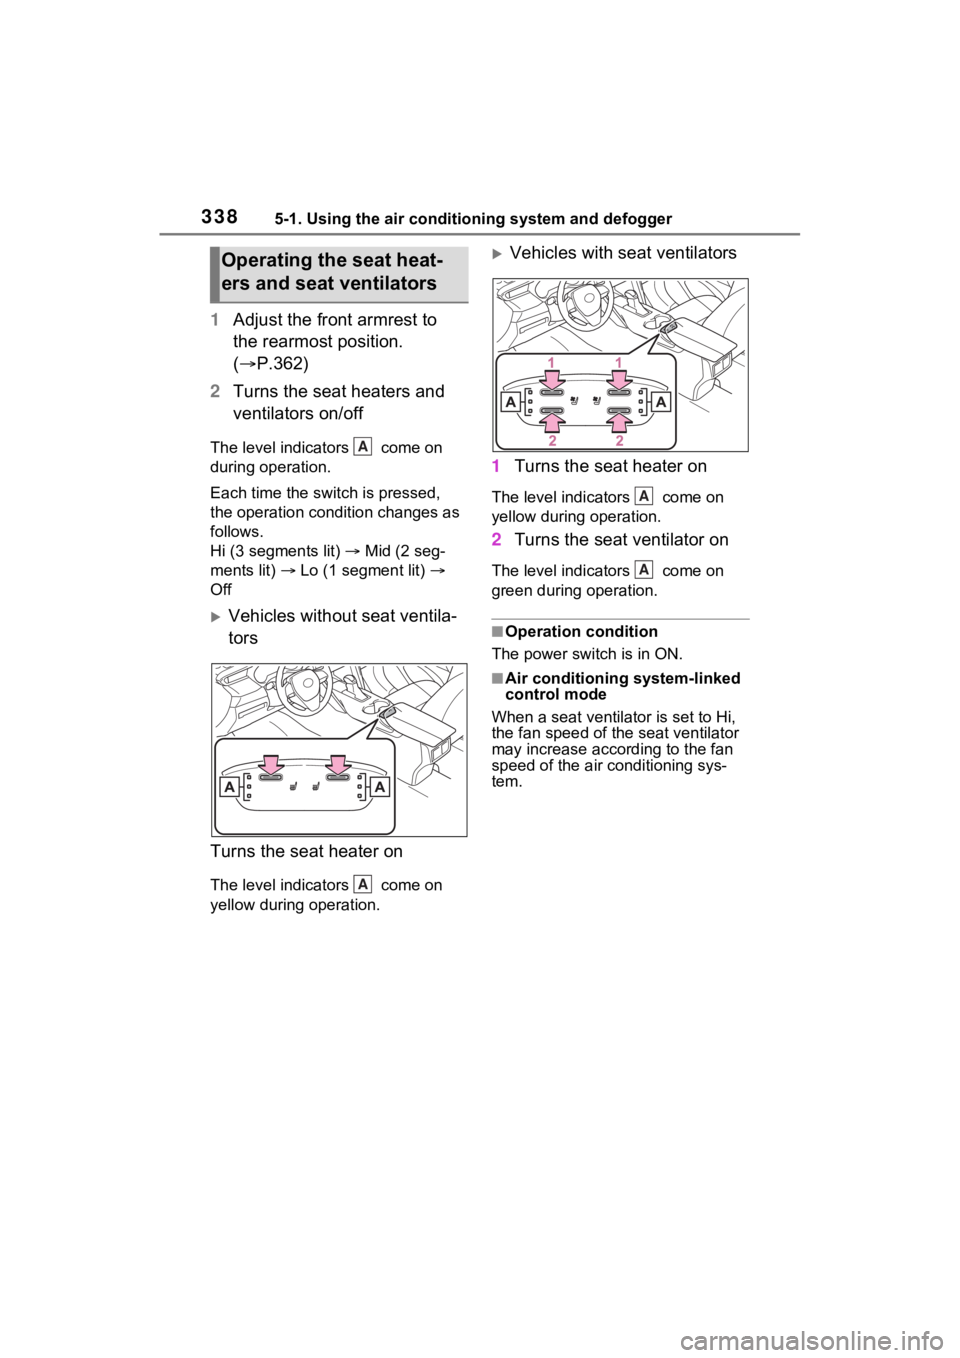
1Adjust the front armrest to
the rearmost position.
( P.362)
2 Turns the seat heaters and
ventilators on/off
The level indicators come on
during operation.
Each time the switch is pressed,
the operation condition changes as
follows.
Hi (3 segments lit) Mid (2 seg-
ments lit) Lo (1 segment lit)
Off
Vehicles without seat ventila-
tors
Turns the seat heater on
The level indicators come on
yellow during operation.
Vehicles with seat ventilators
1 Turns the seat heater on
The level indica tors come on
yellow during operation.
2 Turns the seat ventilator on
The level indica tors come on
green during operation.
■Operation condition
The power switch is in ON.
■Air conditioning system-linked
control mode
When a seat ventilator is set to Hi,
the fan speed of the seat ventilator
may increase according to the fan
speed of the air conditioning sys-
tem.
Operating the seat heat-
ers and seat ventilators
A
A
A
A
Page 340 of 560
3405-2. Using the interior lights
tronic key, whether the doors are
locked/unlocked, and whether the
doors are opened/closed.
●If the interior lights remain on
when the power switch is turned to
OFF, the lights will go off automat-
ically after 20 minutes.
■Interior lights brightness reduc-
tion
The brightness of the following
lights will be reduc ed when shifting
the shift lever to any position other
than P.
●Instrument panel lower illumina-
tion (if equipped)
●Footwell lights (if equipped)
●Upper console lights (if equipped)
●Front console light
●Inside door handle lights (if
equipped)
■The interior lights may turn on
automatically when
If any of the SRS airbags deploy
(inflate) or in the event of a strong
rear impact, the interior lights will
turn on automatically.
The interior lights will turn off auto-
matically after approximately 20
minutes.
The interior lights can be turned off
manually. However, in order to help
prevent further collisions, it is rec-
ommended that they be left on until
safety can be ensured.
(The interior lights may not turn on
automatically depending on the
force of the impact and conditions of
the collision.)
■When the illuminated entry sys-
tem do not turn on
The electronic key battery-saving
function may be activated.( P.155)
■Customization
Setting (e.g. the time elapsed before
the lights turn off) can be changed.
(Customizable features: P.513)
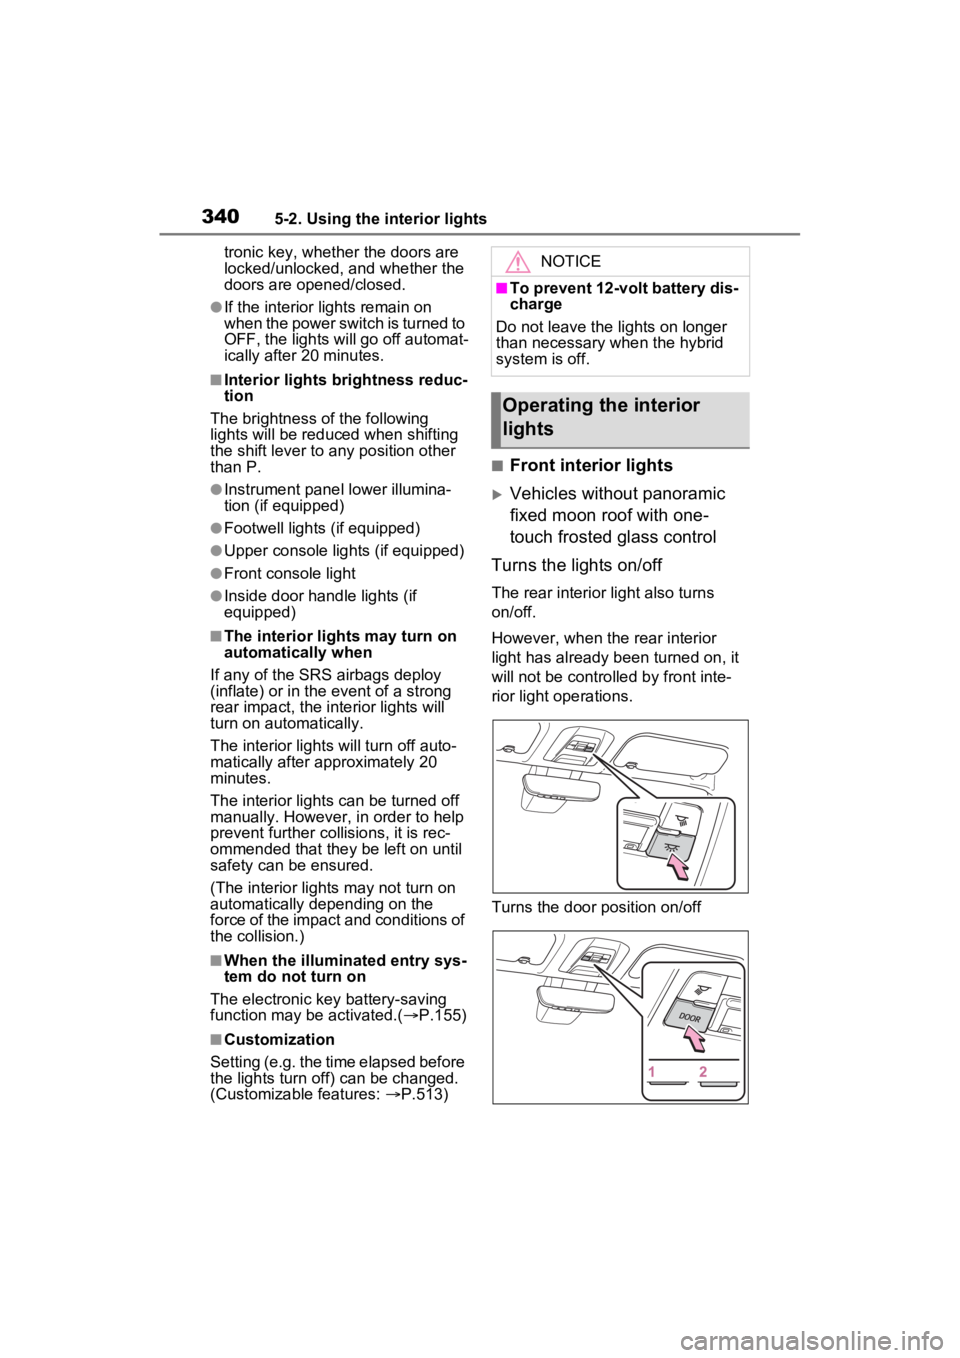
■Front interior lights
Vehicles without panoramic
fixed moon roof with one-
touch frosted glass control
Turns the lights on/off
The rear interior light also turns
on/off.
However, when the rear interior
light has already been turned on, it
will not be controlle d by front inte-
rior light operations.
Turns the door position on/off
NOTICE
■To prevent 12-volt battery dis-
charge
Do not leave the lights on longer
than necessary when the hybrid
system is off.
Operating the interior
lights
Page 350 of 560
3505-4. Using the other interior features
5-4.Using the other interior features
*: If equipped
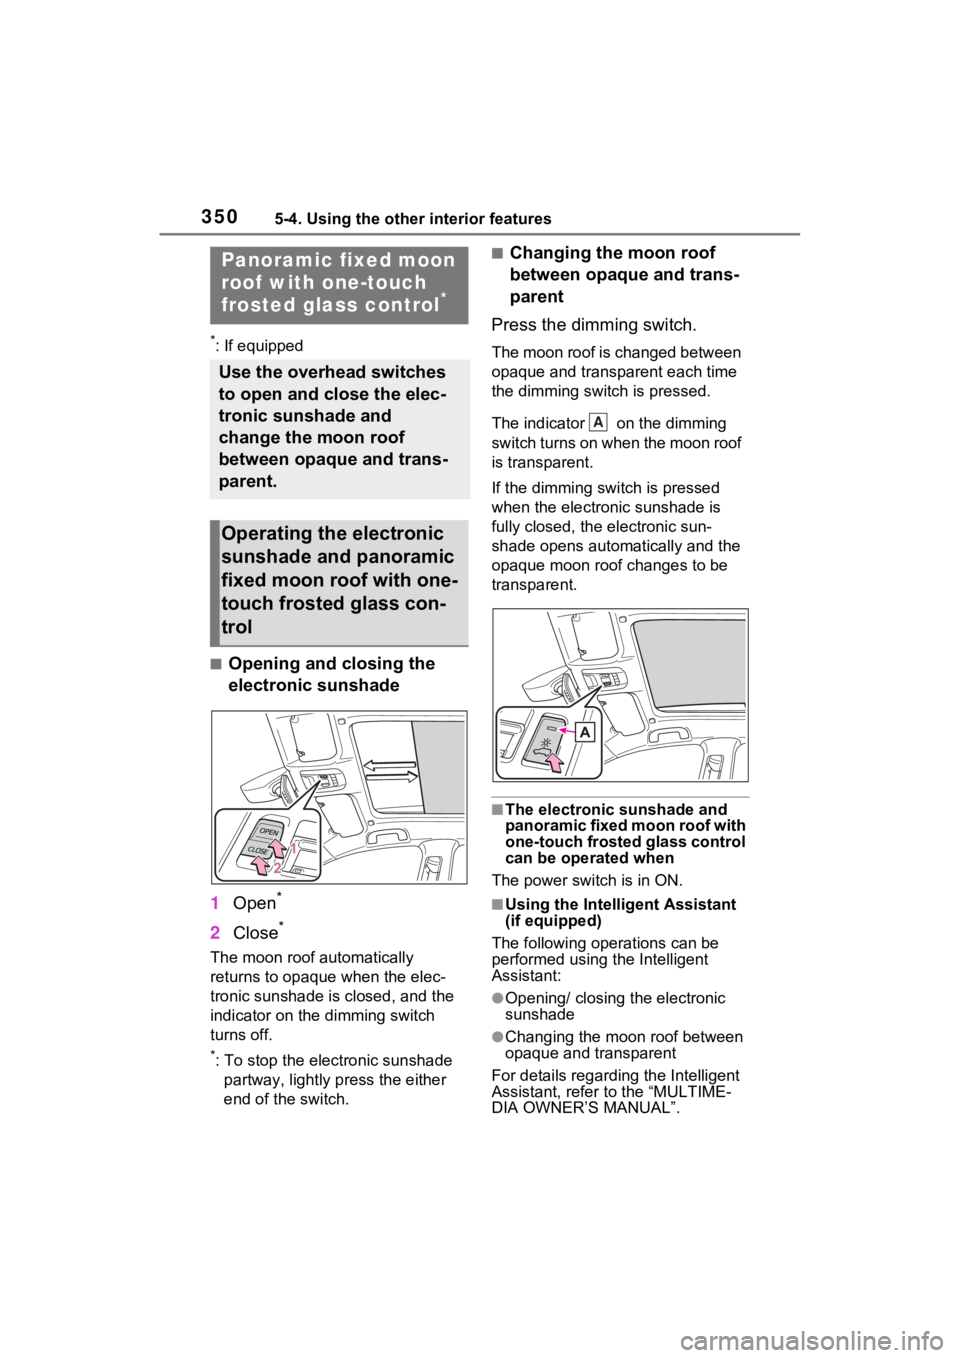
■Opening and closing the
electronic sunshade
1 Open
*
2Close*
The moon roof automatically
returns to opaque when the elec-
tronic sunshade is closed, and the
indicator on the dimming switch
turns off.
*: To stop the electronic sunshade
partway, lightly p ress the either
end of the switch.
■Changing the moon roof
between opaque and trans-
parent
Press the dimming switch.
The moon roof is changed between
opaque and transparent each time
the dimming switch is pressed.
The indicator on the dimming
switch turns on when the moon roof
is transparent.
If the dimming swit ch is pressed
when the electronic sunshade is
fully closed, the electronic sun-
shade opens automat ically and the
opaque moon roof changes to be
transparent.
■The electronic sunshade and
panoramic fixed moon roof with
one-touch frosted glass control
can be operated when
The power switch is in ON.
■Using the Intelligent Assistant
(if equipped)
The following operations can be
performed using the Intelligent
Assistant:
●Opening/ closing the electronic
sunshade
●Changing the moon roof between
opaque and transparent
For details regarding the Intelligent
Assistant, refer to the “MULTIME-
DIA OWNER’S MANUAL”.
Panoramic fixed moon
roof with one-touch
frosted glass control
*
Use the overhead switches
to open and close the elec-
tronic sunshade and
change the moon roof
between opaque and trans-
parent.
Operating the electronic
sunshade and panoramic
fixed moon roof with one-
touch frosted glass con-
trol
A
Page 351 of 560

3515-4. Using the other interior features
5
Interior features
■When the moon roof is trans-
parent
●Stripes (interference patterns)
may appear on the moon roof
under some weather conditions or
depending on how the light shines
the interior and exterior of the
vehicle.
●The moon roof may appear
opaque, depending on the angle.
■The moon roof at low tempera-
tures
The moon roof may take some time
to change between opaque and
transparent. Allow the interior of the
vehicle to warm up before use.
■Turning the power switch to
OFF
The transparent moon roof automat-
ically returns to opaque when the
power switch is turned to OFF.
■If the indicator on the dimming
switch flashes
The panoramic fixed moon roof with
one-touch frosted glass control may
be malfunctioning. Have the vehicle
inspected by your Toyota dealer
immediately.
■Operation of the electronic sun-
shade
To prevent the electronic sunshade
motor from overheating, the motor
may be suspended if the electronic
sunshade is opening and closing
repeatedly in a short period of time.
In this case, refrain from operating
the power switch.
Wait for a little while, the electronic
sunshade motor will resume func-
tioning.
■When the vehicle is subjected
to a strong impact
The moon roof changes to opaque
and cannot be changed back to
transparent. Have the vehicle
inspected by your Toyota dealer.
■Jam protection function for the
electronic sunshade
●If an object becomes jammed
between the electronic sunshade
and the sunshade frame while the
electronic sunshade is closing, the
electronic sunshade movement is
stopped and the electronic sun-
shade is opened slightly.
●When the jam protection function
has operated, even if the
“CLOSE” side of the switch is
pressed again, the electronic sun-
shade will not move in the close
direction until th e reverse opera-
tion has stopped completely.
●The electronic sunshade may
operate in reverse if the electronic
sunshade is subject to an impact
due to the surro undings or the
driving conditions.
■When the automatic opening
and closing f unction of the
electronic sunshade does not
work
Perform the following initialization
procedure.
1 Turn the power switch to ON.
2 Press and hold the “CLOSE”
side of the switch.
It closes until it is near the fully
closed position and then stops. After
that, it and operates in the opening
direction then closes to the fully
closed position.
If the switch is released at the incor-
rect time, the proc edure will have to
be performed again from the begin-
ning.
If the automatic opening and closing
function does not work normally
even after performing the operations
above, have the vehicle inspected
by your Toyo ta dealer.
■Customization
Some functions can be customized.
(Customizable features: P.514)