2023 TOYOTA VENZA HYBRID maintenance
[x] Cancel search: maintenancePage 93 of 560
932-1. Instrument cluster
2
Vehicle status information and indicators
When the trip meter is displayed,
pressing and holding the switch will
reset the trip meter.
Distance until next engine oil
change
Displays the distan ce the vehicle
can be driven until an oil change is
necessary.
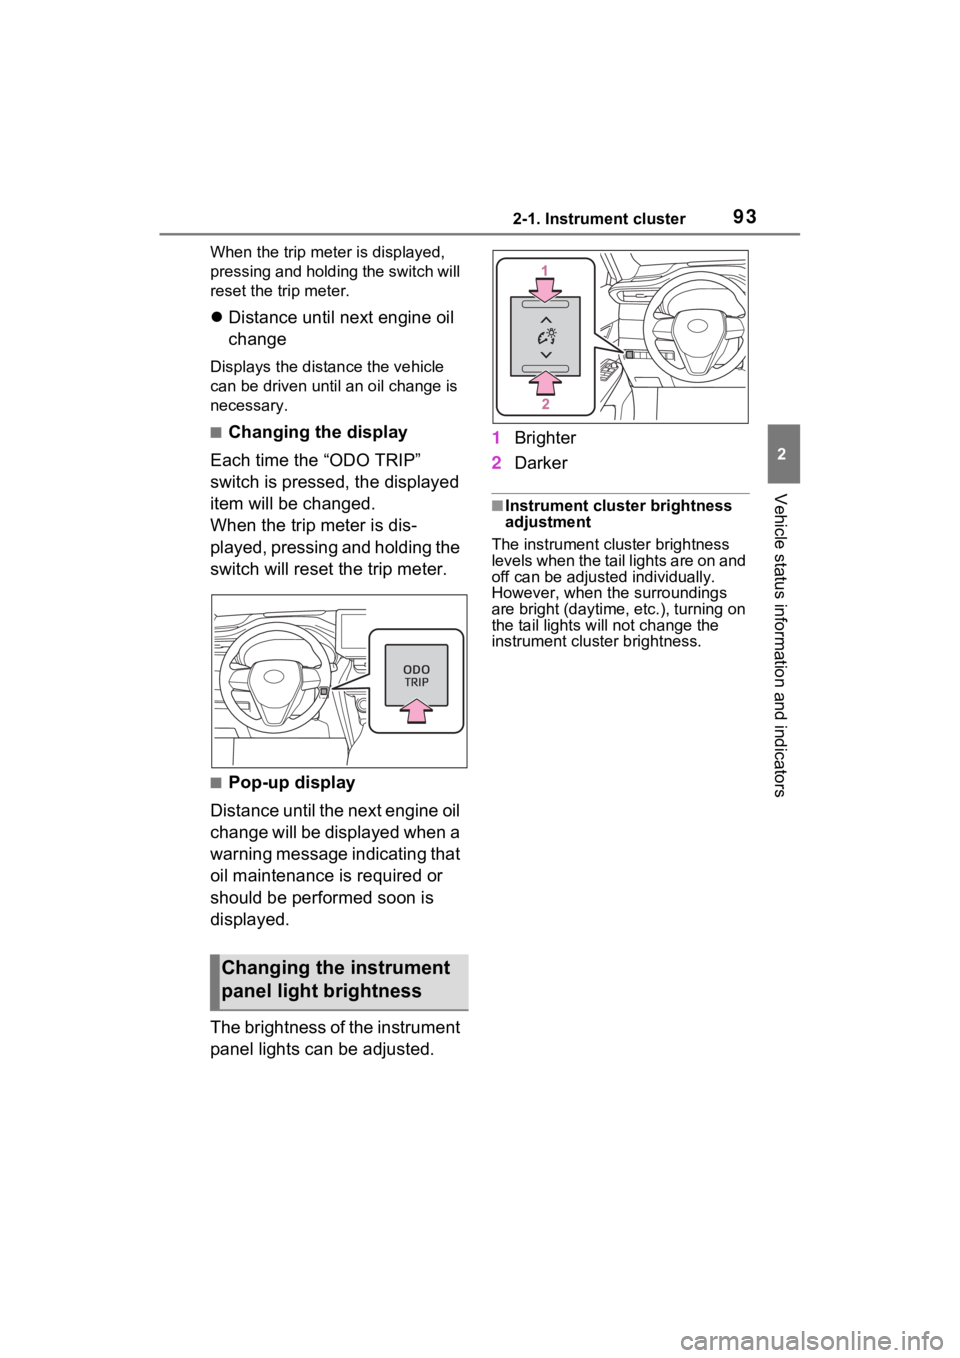
■Changing the display
Each time the “ODO TRIP”
switch is pressed, the displayed
item will be changed.
When the trip meter is dis-
played, pressing and holding the
switch will reset the trip meter.
■Pop-up display
Distance until the next engine oil
change will be displayed when a
warning message indicating that
oil maintenance is required or
should be performed soon is
displayed.
The brightness of the instrument
panel lights can be adjusted. 1
Brighter
2 Darker
■Instrument cluster brightness
adjustment
The instrument cluster brightness
levels when the tail lights are on and
off can be adjusted individually.
However, when the surroundings
are bright (daytime, etc.), turning on
the tail lights will not change the
instrument cluster brightness.
Changing the instrument
panel light brightness
Page 99 of 560
992-1. Instrument cluster
2
Vehicle status information and indicators
■Display items
Odometer
Displays the total distance the vehi-
cle has been driven.
Trip meter A/trip meter B
Displays the distan ce the vehicle
has been driven si nce the meter
was last reset. Trip meters A and B
can be used to record and display
different distances independently.
When the trip meter is displayed,
pressing and holding the switch will
reset the trip meter.
Distance until next engine oil
change
Displays the distan ce the vehicle
can be driven until an oil change is
necessary.
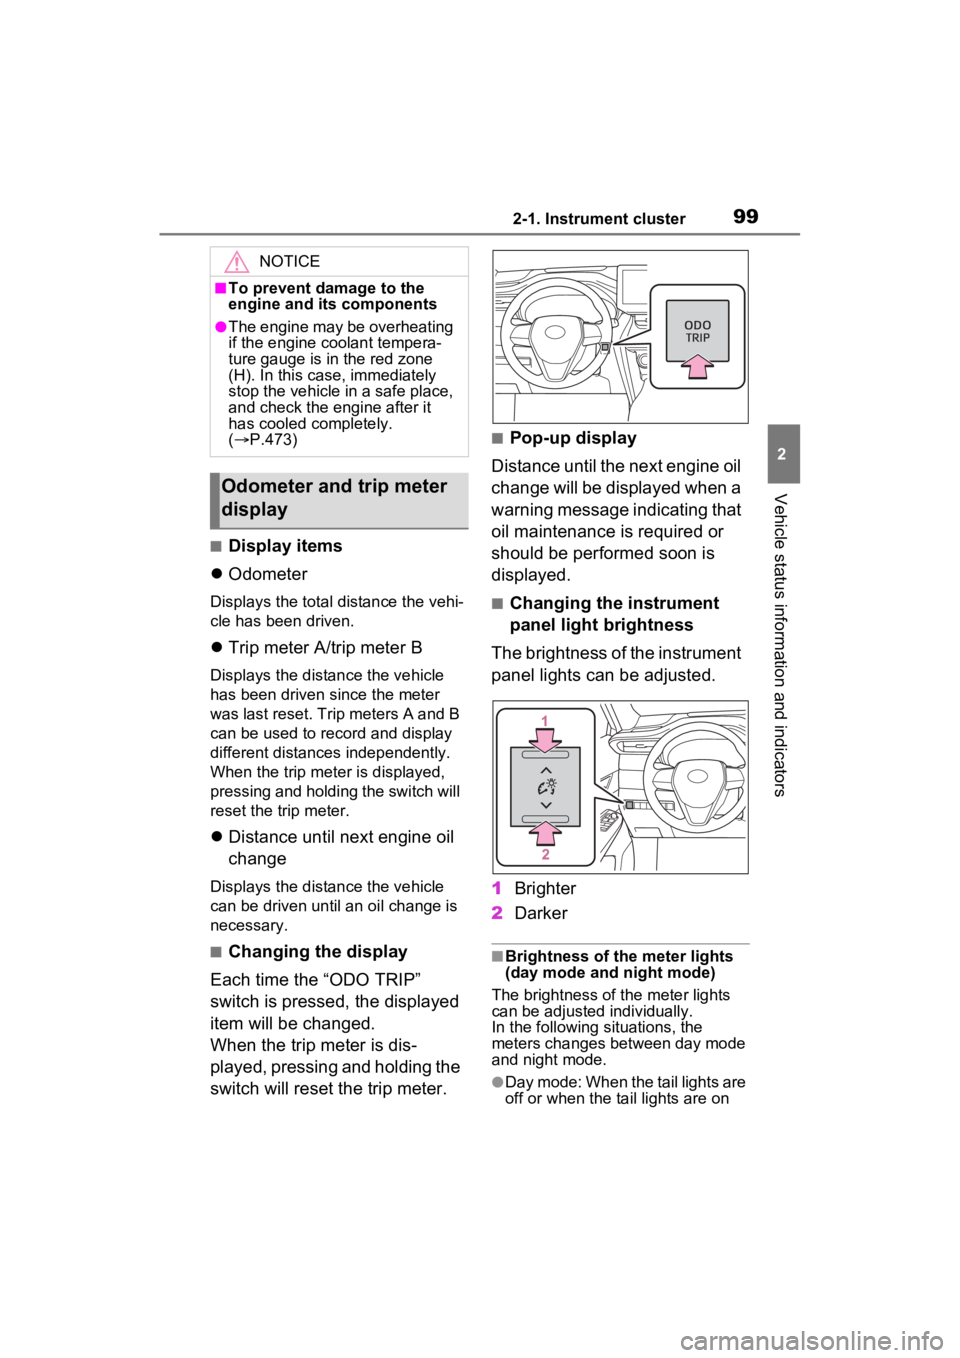
■Changing the display
Each time the “ODO TRIP”
switch is pressed, the displayed
item will be changed.
When the trip meter is dis-
played, pressing and holding the
switch will reset the trip meter.
■Pop-up display
Distance until the next engine oil
change will be displayed when a
warning message indicating that
oil maintenance is required or
should be performed soon is
displayed.
■Changing the instrument
panel light brightness
The brightness of the instrument
panel lights can be adjusted.
1 Brighter
2 Darker
■Brightness of the meter lights
(day mode and night mode)
The brightness of the meter lights
can be adjusted individually.
In the following si tuations, the
meters changes between day mode
and night mode.
●Day mode: When the tail lights are
off or when the ta il lights are on
NOTICE
■To prevent damage to the
engine and its components
●The engine may be overheating
if the engine coolant tempera-
ture gauge is in the red zone
(H). In this case, immediately
stop the vehicle in a safe place,
and check the engine after it
has cooled completely.
( P.473)
Odometer and trip meter
display
Page 108 of 560

1082-1. Instrument cluster
Road Sign Assist on/off
Select to enable/disable the RSA
(Road Sign Assist).
“Notification method”
Select to change e ach notification
method used to notify the driver
when the system recognizes
excess speed and Do Not Enter
sign.
“Notification Level”
Select to change e ach notification
level used to notify the driver when
the system recognizes a speed limit
sign.
■ DRCC
Select to change the curve
speed reduction function setting.
■ Vehicle Settings
PBD (Power Back Door)
( P.143)
Select to set up the following items.
• System settings
Select to enable/disable the power
back door system.
• “Hands Free” (if equipped)
Select to enable/disable the Hands
Free Power Back Door operation.
• “Opening Adjustment”
Select the open position when
power back door is fully open.
•“Volume”
Select to set the volume of the
buzzer which sounds when the
power back door system operates.
“TPWS setting” (Tire Pres-
sure Warning System) (
P.402)
• “Setting Pressure”
Select to initialize the tire pressure
warning system.
• “Identify Wheel”
Select to change the tire pressure
warning system sen sor ID code set.
To enable this function, a second
set of tire pressure warning system
sensor ID codes must be registered
by a Toyota dealer. For information
regarding changing the registered
ID code set, contact your Toyota
dealer.
• “Setting Unit”
Select to change the units of mea-
sure displayed.
Rear Seat Reminder
( P.139)
Select to enable/disable the rear
seat reminder function.
“Scheduled Maintenance”
( P.380)
Select to reset the scheduled main-
tenance information (message indi-
cating maintenance is required and
distance until the next mainte-
nance) after all ma intenance is per-
formed.
Oil Maintenance
Select to reset the Oil maintenance.
( P.392)
■ Settings
“Language”
Select to change the language on
the multi-information display.
“Units”
Select to change the units of mea-
Page 120 of 560

1202-1. Instrument cluster
Select to initialize the tire pres-
sure warning system.
• “Identifying Each Wheel & Posi- tion”
Select to change the tire pressure
warning system sensor ID code
set. To enable this function, a
second set of tire pressure warn-
ing system sensor ID codes must
be registered by a Toyota dealer.
For information regarding chang-
ing the registered ID code set,
contact your Toyota dealer.
• “Pressure unit setting” Select to change the units of
measure displayed.
“Scheduled Maintenance”
( P.380)
Select to reset the scheduled
maintenance information
(message indicating mainte-
nance is required and dis-
tance until the next
maintenance) after all mainte-
nance is performed.
Oil Maintenance
Select to reset the Oil mainte-
nance. ( P.392)
Rear Seat Reminder
( P.139)
Select to enable/disable the
rear seat reminder function.
■ Settings
“Language”
Select to change the lan-
guage on the multi-informa-
tion display.
“Units”
Select to change the unit of measure for fuel consump-
tion.
Meter Type
Select to change the meter
type setting.
Meter Style
Select to change the meter
style.
Dial Type
Select to change dial type.
( P.94)
EV indicator
Select to enable/disable the
EV indicator.
Fuel Economy
Select to change the display
on Fuel Economy. ( P.114)
Hybrid System
Select to enable/disable refer-
ence operation range.
Drive Info
Select to change displayed
items on drive information dis-
play. ( P.116)
Pop-Up Display
Select to enable/disable the
pop-up displays, which may
appear in some situations.
Default Settings
Select to reset the meter dis-
play settings.
■Suspension of the settings dis-
play
●Some settings cannot be changed
while driving. When changing set-
tings, park the vehicle in a safe
place.
Page 318 of 560
3184-6. Driving tips
WARNING
●When driving off-road or in rug-
ged terrain, do not drive at
excessive speeds, jump, make
sharp turns, strike objects, etc.
This may cause loss of control
or vehicle rollover causing
death or serious injury. You are
also risking expensive damage
to your vehicle’s suspension
and chassis.
NOTICE
■To prevent water damage
Take all necessary safety mea-
sures to ensure that water dam-
age to the hybrid battery (traction
battery), hybrid s ystem or other
components does not occur.
●Water entering the engine com-
partment may cause severe
damage to the hybrid system.
Water entering the interior may
cause the hybrid battery (trac-
tion battery) stowed under the
rear seats to short circuit.
●Water entering t he hybrid trans-
mission and rear electric motor
(traction motor) will cause dete-
rioration in transmission quality.
The malfunction indicator may
come on, and the vehicle may
not be drivable.
●Water can wash the grease
from wheel bearings, causing
rusting and premature failure,
and may also enter the hybrid
transmission case, reducing the
gear oil’s lubricating qualities.
■When you drive through
water
If driving through water, such as
when crossing shallow streams,
first check the depth of the water
and the bottom of the riverbed for
firmness. Drive slowly and avoid
deep water.
■Inspection after off-road driv-
ing
●Sand and mud that has accu-
mulated around brake discs
may affect braking efficiency
and may damage brake system
components.
●Always perform a maintenance
inspection after each day of off-
road driving that has taken you
through rough terrain, sand,
mud, or water. For scheduled
maintenance information, refer
to the “Scheduled Maintenance
Guide” or “Owner’s Manual
Supplement”.
Page 371 of 560
371
6
6
Maintenance and care
Maintenance and care
6-1. Maintenance and careCleaning and protecting the vehicle exterior .......... 372
Cleaning and protecting the vehicle interior ........... 376
6-2. Maintenance Maintenance requirements.................................. 379
General maintenance.. 381
Emission inspection and maintenance (I/M) pro-
grams ........................ 383
6-3. Do-it-yourself mainte- nance
Do-it-yourself service pre- cautions ..................... 385
Hood ........................... 387
Positioning a floor jack 388
Engine compartment ... 390
12-volt battery ............. 397
Tires ............................ 400
Tire inflation pressure . 412
Wheels ......... ...............414
Air conditioning filter .... 415
Cleaning the hybrid battery (traction battery) air intake
vent ........................... 417
Wiper insert replacement .................................. 421
Electronic key battery.. 424
Checking and replacing fuses.......................... 426Headlight aim ..............
429
Exterior lights .............. 430
Page 372 of 560
3726-1. Maintenance and care
6-1.Maintenance and care
Working from top to bottom,
liberally apply water to the
vehicle body, wheel wells and
underside of the vehicle to
remove any dirt and dust.
Wash the vehicle body using
a sponge or soft cloth, such
as a chamois.
For hard-to-remove marks,
use car wash soap and rinse
thoroughly with water.
Wipe away any water.
Wax the vehicle when the
waterproof coating deterio-
rates.
If water does not bead on a clean
surface, apply wax when the vehi-
cle body is cool.
■Self-restoring coat (if equipped)
The vehicle body has a self-restor-
ing coating that is resistant to small
surface scratches caused in a car
wash etc.
●The coating lasts for 5 to 8 years
from when the vehicle is delivered
from the plant.
●The restoration time differs
depending on t he depth of the scratch and outside temperature.
The restoration time may become
shorter when the coating is
warmed by applying warm water.
●Deep scratches caused by keys,
coins, etc. cannot be restored.
●Do not use wax that contain abra-
sives.
■Automatic car washes
●Before washing the vehicle:
• Fold the mirrors
• Turn off the power back door
Start washing from the front of the
vehicle. Make sure to extend the
mirrors before driving.
●Brushes used in automatic car
washes may scratch the vehicle
surface, parts (wheel, etc.) and
harm your vehicle’s paint.
●Rear spoiler may not be washable
in some automatic car washes.
There may also be an increased
risk of damage to vehicle.
■High pressure car washes
As water may enter the cabin, do
not bring the nozzle tip near the
gaps around the doors or perimeter
of the windows, or spray these
areas continuously.
■Note for a smart key system
If the door handle becomes wet
while the electronic key is within the
effective range, t he door may lock
and unlock repeatedly. In that case,
follow the following correction pro-
cedures to wash the vehicle:
●Place the key in a position 6 ft. (2
m) or more separate from the
vehicle while the vehicle is being
washed. (Take care to ensure that
the key is not stolen.)
●Set the electronic key to battery-
saving mode to disable the smart
key system. ( P.155)
■Wheels and wheel ornaments
●Remove any dirt immediately by
using a neutral detergent.
Cleaning a nd protect-
ing the vehicle exte-
rior
Perform the following to
protect the vehicle and
maintain it in prime condi-
tion:
Cleaning instructions
Page 373 of 560
3736-1. Maintenance and care
6
Maintenance and care
●Wash detergent off with water
immediately after use.
●To protect the paint from damage,
make sure to observe the follow-
ing precautions.
• Do not use acidi c, alkaline or
abrasive detergent
• Do not use hard brushes
• Do not use det ergent on the
wheels when they are hot, such
as after driving or parking in hot
weather
■Brake pads and calipers
Rust may form if the vehicle is
parked with wet brake pads or disc
rotors, causing them to stick. Before
parking the vehicle after it is
washed, drive slow ly and apply the
brakes several times to dry the
parts.
■Bumpers
Do not scrub with abrasive cleaners.
■Front side windows water-
repellent coating
The following precautions can
extend the effectiveness of the
water-repellent coating.
●Remove any dirt, etc., from the
front side windows regularly.
●Do not allow dirt and dust to accu-
mulate on the windows for a long
period. Clean the windows with a
soft, damp cloth as soon as possi-
ble.
●Do not use wax or glass cleaners
that contain abrasives when
cleaning the windows.
●Do not use any metallic objects to
remove condensation build up.
■Plated portions
If dirt cannot be removed, clean the
parts as follows:
●Use a soft cloth dampened with
an approximately 5% solution of
neutral detergent and water to
clean the dirt off.
●Wipe the surface with a dry, soft
cloth to remove any remaining moisture.
●To remove oily deposits, use alco-
hol wet wipes or a similar product.
WARNING
■When washing the vehicle
Do not apply water to the inside of
the engine compartment. Doing
so may cause the electrical com-
ponents, etc. to catch fire.
■When cleaning the windshield
(vehicles with rain-sensing
windshield wipers)
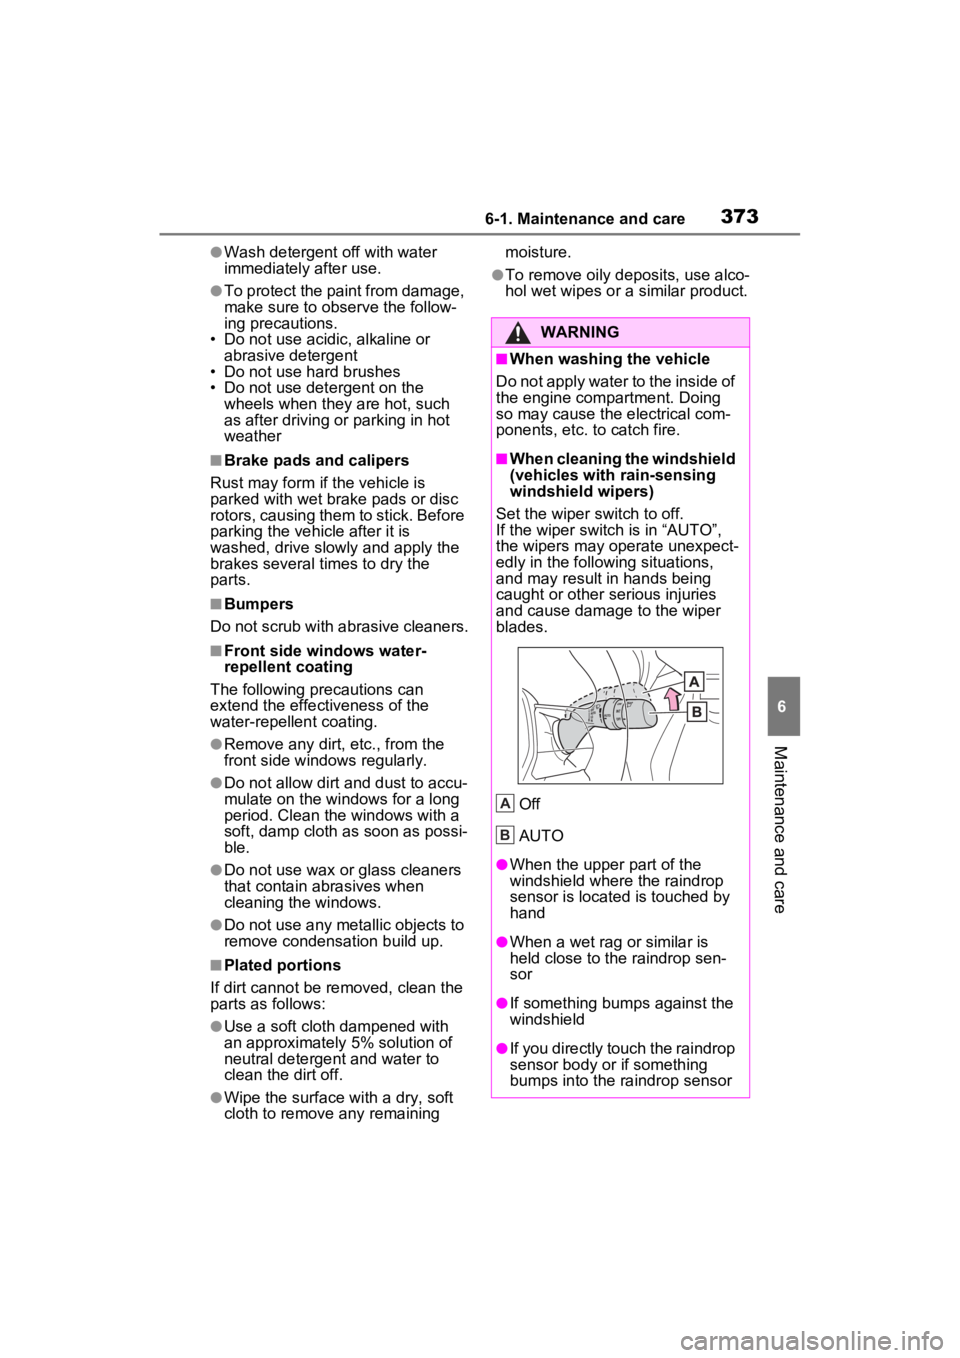
Set the wiper switch to off.
If the wiper switch is in “AUTO”,
the wipers may operate unexpect-
edly in the following situations,
and may result in hands being
caught or other serious injuries
and cause damage to the wiper
blades.
Off
AUTO
●When the upper part of the
windshield where the raindrop
sensor is located is touched by
hand
●When a wet rag or similar is
held close to the raindrop sen-
sor
●If something bumps against the
windshield
●If you directly touch the raindrop
sensor body or if something
bumps into the ra indrop sensor
A
B