2023 TOYOTA RAV4 PRIME warning light
[x] Cancel search: warning lightPage 314 of 662
3165-2. Driving procedures
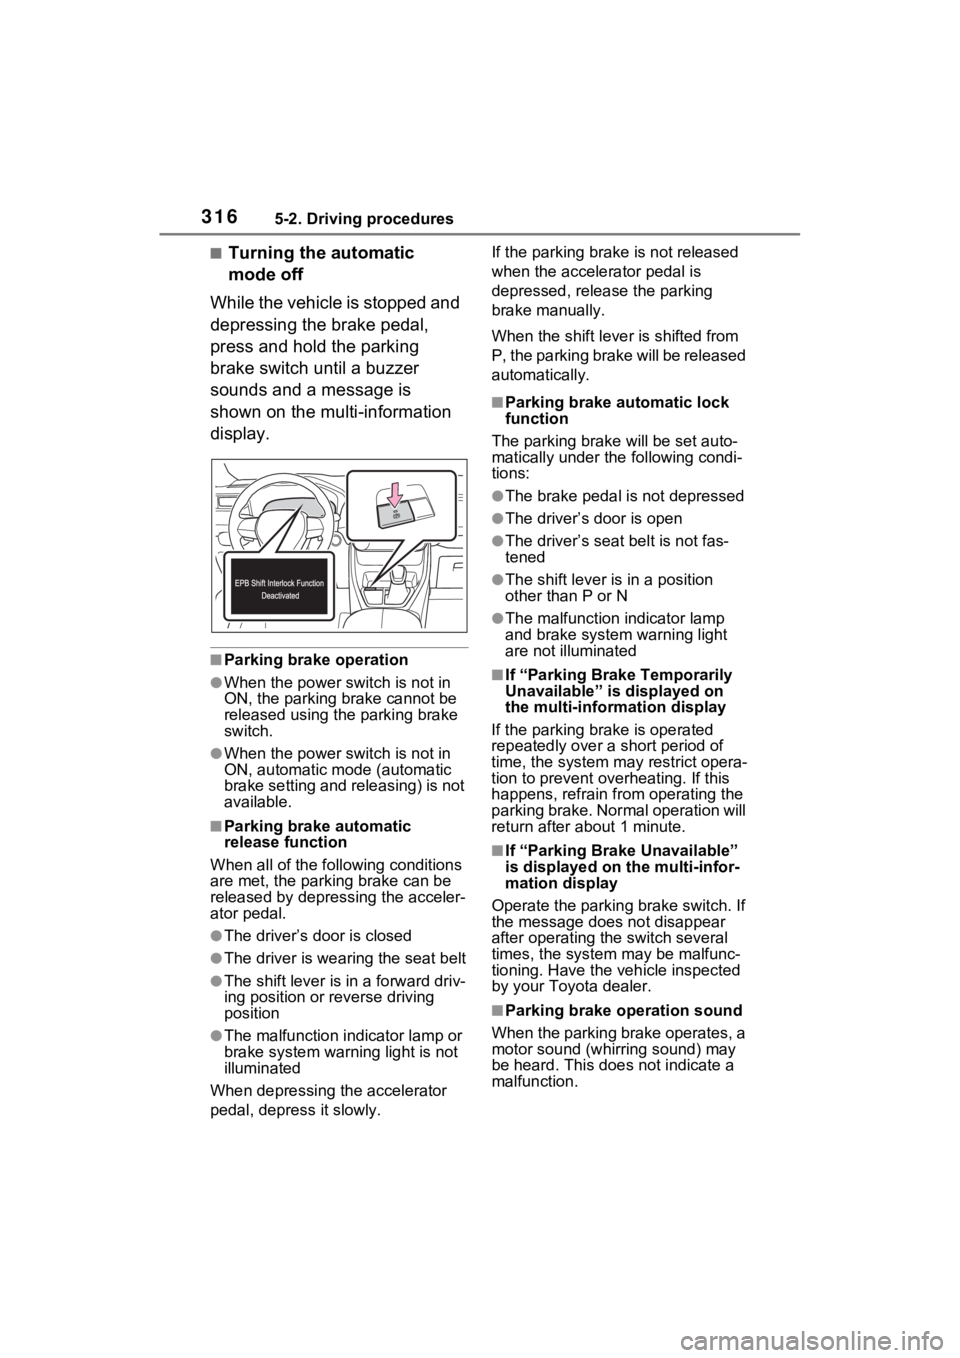
■Turning the automatic
mode off
While the vehicle is stopped and
depressing the brake pedal,
press and hold the parking
brake switch until a buzzer
sounds and a message is
shown on the multi-information
display.
■Parking brake operation
●When the power s witch is not in
ON, the parking brake cannot be
released using the parking brake
switch.
●When the power s witch is not in
ON, automatic mode (automatic
brake setting and releasing) is not
available.
■Parking brake automatic
release function
When all of the follo wing conditions
are met, the parking brake can be
released by depressing the acceler-
ator pedal.
●The driver’s door is closed
●The driver is wearing the seat belt
●The shift lever is in a forward driv-
ing position or reverse driving
position
●The malfunction in dicator lamp or
brake system warning light is not
illuminated
When depressing the accelerator
pedal, depress it slowly. If the parking brak
e is not released
when the accelerator pedal is
depressed, release the parking
brake manually.
When the shift lever is shifted from
P, the parking brake will be released
automatically.
■Parking brake automatic lock
function
The parking brak e will be set auto-
matically under the following condi-
tions:
●The brake pedal is not depressed
●The driver’s door is open
●The driver’s seat belt is not fas-
tened
●The shift lever is in a position
other than P or N
●The malfunction indicator lamp
and brake system warning light
are not illuminated
■If “Parking Brake Temporarily
Unavailable” is displayed on
the multi-info rmation display
If the parking brake is operated
repeatedly over a short period of
time, the system may restrict opera-
tion to prevent ove rheating. If this
happens, refrain from operating the
parking brake. Normal operation will
return after about 1 minute.
■If “Parking Brake Unavailable”
is displayed on the multi-infor-
mation display
Operate the parking brake switch. If
the message does not disappear
after operating the switch several
times, the system may be malfunc-
tioning. Have the vehicle inspected
by your Toyo ta dealer.
■Parking brake operation sound
When the parking brake operates, a
motor sound (whirr ing sound) may
be heard. This does not indicate a
malfunction.
Page 315 of 662
3175-2. Driving procedures
5
Driving
■Parking brake indicator light
and Parking brake switch indi-
cator
●Depending on the power switch
mode the parking brake indicator
light and the parking brake switch
indicator will turn on and stay on
as described below:
ON: Comes on until the parking
brake is released.
Not in ON: Stays on for approxi-
mately 15 seconds.
●When the power switch is turned
off with the parking brake set, the
parking brake indicator light and
the parking brake switch indicator
will stay on for about 15 seconds.
This does not indicate a malfunc-
tion.
■When the parking brake switch
malfunctions
Automatic mode (automatic brake
setting and releas ing) will be turned
on automatically.
■Parking the vehicle
P.282
■Parking brake engaged warning
buzzer
A buzzer will sound if the vehicle is
driven with the parking brake
engaged. “Parking Brake ON” is dis-
played on the multi-information dis-
play (with the vehicle reaching a
speed of 3 mph [5 km/h]).
■If the brake system warning
light comes on
P.541
■Usage in winter time
P.414
WARNING
■When parking the vehicle
Do not leave a child in the vehicle
alone. The parking brake may be
released unintentionally by a child
and there is the danger of the
vehicle moving that may lead to
an accident resulting in death or
serious injury.
■Parking brake switch
Do not set any objects near the
parking brake switch. Objects
may interfere with the switch and
may lead the parking brake to
unexpectedly operate.
■Parking brake automatic lock
function
Never use the automatic parking
brake engagement function in
place of normal parking brake
operation. This function is
designed to reduce the risk of a
collision due to the driver forget-
ting to engage the parking brake.
Over-reliance on this function to
park the vehicle safely may lead
to an accident resulting in death
or serious injury. ( P.316)
NOTICE
■When parking the vehicle
Before you leave the vehicle, shift
the shift lever to P, set the parking
brake and make s ure that the
vehicle does not move.
■When the system malfunc-
tions
Stop the vehicle in a safe place
and check the warning messages.
■When the vehicle 12-volt bat-
tery is discharged
The parking brake system cannot
be activated. ( P.569)
Page 317 of 662
3195-2. Driving procedures
5
Driving
●The parking brake is engaged.
If any of the conditions above are
detected when the brake hold sys-
tem is enabled, the system will turn
off and the brake hold standby indi-
cator light will go off. In addition, if
any of the conditions are detected
while the system is holding the
brake, a warning buzzer will sound
and a message will be shown on the
multi-information display. The park-
ing brake will then be set automati-
cally.
■Brake hold function
●If the brake pedal is left released
for a period of about 3 minutes
after the system has started hold-
ing the brake, the parking brake
will be set automatically. In this
case, a warning buzzer sounds
and a message is shown on the
multi-informat ion display.
●To turn the system off while the
system is holding the brake, firmly
depress the brake pedal and
press the button again.
●The brake hold function may not
hold the vehicle when the vehicle
is on a steep inclin e. In this situa-
tion, it may be necessary for the
driver to apply the brakes. A warn-
ing buzzer will sound and the
multi-informatio n display will
inform the driver of this situation. If
a warning message is shown on
the multi-information display, read
the message and follow the
instructions.
■When the parking brake is set
automatically while the system
is holding the brakes
Perform any of the following opera-
tions to release the parking brake.
●Depress the accelerator pedal.
(The parking brake will not be
released automatic ally if the seat
belt is not fastened.)
●Operate the parking brake switch
with the brake pedal depressed.
Make sure that the parking brake indicator light goes off. (
P.314)
■When an inspection at your
Toyota dealer is necessary
When the brake hold standby indi-
cator (green) does not illuminate
even when the brake hold switch is
pressed with the brake hold system
operating conditions met, the sys-
tem may be malf unctioning. Have
the vehicle inspected at your Toyota
dealer.
■If “Brake Hold Malfunction
Press Brake to Deactivate Visit
Your Dealer” or “Brake Hold
Malfunction Visit Your Dealer”
is displayed on the multi-infor-
mation display
The system may be malfunctioning.
Have the vehicle inspected by your
Toyota dealer.
■Warning messages and buzzers
Warning messages and buzzers are
used to indicate a system malfunc-
tion or to inform the driver of the
need for caution. If a warning mes-
sage is shown on the multi-informa-
tion display, read the message and
follow the instructions.
■If the brake hold operated indi-
cator flashes
P.546
WARNING
■When the vehicle is on a
steep incline
Take care when using the brake
hold system on a steep incline,
exercise caution. The brake hold
function may not hold brakes in
such situations.
Also, the system may not activate
depending on the angle of the
slope.
Page 322 of 662
3245-3. Operating the lights and wipers
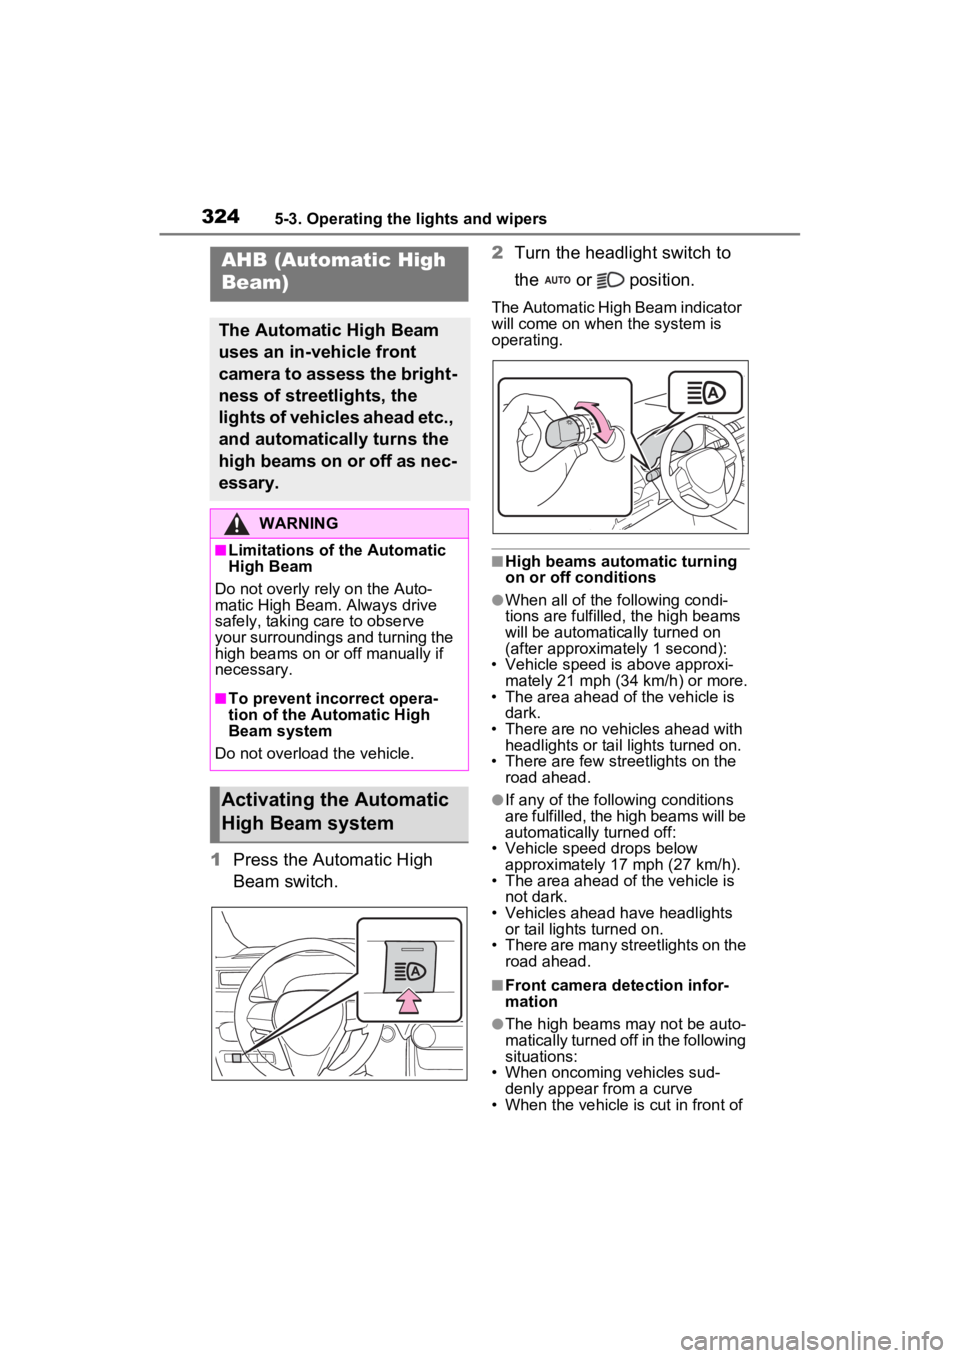
1Press the Automatic High
Beam switch. 2
Turn the headlight switch to
the or position.
The Automatic High Beam indicator
will come on when the system is
operating.
■High beams automatic turning
on or off conditions
●When all of the following condi-
tions are fulfilled, the high beams
will be automatically turned on
(after approximately 1 second):
• Vehicle speed is above approxi-
mately 21 mph (34 km/h) or more.
• The area ahead of the vehicle is dark.
• There are no vehicles ahead with headlights or tail lights turned on.
• There are few str eetlights on the
road ahead.
●If any of the following conditions
are fulfilled, the high beams will be
automatically turned off:
• Vehicle speed drops below
approximately 17 mph (27 km/h).
• The area ahead of the vehicle is not dark.
• Vehicles ahead have headlights or tail lights turned on.
• There are many streetlights on the
road ahead.
■Front camera detection infor-
mation
●The high beams m ay not be auto-
matically turned off in the following
situations:
• When oncoming vehicles sud-
denly appear from a curve
• When the vehicle is cut in front of
AHB (Automatic High
Beam)
The Automatic High Beam
uses an in-vehicle front
camera to assess the bright-
ness of streetlights, the
lights of vehicles ahead etc.,
and automatically turns the
high beams on or off as nec-
essary.
WARNING
■Limitations of the Automatic
High Beam
Do not overly rely on the Auto-
matic High Beam. Always drive
safely, taking care to observe
your surroundings and turning the
high beams on or off manually if
necessary.
■To prevent incorrect opera-
tion of the Automatic High
Beam system
Do not overload the vehicle.
Activating the Automatic
High Beam system
Page 328 of 662
3305-3. Operating the lights and wipers
not blocked if there is washer fluid in
the windshield washer fluid reser-
voir.
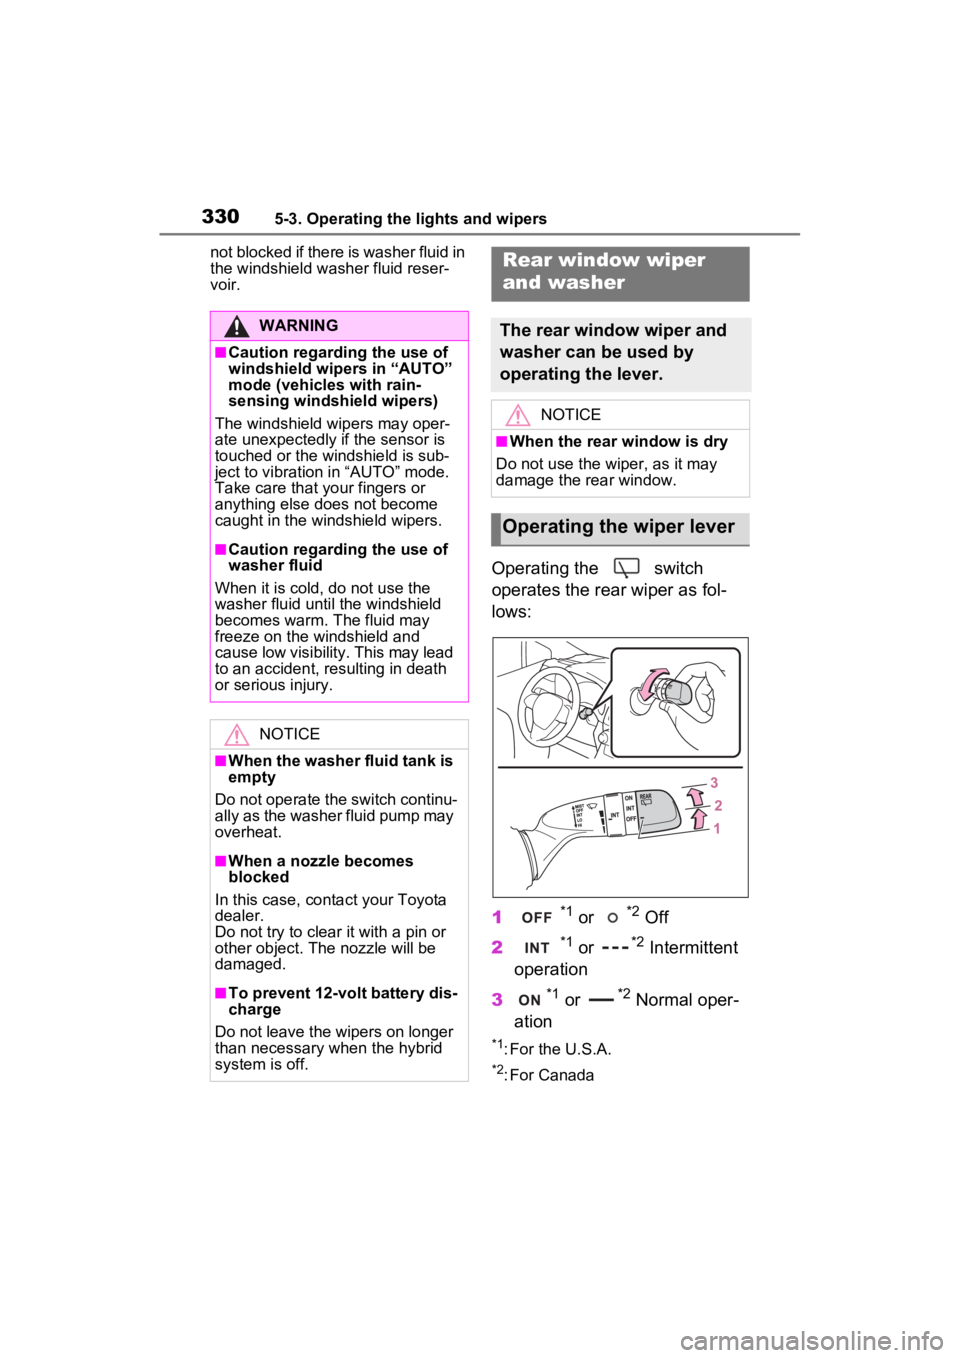
Operating the switch
operates the rear wiper as fol-
lows:
1
*1 or *2 Off
2
*1 or *2 Intermittent
operation
3
*1 or *2 Normal oper-
ation
*1: For the U.S.A.
*2: For Canada
WARNING
■Caution regarding the use of
windshield wipers in “AUTO”
mode (vehicles with rain-
sensing windshield wipers)
The windshield wipers may oper-
ate unexpectedly if the sensor is
touched or the windshield is sub-
ject to vibration in “AUTO” mode.
Take care that y our fingers or
anything else does not become
caught in the windshield wipers.
■Caution regarding the use of
washer fluid
When it is cold, do not use the
washer fluid until the windshield
becomes warm. The fluid may
freeze on the windshield and
cause low visibility. This may lead
to an accident, resulting in death
or serious injury.
NOTICE
■When the washer fluid tank is
empty
Do not operate the switch continu-
ally as the washer fluid pump may
overheat.
■When a nozzle becomes
blocked
In this case, conta ct your Toyota
dealer.
Do not try to clear it with a pin or
other object. The nozzle will be
damaged.
■To prevent 12-volt battery dis-
charge
Do not leave the wipers on longer
than necessary when the hybrid
system is off.
Rear window wiper
and washer
The rear window wiper and
washer can be used by
operating the lever.
NOTICE
■When the rear window is dry
Do not use the wiper, as it may
damage the rear window.
Operating the wiper lever
Page 332 of 662
3345-4. Refueling
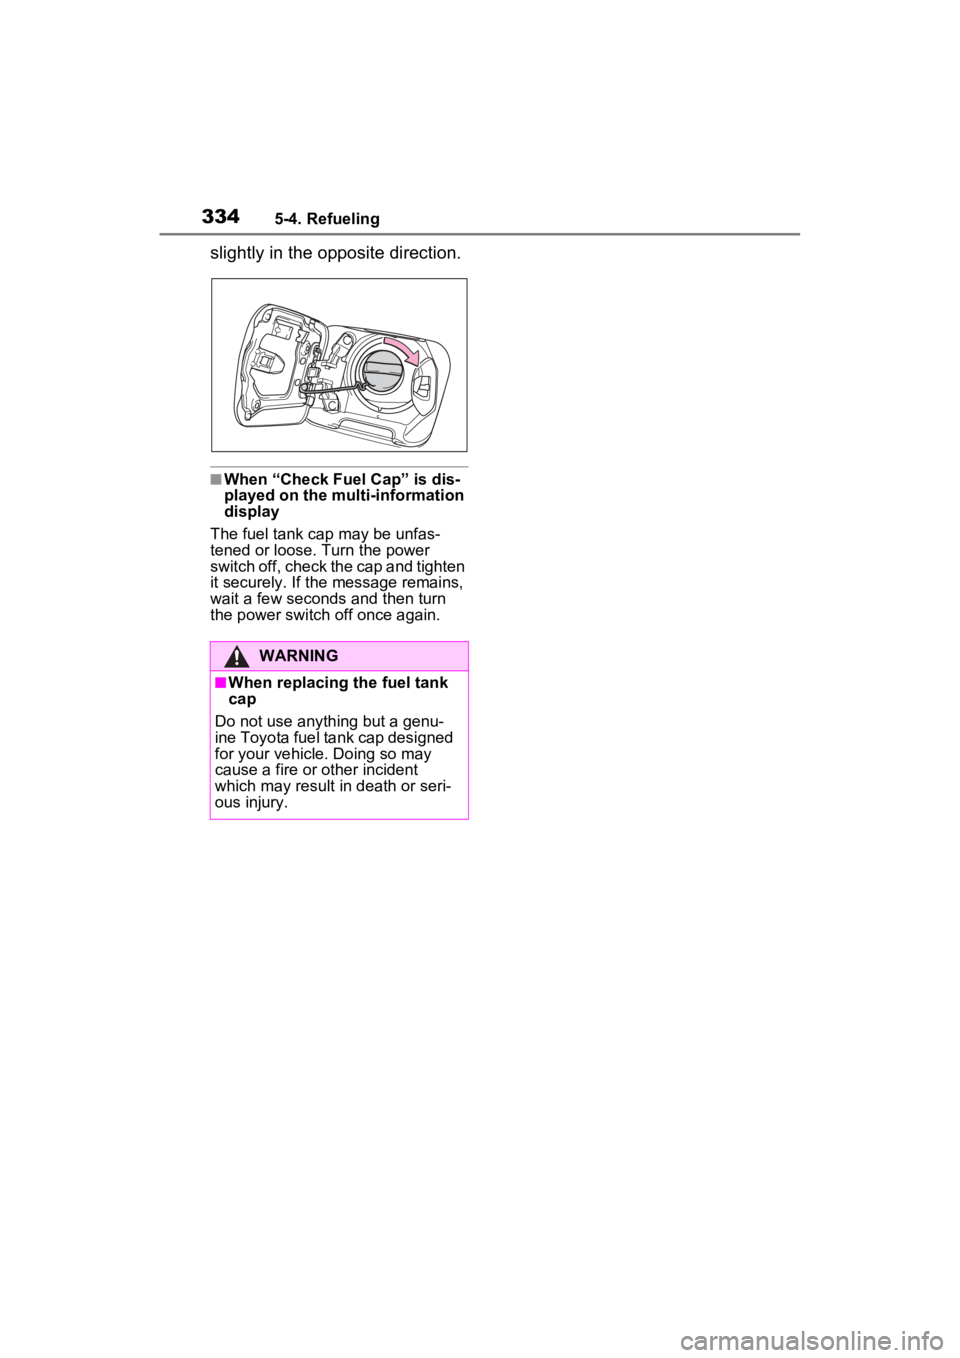
slightly in the opposite direction.
■When “Check Fuel Cap” is dis-
played on the multi-information
display
The fuel tank cap may be unfas-
tened or loose. Turn the power
switch off, check the cap and tighten
it securely. If the message remains,
wait a few seconds and then turn
the power switch off once again.
WARNING
■When replacing the fuel tank
cap
Do not use anything but a genu-
ine Toyota fuel tank cap designed
for your vehicle. Doing so may
cause a fire or other incident
which may result in death or seri-
ous injury.
Page 335 of 662
3375-5. Using the driving support systems
5
Driving
WARNING
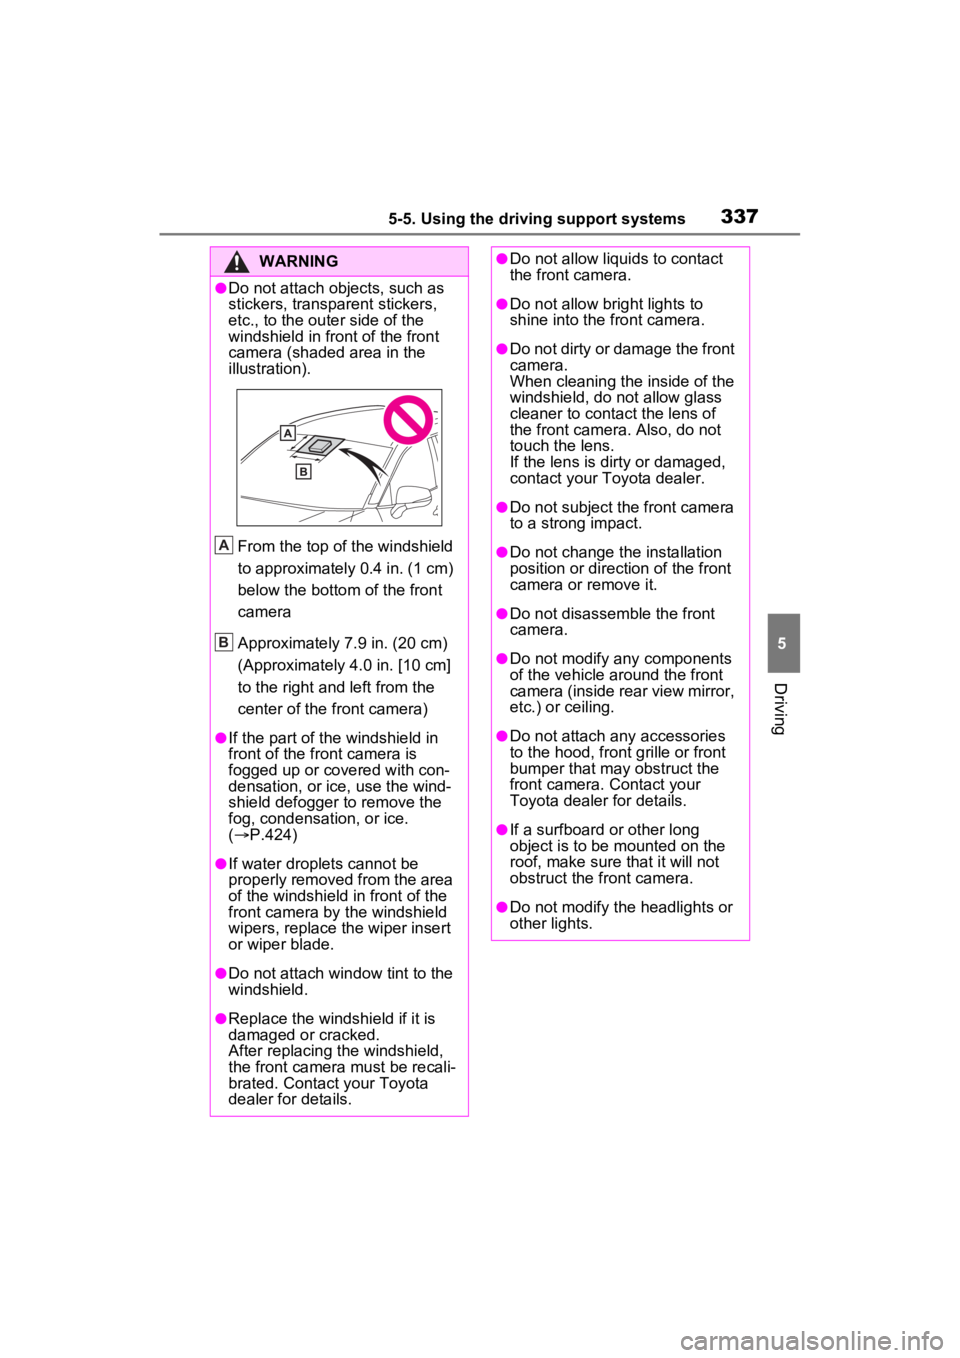
●Do not attach objects, such as
stickers, transparent stickers,
etc., to the outer side of the
windshield in fr ont of the front
camera (shaded area in the
illustration).
From the top of the windshield
to approximately 0.4 in. (1 cm)
below the bottom of the front
camera
Approximately 7.9 in. (20 cm)
(Approximately 4.0 in. [10 cm]
to the right and left from the
center of the front camera)
●If the part of the windshield in
front of the front camera is
fogged up or covered with con-
densation, or ice, use the wind-
shield defogger to remove the
fog, condensation, or ice.
( P.424)
●If water droplets cannot be
properly removed from the area
of the windshield in front of the
front camera by the windshield
wipers, replace the wiper insert
or wiper blade.
●Do not attach win dow tint to the
windshield.
●Replace the windshield if it is
damaged or cracked.
After replacing the windshield,
the front camera must be recali-
brated. Contact your Toyota
dealer for details.
A
B
●Do not allow liquids to contact
the front camera.
●Do not allow bright lights to
shine into the front camera.
●Do not dirty or damage the front
camera.
When cleaning the inside of the
windshield, do not allow glass
cleaner to contact the lens of
the front camera . Also, do not
touch the lens.
If the lens is dirty or damaged,
contact your Toyota dealer.
●Do not subject the front camera
to a strong impact.
●Do not change the installation
position or direction of the front
camera or remove it.
●Do not disassemble the front
camera.
●Do not modify any components
of the vehicle around the front
camera (inside rear view mirror,
etc.) or ceiling.
●Do not attach any accessories
to the hood, front grille or front
bumper that may obstruct the
front camera. Contact your
Toyota dealer for details.
●If a surfboard or other long
object is to be mounted on the
roof, make sure that it will not
obstruct the front camera.
●Do not modify the headlights or
other lights.
Page 336 of 662

3385-5. Using the driving support systems
■If a warning message is displayed on the multi-information display
A system may be temporarily unava ilable or there may be a malfunction in
the system.
●In the following situations, perform the actions specified in t he table. When
the normal operating conditions are detected, the message will disappear
and the system will be come operational.
If the message does not disapp ear, contact your Toyota dealer.
●In the following situations, if the situation has changed (or the vehicle has
been driven for some time) and the normal operating conditions are
detected, the message will disappear and the system will become opera-
tional.
SituationActions
When the area around a camera is
covered with dirt, moisture (fogged
up, covered with condensation, ice,
etc.), or other foreign matterUsing the wiper and A/C function,
remove the dirt and other attached
matter. ( P.424).
When the temperature around the
front camera is outside of the opera-
tional range, such as when the vehi-
cle is in the sun or in an extremely
cold environment
If the front camera is hot, such as
after the vehicle had been parked in
the sun, use the air conditioning sys-
tem to decrease the temperature
around the front camera.
If a sunshade was used when the
vehicle was parked, depending on its
type, the sunlight reflected from the
surface of the sunshade may cause
the temperature of the front camera
to become excessively high.
If the front camera is cold, such after
the vehicle is parked in an extremely
cold environment, use the air condi-
tioning system to increase the tem-
perature around the front camera.
The area in front o f the front camera
is obstructed, such as when the
hood is open or a sticker is attached
to the part of the win dshield in front
of the front camera.
Close the hood, rem ove the sticker,
etc. to clear the obstruction.
When “Pre-Collisio n System Radar
In Self Calibration Unavailable See
Owner’s Manual” is displayed.Check whether there is attached
materials on the radar sensor and
radar sensor cover , and if there is,
remove it.