2023 TOYOTA RAV4 PRIME belt
[x] Cancel search: beltPage 497 of 662
4997-3. Do-it-yourself maintenance
7
Maintenance and care
■If the tread on snow tires wears
down below 0.16 in. (4 mm)
The effectiveness of the tires as
snow tires is lost.
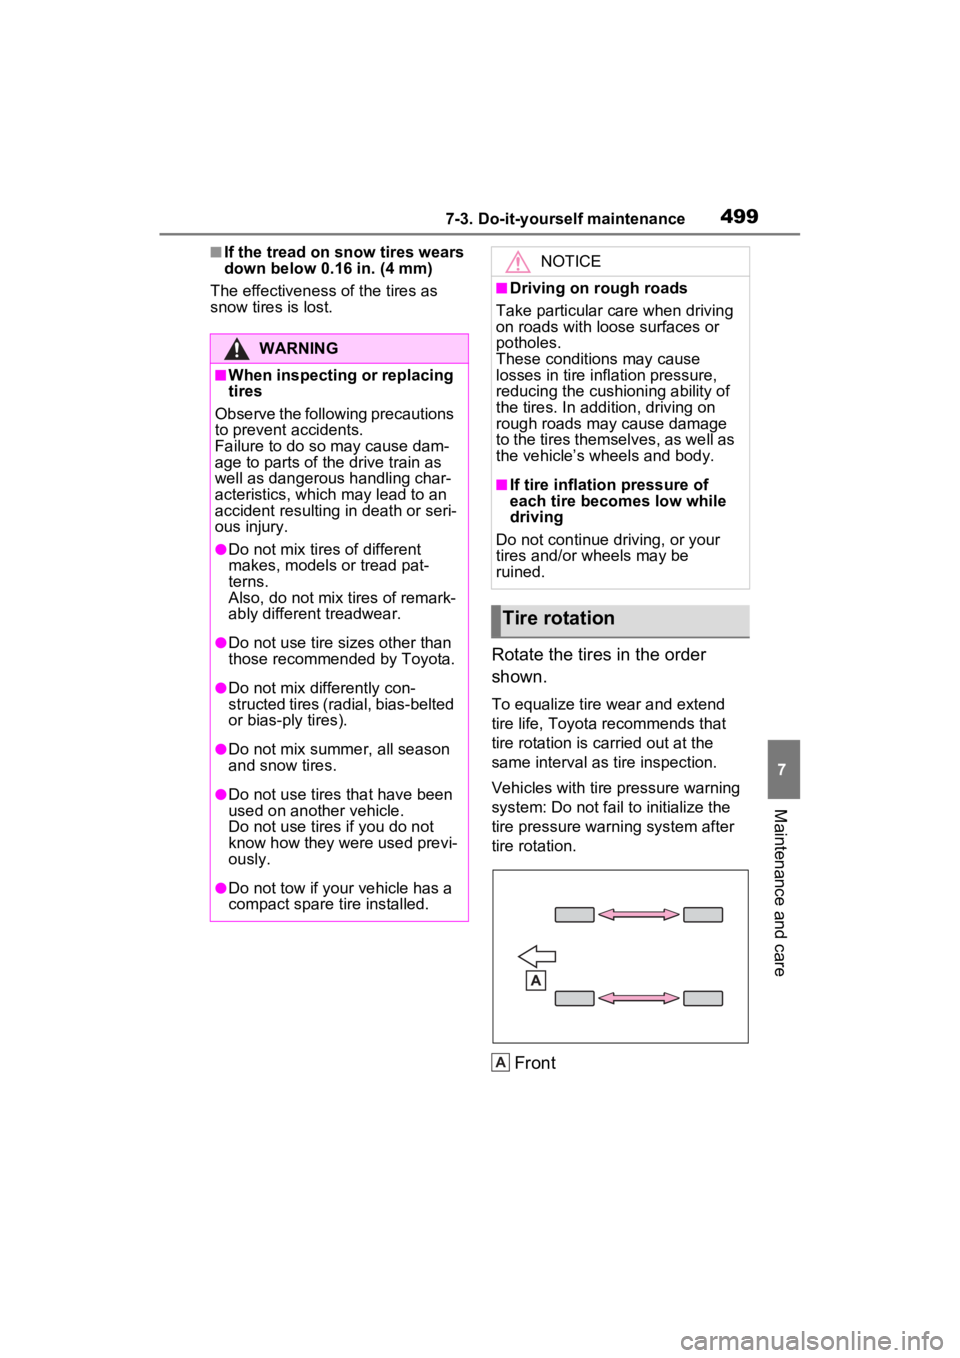
Rotate the tires in the order
shown.
To equalize tire wear and extend
tire life, Toyota recommends that
tire rotation is carried out at the
same interval as tire inspection.
Vehicles with tire pressure warning
system: Do not fail to initialize the
tire pressure warning system after
tire rotation.
Front
WARNING
■When inspecting or replacing
tires
Observe the following precautions
to prevent accidents.
Failure to do so may cause dam-
age to parts of t he drive train as
well as dangerous handling char-
acteristics, which may lead to an
accident resulting in death or seri-
ous injury.
●Do not mix tires of different
makes, models or tread pat-
terns.
Also, do not mix tires of remark-
ably different treadwear.
●Do not use tire sizes other than
those recommende d by Toyota.
●Do not mix differently con-
structed tires (radial, bias-belted
or bias-ply tires).
●Do not mix summer, all season
and snow tires.
●Do not use tires that have been
used on another vehicle.
Do not use tires if you do not
know how they were used previ-
ously.
●Do not tow if your vehicle has a
compact spare tire installed.
NOTICE
■Driving on rough roads
Take particular care when driving
on roads with loose surfaces or
potholes.
These conditions may cause
losses in tire inflation pressure,
reducing the cushioning ability of
the tires. In addition, driving on
rough roads may cause damage
to the tires themselves, as well as
the vehicle’s wheels and body.
■If tire inflation pressure of
each tire becomes low while
driving
Do not continue driving, or your
tires and/or wheels may be
ruined.
Tire rotation
A
Page 537 of 662
5398-2. Steps to take in an emergency
8
When trouble arises
When using a flat-bed truck to
transport the vehicle, use tire
strapping belts. Refer to the
owner’s manual of the flat-bed
truck for the tire strapping
method.
In order to suppress vehicle
movement during transporta-
tion, set the parking brake and
turn the power switch off.
NOTICE
■To prevent damage to the
vehicle when towing using a
wheel-lift type truck
When raising the vehicle, ensure
adequate ground clearance for
towing at the opposite end of the
raised vehicle. Without adequate
clearance, the vehicle could be
damaged while being towed.
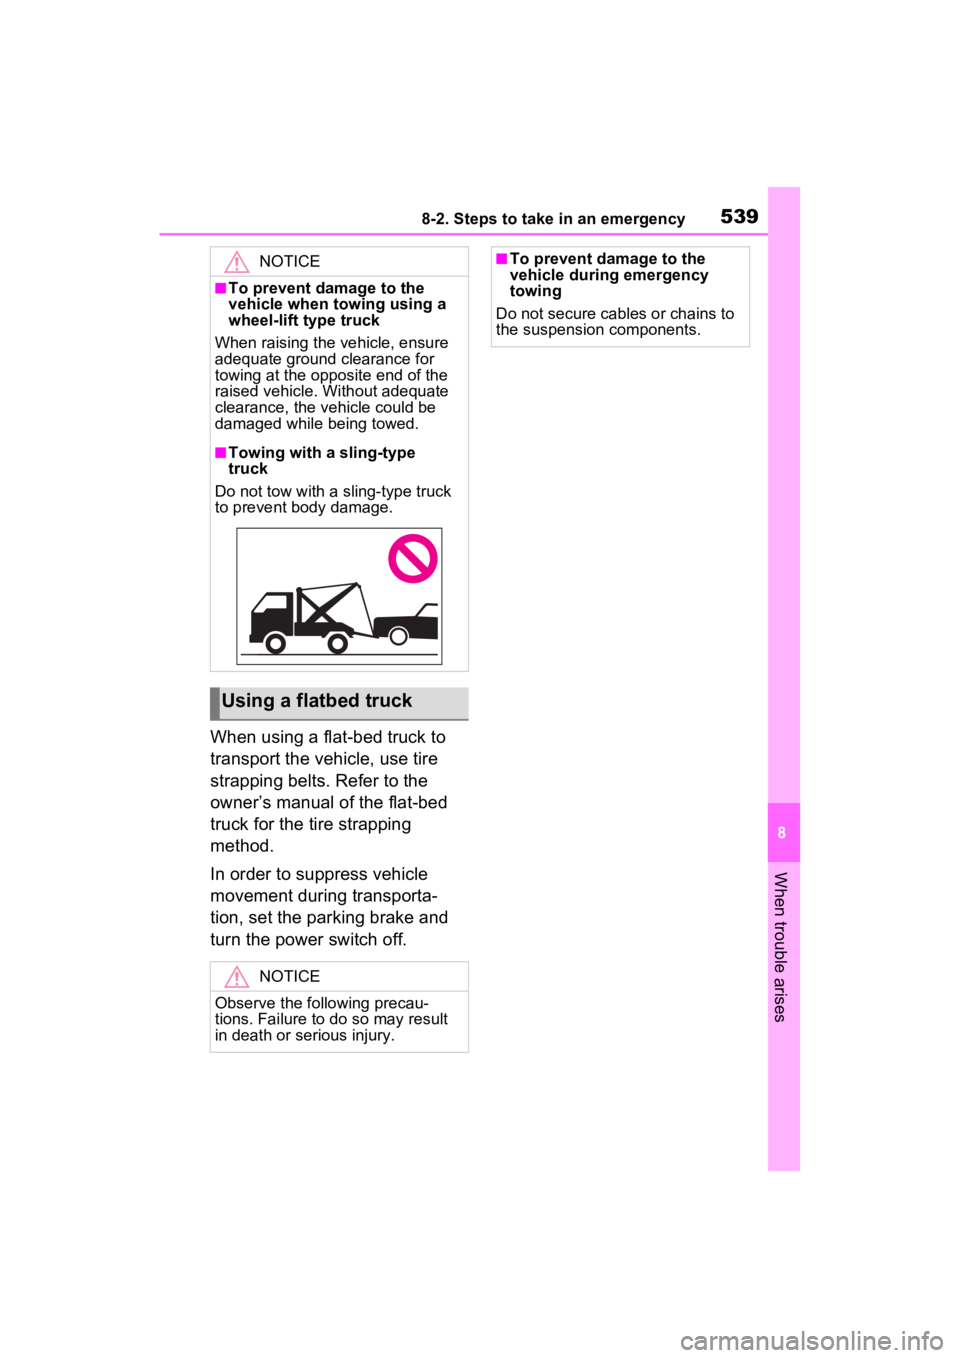
■Towing with a sling-type
truck
Do not tow with a sling-type truck
to prevent body damage.
Using a flatbed truck
NOTICE
Observe the following precau-
tions. Failure to do so may result
in death or serious injury.
■To prevent damage to the
vehicle during emergency
towing
Do not secure cables or chains to
the suspension components.
Page 541 of 662
5438-2. Steps to take in an emergency
8
When trouble arises
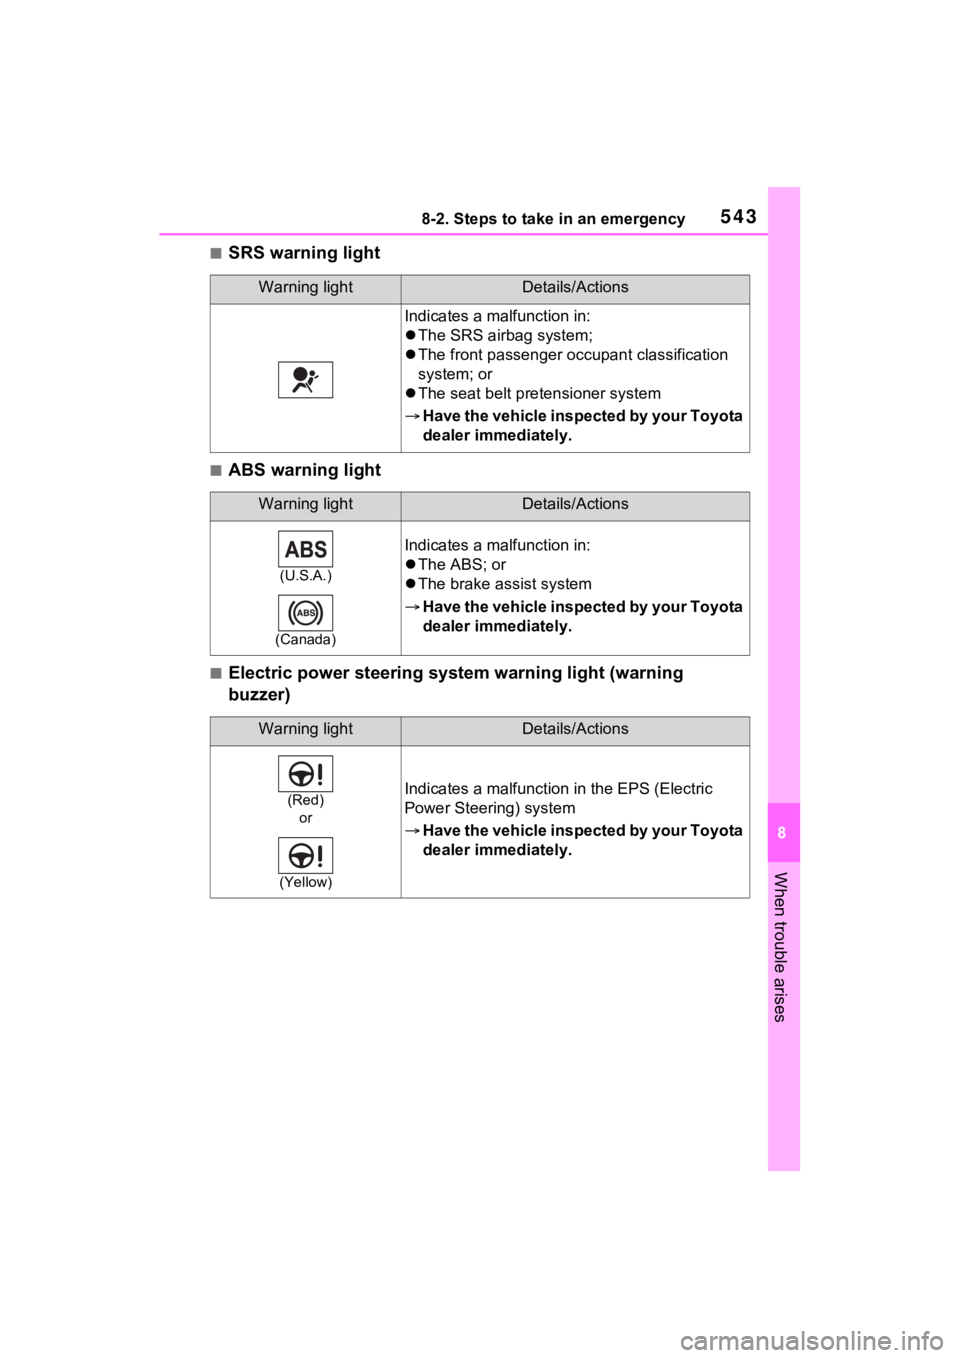
■SRS warning light
■ABS warning light
■Electric power steering system warning light (warning
buzzer)
Warning lightDetails/Actions
Indicates a malfunction in:
The SRS airbag system;
The front passenger o ccupant classification
system; or
The seat belt pretensioner system
Have the vehicle inspected by your Toyota
dealer immediately.
Warning lightDetails/Actions
(U.S.A.)
(Canada)
Indicates a malfunction in:
The ABS; or
The brake assist system
Have the vehicle inspected by your Toyota
dealer immediately.
Warning lightDetails/Actions
(Red)
or
(Yellow)Indicates a malfunction in the EPS (Electric
Power Steeri ng) system
Have the vehicle inspected by your Toyota
dealer immediately.
Page 546 of 662
5488-2. Steps to take in an emergency
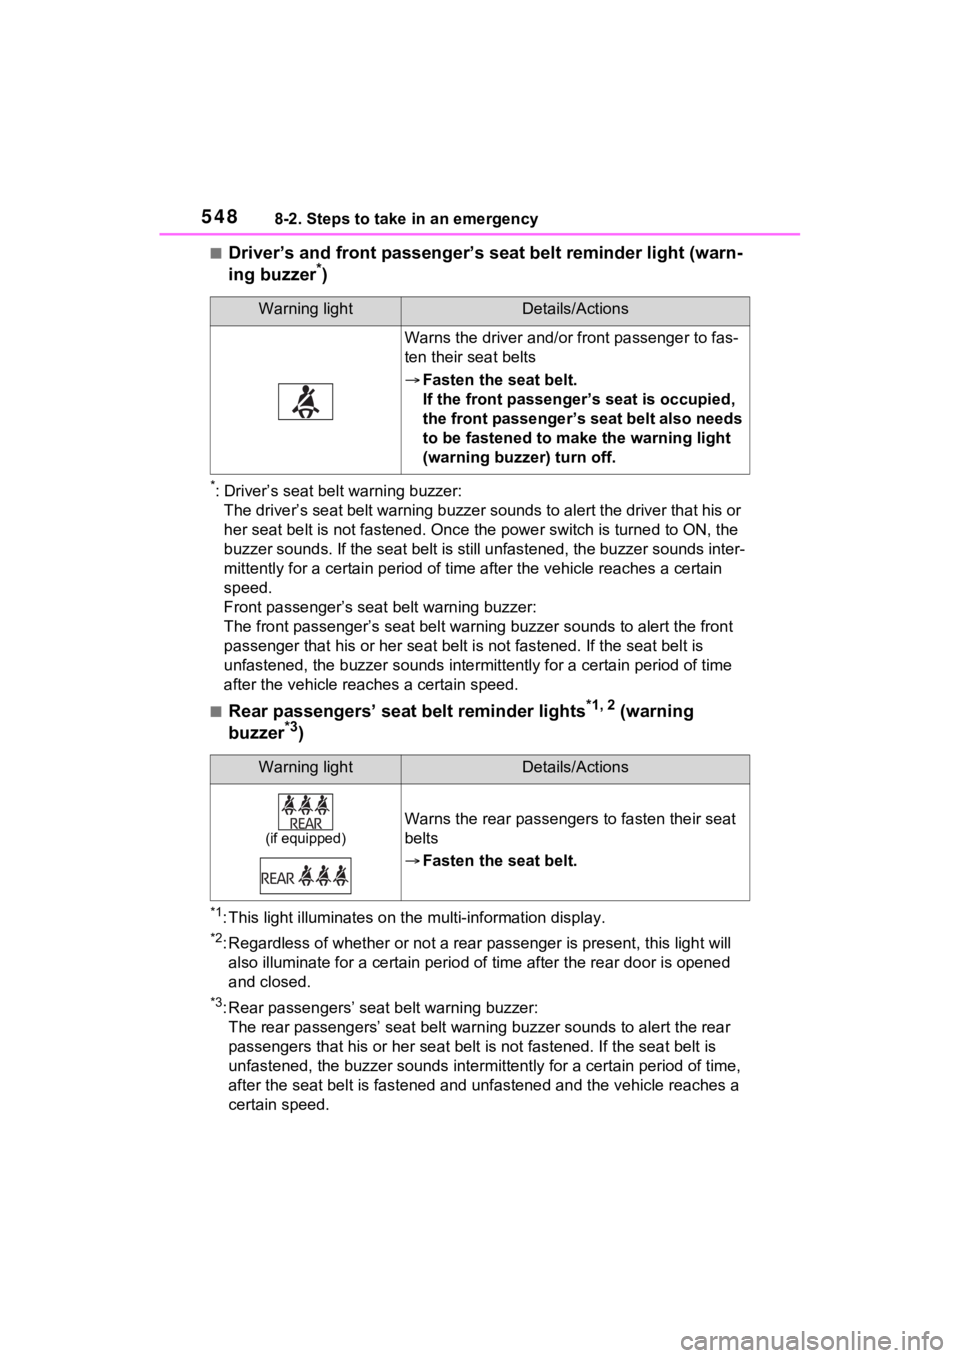
■Driver’s and front passenger’s seat belt reminder light (warn-
ing buzzer*)
*: Driver’s seat belt warning buzzer:
The driver’s seat belt warning buzzer sounds to alert the drive r that his or
her seat belt is not fastened. Onc e the power switch is turned to ON, the
buzzer sounds. If the seat belt is still unfastened, the buzzer sounds inter-
mittently for a certain period o f time after the vehicle reaches a certain
speed.
Front passenger’s seat belt warning buzzer:
The front passenger’s seat belt warning buzzer sounds to alert the front
passenger that his or her seat belt is not fastened. If the sea t belt is
unfastened, the buzzer sounds int ermittently for a certain period of time
after the vehicle reaches a certain speed.
■Rear passengers’ seat belt reminder lights*1, 2 (warning
buzzer*3)
*1: This light illuminates on the multi-information display.
*2: Regardless of whether or not a rear passenger is present, this light will
also illuminate for a certain period of tim e after the rear doo r is opened
and closed.
*3: Rear passengers’ seat belt warning buzzer: The rear passengers’ seat belt w arning buzzer sounds to alert the rear
passengers that his o r her seat belt is not fastened. If the se at belt is
unfastened, the buzzer sounds intermittently for a certain peri od of time,
after the seat belt is fastened and unfastened and the vehicle reaches a
certain speed.
Warning lightDetails/Actions
Warns the driver and/or front passenger to fas-
ten their seat belts
Fasten the seat belt.
If the front passenger’s seat is occupied,
the front passenger’s seat belt also needs
to be fastened to m ake the warning light
(warning buzzer) turn off.
Warning lightDetails/Actions
(if equipped)
Warns the rear passengers to fasten their seat
belts
Fasten the seat belt.
Page 547 of 662

5498-2. Steps to take in an emergency
8
When trouble arises
■Warning buzzer
In some cases, the buzzer may not
be heard because of noisy place or
an audio sound.
■Front passenger detection sen-
sor, seat belt reminder and
warning buzzer
●If luggage is placed on the front
passenger seat, the front passen-
ger detection sensor may cause
the warning light to flash and the
warning buzzer to sound even if a
passenger is not sitting in the
seat.
●If a cushion is placed on the seat,
the sensor may n ot detect a pas-
senger, and the warning light may
not operate properly.
■SRS warning light
This warning light system monitors
the airbag sensor assembly, front
impact sensors, side impact sensors
(front door), side impact sensors
(front), side impact sensors (rear),
driver’s seat position sensor, front
passenger occupant classification
sensors, “AIR BAG ON” indicator
light, “AIR BAG OFF” indicator light,
front passenger’s seat belt buckle
switch, driver’s seat belt preten-
sioner, front passenger’s seat belt
pretensioner and force limiter, air-
bags, interconnecting wiring and
power sources. ( P.34)
■If the malfunction indicator
lamp comes on while driving
First check the following:
●Is the fuel t ank empty?
If it is, fill the fuel tank immediately.
●Is the fuel tank cap loose?
If it is, tighten it securely.
The light will go o ff after several
driving trips.
If the light does not go off even after
several trips, contact your Toyota
dealer as soon as possible.
■Electric power steering system
warning light (warning buzzer)
When the 12-volt battery charge
becomes insufficien t or the voltage
temporarily drops, the electric power
steering system warning light may
come on and the warning buzzer
may sound.
At this time, the functions of the air
conditioning, etc. may be partially
limited in order to reduce the power
consumption of the 12-volt battery.
■When the tire pressure warning
light comes on (vehicles with
tire pressure warning system)
Inspect the tires to check if a tire is
punctured.
If a tire is punctured: P.557
If none of the tires are punctured:
Turn the power switch to OFF then
turn it to ON. Check if the tire pres-
sure warning light comes on or
blinks.
If the tire pressur e warning light
blinks for approximately 1 minute
then stays on
There may be a malfunction in the
tire pressure warning system. Have
the vehicle inspected by your
Toyota dealer immediately.
If the tire pressur e warning light
comes on
1 After the temperature of the tires
has lowered sufficiently, check
the inflation pressure of each tire
and adjust them to the specified
level.
2 If the warning light does not turn
off even after several minutes
have elapsed, check that the
inflation pressure of each tire is
at the specified level and perform
initialization. ( P.503)
■The tire pressure warning light
may come on due to natural
causes (vehicles with tire pres-
sure warning system)
The tire pressure warning light may
Page 590 of 662
5929-1. Specifications
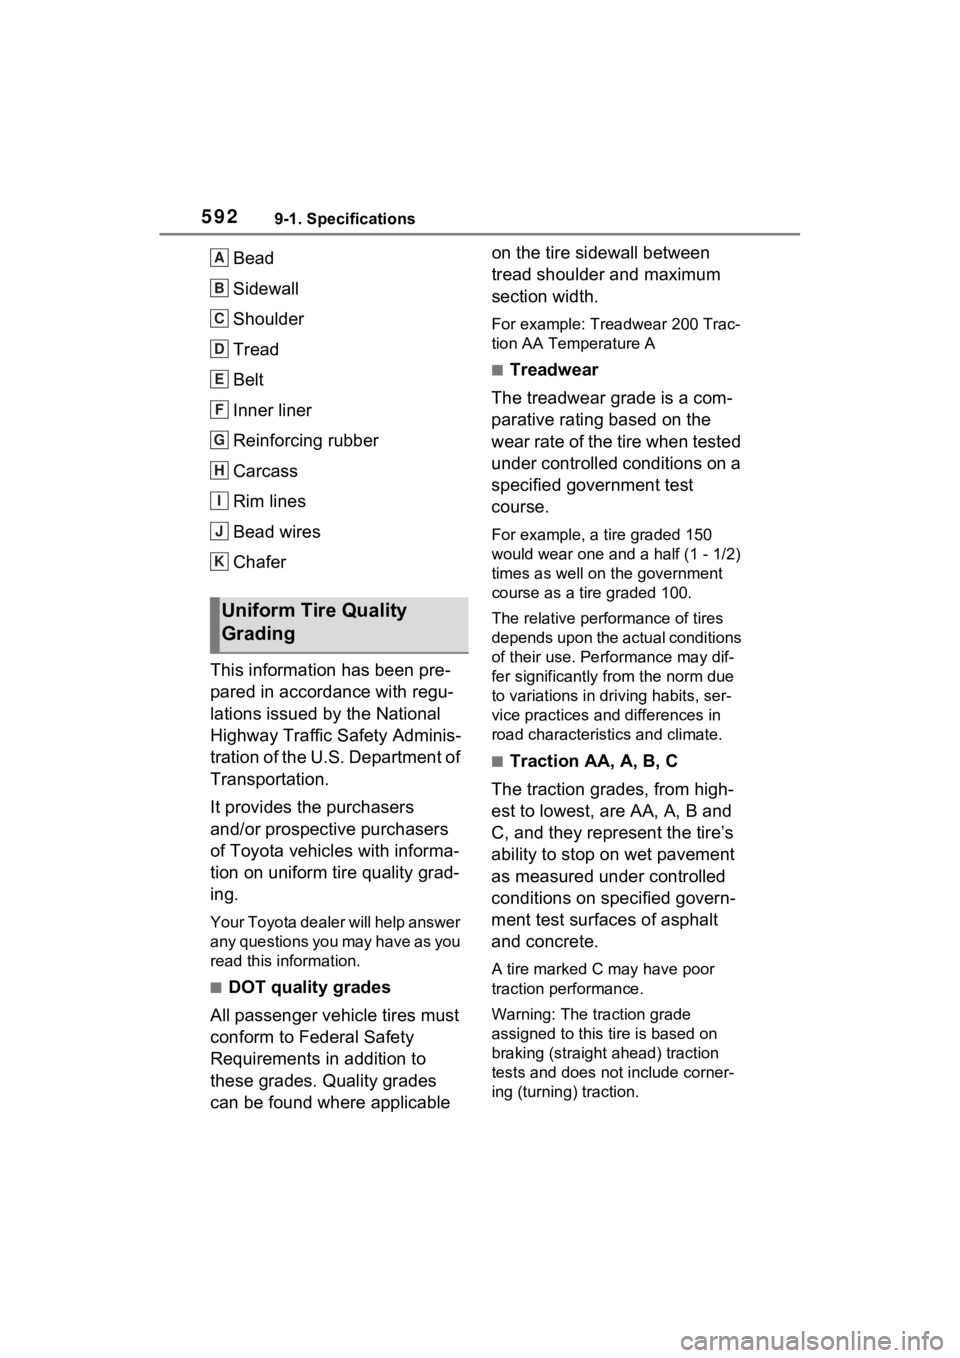
Bead
Sidewall
Shoulder
Tread
Belt
Inner liner
Reinforcing rubber
Carcass
Rim lines
Bead wires
Chafer
This information has been pre-
pared in accordance with regu-
lations issued by the National
Highway Traffic Safety Adminis-
tration of the U.S. Department of
Transportation.
It provides the purchasers
and/or prospective purchasers
of Toyota vehicles with informa-
tion on uniform tire quality grad-
ing.
Your Toyota dealer will help answer
any questions you may have as you
read this information.
■DOT quality grades
All passenger vehicle tires must
conform to Federal Safety
Requirements in addition to
these grades. Quality grades
can be found where applicable on the tire sidewall between
tread shoulder and maximum
section width.
For example: Treadwear 200 Trac-
tion AA Temperature A
■Treadwear
The treadwear grade is a com-
parative rating based on the
wear rate of the tire when tested
under controlled conditions on a
specified government test
course.
For example, a tire graded 150
would wear one and a half (1 - 1/2)
times as well on the government
course as a tire graded 100.
The relative performance of tires
depends upon the ac tual conditions
of their use. Performance may dif-
fer significantly from the norm due
to variations in dri ving habits, ser-
vice practices and differences in
road characteristics and climate.
■Traction AA, A, B, C
The traction grades, from high-
est to lowest, are AA, A, B and
C, and they represent the tire’s
ability to stop on wet pavement
as measured under controlled
conditions on specified govern-
ment test surfaces of asphalt
and concrete.
A tire marked C may have poor
traction performance.
Warning: The traction grade
assigned to this tire is based on
braking (straight ahead) traction
tests and does not include corner-
ing (turning) traction.
Uniform Tire Quality
Grading
A
B
C
D
E
F
G
H
I
J
K
Page 615 of 662
617
10
10
For owners
For owners
10-1.For ownersReporting safety defects for
U.S. owners............... 618
Reporting safety defects for
Canadian owners ...... 619
Seat belt instructions for Canadian owners (in
French) ...................... 619
SRS airbag instructions for Canadian owners (in
French) ...................... 621
Headlight aim instructions for Canadian owners (in
French) ...................... 628
Page 617 of 662
61910-1. For owners
10
For owners
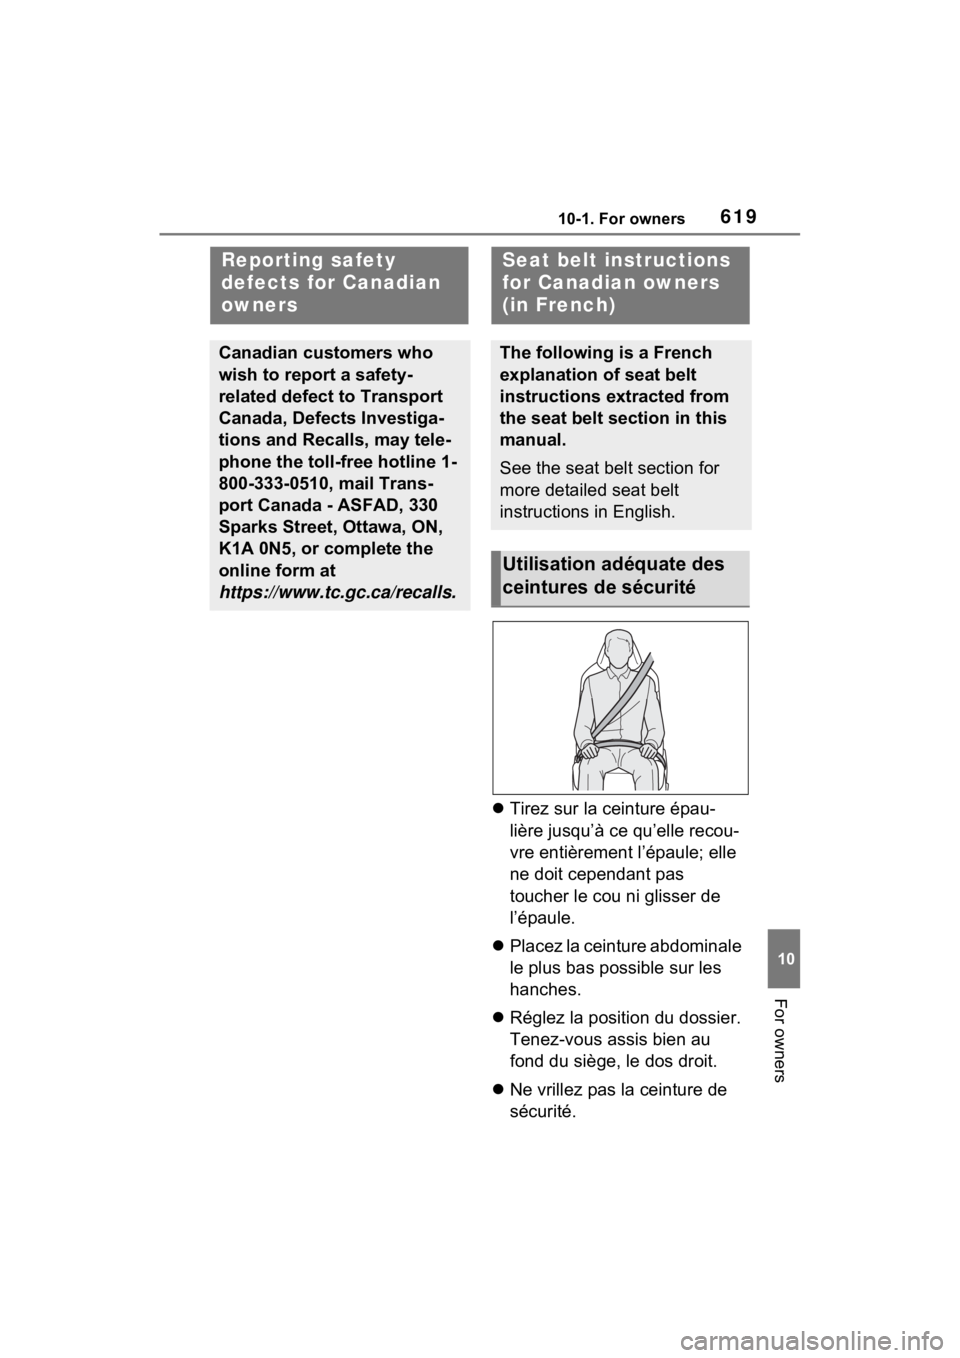
Tirez sur la ceinture épau-
lière jusqu’à ce qu’elle recou-
vre entièrement l’épaule; elle
ne doit cependant pas
toucher le cou ni glisser de
l’épaule.
Placez la ceinture abdominale
le plus bas possible sur les
hanches.
Réglez la position du dossier.
Tenez-vous assis bien au
fond du siège, le dos droit.
Ne vrillez pas la ceinture de
sécurité.
Reporting safety
defects for Canadian
owners
Canadian customers who
wish to report a safety-
related defect to Transport
Canada, Defects Investiga-
tions and Recalls, may tele-
phone the toll-free hotline 1-
800-333-0510, mail Trans-
port Canada - ASFAD, 330
Sparks Street, Ottawa, ON,
K1A 0N5, or complete the
online form at
https://www.tc.gc.ca/recalls.
Seat belt in structions
for Canadian owners
(in French)
The following is a French
explanation of seat belt
instructions extracted from
the seat belt section in this
manual.
See the seat belt section for
more detailed seat belt
instructions in English.
Utilisation adéquate des
ceintures de sécurité