2023 TOYOTA COROLLA audio
[x] Cancel search: audioPage 16 of 468

16Pictorial index
When a warning message is displayed ................................ P.366
Turn signal lever.............................................. ................... P.167
Headlight switch ............................................... ................. P.173
Headlights/parking lights/tail lig hts/side marker lights/daytime run-
ning lights/LED accent lights
*3............................................. P.173
Windshield wiper and washer switch............................... P.178
Usage................................................................................... P.178
Adding washer fluid .............................................................. P.310
Emergency flasher switch ....................................... .......... P.348
Hood lock release lever ........................................ ............. P.302
Tilt and telescopic steering lock release lever ................P. 1 3 0
Air conditioning system ............................. ............... P.258, 263
Usage.......................................................... ................. P.258, 263
Rear window defogger ........................................... ...... P.260, 265
Audio system
*4
*1
: Vehicles without a smart key system
*2: Vehicles with a smart key system
*3: If equipped
*4: Refer to “MULTIMEDIA OWNER’S MANUAL”.
Page 18 of 468
18Pictorial index
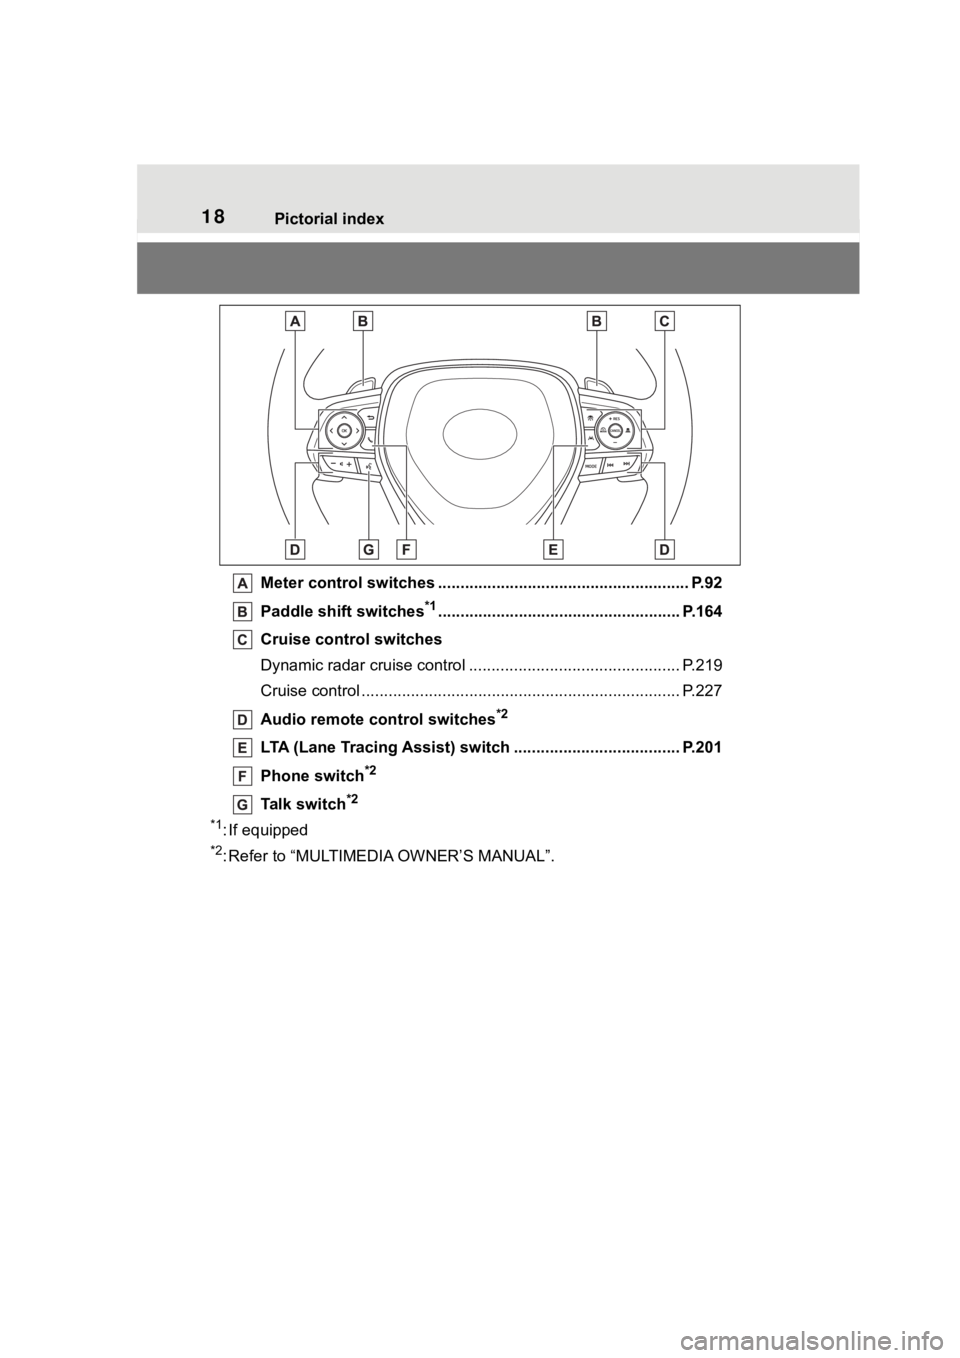
Meter control switches ........................................................ P.92
Paddle shift switches
*1...................................................... P.164
Cruise control switches
Dynamic radar cruise control ................................... ............ P.219
Cruise control ................................................. ...................... P.227
Audio remote control switches
*2
LTA (Lane Tracing Assist) switch ............................... ...... P.201
Phone switch
*2
Talk switch*2
*1
: If equipped
*2: Refer to “MULTIMEDIA OWNER’S MANUAL”.
Page 88 of 468

882-1. Instrument cluster
different distances independently.
To reset, display the desired trip
meter and press and hold the dis-
play change button.
The brightness of the instrument
panel lights can be adjusted.
1Brighter
2 Darker
■Instrument panel light bright-
ness adjustment
The brightness of the instrument
panel lights can be adjusted sepa-
rately for when the tail lights are on
and off.
■The clocks can be adjusted
on the audio system
screen.
Refer to “MULTIMEDIA
OWNER’S MANUAL”.
Changing the instrument
panel light brightness
Adjusting the clock
Page 91 of 468

912-1. Instrument cluster
2
Vehicle status information and indicators
can be used to record and display
different distances independently.
To reset, display the desired trip
meter and press and hold the dis-
play change button.
The brightness of the instrument
panel lights can be adjusted.
1Brighter
2 Darker
■Instrument panel light bright-
ness adjustment
The brightness of the instrument
panel lights can be adjusted sepa-
rately for when the tail lights are on
and off.
■The clocks can be adjusted
on the audio system
screen.
Refer to “MULTIMEDIA
OWNER’S MANUAL”.
■Display
Driving support system status
display area
Displays an image when the follow-
ing systems are operating and a
menu icon other than is
selected:
• LTA (Lane Tracing Assist)
• LDA (Lane Departure Alert)
• Dynamic radar cruise control
• RSA (Road Sign Assist) (if equipped) ( P.217)
Content display area
By selecting menu icons on the
multi-information di splay, a variety
of driving-related information can
be displayed. The multi-information
display can also be used to change
display settings and other vehicle
settings.
Warning or advice pop-up displays
are also displayed in certain situa-
tions.
■Menu icons
The menu icons will be dis-
played by pressing the or
Changing the instrument
panel light brightness
Adjusting the clock
Multi-infor mation dis-
play (4.2-inch display)
Display and menu icons
Page 92 of 468
922-1. Instrument cluster
meter control switch.
■Liquid crystal display
Small spots or light spots may
appear on the display. This phenom-
enon is characteristi c of liquid crys-
tal displays, and there is no problem
continuing to use the display.
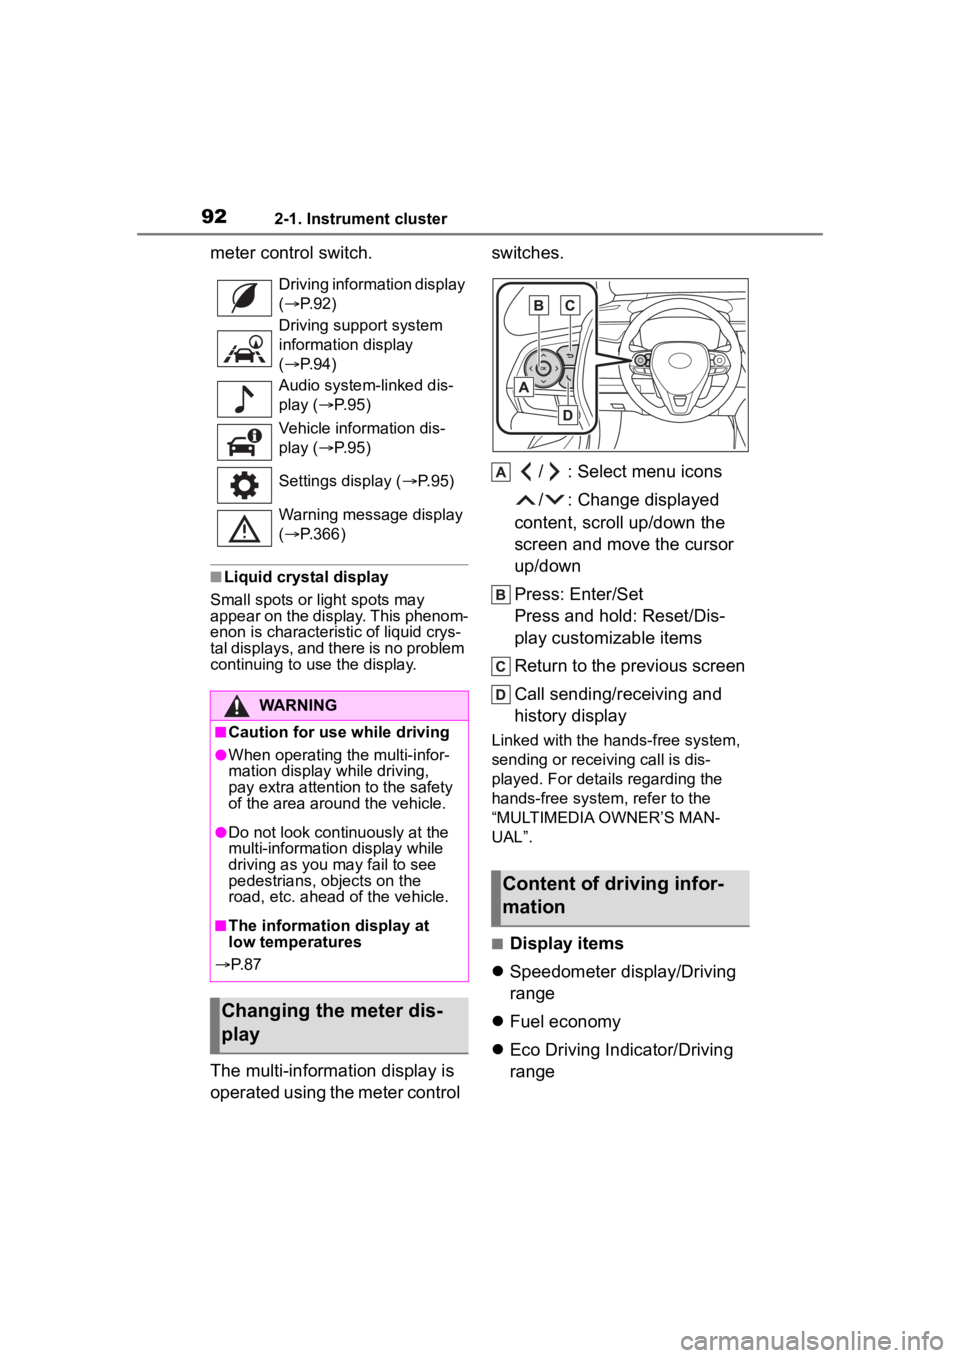
The multi-information display is
operated using the meter control switches.
/ : Select menu icons
/ : Change displayed
content, scroll up/down the
screen and move the cursor
up/down
Press: Enter/Set
Press and hold: Reset/Dis-
play customizable items
Return to the previous screen
Call sending/receiving and
history display
Linked with the hands-free system,
sending or receiving call is dis-
played. For details regarding the
hands-free system, refer to the
“MULTIMEDIA OWNER’S MAN-
UAL”.
■Display items
Speedometer display/Driving
range
Fuel economy
Eco Driving Indicator/Driving
range
Driving information display
( P. 9 2 )
Driving support system
information display
( P. 9 4 )
Audio system-linked dis-
play ( P. 9 5 )
Vehicle information dis-
play ( P. 9 5 )
Settings display ( P. 9 5 )
Warning message display
( P.366)
WARNING
■Caution for use while driving
●When operating the multi-infor-
mation display while driving,
pay extra attention to the safety
of the area aroun d the vehicle.
●Do not look continuously at the
multi-information display while
driving as you may fail to see
pedestrians, objects on the
road, etc. ahead o f the vehicle.
■The information display at
low temperatures
P. 8 7
Changing the meter dis-
play
Content of driving infor-
mation
Page 95 of 468
952-1. Instrument cluster
2
Vehicle status information and indicators
■Navigation system-linked
display (if equipped)
Select to display the following
navigation system-linked infor-
mation:
Route guidance to destination
Compass display (head-
ing-up display)
Select to enable selection of an
audio source or track on the
meter using the meter control
switches.
This menu icon can be set to be
displayed/not displayed in .
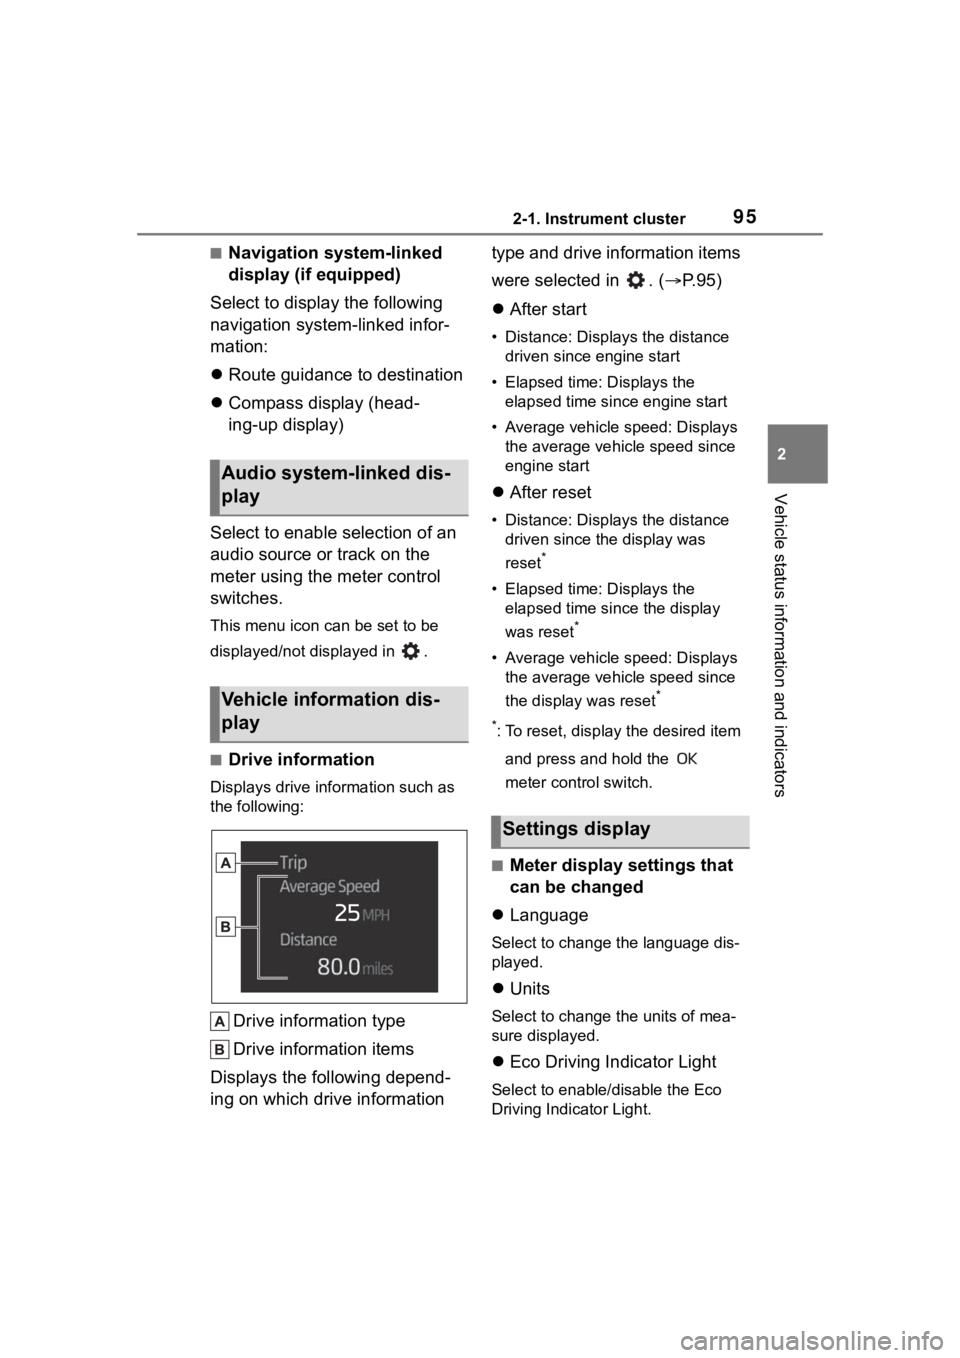
■Drive information
Displays drive information such as
the following:
Drive information type
Drive information items
Displays the following depend-
ing on which drive information type and drive information items
were selected in . (
P.95)
After start
• Distance: Displays the distance
driven since engine start
• Elapsed time: Displays the elapsed time since engine start
• Average vehicle speed: Displays the average vehicle speed since
engine start
After reset
• Distance: Displays the distance
driven since the display was
reset
*
• Elapsed time: Displays the elapsed time since the display
was reset
*
• Average vehicle speed: Displays the average vehicle speed since
the display was reset
*
*
: To reset, display the desired item and press and hold the
meter control switch.
■Meter display settings that
can be changed
Language
Select to change the language dis-
played.
Units
Select to change the units of mea-
sure displayed.
Eco Driving Indicator Light
Select to enable/disable the Eco
Driving Indi cator Light.
Audio system-linked dis-
play
Vehicle information dis-
play
Settings display
Page 96 of 468
962-1. Instrument cluster
• Fuel economy display
Select to change the average fuel
consumption display between after
start/after reset. (P. 9 3 )
Select to display/not display the
audio system linked display.
Select to change the displayed con-
tent of the following:
• Drive information type
Select to change the drive informa-
tion type display between after
start/after reset.
• Drive information items
Select to set the first and second
items of the drive information dis-
play to any of the following: aver-
age vehicle
speed/distance/elapsed time.
Pop-up display
Select to enable/disable pop-up
displays for each relevant system.
Multi-information display off
Select to turn the m ulti-information
display off.
To turn the multi-in formation display
on again, press any of the following
meter control switches
//// /.
Default setting
Select to reset the meter display
settings to the default setting.
■Vehicle functions and set-
tings that can be changed
P.412
■Suspension of the settings dis-
play
●Some settings cannot be changed
while driving. When changing set-
tings, park the vehicle in a safe
place.
●If a warning message is displayed,
operation of the settings display
will be suspended.
WARNING
■Cautions during setting up
the display
If the engine is running when
changing the dis play settings,
ensure that the vehicle is parked
in a place with adequate ventila-
tion. In a closed area such as a
garage, exhaust gases including
harmful carbon monoxide (CO)
may collect and enter the vehicle.
This may lead to death or a seri-
ous health hazard.
NOTICE
■During setting up the display
To prevent batte ry discharge,
ensure that the engine is running
while setting up the display fea-
tures.
Page 97 of 468
972-1. Instrument cluster
2
Vehicle status information and indicators
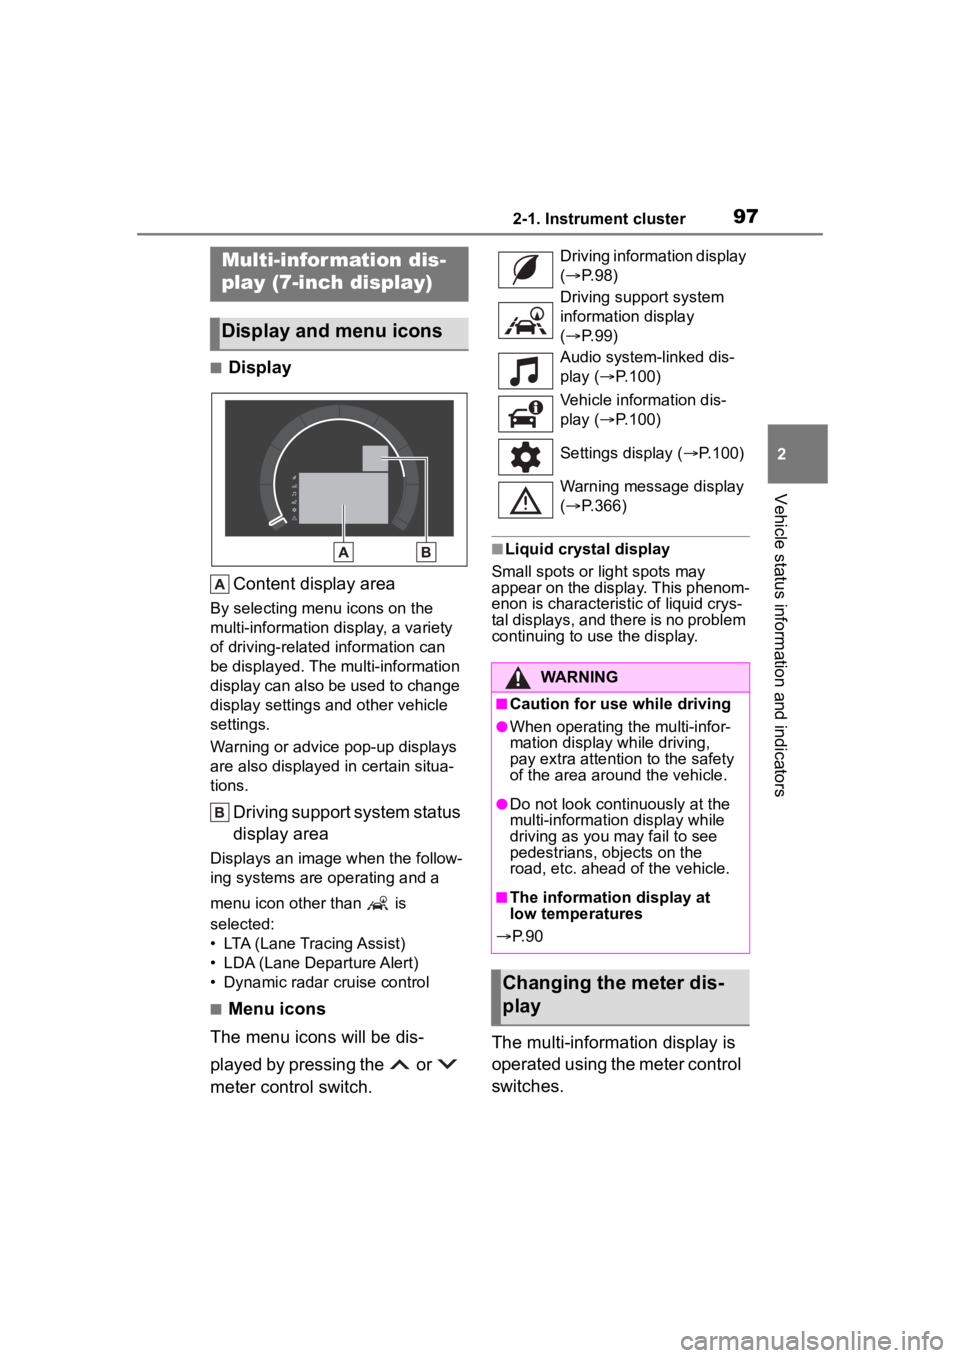
■DisplayContent display area
By selecting menu icons on the
multi-information display, a variety
of driving-related information can
be displayed. The multi-information
display can also be used to change
display settings and other vehicle
settings.
Warning or advice pop-up displays
are also displayed in certain situa-
tions.
Driving support system status
display area
Displays an image when the follow-
ing systems are operating and a
menu icon other than is
selected:
• LTA (Lane Tracing Assist)
• LDA (Lane Departure Alert)
• Dynamic radar cruise control
■Menu icons
The menu icons will be dis-
played by pressing the or
meter control switch.
■Liquid crystal display
Small spots or light spots may
appear on the display. This phenom-
enon is characteristic of liquid crys-
tal displays, and there is no problem
continuing to use the display.
The multi-information display is
operated using the meter control
switches.
Multi-infor mation dis-
play (7-inch display)
Display and menu icons
Driving information display
( P. 9 8 )
Driving support system
information display
( P. 9 9 )
Audio system-linked dis-
play ( P.100)
Vehicle information dis-
play ( P.100)
Settings display ( P.100)
Warning message display
( P.366)
WARNING
■Caution for use while driving
●When operating the multi-infor-
mation display while driving,
pay extra attention to the safety
of the area around the vehicle.
●Do not look continuously at the
multi-informatio n display while
driving as you may fail to see
pedestrians, objects on the
road, etc. ahead of the vehicle.
■The information display at
low temperatures
P. 9 0
Changing the meter dis-
play