2023 TOYOTA COROLLA ESP
[x] Cancel search: ESPPage 74 of 468

741-3. Emergency assistance
busy.
When the engine switch is
turned to ON, the red indicator
light comes on for 2 seconds
then turns off. Afterward, the
green indicator light comes on,
indicating that the service is
active.
The following indicator light pat-
terns indicate specific system
usage conditions:
Green indicator light on =
Active service
Green indicator light flashing
= Safety Connect call in pro-
cess
Red indicator light (except at
vehicle start-up) = System
malfunction (contact your Toy-
ota dealer)
No indicator light (off) =
Safety Connect service not
active
■Automatic Collision Notifi-
cation
In case of either airbag deploy-
ment or severe rear-end colli-
sion, the system is designed to
automatically call the response
center. The responding agent
receives the vehicle’s location
and attempts to speak with the vehicle occupants to assess the
level of emergency. If the occu-
pants are unable to communi-
cate, the agent automatically
treats the call as an emergency,
contacts the nearest emer-
gency services provider to
describe the situation, and
requests that assistance be sent
to the location.
■Stolen Vehicle Location
If your vehicle is stolen, Safety
Connect can work with local
authorities to assist them in
locating and recovering the
vehicle. After filing a police
report, call the Customer Experi-
ence Center at 1-800-331-4331
in the United States,
1-877-855-8377 in Puerto Rico
or 1- 888-869-6828 in Canada,
and follow the prompts for
Safety Connect to initiate this
service.
In addition to assisting law
enforcement with recovery of a
stolen vehicle, Safety-Con-
nect-equipped vehicle location
data may, under certain circum-
stances, be shared with third
parties to locate your vehicle.
Further information is available
at Toyota.com in the United
States, Toyotapr.com in Puerto
Rico and Toyota.ca in Canada.
■Emergency Assistance But-
ton (“SOS”)
In the event of an emergency on
the road, push the “SOS” button
Safety Connect LED light
Indicators
Safety Connect services
Page 75 of 468
751-3. Emergency assistance
1
For safety and security
to reach the Safety Connect
response center. The answer-
ing agent will determine your
vehicle’s location, assess the
emergency, and dispatch the
necessary assistance required.
If you accidentally press the “SOS”
button, tell the response-center
agent that you are not experiencing
an emergency.
■Enhanced Roadside Assis-
tance
Enhanced Roadside Assistance
adds GPS data to the already
included warranty-based Toyota
roadside service.
Subscribers can press the
“SOS” button to reach a Safety
Connect response-center agent,
who can help with a wide range
of needs, such as: towing, flat
tire, fuel delivery, etc. For a
description of the Enhanced
Roadside Assistance services
and their limitations, please see
the Safety Connect Terms and
Conditions, which are available
at Toyota.com in the United
States, Toyotapr.com in Puerto
Rico and Toyota.ca in Canada.
Important! Read this informa-
tion before using Safety Con-
nect.
■Exposure to radio fre-
quency signals
The Safety Connect system
installed in your vehicle is a
low-power radio transmitter and
receiver. It receives and also
sends out radio frequency (RF)
signals.
In August 1996, the Federal
Communications Commission
(FCC) adopted RF exposure
guidelines with safety levels for
mobile wireless phones. Those
guidelines are consistent with
the safety standards previously
set by the following U.S. and
international standards bodies.
ANSI (American National
Standards Institute) C95.1
[1992]
NCRP (National Council on
Radiation Protection and
Measurement) Report 86
[1986]
ICNIRP (International Com-
mission on Non-Ionizing Radi-
ation Protection) [1996]
Those standards were based on
comprehensive and periodic
evaluations of the relevant sci-
entific literature. Over 120 scien-
tists, engineers, and physicians
from universities, and govern-
ment health agencies and
industries reviewed the avail-
able body of research to
develop the ANSI Standard
(C95.1).
Safety information for
Safety Connect
Page 87 of 468
872-1. Instrument cluster
2
Vehicle status information and indicators
■Outside temperature display
●In the following situations, the cor-
rect outside tempe rature may not
be displayed, or the display may
take longer than normal to
change:
• When stopped, or driving at low
speeds (less than 12 mph [20
km/h])
• When the outside temperature
has changed suddenly (at the
entrance/exit of a garage, tunnel,
etc.)
●When “--” or “E” is displayed, the
system may be malfunctioning.
Take your vehicle to your Toyota
dealer.
■Liquid crystal display
P. 9 2
■Customization
The gauges and meters can be cus-
tomized in of the multi-informa-
tion display. ( P.412)■Changing the display
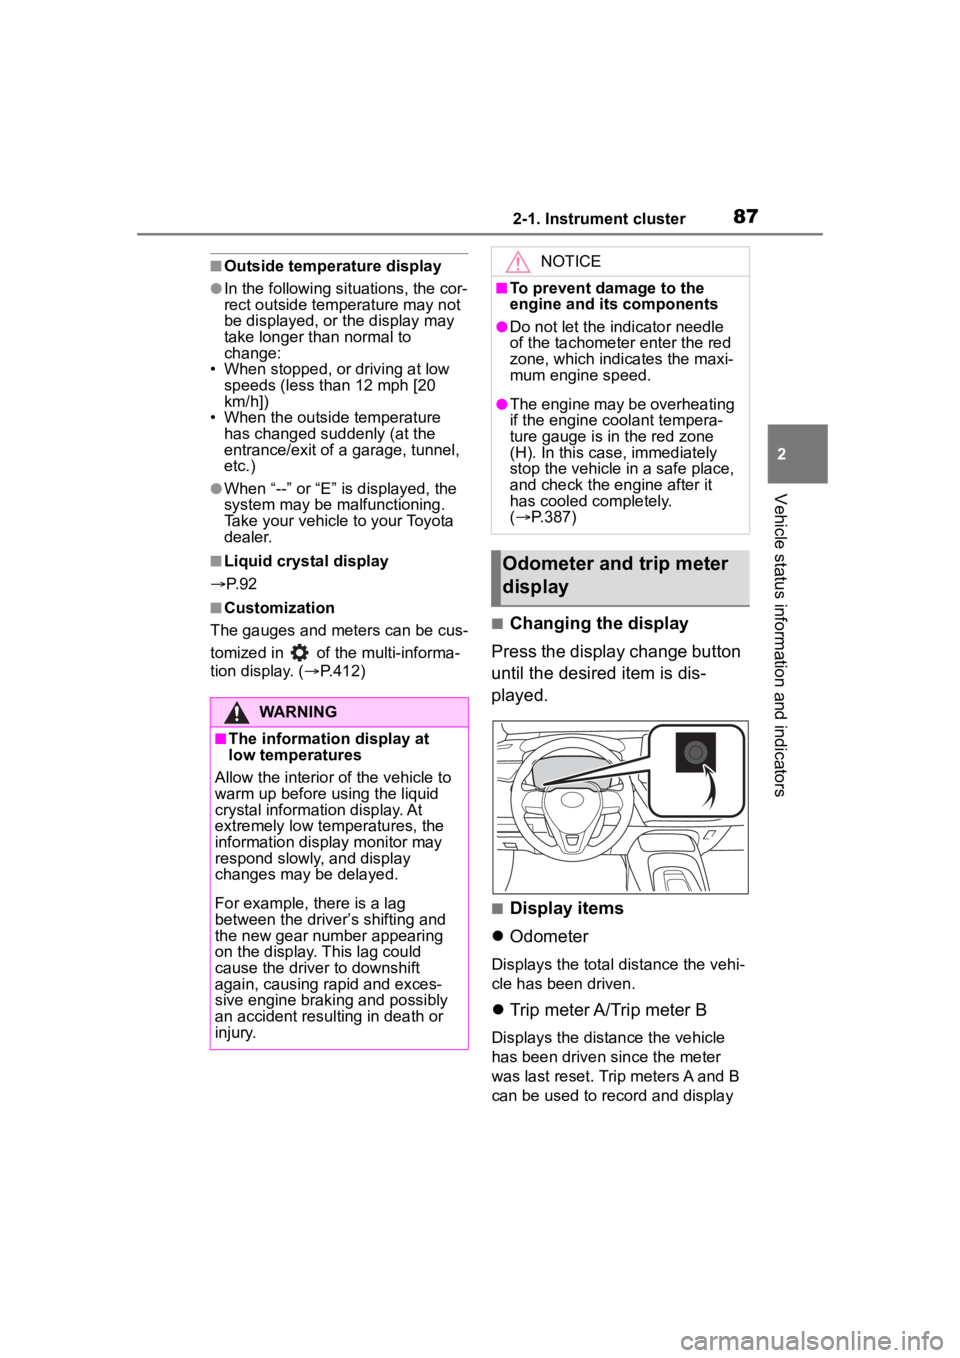
Press the display change button
until the desired item is dis-
played.
■Display items
Odometer
Displays the total distance the vehi-
cle has been driven.
Trip meter A/Trip meter B
Displays the distance the vehicle
has been driven since the meter
was last reset. Trip meters A and B
can be used to record and display
WARNING
■The information display at
low temperatures
Allow the interior of the vehicle to
warm up before u sing the liquid
crystal informat ion display. At
extremely low temperatures, the
information display monitor may
respond slowly, and display
changes may be delayed.
For example, there is a lag
between the driver’s shifting and
the new gear number appearing
on the display. This lag could
cause the driver to downshift
again, causing rapid and exces-
sive engine braking and possibly
an accident resulting in death or
injury.
NOTICE
■To prevent damage to the
engine and its components
●Do not let the indicator needle
of the tachometer enter the red
zone, which indicates the maxi-
mum engine speed.
●The engine may be overheating
if the engine coolant tempera-
ture gauge is in the red zone
(H). In this case, immediately
stop the vehicle in a safe place,
and check the engine after it
has cooled completely.
( P.387)
Odometer and trip meter
display
Page 90 of 468
902-1. Instrument cluster
Display change button (P.90)
■Outside temperature display
●In the following situations, the cor-
rect outside tempe rature may not
be displayed, or the display may
take longer than normal to
change:
• When stopped, or driving at low
speeds (less than 12 mph [20
km/h])
• When the outside temperature
has changed suddenly (at the
entrance/exit of a garage, tunnel,
etc.)
●When “--” or “E” is displayed, the
system may be malfunctioning.
Take your vehicle to your Toyota
dealer.
■Liquid crystal display
P. 9 7
■Customization
The gauges and meters can be cus-
tomized in of the multi-informa-
tion display. ( P.412)■Changing the display
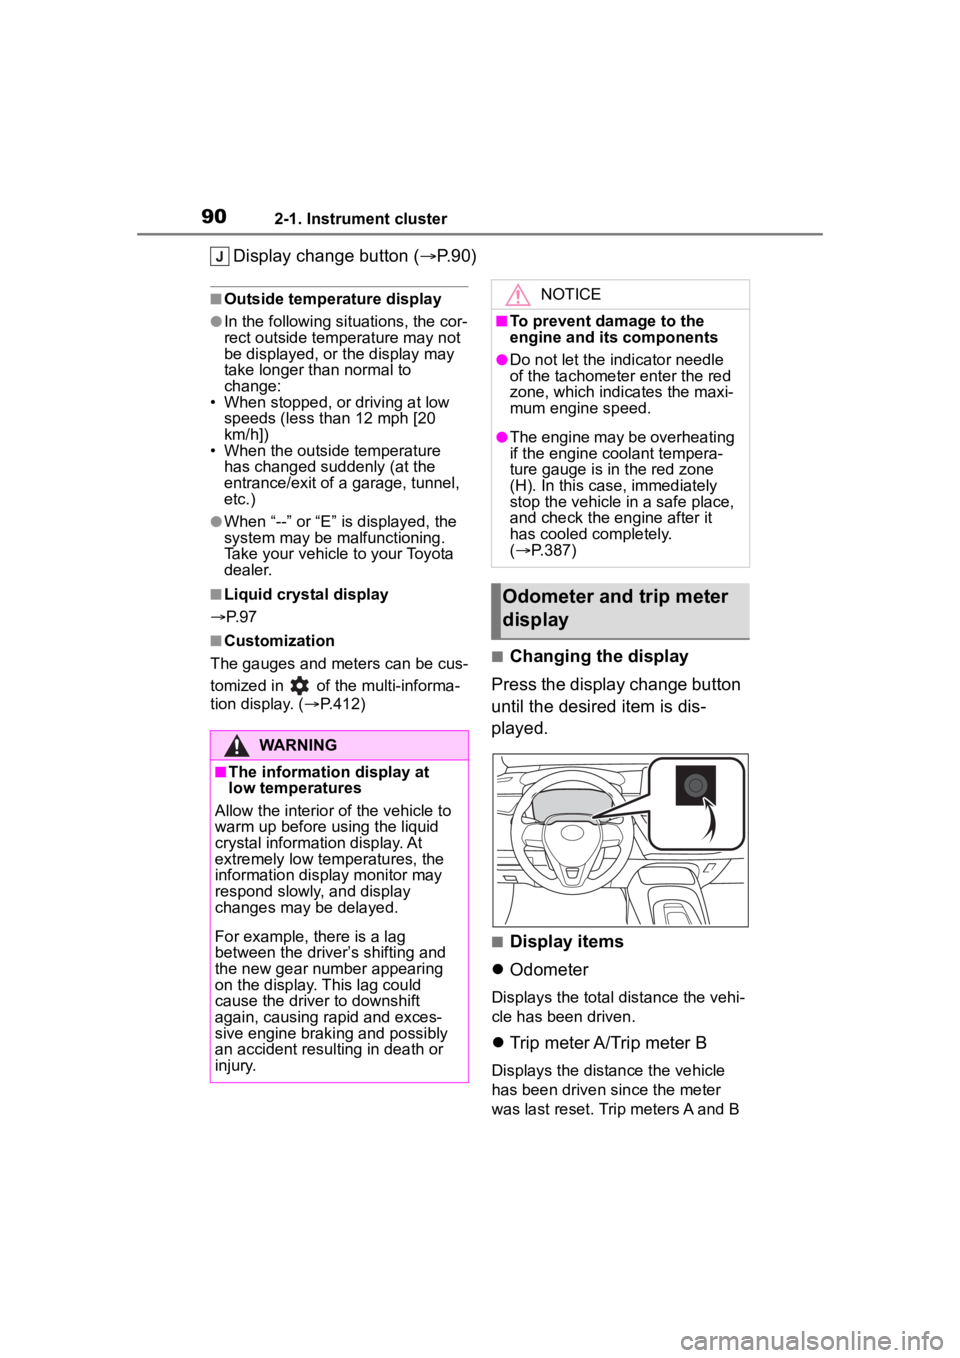
Press the display change button
until the desired item is dis-
played.
■Display items
Odometer
Displays the total distance the vehi-
cle has been driven.
Trip meter A/Trip meter B
Displays the distance the vehicle
has been driven since the meter
was last reset. Trip meters A and B
WARNING
■The information display at
low temperatures
Allow the interior of the vehicle to
warm up before u sing the liquid
crystal informat ion display. At
extremely low temperatures, the
information display monitor may
respond slowly, and display
changes may be delayed.
For example, there is a lag
between the driver’s shifting and
the new gear number appearing
on the display. This lag could
cause the driver to downshift
again, causing rapid and exces-
sive engine braking and possibly
an accident resulting in death or
injury.
NOTICE
■To prevent damage to the
engine and its components
●Do not let the indicator needle
of the tachometer enter the red
zone, which indicates the maxi-
mum engine speed.
●The engine may be overheating
if the engine coolant tempera-
ture gauge is in the red zone
(H). In this case, immediately
stop the vehicle in a safe place,
and check the engine after it
has cooled completely.
( P.387)
Odometer and trip meter
display
Page 114 of 468
1143-2. Opening, closing and locking the doors
■If the smart key system or the
wireless remote control does
not operate properly (if
equipped)
Vehicles without a smart key sys-
tem
Replace the key battery with a new
one if it is depleted. ( P.333)
Vehicles with a smart key system
Use the mechanical key to lock and
unlock the doors. ( P.381)
Replace the key battery with a new
one if it is depleted. ( P.333)
■If the battery is discharged
(vehicles with a smart key sys-
tem)
The doors cannot be locked and
unlocked using the smart key sys-
tem or wireless remote control. Lock
or unlock the doors using the
mechanical key. ( P.382)
■Rear seat reminder function
In order to remind you not to forget
luggage, etc. in the rear seat, when
the engine switch is turned off after
any of the following conditions are
met, a buzzer will sound and a mes-
sage will be displayed on the
multi-information di splay for approx-
imately 6 seconds.
●The engine is started within
approximately 10 minutes after
opening and closing a rear door.
●A rear door has been opened and
closed after the engine was
started.
However, if a rear door is opened
and then closed within approxi-
mately 2 seconds , the rear seat
reminder function may not operate.
The rear seat rem inder function
determines that luggage, etc. has
been placed in a rear seat based on
opening and closing of a rear door.
Therefore, depending on the situa-
tion, the rear seat reminder function
may not operate and you may still
forget luggage, etc. in the rear seat,
or it may operate unnecessarily.
■Customization
Some functions can be customized.
( P.412)
WARNING
■To prevent an accident
Observe the following precautions
while driving the vehicle.
Failure to do so may result in a
door opening and an occupant
being thrown out o f the vehicle,
resulting in death o r serious injury.
●Ensure that all doors are prop-
erly closed and locked.
●Do not pull the inside door han-
dle while driving.
Be especially careful of the front
doors, as the doors may be
opened even if the inside lock
buttons are in the locked posi-
tion.
●Set the rear door child-protector
locks when children are seated
in the rear seats.
■When opening or closing a
door
Check the surroundings of the
vehicle such as wh ether the vehi-
cle is on an incline, whether there
is enough space for a door to
open and whether a strong wind
is blowing. When opening or clos-
ing the door, hold the door handle
tightly to prepare for any unpre-
dictable movement.
Page 128 of 468
1283-3. Adjusting the seats
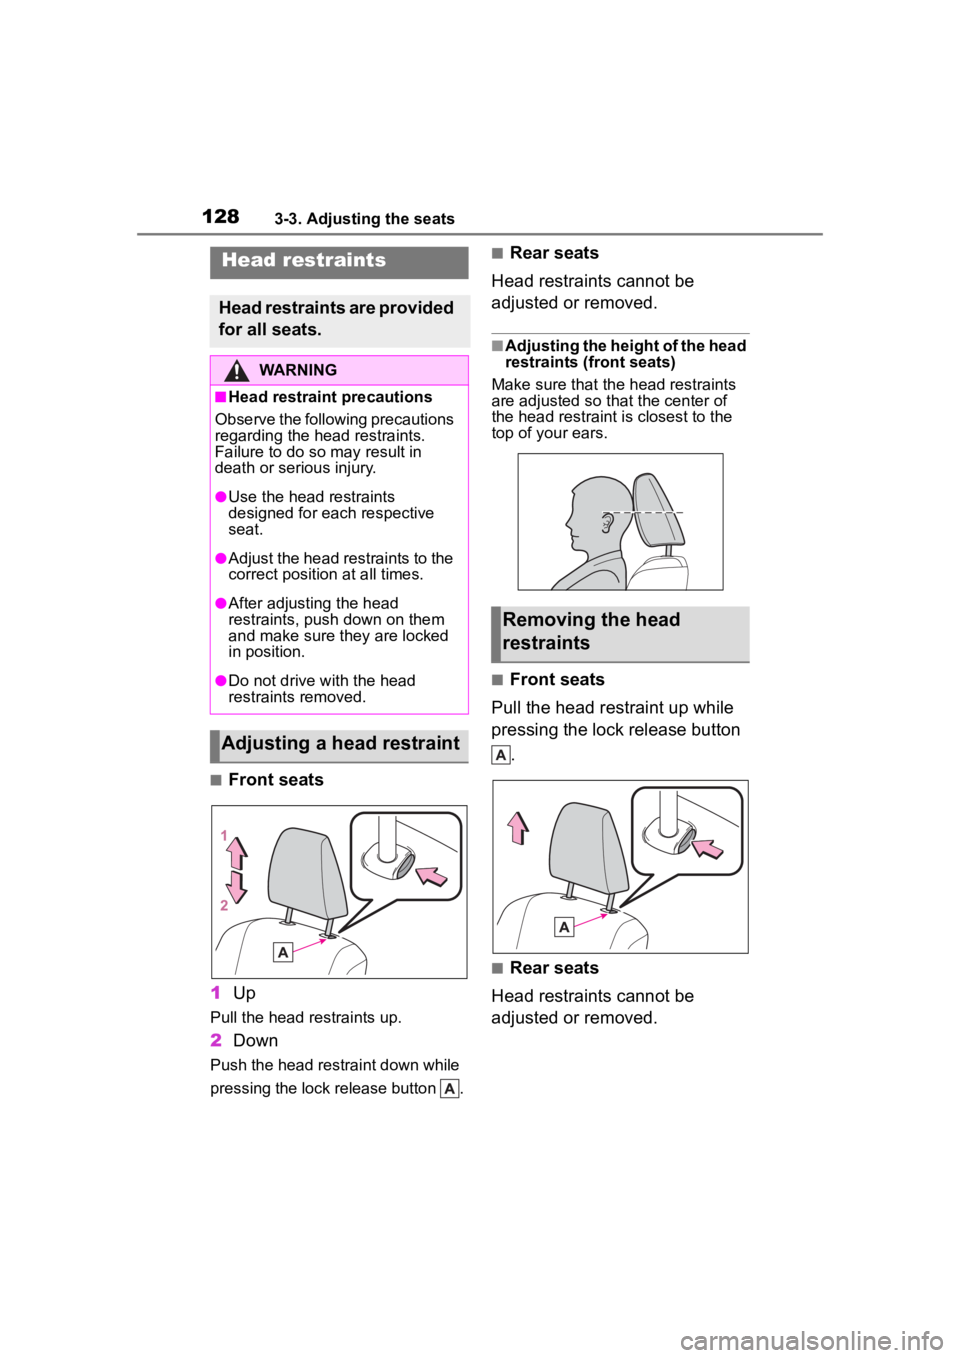
■Front seats
1 Up
Pull the head restraints up.
2Down
Push the head restraint down while
pressing the lock release button .
■Rear seats
Head restraints cannot be
adjusted or removed.
■Adjusting the height of the head
restraints (front seats)
Make sure that the head restraints
are adjusted so that the center of
the head restraint i s closest to the
top of your ears.
■Front seats
Pull the head restraint up while
pressing the lock release button .
■Rear seats
Head restraints cannot be
adjusted or removed.
Head restraints
Head restraints are provided
for all seats.
WARNING
■Head restraint precautions
Observe the following precautions
regarding the head restraints.
Failure to do so m ay result in
death or serious injury.
●Use the head restraints
designed for each respective
seat.
●Adjust the head restraints to the
correct position at all times.
●After adjusting the head
restraints, push down on them
and make sure they are locked
in position.
●Do not drive with the head
restraints removed.
Adjusting a head restraint
Removing the head
restraints
Page 135 of 468
1353-5. Opening and closing the windows
3
Before driving
pushing the switch in the
one-touch opening direction, and
hold it there for approximately 4
seconds or more.
6 Pull and hold the power window
switch in the one-touch closing
direction again. After the door
window is completely closed,
continue holding the switch for a
further 1 second or more.
If you release the switch while the
window is moving, start again from
the beginning.
If the window reverses and cannot
be fully closed or opened, have the
vehicle inspected by your Toyota
dealer.
■Door lock linked window opera-
tion
●Vehicles without a smart key sys-
tem: The power windows can be
opened and closed using the key.
*
( P.112)
Vehicles with a smart key system:
The power windows can be
opened and closed using the
mechanical key.
* ( P.382)
●The power windows can be
opened using the wireless remote
control.
* (with a wireless remote
control function) ( P. 1 1 1 )
*: These settings must be custom-
ized at your Toyota dealer.
■Customization
Some functions can be customized.
( P.412)
WARNING
Observe the following precau-
tions. Failure to do so may result
in death or serious injury.
■Closing the windows
●The driver is responsible for all
the power window operations,
including the operation for the
passengers. In order to prevent
accidental operation, especially
by a child, do not let a child
operate the power windows. It is
possible for children and other
passengers to have body parts
caught in the power window.
Also, when ridin g with a child, it
is recommended to use the win-
dow lock switch. (
P.136)
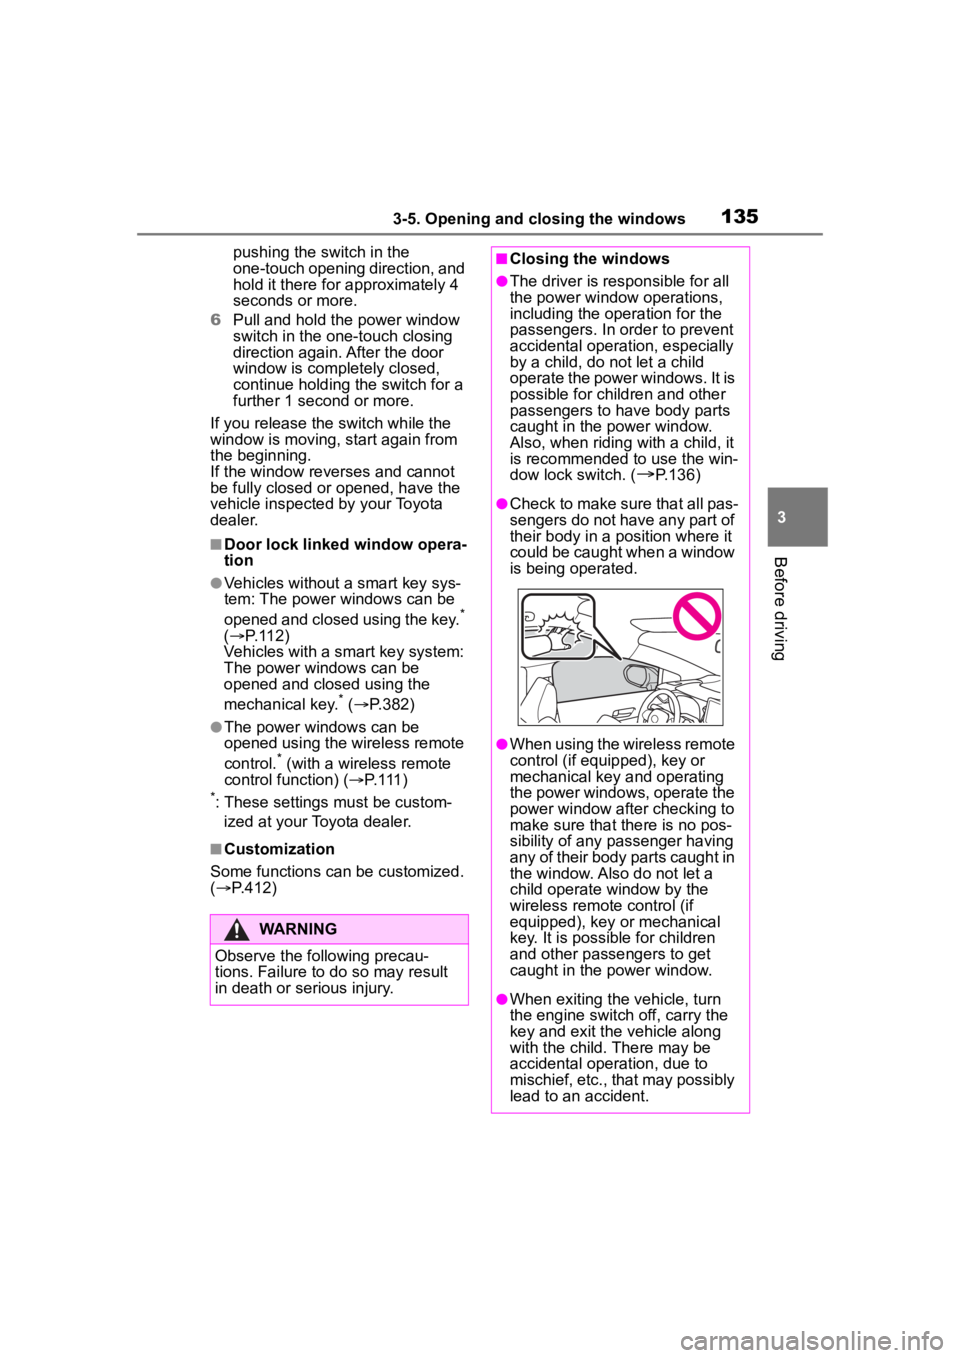
●Check to make sure that all pas-
sengers do not have any part of
their body in a pos ition where it
could be caught when a window
is being operated.
●When using the wireless remote
control (if equipped), key or
mechanical key and operating
the power windows, operate the
power window after checking to
make sure that there is no pos-
sibility of any passenger having
any of their body parts caught in
the window. Also do not let a
child operate window by the
wireless remote control (if
equipped), key or mechanical
key. It is possib le for children
and other passengers to get
caught in the power window.
●When exiting the vehicle, turn
the engine switch off, carry the
key and exit the vehicle along
with the child. There may be
accidental operation, due to
mischief, etc., that may possibly
lead to an accident.
Page 138 of 468
1383-5. Opening and closing the windows
●If the moon roof closes but then
re-opens slightly
1 Stop the vehicle.
2 Press and hold the “CLOSE”
switch.
*1
The moon roof will close, reopen
and pause for approximately 10 sec-
onds.
*2 Then it will close again, tilt
up and pause for approximately 1
second. Finally, it will tilt down, open
and close.
3 Check to make sure that the
moon roof is completely closed
and then release the switch.
●If the moon roof tilts down but then
tilts back up
1 Stop the vehicle.
2 Press and hold the “UP” switch
*1
until the moon roof moves into
the tilt up position and stops.
3 Release the “UP” switch once
and then press and hold the “UP”
switch again.
*1
The moon roof will pause for
approximately 10 se conds in the tilt
up position.
*2 Then it will adjust
slightly and pause for approximately
1 second. Finally, it will tilt down,
open and close.
4 Check to make sure that the
moon roof is completely closed
and then release the switch.
*1: If the switch is released at the
incorrect time, t he procedure will
have to be performed again from
the beginning.
*2: If the switch is re leased after the
above mentioned 10 second
pause, automatic operation will
be disabled. In that case, press
and hold the “CLOSE” or “UP”
switch, and the mo on roof will tilt
up and pause for approximately 1
second. Then it will tilt down,
open and close. Check to make
sure that the moon roof is com- pletely closed and then release
the switch.
If the moon roof does not fully close
even after perfo rming the above
procedure correctly, have the vehi-
cle inspected by your Toyota dealer.
■Customization
Some functions can be customized.
( P.412)
WARNING
Observe the following precau-
tions.
Failure to do so may cause death
or serious injury.
■Opening the moon roof
●Do not allow any passengers to
put their hands or heads outside
the vehicle while it is moving.
●Do not sit on top of the moon
roof.
■Opening and closing the
moon roof
●The driver is responsible for
moon roof opening and closing
operations.
In order to prevent accidental
operation, especially by a child,
do not let a child operate the
moon roof. It is possible for chil-
dren and other passengers to
have body parts caught in the
moon roof.