2023 TOYOTA 86 battery
[x] Cancel search: batteryPage 149 of 449
1494-2. Driving procedures
4
Driving
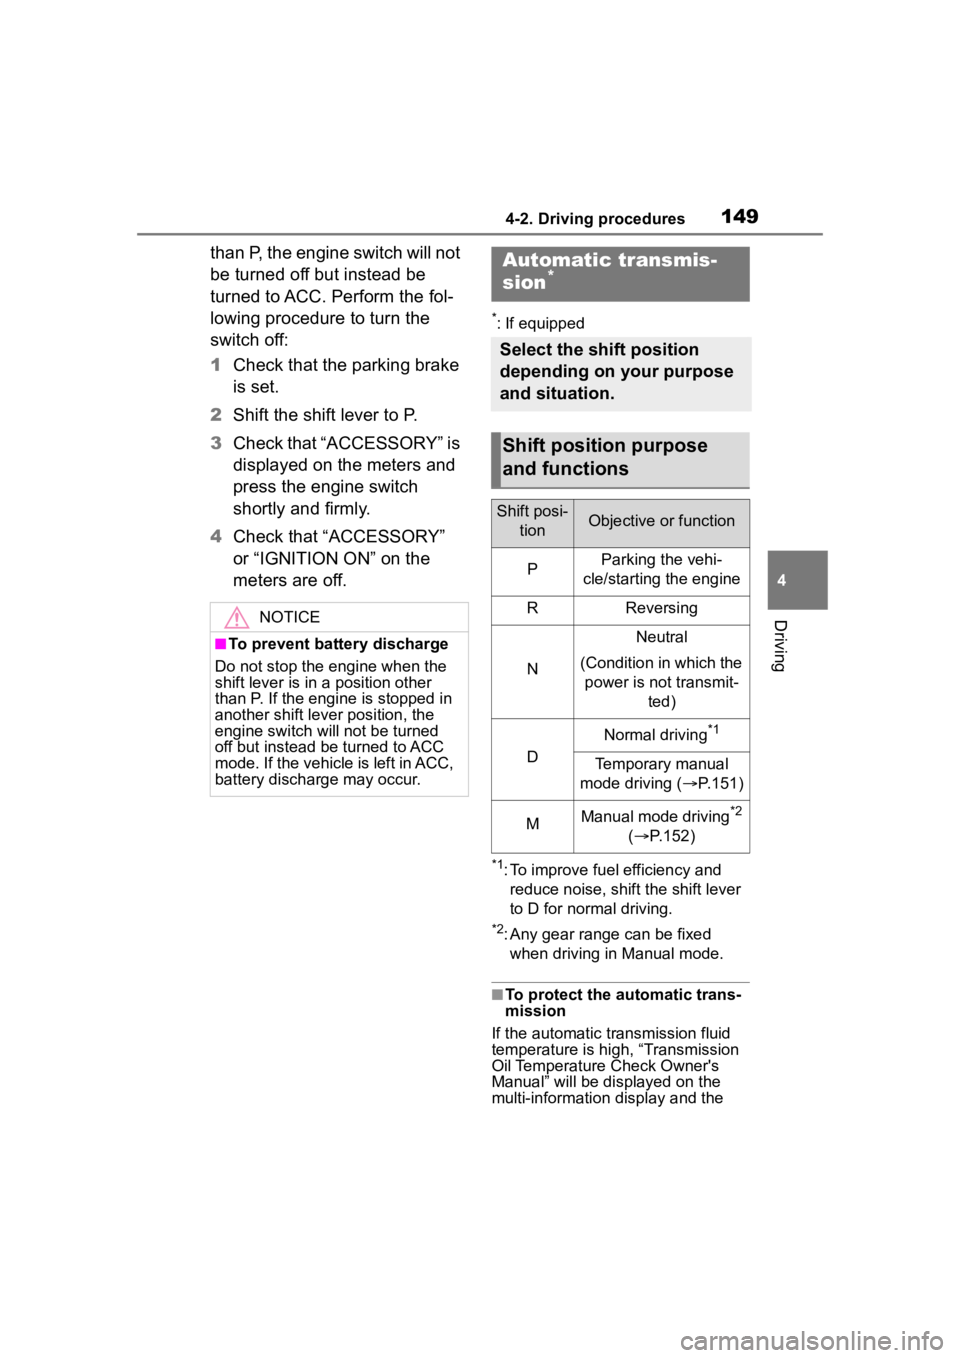
than P, the engine switch will not
be turned off but instead be
turned to ACC. Perform the fol-
lowing procedure to turn the
switch off:
1Check that the parking brake
is set.
2 Shift the shift lever to P.
3 Check that “ACCESSORY” is
displayed on the meters and
press the engine switch
shortly and firmly.
4 Check that “ACCESSORY”
or “IGNITION ON” on the
meters are off.
*: If equipped
*1: To improve fuel efficiency and
reduce noise, shift the shift lever
to D for normal driving.
*2: Any gear range can be fixed when driving in Manual mode.
■To protect the a utomatic trans-
mission
If the automatic transmission fluid
temperature is high, “Transmission
Oil Temperature Check Owner's
Manual” will be displayed on the
multi-information display and the
NOTICE
■To prevent battery discharge
Do not stop the engine when the
shift lever is in a position other
than P. If the engin e is stopped in
another shift lever position, the
engine switch will not be turned
off but instead be turned to ACC
mode. If the vehicle is left in ACC,
battery discharge may occur.
Automatic transmis-
sion*
Select the shift position
depending on your purpose
and situation.
Shift position purpose
and functions
Shift posi-
tionObjective or function
PParking the vehi-
cle/starting the engine
RReversing
N
Neutral
(Condition in which the power is not transmit- ted)
D
Normal driving*1
Temporary manual
mode driving ( P.151)
MManual mode driving*2
( P.152)
Page 150 of 449
1504-2. Driving procedures
vehicle will go into transmission pro-
tection mode automatically. Have
the vehicle inspected by your Toyota
dealer.
■When driving with Adaptive
Cruise Control or Conventional
Cruise Control activated
Downshifting can be performed
even when using Adaptive Cruise
Control or Conventional Cruise Con-
trol. After downshifting, the set
speed continues. ( P.151, 152)
■Automatic gear selection when
the vehicle is stopped
When the vehicle is idling at high
rpm in order to warm up, and the
vehicle is on a slippery road, the
transmission may automatically shift
to 2nd gear for stopping and starting
off.
■AI-SHIFT
●The AI-SHIFT automatically
selects the suitable gear accord-
ing to driver performance and driv-
ing conditions. The AI-SHIFT
automatically operates when the
shift lever is in D. (Shifting the shift
lever to the M position cancels the
function.)
●G AI-SHIFT automat ically selects
a suitable gear for sporty driving
according to dri ver’s input and
driving conditions. G AI-SHIFT
operates automatically when the
shift lever is in D and sport mode
is selected for t he driving mode.
(Selecting normal mode with the
driving mode select switch or shift-
ing the shift lever to the M position
cancels this function.)
■After recharging/reconnecting
the battery
P. 3 7 3
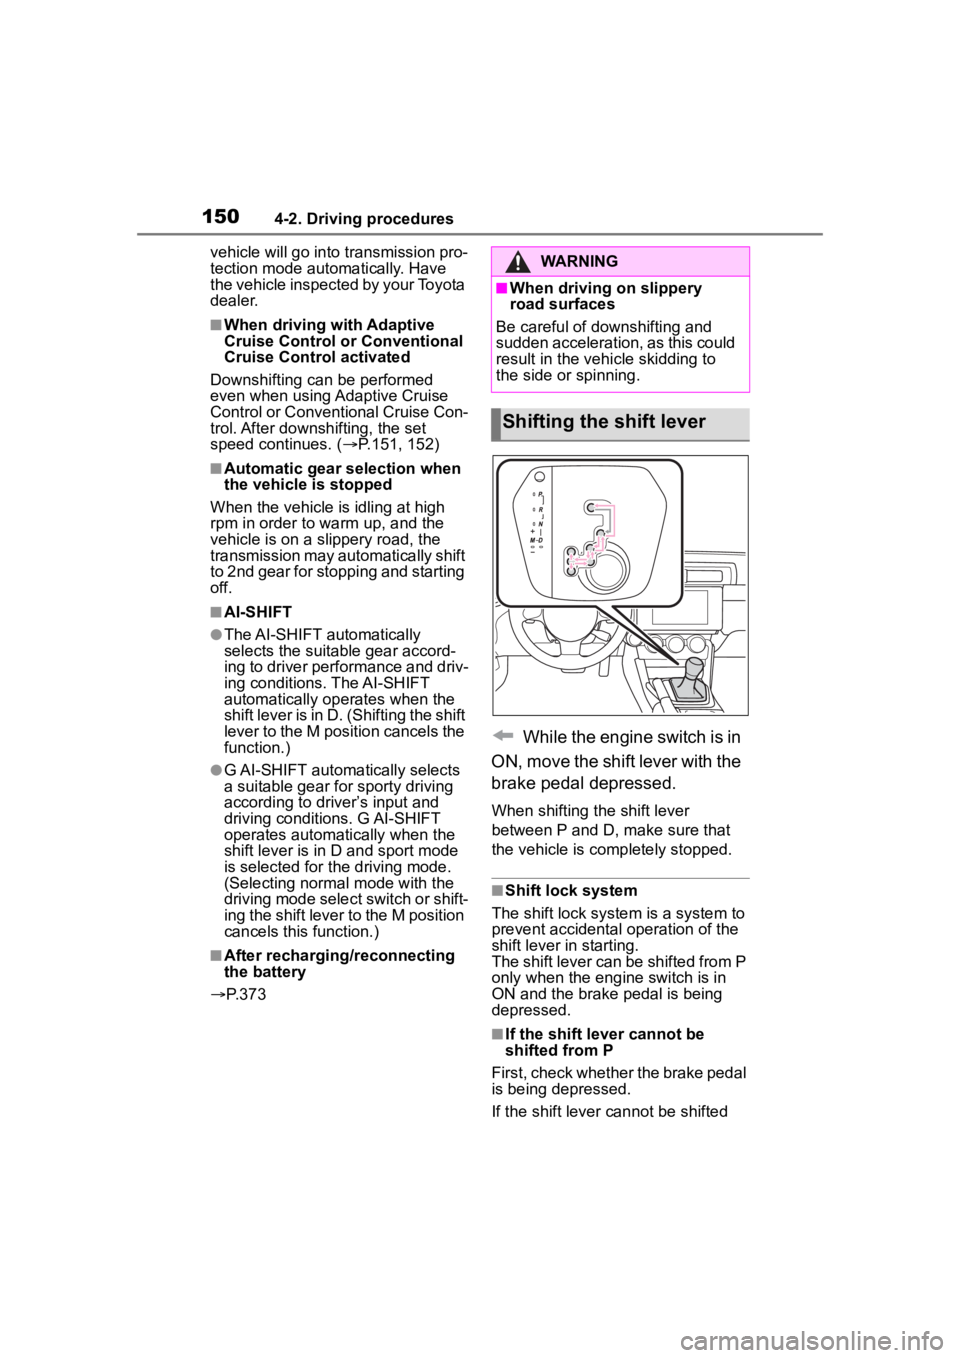
While the engine switch is in
ON, move the shift lever with the
brake pedal depressed.
When shifting the shift lever
between P and D, make sure that
the vehicle is completely stopped.
■Shift lock system
The shift lock system is a system to
prevent accidental operation of the
shift lever in starting.
The shift lever can be shifted from P
only when the engi ne switch is in
ON and the brake pedal is being
depressed.
■If the shift lever cannot be
shifted from P
First, check whether the brake pedal
is being depressed.
If the shift lever cannot be shifted
WARNING
■When driving on slippery
road surfaces
Be careful of downshifting and
sudden acceleration, as this could
result in the vehicle skidding to
the side or spinning.
Shifting the shift lever
Page 159 of 449

1594-3. Operating the lights and wipers
4
Driving
parking lights and illuminate
brighter than the parking lights.
●To make your vehicle more visible
to other drivers during daytime
driving, the daytime running lights
turn on automatically when all of
the following conditions are met.
(The daytime running lights are
not designed for use at night.)
• The engine is running
• The shift lever is shifted out of P (vehicles with an automatic trans-
mission)
• The parking brake is released
• The headlight s witch is in the
(U.S.A. only), or
* position
*: When the surroundings are bright
The daytime running lights remain
on after they illumi nate, even if the
parking brake is set again.
●When the turn signal indicators
are flashing, the daytime running
light on the side that the turn sig-
nals are flashing will turn off.
●When the emergency flashers are
flashing, both daytime running
lights will turn off.
●Compared to turning on the head-
lights, the daytime running light
system offers gr eater durability
and consumes less electricity, so
it can help improve fuel economy.
■Headlight control sensor
In the following si tuations, the auto-
matic light control system may not
operate correctly.
●When an object is placed on the
sensor or something which blocks
the sensor is affixed to the wind-
shield
●When the surrounding area is lit
by light other than natural light
■Automatic light off system
When the light switch is in : The
headlights and tail lights turn off 30
seconds after a door is opened and
closed if the engine switch is turned
off. (The lights turn off immediately if on the key is pressed twice after
both side doors are closed.)
To turn the lights on again, turn the
engine switch to ON, or turn the light
switch off once and then back to
or (except for Canada).
■Light reminder buzzer
A buzzer sounds when the engine
switch is turned off and the driver’s
door is opened wh ile the lights are
turned on.
■Automatic headlight leveling
system
The level of the headlights is auto-
matically adjusted according to the
number of passengers and the load-
ing condition of the vehicle to
ensure that the headlights do not
interfere with o ther road users.
■Windshield wiper linked head-
light illumination
When driving during daytime with
the headlight switch turned to , if
the windshield wipers are used, the
headlights will turn o n automatically
after several se conds to help
enhance the visibility of your vehi-
cle.
■Battery-saving function
In order to prevent the battery of the
vehicle from discharging, if the
headlights and/or tail lights are on
Page 160 of 449
1604-3. Operating the lights and wipers
when the engine switch is turned off
the battery saving function will oper-
ate and automatically turn off all the
lights after approximately 20 min-
utes.
When any of the fo llowing are per-
formed, the battery -saving function
will be disabled.
●When the engine switch is turned
to ACC or ON
●When the headlight switch is in
the position (U.S.A. only)
●When a door is opened or closed
■Welcome light illumination con-
trol
The headlights and t ail lights auto-
matically turn on at night when the
doors are unlocked using the wire-
less remote control if the light switch
is in the position. The headlights
and tail lights will turn off automati-
cally after approximately 30 sec-
onds.
■Customization
Some functions can be customized.
( P.400)
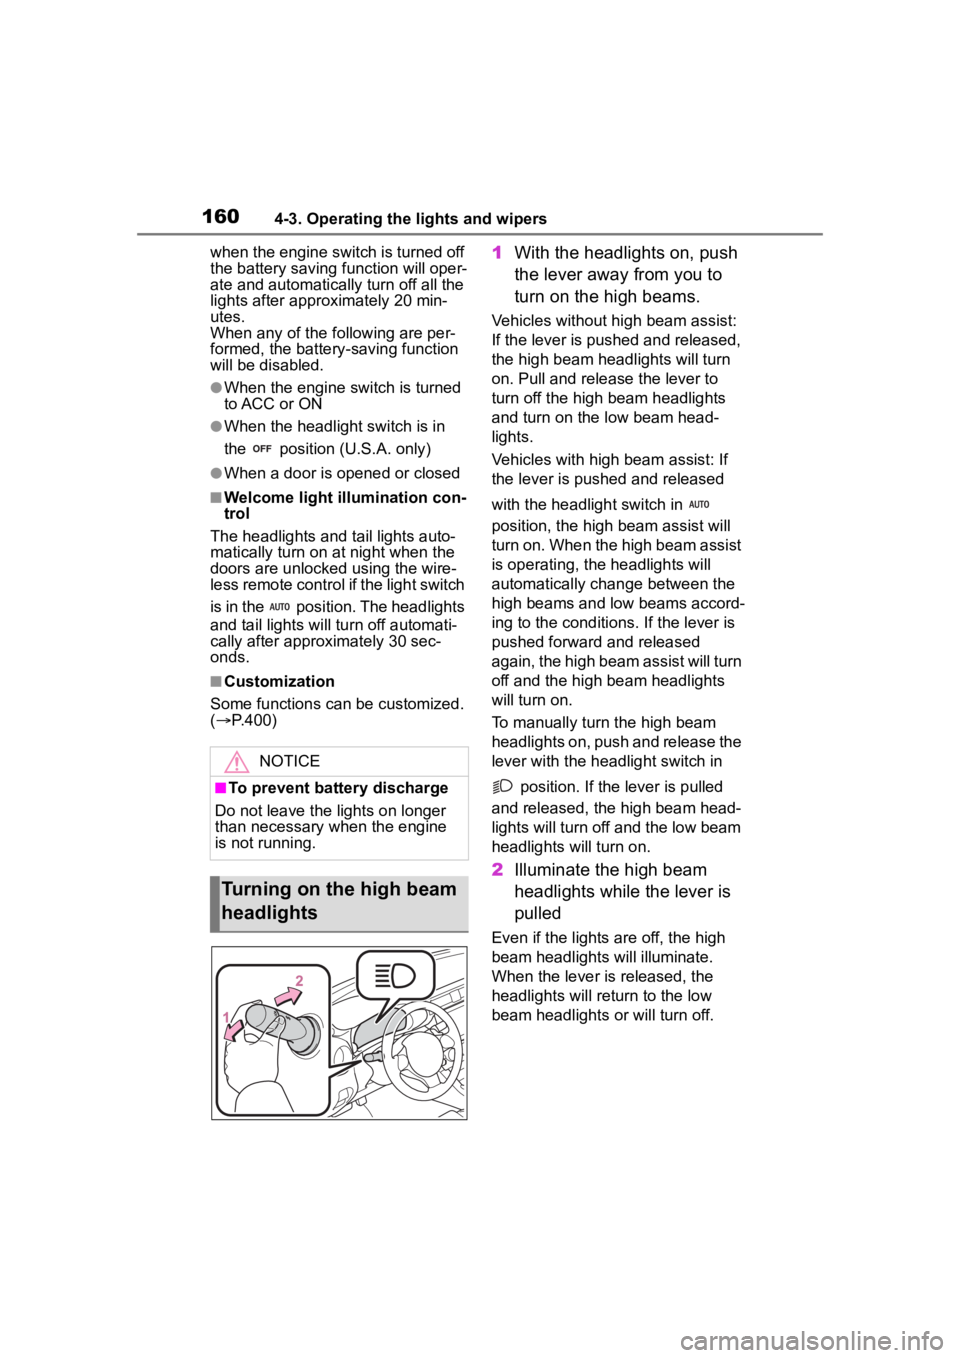
1 With the headlights on, push
the lever away from you to
turn on the high beams.
Vehicles without high beam assist:
If the lever is pushed and released,
the high beam he adlights will turn
on. Pull and releas e the lever to
turn off the high beam headlights
and turn on the low beam head-
lights.
Vehicles with high beam assist: If
the lever is pushed and released
with the headlight switch in
position, the high beam assist will
turn on. When the high beam assist
is operating, the headlights will
automatically change between the
high beams and low beams accord-
ing to the conditio ns. If the lever is
pushed forward and released
again, the high beam assist will turn
off and the high beam headlights
will turn on.
To manually turn the high beam
headlights on, push and release the
lever with the headlight switch in
position. If the lever is pulled
and released, the high beam head-
lights will turn off and the low beam
headlights will turn on.
2 Illuminate the high beam
headlights while the lever is
pulled
Even if the lights are off, the high
beam headlights will illuminate.
When the lever is released, the
headlights will retu rn to the low
beam headlights or will turn off.
NOTICE
■To prevent battery discharge
Do not leave the lights on longer
than necessary when the engine
is not running.
Turning on the high beam
headlights
Page 235 of 449

2354-6. Using other driving systems
4
Driving
The vehicle speed is below 6
mph (10 km/h) even when the
BSD/RCTA OFF indicator
does not appear (except
when reversing).
●In the following cases, the
BSD/RCTA will stop operating and
the BSD/RCTA warning light will
appear.
• When a malfunction occurs in the system, including the BSD/RCTA
approach indicator
●If the BSD/RCTA warning light
appears, exercise proper caution.
( P.238)
●In the following cases, the
BSD/RCTA will temporarily stop
operating (or may stop operating)
and the BSD/RCTA OFF indicator
will appear.
• When the radar sensor becomes significantly misaligned (If the ori-
entation of the r adar sensor is
shifted for any reason, readjust-
ment is required. Have the sensor
adjusted at a Toyota dealer.)
• When a large amount of snow or ice sticks to the rear bumper sur-
face around the radar sensors
• When the vehicle is driven on a snow-covered road or in an envi-
ronment in which there are no
objects around (such as in a des-
ert) for a prolonged period of time
• When the temperature around the
radar sensors increases exces-
sively due to long driving on uphill
grades in the summer, etc.
• When the temperature around the radar sensors becomes extremely
low
• When the vehicle battery voltage lowers
• When the vehicle voltage exceeds
the battery voltage rating
●The BSD/RCTA will resume oper-
ation once these conditions are
corrected, and the BSD/RCTA
OFF indicator will disappear. How-
ever, if the BSD/RCTA OFF indi- cator appears for a prolonged
period of time, have the system
inspected at a Toyota dealer as
soon as possible.
●The detectability o
f the radar sen-
sors is restricted. The BSD/RCTA
detection may be impaired and
the system may not operate prop-
erly under the following condi-
tions.
• When the rear bumper around the
radar sensors is distorted
• When ice, snow or mud adheres to the rear bumper surface around
the radar sensors
• When stickers, etc . are affixed on
the areas of the radar sensors on
the rear bumper
• During adverse weather condi- tions such as ra in, snow or fog
• When driving on wet roads such as snow-covered roads and
through puddles
●The radar sensors may not detect
or may have difficulty detecting
the following vehicles and objects.
• Small motorcycles, bicycles, pedestrians, stationary objects on
the road or ro ad side, etc.
• Vehicles with body shapes that the radar may not reflect (vehicles
with lower body height such as a
trailer with no cargo and sports
cars)
• Vehicles that are not approaching
your vehicle even though they are
in the detection area (either on a
neighboring lane to the rear or
beside your vehicle when revers-
ing) (The system determines the
presence of approaching vehicles
based on data detected by the
radar sensors.)
• Vehicles traveling at significantly
different speeds
• Vehicles driving in parallel at almost the same speed as your
vehicle for a prolonged time
• Oncoming vehicles
• Vehicles in a lane beyond the neighboring lane
• Vehicles travelling at a signifi- cantly lower speed that you are
Page 251 of 449
2514-6. Using other driving systems
4
Driving
When the shift lever is set to R,
the rear view camera automati-
cally displays the rear view
image from the vehicle. When
the lever is set to other posi-
tions, the image before setting
to R is displayed.
1Set the engine switch to ON.
2 Set the shift lever to R.
●The image of the rear view cam-
era is horizontally reversed as is
the case with the vehicle inside mirror or the outside mirror.
●When “Rear Camera Delay Con-
trol” is on, the r
ear view image
from the r ear view camera will be
displayed on the multimedia sys-
tem screen for a certain amount of
time after the shift lever is shifted
from R to another position. When
any of the following conditions are
met, the rear view image will be
canceled:
• The shift lever is shifted to P (vehi- cles with an automatic transmis-
sion)
• The vehicle speed becomes approximately 5 mph (8 km/h) or
more
• The parking brake is engaged
• 9 seconds have elapsed since the shift lever was shifted from R to
another position
To turn the function on and off, refer
to “MULTIMEDIA OWNER’S MAN-
UAL”.
●It may be difficult to see the image
of the rear view camera in the fol-
lowing cases. This is not a mal-
function of the camera.
• The vehicle is in a dark place (at night, in a tunnel, etc.).
• The vehicle is in an extremely hot or cold place.
• An object (such as raindrops,
snow, dirt, etc.) that disturbs the
view of the rear view camera
sticks to the lens of the camera.
• Strong light is shining directly on the camera lens ( occasionally,
there are vertical lines on the
screen).
The area from the rear end of
the bumper can be viewed.
Areas at both ends of the
bumper and areas just under the
bumper cannot be viewed.
NOTICE
●Since the camera is a precision
device, do not subject it to
strong impacts. Otherwise, mal-
function, fire or electric shock
may occur.
●If mud or snow sticks to or is fro-
zen on the camera, you must be
very careful when removing it.
Otherwise, damage to the cam-
era may cause a fire or electric
shock. Pour water or lukewarm
water over the camera to
remove mud and ice, and wipe
it with a soft, dry cloth.
●Do not put a flame close to the
camera or wirin g. Otherwise,
damage or fire may occur.
●When replacing the fuse, be
sure to use a fuse with the spec-
ified rating. Use of a fuse with a
different rating may result in a
malfunction.
●If you use the rear view camera
for a long time while the engine
is not operated, the battery may
become completely discharged.
How to use the rear view
camera
Viewing range on the
screen
Page 266 of 449
2664-7. Driving tips
4-7.Driving tips
Use fluids that are appropriate
to the prevailing outside tem-
peratures.
• Engine oil
• Engine coolant
• Washer fluid
Have a service technician
inspect the condition of the
battery.
Have the vehicle fitted with
four snow tires.
Make sure to install 4 tires that are
of the specified size, and that all 4
tires are the sa me size, same
maker, same brand and tread pat-
tern.
Perform the following according
to the driving conditions:
Do not try to forcibly open a
window or move a wiper that
is frozen. Pour warm water
over the frozen area to melt
the ice. Wipe away the water
immediately to prevent it from
freezing.
To ensure proper operation of
the climate control system
fan, remove any snow that
has accumulated on the air
inlet vents in front of the wind-
shield.
Check for and remove any
excess ice or snow that may
have accumulated on the
exterior lights, vehicle’s roof,
Winter driving tips
Carry out the necessary
preparations and inspec-
tions before driving the
vehicle in winter. Always
drive the vehicle in a man-
ner appropriate to the pre-
vailing weather conditions.
Preparation for winter
WARNING
■Driving with snow tires
Observe the following precautions
to reduce the risk of accidents.
Failure to do so m ay result in a
loss of vehicle control and cause
death or serious injury.
●Use tires of the specified size,
and that are the same size,
same maker, same brand and
tread pattern.
●Maintain the recommended
level of air pressure.
●Do not drive in excess of 75
mph (120 km/h), regardless of
the type of snow tires being
used.
●Use snow tires on all, not just
some wheels.
NOTICE
■Repairing or replacing snow
tires
Request repairs or replacement of
snow tires from Toyota dealers or
legitimate tire retailers.
This is because the removal and
attachment of snow tires affects
the operation of the tire pressure
warning valves and transmitters.
Before driving the vehicle
Page 274 of 449
2745-1. Using the air conditioning system
operating light remains illuminated.
The rear window defogger will con-
tinue to operate in this cycle until it
is turned off.
■Customization
Some functions can be customized.
( P.400)
1 Press the automatic mode
switch.
2 Adjust the temperature set-
ting.
3 To stop the operation, press
the “ON/OFF” switch.
If the fan speed setting or air
flow modes are operated, the
automatic mode indicator goes
off. However, automatic mode
for functions other than that
operated is maintained.
■Using automatic mode
Fan speed is adjusted automati-
cally according to the temperature
setting and the ambient conditions.
Therefore, the fan may stop for a
while until warm or cool air is ready
to flow immediately after the auto-
matic mode switch pressed.
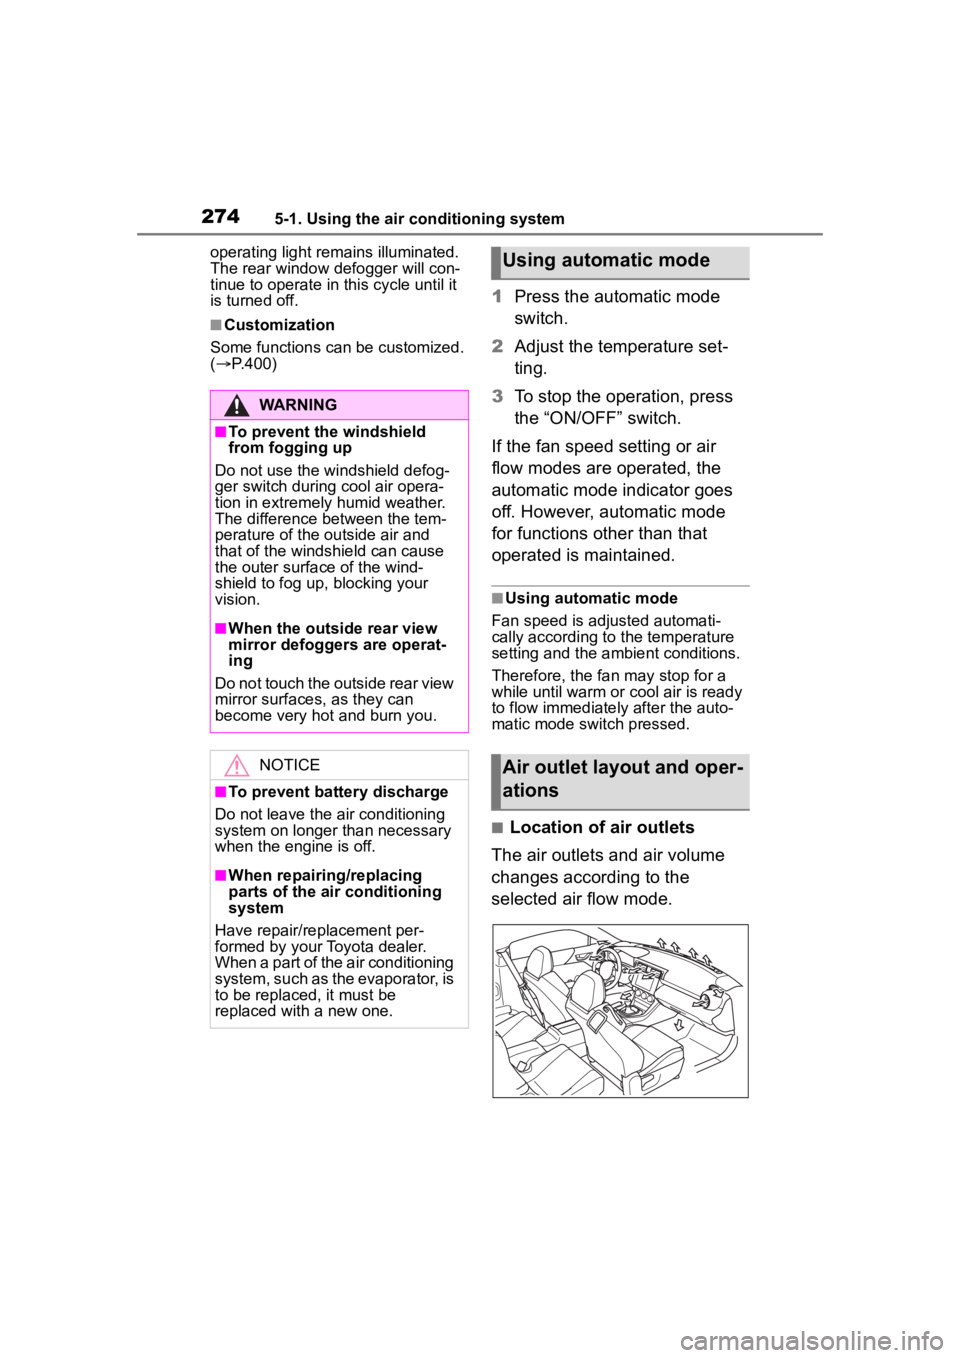
■Location of air outlets
The air outlets and air volume
changes according to the
selected air flow mode.
WARNING
■To prevent the windshield
from fogging up
Do not use the windshield defog-
ger switch during cool air opera-
tion in extremely humid weather.
The difference between the tem-
perature of the outside air and
that of the windshield can cause
the outer surface of the wind-
shield to fog up, blocking your
vision.
■When the outside rear view
mirror defoggers are operat-
ing
Do not touch the outside rear view
mirror surfaces, as they can
become very hot and burn you.
NOTICE
■To prevent battery discharge
Do not leave the air conditioning
system on longer than necessary
when the engine is off.
■When repairing/replacing
parts of the air conditioning
system
Have repair/replacement per-
formed by your Toyota dealer.
When a part of the air conditioning
system, such as the evaporator, is
to be replaced, it must be
replaced with a new one.
Using automatic mode
Air outlet layout and oper-
ations