2023 TOYOTA 86 oil
[x] Cancel search: oilPage 149 of 449
1494-2. Driving procedures
4
Driving
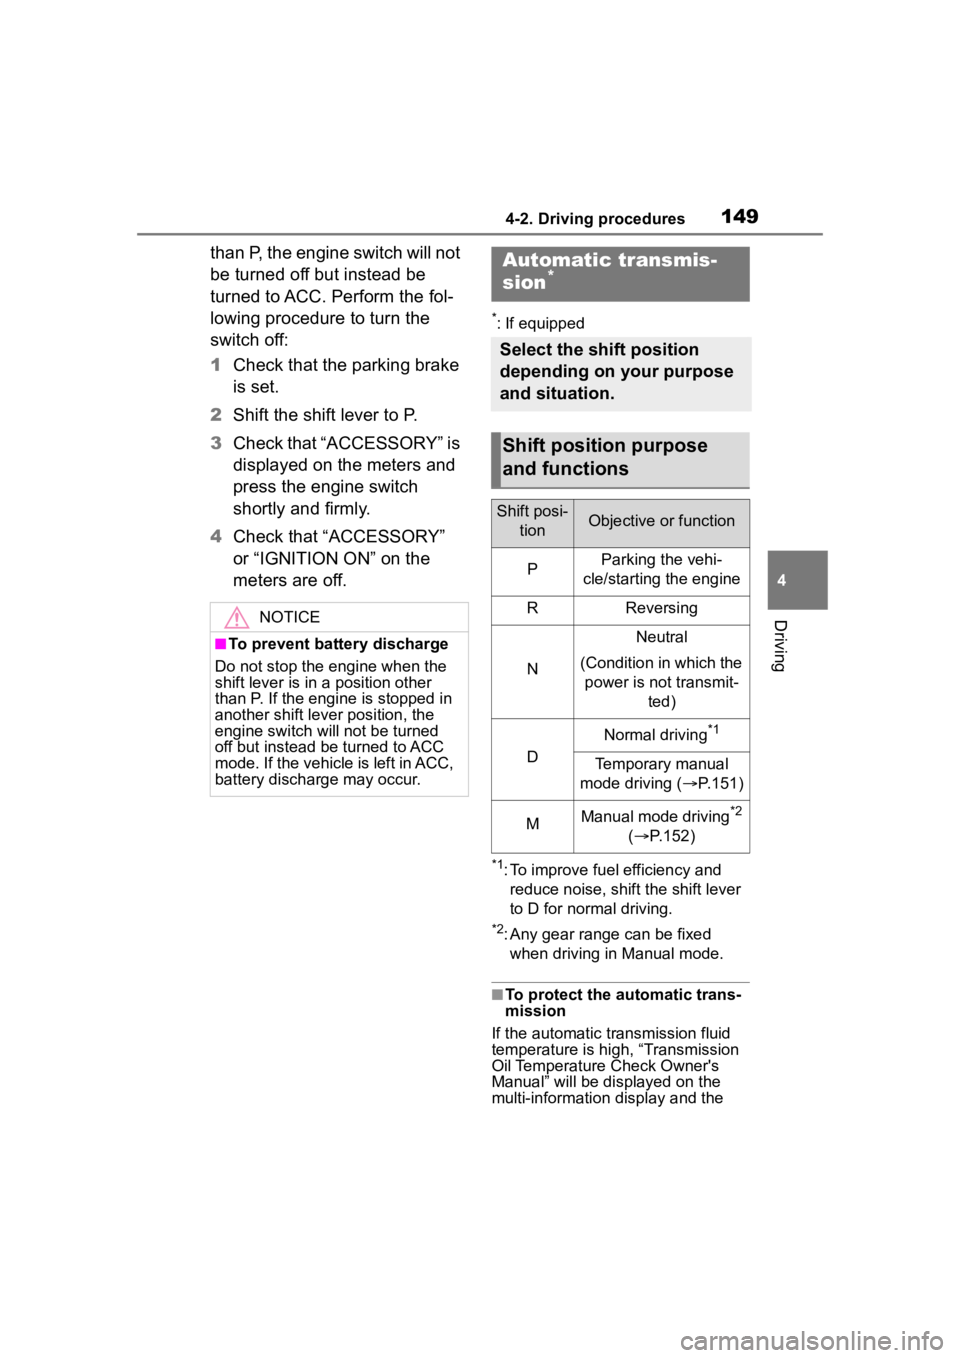
than P, the engine switch will not
be turned off but instead be
turned to ACC. Perform the fol-
lowing procedure to turn the
switch off:
1Check that the parking brake
is set.
2 Shift the shift lever to P.
3 Check that “ACCESSORY” is
displayed on the meters and
press the engine switch
shortly and firmly.
4 Check that “ACCESSORY”
or “IGNITION ON” on the
meters are off.
*: If equipped
*1: To improve fuel efficiency and
reduce noise, shift the shift lever
to D for normal driving.
*2: Any gear range can be fixed when driving in Manual mode.
■To protect the a utomatic trans-
mission
If the automatic transmission fluid
temperature is high, “Transmission
Oil Temperature Check Owner's
Manual” will be displayed on the
multi-information display and the
NOTICE
■To prevent battery discharge
Do not stop the engine when the
shift lever is in a position other
than P. If the engin e is stopped in
another shift lever position, the
engine switch will not be turned
off but instead be turned to ACC
mode. If the vehicle is left in ACC,
battery discharge may occur.
Automatic transmis-
sion*
Select the shift position
depending on your purpose
and situation.
Shift position purpose
and functions
Shift posi-
tionObjective or function
PParking the vehi-
cle/starting the engine
RReversing
N
Neutral
(Condition in which the power is not transmit- ted)
D
Normal driving*1
Temporary manual
mode driving ( P.151)
MManual mode driving*2
( P.152)
Page 153 of 449
1534-2. Driving procedures
4
Driving
Each time the shift lever or paddle
shift switches are operated, the
gear changes up or down one gear
and the selected gear, “1” through
“6”, will be set.
The selected gear, from M1 to M6,
will be fixed and displayed on the
meter.
When in manual mode, the gear
will not change unless the shift
lever or paddle shift switches
are operated.
However, even when in the
manual mode, the gears will be
automatically changed in the fol-
lowing situation:
When vehicle speed drops
(downshift only).
When engine oil temperature
is high and engine speed
rises close to the red zone.
■Downshifting restriction warn-
ing buzzer
If downshifting operations are per-
formed at a vehicle speed by which
downshifting is not possible (when
downshifting will cause the engine
speed to enter the red zone), a
buzzer will sound to w arn the driver
that downshifting cannot be per-
formed.
*: If equipped
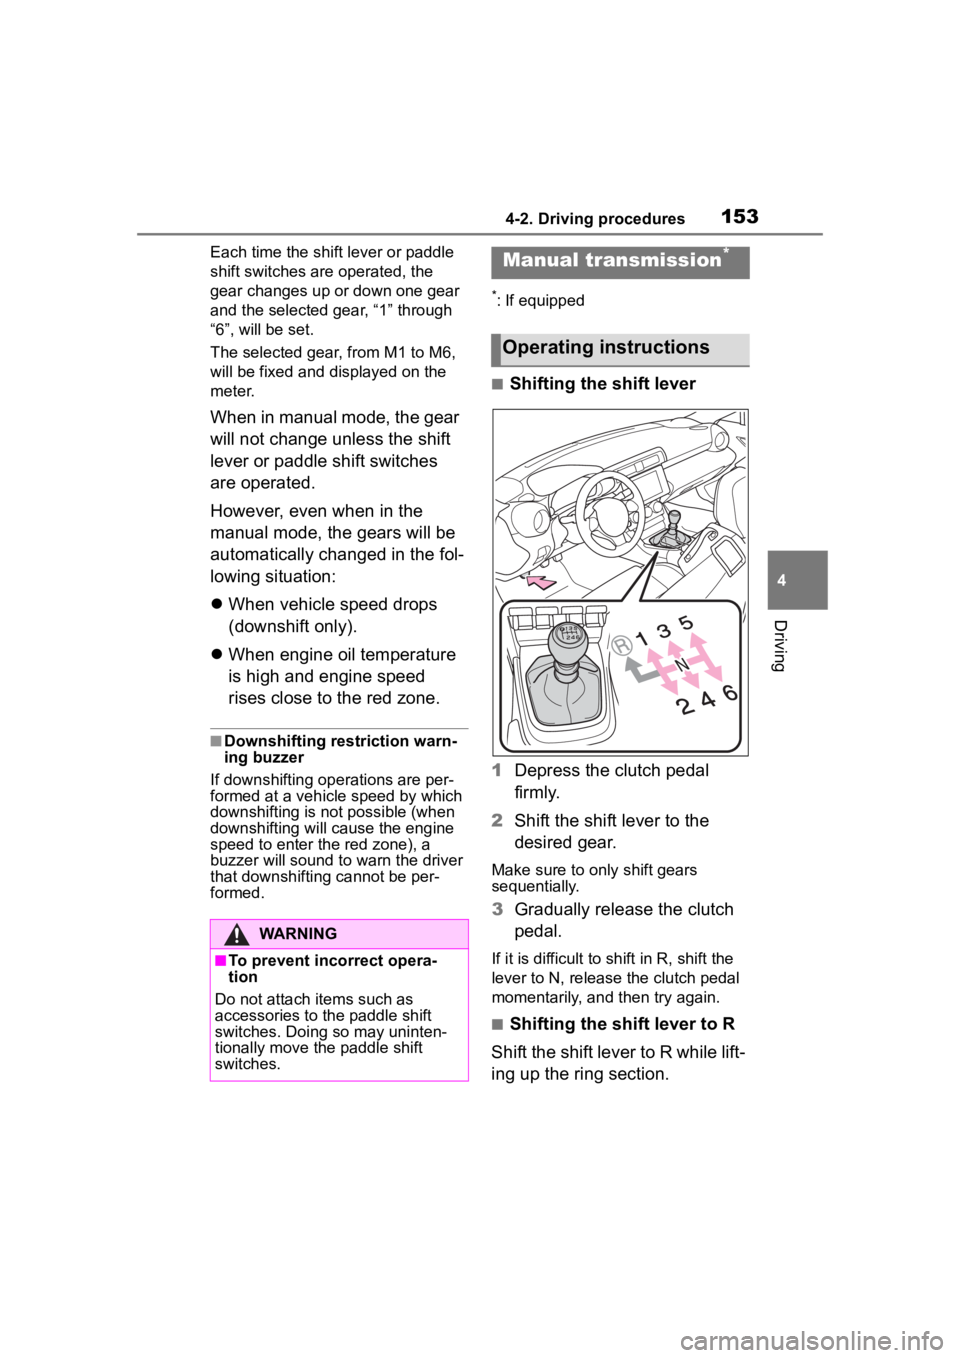
■Shifting the shift lever
1 Depress the clutch pedal
firmly.
2 Shift the shift lever to the
desired gear.
Make sure to only shift gears
sequentially.
3Gradually release the clutch
pedal.
If it is difficult to shift in R, shift the
lever to N, release the clutch pedal
momentarily, and then try again.
■Shifting the shift lever to R
Shift the shift lever to R while lift-
ing up the ring section.
WARNING
■To prevent incorrect opera-
tion
Do not attach items such as
accessories to the paddle shift
switches. Doing so may uninten-
tionally move the paddle shift
switches.
Manual transmission*
Operating instructions
Page 173 of 449
1734-5. EyeSight
4
Driving
NOTICE
●Under the conditions listed
below, it will become more diffi-
cult for the system to detect the
vehicle in front, motorcycles,
bicycles, pedestrians and obsta-
cles on the road, and lane mark-
ers. Also, EyeSight may
temporarily stop operating.
However, the temporary stop
will be canceled once these
conditions have improved and
the vehicle is driven for a short
period of time.
• Bad weather (for example heavy rain, a blizzard or thick
fog). In particular, the system is
more likely to temporarily stop
operating when there is an oil
film adhering to the windshield,
a glass coating has been
applied, or poorly performing
wipers are used.
• Strong light is coming from the front (sunlight or headlight
beams of oncoming traffic, etc.).
• The windshield washer is in use.
• Raindrops, water drops, or dirt on the windshield are not wiped
off sufficiently.
• The windshield has become fogged, scratched or smeared,
or snow, dirt ,dust or frost has
adhered to it, or it is otherwise
affected. These will reduce the
stereo camera’s field of view.
Also, light is reflecting off the
dirt, etc.
• The vehicle is tilted at an extreme angle due to loaded
cargo or other factors.
• Visibility is poo r due to sand,
smoke or water vapor blowing in
the wind, or the front vision is
obscured due to water
splashes, snow, dirt or dust stir
up generated by the vehicle in
front or oncoming traffic.
• The stereo came ra’s field of
view is obstructed.
• Through the entra nce or exit of
a tunnel
• The rear aspect of the vehicle in front is low, small or irregular
(for example a low bed trailer,
etc.).
• The obstacle is a fence, a wall or a shutter, etc. with a uniform
pattern (a striped pattern, brick,
etc.) or with no pattern in front.
• The obstacle is a wall or door made of glass or a mirror in
front.
• Driving at night or in a tunnel when there is a ve hicle in front
that does not ha ve its taillights
on
• Driving through a banner or flag, low branches on a tree or
thick/tall vegetation
• On steep uphill or downhill grades
• The stereo camera is obstructed by a hand, etc. (If
even one of the lenses is
obstructed, the system does not
operate properly.)
• It is completel y dark and no
objects are detected.
• The area around the vehicle has a uniform color (such as when
completely covered in snow,
etc.).
Page 175 of 449
1754-5. EyeSight
4
Driving
NOTICE
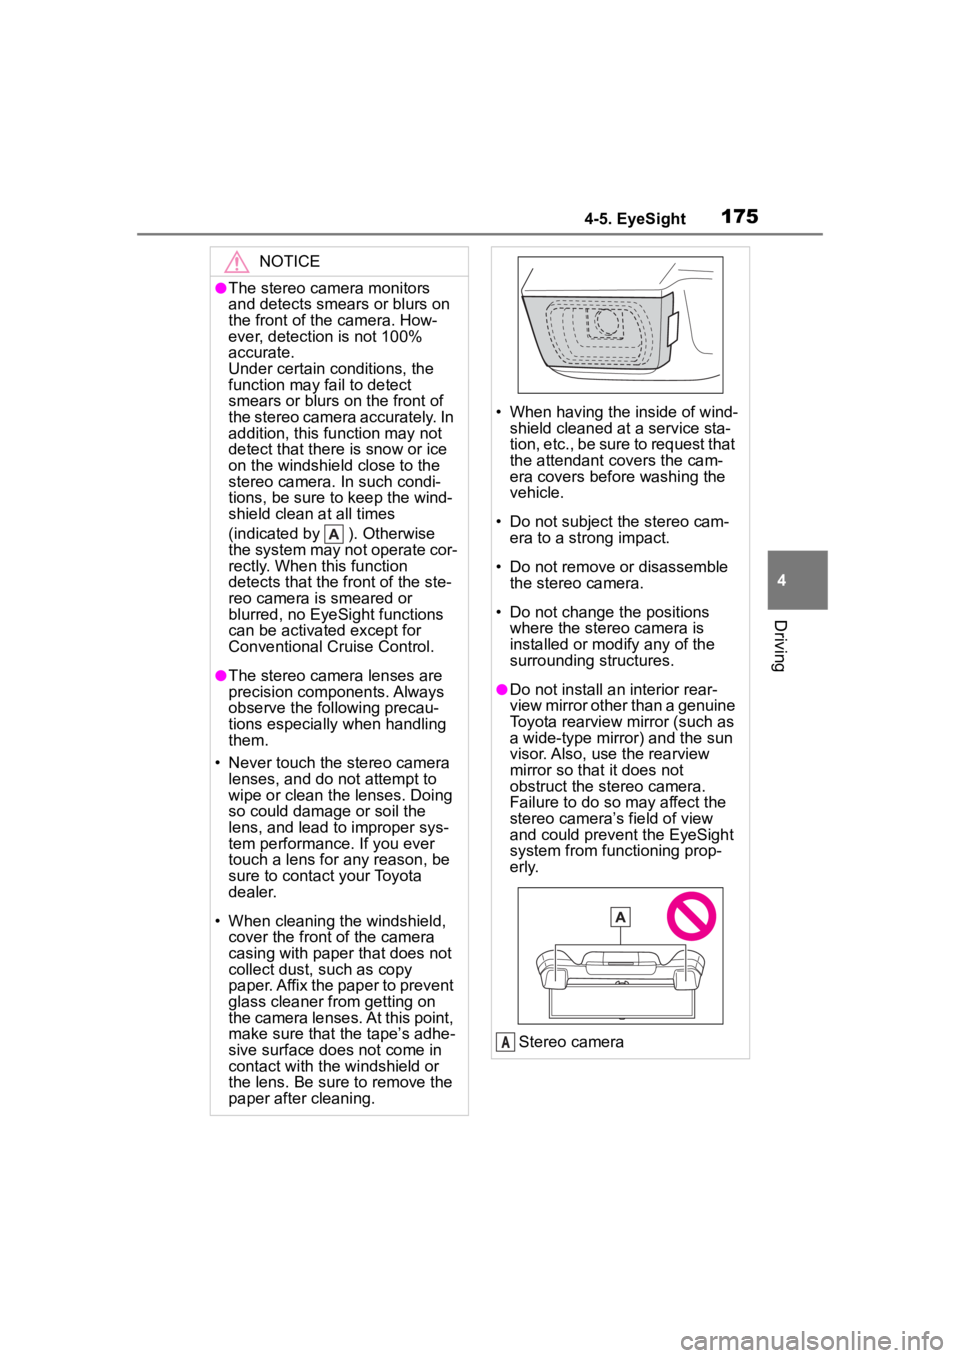
●The stereo camera monitors
and detects smears or blurs on
the front of the camera. How-
ever, detection is not 100%
accurate.
Under certain conditions, the
function may fail to detect
smears or blurs on the front of
the stereo camera accurately. In
addition, this function may not
detect that there is snow or ice
on the windshield close to the
stereo camera. In such condi-
tions, be sure to keep the wind-
shield clean at all times
(indicated by ). Otherwise
the system may not operate cor-
rectly. When this function
detects that the front of the ste-
reo camera is smeared or
blurred, no EyeSight functions
can be activated except for
Conventional Cruise Control.
●The stereo camera lenses are
precision components. Always
observe the following precau-
tions especially when handling
them.
• Never touch the stereo camera lenses, and do not attempt to
wipe or clean the lenses. Doing
so could damage or soil the
lens, and lead to improper sys-
tem performance. If you ever
touch a lens for any reason, be
sure to contact your Toyota
dealer.
• When cleaning the windshield, cover the front of the camera
casing with paper that does not
collect dust, such as copy
paper. Affix the paper to prevent
glass cleaner from getting on
the camera lenses. At this point,
make sure that the tape’s adhe-
sive surface does not come in
contact with the windshield or
the lens. Be sure to remove the
paper after cleaning.
• When having the inside of wind- shield cleaned at a service sta-
tion, etc., be sure to request that
the attendant covers the cam-
era covers before washing the
vehicle.
• Do not subject the stereo cam- era to a strong impact.
• Do not remove or disassemble the stereo camera.
• Do not change the positions where the stereo camera is
installed or mod ify any of the
surrounding structures.
●Do not install an interior rear-
view mirror other than a genuine
Toyota rearview mirror (such as
a wide-type mirror) and the sun
visor. Also, use the rearview
mirror so that it does not
obstruct the stereo camera.
Failure to do so may affect the
stereo camera’s field of view
and could prevent the EyeSight
system from functioning prop-
erly.
Stereo camera
A
Page 177 of 449
1774-5. EyeSight
4
Driving
EyeSight includes the following
functions.
■Pre-Collision Braking Sys-
tem
This function uses a following
distance warning feature to
warn the driver to take evasive
action when there is the possi-
bility of a collision with a vehicle,
pedestrian or obstacle in front of
you. If the driver does not take
evasive action, the brakes are
applied automatically to help
reduce vehicle collision dam-
age or, if possible, help prevent
a collision. ( P.179)
■Adaptive Cruise Control
This function maintains the set
vehicle speed and when there is
a vehicle in front in the same
traffic lane, it follows the speed
of the vehicle in front up to the
maximum of the set vehicle
speed. ( P.190)
■Conventional Cruise Con-
trol
In this mode, the system main-
tains a constant vehicle speed.
It does not follow the vehicle in
front. This function can be used
even when the stereo camera
has temporarily stopped operat-
ing ( P.229). This function is
used by switching from Adaptive
Cruise Control to Conventional
Cruise Control. ( P.207)
NOTICE
●Keep the windshield (outside
and inside) clean at all times.
When the windshield has
become fogged, or it has a dirt
or an oil film on it, the stereo
camera may not detect objects
accurately and the EyeSight
system may not operate cor-
rectly. Never mount any device
to the center air vent, as any air-
flow change may impact Eye-
Sight performance.
●Do not place any stickers or
accessories on the windshield
(outside or inside). If you have
to do so (for example, legally
required or electronic toll tag),
avoid the area directly in front of
the camera. Otherwise, it may
adversely affect the field of view
of the stereo camera and can
cause improper operation of the
system. For details, contact a
Toyota dealer.
●Do not use any glass coating
agents or similar substances on
the windshield. Doing so may
interfere with the proper opera-
tion of the system.
●Do not install any film or an
additional layer of glass on the
windshield. The system may not
operate correctly.
●If there are scratches or cracks
on the windshield, contact a
Toyota dealer.
●To have the windshield replaced
or repaired, contact a Toyota
dealer. Do not install a wind-
shield other than a genuine Toy-
ota windshield. The stereo
camera may not be able to
detect objects accurately and
the EyeSight system may not
operate properly.
EyeSight functions
Page 266 of 449
2664-7. Driving tips
4-7.Driving tips
Use fluids that are appropriate
to the prevailing outside tem-
peratures.
• Engine oil
• Engine coolant
• Washer fluid
Have a service technician
inspect the condition of the
battery.
Have the vehicle fitted with
four snow tires.
Make sure to install 4 tires that are
of the specified size, and that all 4
tires are the sa me size, same
maker, same brand and tread pat-
tern.
Perform the following according
to the driving conditions:
Do not try to forcibly open a
window or move a wiper that
is frozen. Pour warm water
over the frozen area to melt
the ice. Wipe away the water
immediately to prevent it from
freezing.
To ensure proper operation of
the climate control system
fan, remove any snow that
has accumulated on the air
inlet vents in front of the wind-
shield.
Check for and remove any
excess ice or snow that may
have accumulated on the
exterior lights, vehicle’s roof,
Winter driving tips
Carry out the necessary
preparations and inspec-
tions before driving the
vehicle in winter. Always
drive the vehicle in a man-
ner appropriate to the pre-
vailing weather conditions.
Preparation for winter
WARNING
■Driving with snow tires
Observe the following precautions
to reduce the risk of accidents.
Failure to do so m ay result in a
loss of vehicle control and cause
death or serious injury.
●Use tires of the specified size,
and that are the same size,
same maker, same brand and
tread pattern.
●Maintain the recommended
level of air pressure.
●Do not drive in excess of 75
mph (120 km/h), regardless of
the type of snow tires being
used.
●Use snow tires on all, not just
some wheels.
NOTICE
■Repairing or replacing snow
tires
Request repairs or replacement of
snow tires from Toyota dealers or
legitimate tire retailers.
This is because the removal and
attachment of snow tires affects
the operation of the tire pressure
warning valves and transmitters.
Before driving the vehicle
Page 289 of 449
2896-1. Maintenance and care
6
Maintenance and care
with a diluted neutral detergent to
remove the dirt.
●To protect the matte paint from
damage, make sure to observe
the following precautions.
• Do not scrub or polish the wheels using a brush or dry cloth
• Do not use any wheel coatings or
abrasive detergents
■Brake pads and calipers
Rust may form if the vehicle is
parked with wet brake pads or disc
rotors, causing them to stick. Before
parking the vehicle after it is
washed, drive slow ly and apply the
brakes several times to dry the
parts.
■Bumpers
Do not scrub with abrasive cleaners.
■Plated portions
If dirt cannot be removed, clean the
parts as follows:
●Use a soft cloth dampened with an
approximately 5% solution of neu-
tral detergent and water to clean
the dirt off.
●Wipe the surface with a dry, soft
cloth to remove any remaining
moisture.
●To remove oily deposits, use alco-
hol wet wipes or a similar product.
WARNING
■When washing the vehicle
Do not apply water to the inside of
the engine compartment. Doing
so may cause the electrical com-
ponents, etc. to catch fire.
■Precautions regarding the
exhaust pipes
Exhaust gasses cause the
exhaust pipes and rear bumper
diffusers to become quite hot.
When washing the vehicle, be
careful not to touch the pipes and
diffusers until they have cooled
sufficiently, as touching hot
exhaust pipes and rear bumper
diffusers can cause burns.
■Precaution regarding the rear
bumper
If the paint of th e rear bumper is
chipped or scratched, the follow-
ing systems may not function cor-
rectly. If this occurs, consult your
Toyota dealer.
●BSD/RCTA (if equipped)
●RAB (if equipped)
NOTICE
■To prevent paint deteriora-
tion and corrosion on the
body and components (alumi-
num wheels, etc.)
●Wash the vehicle immediately in
the following cases:
• After driving nea r the sea coast
• After driving on salted roads
• If coal tar or tree sap is present on the paint surface
• If dead insects, insect droppings or bird droppings are present on
the paint surface
• After driving in an area contami- nated with soot, oily smoke,
mine dust, iron powder or chem-
ical substances
• If the vehicle becomes heavily soiled with d ust or mud
Page 294 of 449
2946-1. Maintenance and care
tape.
If liquid is spilled, lightly pat
the area with a tissue paper or
similar to soak up the liquid.
When mud, coffee, etc., has
dried on the Ultrasuede
®
upholstery, remove it by lightly
brushing the area with a soft
brush or similar.
We recommend using a vacuum
cleaner to clean up the area after
the above has been performed.
When a stain cannot be
removed using the above proce-
dures, remove it by performing
the following:
1 Lightly wipe the stained area
from the outside to the inside
from multiple angles with a
soft cloth that has been
dampened with lukewarm
water (approximately 104°F
[40°C]) and squeezed out.
Do not wipe too hard. Doing so may
make the Ultrasuede® upholstery
surface become uneven. Also, only
use a clean cloth.
2 If the Ultrasuede® upholstery
surface becomes uneven,
lightly brush it with a soft
brush.
3 Allow the surface to dry com-
pletely. You will need the following
items:
A cloth that has been damp-
ened with benzene
A dry cloth
1 Using a dry cloth or tissue
paper, wipe away as much of
the oil as possible to prevent
the stained area from
expanding.
2 After patting the area from
the outside to the inside from
multiple angles using the
cloth dampened with ben-
zene, soak up the oil and
benzene that floats up by pat-
ting the area with a dry cloth.
3 If the Ultrasuede
® upholstery
surface becomes uneven,
lightly brush it with a soft
brush.
Liquid stains
NOTICE
■When soaking up spilled liq-
uids
Do not press down too firmly with
the cloth, tissue paper etc., as
doing so may cause the liquid to
further penetrate the material,
making soaking up the liquid more
difficult.
Oily stains