Page 92 of 296

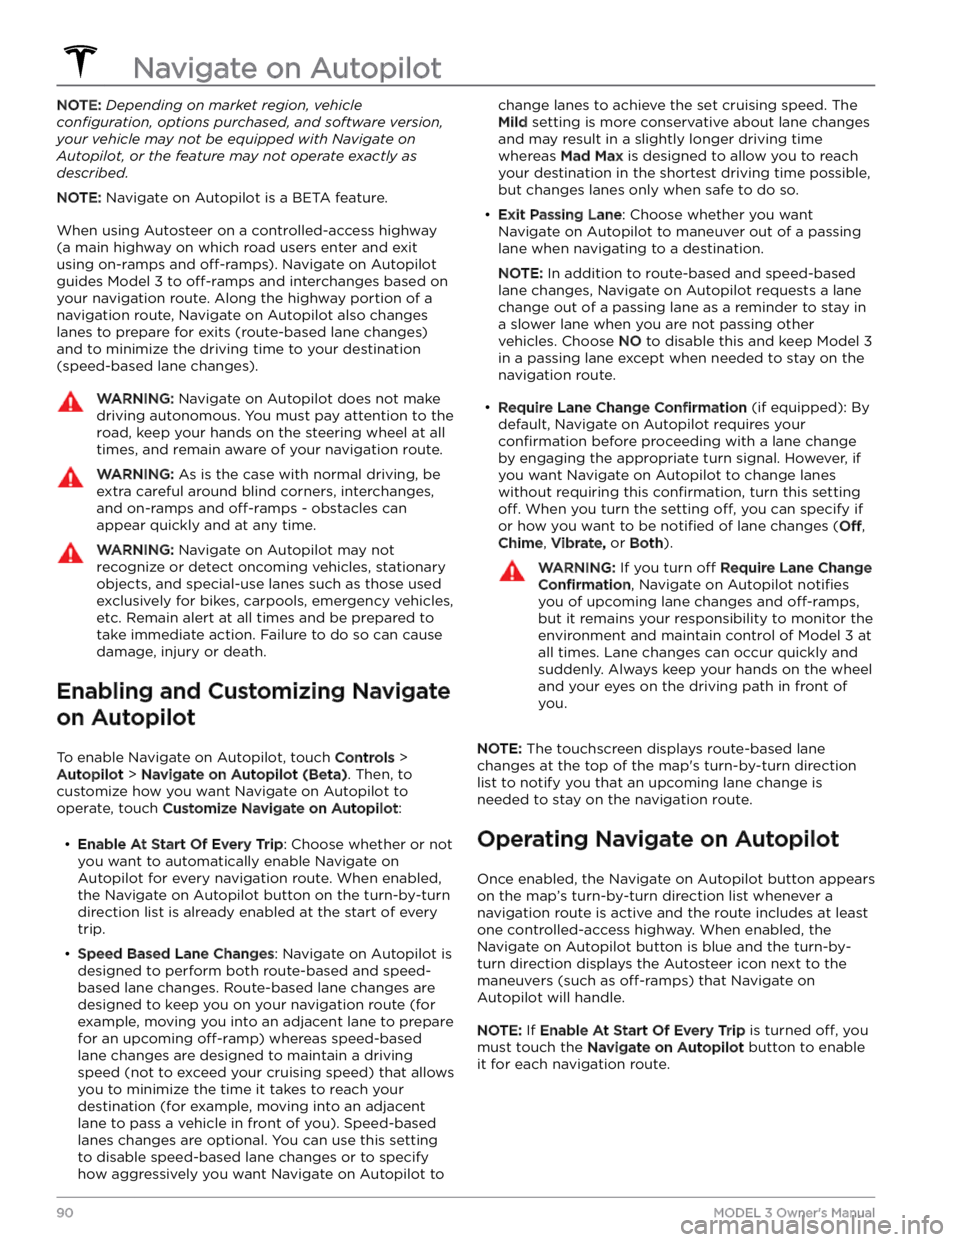
NOTE: Depending on market region, vehicle
configuration, options purchased, and software version,
your vehicle may not be equipped with Navigate on
Autopilot, or the feature may not operate exactly as
described.
NOTE: Navigate on Autopilot is a BETA feature.
When using Autosteer on a controlled-access highway (a main highway on which road users enter and exit
using on-ramps and
off-ramps). Navigate on Autopilot
guides
Model 3 to off-ramps and interchanges based on
your navigation route. Along the highway portion of a navigation route, Navigate on Autopilot also changes
lanes to prepare for exits (route-based lane changes) and to minimize the driving time to your destination (speed-based lane changes).
WARNING: Navigate on Autopilot does not make
driving autonomous. You must pay attention to the
road, keep your hands on the steering wheel at all
times, and remain aware of your navigation route.
WARNING: As is the case with normal driving, be
extra careful around blind corners, interchanges,
and on-ramps and off-ramps - obstacles can
appear quickly and at any time.
WARNING: Navigate on Autopilot may not
recognize or detect oncoming vehicles, stationary
objects, and special-use lanes such as those used
exclusively for bikes, carpools, emergency vehicles,
etc. Remain alert at all times and be prepared to
take immediate action. Failure to do so can cause
damage, injury or death.
Enabling and Customizing Navigate
on Autopilot
To enable Navigate on Autopilot, touch Controls >
Autopilot > Navigate on Autopilot (Beta). Then, to
customize how you want Navigate on Autopilot to operate, touch
Customize Navigate on Autopilot:
Page 97 of 296
Traffic Lights
When driving with Autosteer or Traffic-Aware Cruise Control engaged, and Traffic Light and Stop Sign Control
enabled,
Model 3 is designed to respond as follows when approaching intersections controlled by a traffic light:
Type of Traffic LightVehicle Intended Response
At a solid green traffic light, or at a traffic light that is currently off (not
illuminated),
Model 3 slows down.
If you are following a car in front of you that continues through the intersection,
the
touchscreen displays a green stop line and provided your hands are detected
on the
steering wheel, Model 3 also continues. If a car is not in front of you, the
touchscreen displays a red stop line and you must confirm that you want to
continue through the intersection by
pressing down on the drive stalk or briefly
pressing the accelerator pedal. If you don
Page 99 of 296

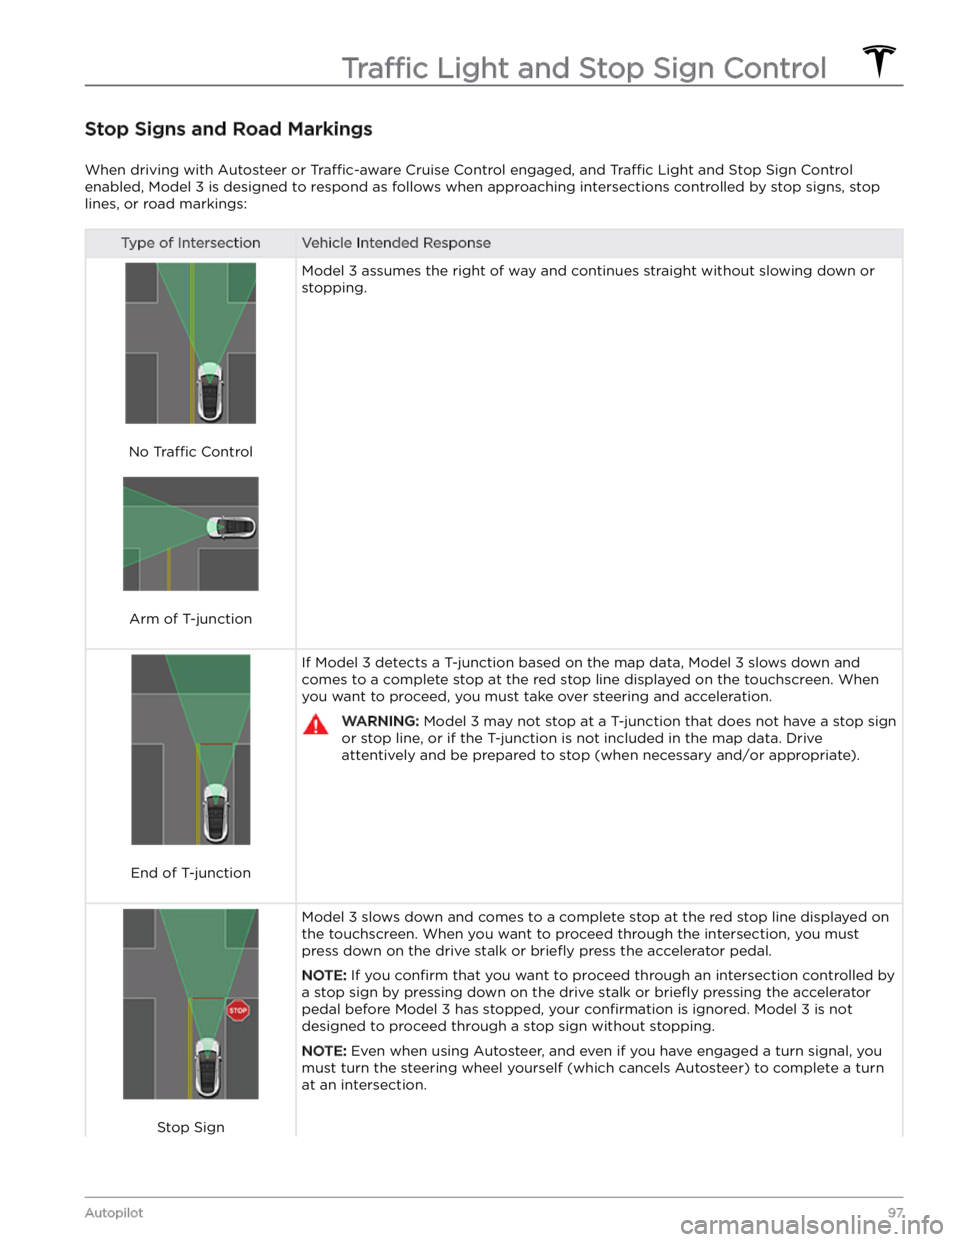
Stop Signs and Road Markings
When driving with Autosteer or Traffic-aware Cruise Control engaged, and Traffic Light and Stop Sign Control
enabled,
Model 3 is designed to respond as follows when approaching intersections controlled by stop signs, stop
lines, or road markings:
Type of IntersectionVehicle Intended Response
No Traffic Control
Arm of T-junction
Model 3 assumes the right of way and continues straight without slowing down or
stopping.
End of T-junction
If Model 3 detects a T-junction based on the map data, Model 3 slows down and
comes to a complete stop at the red stop line displayed on the
touchscreen. When
you want to proceed, you must take over steering and acceleration.
WARNING: Model 3 may not stop at a T-junction that does not have a stop sign
or stop line, or if the T-junction is not included in the map data. Drive
attentively and be prepared to stop (when necessary and/or appropriate).
Stop Sign
Model 3 slows down and comes to a complete stop at the red stop line displayed on
the
touchscreen. When you want to proceed through the intersection, you must
press down on the drive stalk or briefly press the accelerator pedal.
NOTE: If you confirm that you want to proceed through an intersection controlled by
a stop sign by
pressing down on the drive stalk or briefly pressing the accelerator
pedal before
Model 3 has stopped, your confirmation is ignored. Model 3 is not
designed to proceed through a stop sign without stopping.
NOTE: Even when using Autosteer, and even if you have engaged a turn signal, you
must turn the
steering wheel yourself (which cancels Autosteer) to complete a turn
at an intersection.
Traffic Light and Stop Sign Control
97Autopilot
Page 103 of 296
WARNING: When Autopark is actively steering
Model 3, the steering wheel moves in accordance
with Autopark
Page 153 of 296

Overview
NOTE: Entertainment options vary by market region.
The touchscreen displays the Entertainment screen when you choose any of the following apps:
Theater: Play various video streaming services (such as Netflix, YouTube, Hulu, etc.) while parked.
Available only if
Model 3 is connected to WiFi, or is equipped with premium connectivity and a cellular
signal is available.
Arcade: Want to game? Depending on the game, you may need to use the steering wheel buttons or a
Bluetooth or USB controller to play. See
Gaming Controllers on page 153.
NOTE: For some vehicles manufactured after approximately November 1, 2021, the center console USB
ports can only be used to charge devices. On these vehicles, you must use the USB port inside the glove box.
Toybox: Play in the Toybox while parked.WARNING: Use these features only when Model 3 is parked. Always pay attention to road and traffic
conditions when driving. Using these features while driving is illegal and very dangerous.
NOTE: You can also use voice commands to access these features (see Voice Commands on page 125).
Toybox
Your vehicle
Page 179 of 296

WARNING: Do not drive Model 3 if a tire is
damaged, excessively worn, or inflated to an
incorrect pressure. Check tires regularly for wear,
and ensure there are no cuts, bulges or exposure
of the ply/cord structure.
Tire Wear
Adequate tread depth is important for proper tire
performance. Tires with a tread depth less than
4/32”
(3 mm) are more likely to hydroplane in wet conditions
and should not be used. Tires with a tread depth less than
5/32” (4 mm) do not perform well in snow and
slush and should not be used when driving in winter conditions.
Model 3 is originally fitted with tires that have wear
indicators molded into the tread pattern. When the tread has been worn down to
4/32” (3 mm), the
indicators start to appear at the surface of the tread pattern, producing the
effect of a continuous band of
rubber across the width of the tire. For optimal performance and safety, Tesla recommends replacing
tires before the wear indicators are visible.
To improve vehicle handling characteristics and minimize
hydroplaning in wet conditions, put tires with the most tread on the rear of the car.
Tire Rotation, Balance, and Wheel
Alignment
Tesla recommends rotating the tires every 6,250 miles
(10,000 km) or if tread depth difference is 2/32 in (1.5
mm) or greater, whichever comes first.
Tire rotation is an essential part of tire maintenance. It helps maintain an even treadwear pattern which enhances the tire
Page 180 of 296

If tires need to be replaced early, for example due to a
flat tire, we recommend replacing the tires in pairs
unless the other tires are within
2/32 in (1.5 mm) of tread
depth of the new tire. When replacing tires, it is important to match the brand and model of the older
tires. Always place a pair of new tires on the rear if all four tires are the same size. Always balance the wheel and tire after replacing a tire. Consult with a professional tire retailer and installer for further guidance.
If you
replace your tires or install different ones, reset the tire
configuration (see Tire Configuration on page 179). This
resets the learned tire settings and improves the driving
experience on your new tires.
NOTE: Regardless of the number of tires replaced, a
complete set of matching tires is recommended for optimum performance.
If tires other than those specified are used, ensure that
the load and speed ratings marked on the tire
(see
Understanding Tire Markings on page 214) equal or
exceed those of the original
specification.
For the specification of the original wheels and tires
installed on
Model 3, see Wheels and Tires on page 213.
If you replace a wheel, the TPMS (Tire Pressure Monitoring System) sensors need to be reset to ensure they provide accurate warnings when tires are under-
or
over-inflated (see Automatic Reset of TPMS Sensors on
page 180).
NOTE: Installing winter tires with aggressive compound
and tread design may result in temporarily-reduced regenerative braking power. However, your vehicle is
designed to continuously recalibrate itself, and after changing tires it will increasingly restore regenerative
braking power after some moderate-torque straight-line accelerations. For most drivers this occurs after a short period of normal driving, but drivers who normally
accelerate lightly may need to use slightly harder accelerations while the recalibration is in progress. Go to
Service > Wheel & Tire Configuration > Tires to select
winter tires and quicken this process.
WARNING: For your safety, use only tires and
wheels that match the original specification. Tires
that do not match the original specification can
affect the operation of the TPMS.
WARNING: Never exceed the speed rating of your
vehicle
Page 181 of 296

For Gemini wheels, press on the perimeter of the cover until it aligns with the wheel surface. Press on the Tesla “T” in the center until the cap snaps into place. See
Parts and Accessories on page 190 for
more information.
CAUTION: To prevent the aero cover from
falling off, ensure that it is fully secured before
driving.
Removing and Installing Lug Nut Covers
If your Model 3 is equipped with lug nut covers, you
must remove them to access the lug nuts.
To remove a lug nut cover:
1.
Insert the curved part of the lug nut cover tool, if equipped (located in the glovebox in some vehicles, or you can use a small allen wrench) into the hole at the base of the Tesla "T".
NOTE: The lug nut cover tool can also be purchased
at an auto parts store or through online retailers.
2.
Maneuver the lug nut cover tool so that it is fully inserted into the hole in the lug nut cover.
3.
Twist the lug nut cover tool so that the curved part is
touching the middle of the lug nut cover.
4.
Firmly pull the lug nut tool away from the wheel until the lug nut cover is released.
To install the lug nut cover:
1.
Align the lug nut cover into position.
2.
Push firmly on the lug nut cover until it fully snaps
into place.
CAUTION: Make sure the lug nut cover is fully
secure before driving to prevent it from falling
off.
Wheel Configuration
If you are installing new wheels or swapping them for
different ones, update your vehicle