2023 SUBARU BRZ ECU
[x] Cancel search: ECUPage 194 of 432
Mirrors
188
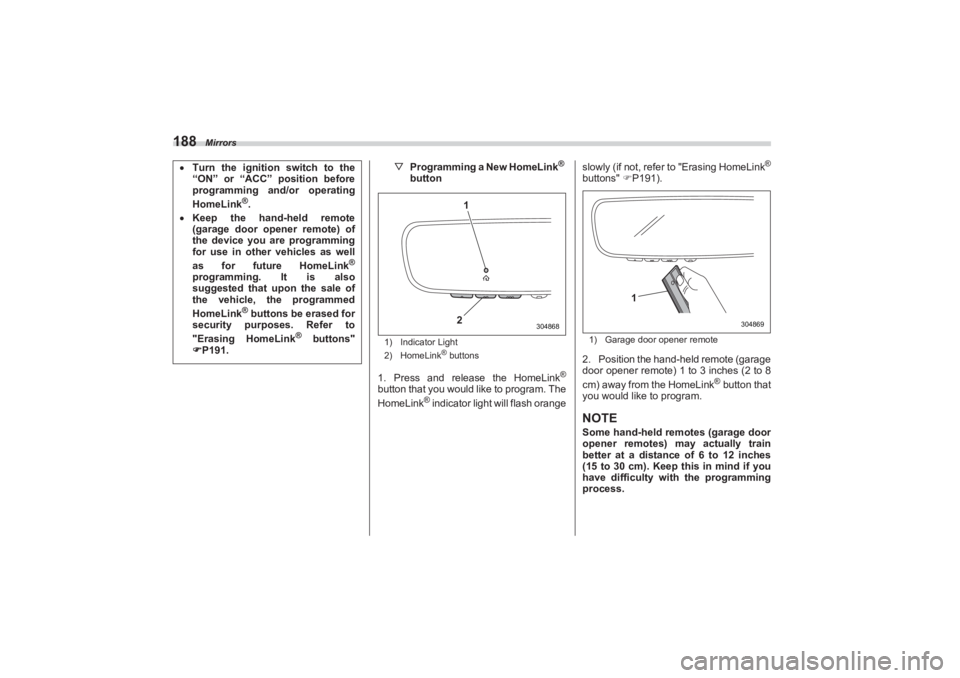
▽Programming a New HomeLink
®
button
1) Indicator Light
2) HomeLink
® buttons
1. Press and release the HomeLink
®
button that you would like to program. The
HomeLink
® indicator light will flash orange slowly (if not, refer to "Erasing HomeLink
®
buttons"
P191).1) Garage door opener remote2. Position the hand-held remote (garage
door opener remote) 1 to 3 inches (2 to 8
cm) away from the HomeLink
® button that
you would like to program.
NOTESome hand-held remotes (garage door
opener remotes) may actually train
better at a distance of 6 to 12 inches
(15 to 30 cm). Keep this in mind if you
have difficulty with the programming
process.
Turn the ignition switch to the
“ON” or “ACC” position before
programming and/or operating
HomeLink
®.
Keep the hand-held remote
(garage door opener remote) of
the device you are programming
for use in other vehicles as well
as for future HomeLink
®
programming. It is also
suggested that upon the sale of
the vehicle, the programmed
HomeLink
® buttons be erased for
security purposes. Refer to
"Erasing HomeLink
® buttons"
P191.
2
304868
1
304869
1
BRZ_U.book 188 ページ 2022年3月29日 火曜日 午後3時59分
Page 195 of 432
Mirrors
189
Instruments and Controls3
– CONTINUED –
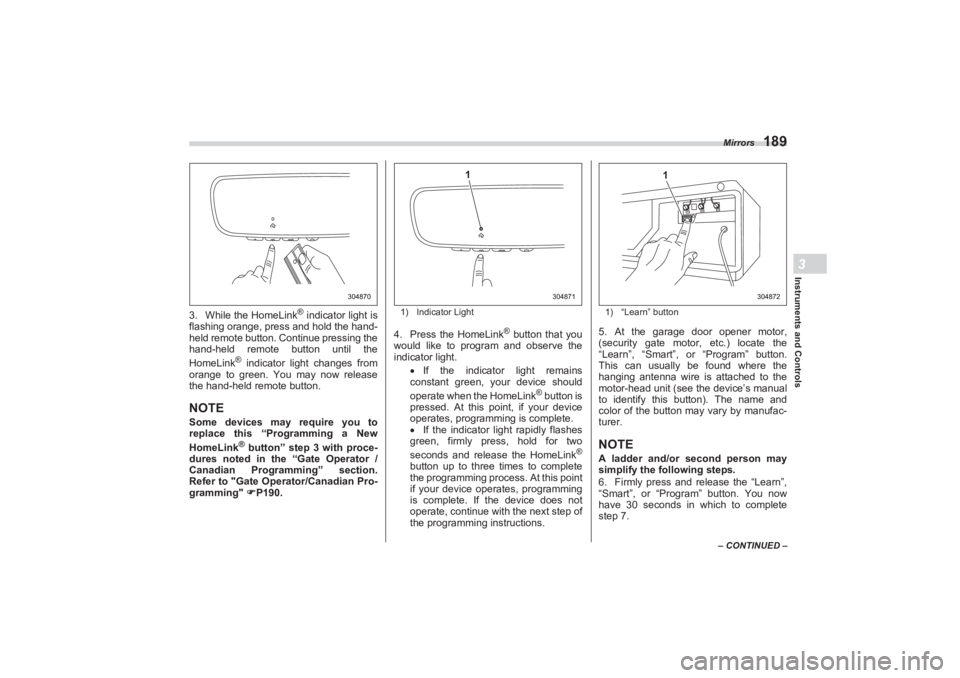
3. While the HomeLink
® indicator light is
flashing orange, press and hold the hand-
held remote button. Continue pressing the
hand-held remote button until the
HomeLink
® indicator light changes from
orange to green. You may now release
the hand-held remote button.
NOTESome devices may require you to
replace this “Programming a New
HomeLink
® button” step 3 with proce-
dures noted in the “Gate Operator /
Canadian Programming” section.
Refer to "Gate Operator/Canadian Pro-
gramming" P190.
1) Indicator Light4. Press the HomeLink
® button that you
would like to program and observe the
indicator light.
If the indicator light remains
constant green, your device should
operate when the HomeLink
® button is
pressed. At this point, if your device
operates, programming is complete.
If the indicator light rapidly flashes
green, firmly press, hold for two
seconds and release the HomeLink
®
button up to three times to complete
the programming process. At this point
if your device operates, programming
is complete. If the device does not
operate, continue with the next step of
the programming instructions.
1) “Learn” button5. At the garage door opener motor,
(security gate motor, etc.) locate the
“Learn”, “Smart”, or “Program” button.
This can usually be found where the
hanging antenna wire is attached to the
motor-head unit (see the device’s manual
to identify this button). The name and
color of the button may vary by manufac-
turer.NOTEA ladder and/or second person may
simplify the following steps.
6. Firmly press and release the “Learn”,
“Smart”, or “Program” button. You now
have 30 seconds in which to complete
step 7.
304870
304871
1
304872
1
BRZ_U.book 189 ページ 2022年3月29日 火曜日 午後3時59分
Page 197 of 432
Mirrors
191
Instruments and Controls3
– CONTINUED –
Proceed with “Programming a New
HomeLink
® button” step 4 to complete.
▽ Using HomeLink
®
To operate, simply press and release the
programmed HomeLink
® button. Activa-
tion will now occur for the trained device
(i.e. garage door opener, gate operator,
security system, entry door lock, home/
office lighting, etc.). For convenience, the
hand-held remote of the device may also
be used at any time.
▽Erasing HomeLink® buttons
To erase programming from the three
buttons (individual buttons cannot be
erased but can be “reprogrammed” as
outlined below), follow the step noted:
Press and hold the two outer HomeLink
®
buttons for at least 10 seconds. The LED
indicator will change from continuously lit
to rapidly flashing. Release both buttons.
Do not hold for longer than 20 seconds.
HomeLink
® is now ready to be
programmed at any time beginning with
“Programming a New HomeLink
® button”-
step 1. ▽
Reprogramming a Single
HomeLink
® button
To program a previously trained button,
follow these steps:
1. Press and hold the desired
HomeLink
® button. DO NOT release the
button.
2. The indicator light will begin to slowly
flash orange after 20 seconds. The
HomeLink® button can be released at this
point. Proceed with “Programming a New
HomeLink® button”- step 3.
3. If you do not complete the program-
ming of a new device to the button, it will
revert to the previously stored program-
ming.
▽Garage Door Two-Way Commu -
nication
HomeLink® has the capability of commu-
nicating with your garage door opener.
HomeLink® can receive and display
“closing” or “opening” status messages
from compatible garage door opener
systems. At any time, HomeLink
® can
also recall and display the last recorded
status communicated by the garage door
opener to indicate your garage door being
“closed” or “opened”. HomeLink
® has the capability of receiving
this communication from the garage door
opener at a range up to 820 feet (250 m).
Range may be reduced by obstacles such
as houses or trees. You may have to slow
your vehicle speed to successfully receive
the garage door opener communication.
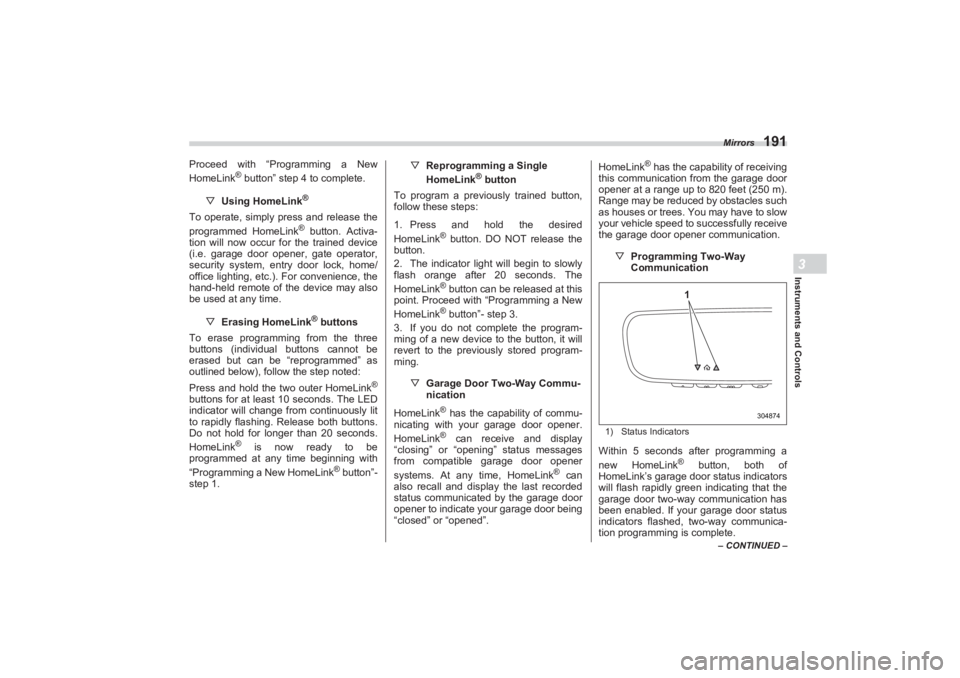
▽Programming Two-Way
Communication
1) Status IndicatorsWithin 5 seconds after programming a
new HomeLink
® button, both of
HomeLink’s garage door status indicators
will flash rapidly green indicating that the
garage door two-way communication has
been enabled. If your garage door status
indicators flashed, two-way communica-
tion programming is complete.
304874
1
BRZ_U.book 191 ページ 2022年3月29日 火曜日 午後3時59分
Page 201 of 432
Tilt/Telescopic Steering Wheel
195
Instruments and Controls3
3-17. Tilt/Telescopic SteeringWheel
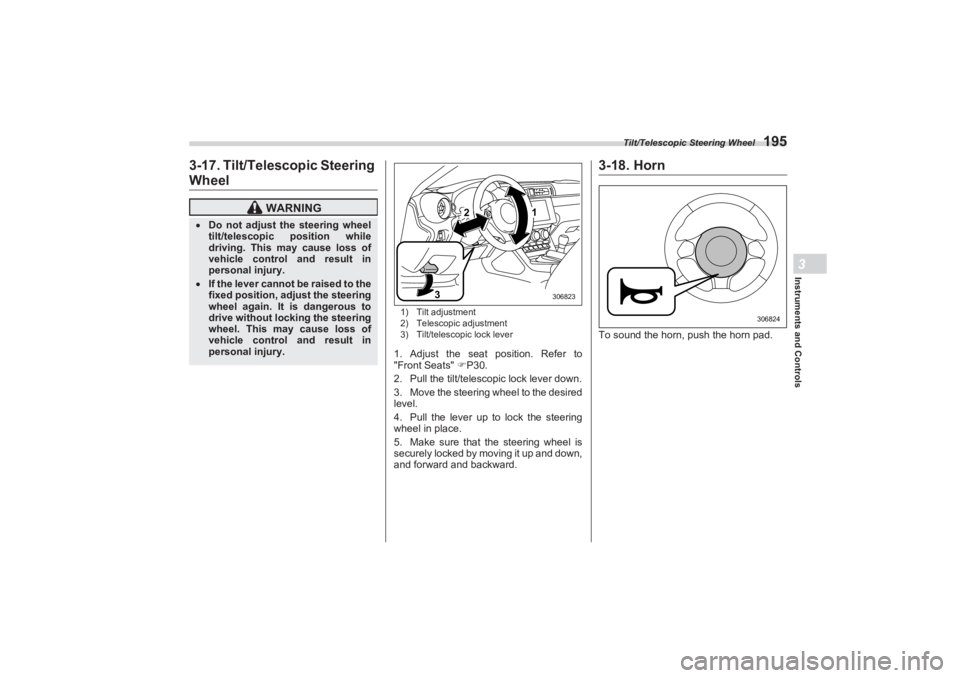
1) Tilt adjustment
2) Telescopic adjustment
3) Tilt/telescopic lock lever1. Adjust the seat position. Refer to
"Front Seats" P30.
2. Pull the tilt/telescopic lock lever down.
3. Move the steering wheel to the desired
level.
4. Pull the lever up to lock the steering
wheel in place.
5. Make sure that the steering wheel is
securely locked by moving it up and down,
and forward and backward.
3-18. HornTo sound the horn, push the horn pad.
WARNING
Do not adjust the steering wheel
tilt/telescopic position while
driving. This may cause loss of
vehicle control and result in
personal injury. If the lever cannot be raised to the
fixed position, adjust the steering
wheel again. It is dangerous to
drive without locking the steering
wheel. This may cause loss of
vehicle control and result in
personal injury.
2
3
1
306823
306824
BRZ_U.book 195 ページ 2022年3月29日 火曜日 午後3時59分
Page 223 of 432
Ashtray (Dealer Option)
217
Interior Equipment6
– CONTINUED –
cable is used. In this case, be sure to
connect the device using the special
cable.
When a device that communicates
with a PC is connected, power supply
or charging may not be possible.
When connect a device for charging,
disconnect the device promptly after
charging is completed.■ How to Use the USB Power
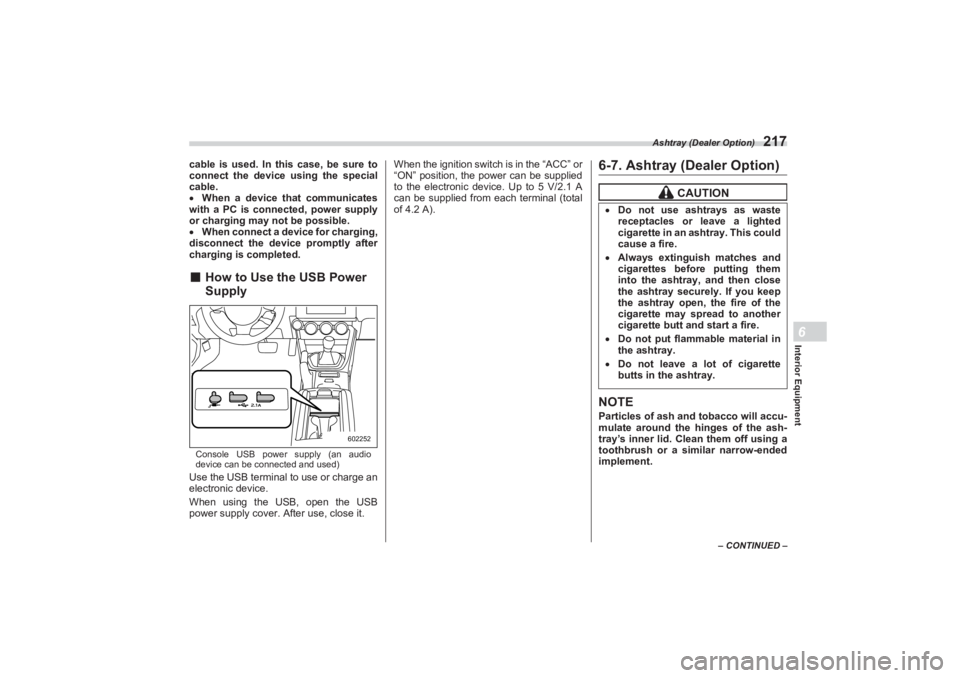
SupplyConsole USB power supply (an audio
device can be connected and used)Use the USB terminal to use or charge an
electronic device.
When using the USB, open the USB
power supply cover. After use, close it. When the ignition switch is in the “ACC” or
“ON” position, the power can be supplied
to the electronic device. Up to 5 V/2.1 A
can be supplied from each terminal (total
of 4.2 A).
6-7. Ashtray (Dealer Option)NOTEParticles of ash and tobacco will accu-
mulate around the hinges of the ash-
tray’s inner lid. Clean them off using a
toothbrush or a similar narrow-ended
implement.
602252
CAUTION
Do not use ashtrays as waste
receptacles or leave a lighted
cigarette in an ashtray. This could
cause a fire. Always extinguish matches and
cigarettes before putting them
into the ashtray, and then close
the ashtray securely. If you keep
the ashtray open, the fire of the
cigarette may spread to another
cigarette butt and start a fire. Do not put flamma ble material in
the ashtray. Do not leave a lot of cigarette
butts in the ashtray.
BRZ_U.book 217 ページ 2022年3月29日 火曜日 午後3時59分
Page 224 of 432
Floor Mat
218The portable ashtray can be installed in
each cup holder or bottle holder. For the
locations of the cup holders, refer to "Cup
Holder and Console Tray" P214. For the
locations of the bottle holders, refer to
"Bottle Holders" P215.
When using the ashtray, open the lid of
the ashtray. Fully close the lid after using
the ashtray to help reduce residual
smoke.
6-8. Floor Mat
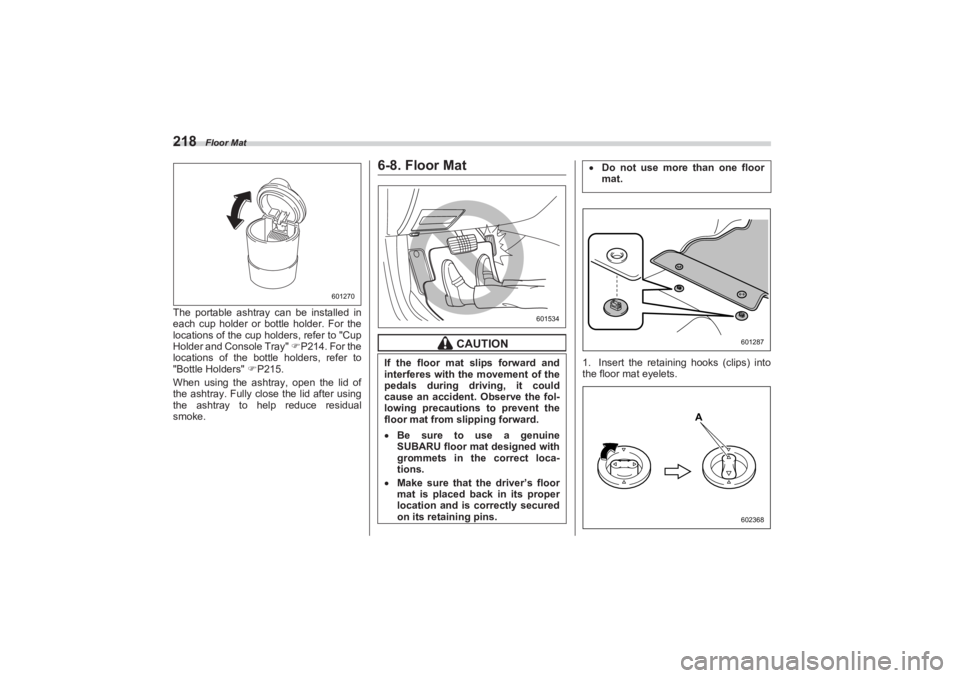
1. Insert the retaining hooks (clips) into
the floor mat eyelets.
601270
CAUTION
If the floor mat slips forward and
interferes with th e movement of the
pedals during driving, it could
cause an accident. Observe the fol-
lowing precautions to prevent the
floor mat from slipping forward. Be sure to use a genuine
SUBARU floor mat designed with
grommets in the correct loca-
tions. Make sure that the driver’s floor
mat is placed back in its proper
location and is correctly secured
on its retaining pins.
601534
Do not use more than one floor
mat.
601287
A
602368
BRZ_U.book 218 ページ 2022年3月29日 火曜日 午後3時59分
Page 225 of 432
Under-Floor Storage Compartment (models with the flat tire repair kit)
219
Interior Equipment6
2. Turn the upper knob of each retaining
hook (clip) to secure the floor mats in
place.
A: Always align the “ ” marks.
6-9. Under-Floor Storage
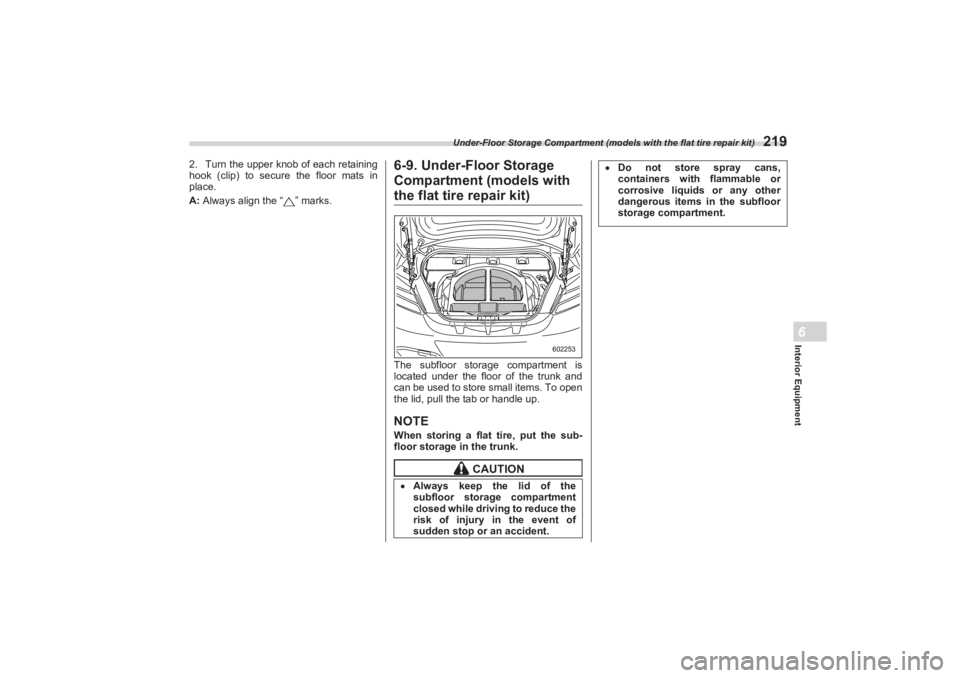
Compartment (models withthe flat tire repair kit)The subfloor storage compartment is
located under the floor of the trunk and
can be used to store small items. To open
the lid, pull the tab or handle up.NOTEWhen storing a flat tire, put the sub-
floor storage in the trunk.
CAUTION
Always keep the lid of the
subfloor storage compartment
closed while driving to reduce the
risk of injury in the event of
sudden stop or an accident.
602253
Do not store spray cans,
containers with flammable or
corrosive liquids or any other
dangerous items in the subfloor
storage compartment.
BRZ_U.book 219 ページ 2022年3月29日 火曜日 午後3時59分
Page 232 of 432
Fuel
2266. Stop filling the tank after the fuel filler
pump automatically stops. Do not add any
more fuel.
7. Put the cap back on and turn it clock-
wise until you hear a clicking noise. Be
certain not to catch the tether under the
cap while tightening.
8. Close the fuel filler lid completely.
NOTE You will see the “ ” sign in the
fuel gauge. This indicates that the fuel
filler lid is located on the right side of
the vehicle.
If the fuel filler cap is not tightened
until it clicks or if the tether is caught
under the cap, the CHECK ENGINE
warning light/malfunction indicator
light may illuminate. Refer to "CHECK
ENGINE Warning Light/Malfunction
Indicator Light" P136.
To lock the fuel filler lid, perform one
of the operations below. However if
these operations are performed when
the fuel filler lid is open, the fuel filler
lid will not lock when it is subsequently
closed. - Press the “ ” button on the key
fob.
- Press the lock side of the power
door locking switch.
WARNING
When refueling, insert the fuel
nozzle securely into the fuel filler
pipe. If the nozzle is lifted or not
fully inserted, its automatic stop-
ping mechanism may not func-
tion, causing fuel to overflow the
tank and creating a fire hazard. Stop refueling when the auto-
matic stop mechanism on the fuel
nozzle activates. If you continue
to add fuel, temperature changes
or other conditions may cause
fuel to overflow from the tank and
create a fire hazard.
CAUTION
Make sure that the cap is tightened
until it clicks to prevent fuel spillage
in the event of an accident.
CAUTION
Do not let fuel sp ill on the exterior
surfaces of the vehicle. Because
fuel may damage th e paint, be sure
to wipe off any spilled fuel quickly.
Paint damage caused by spilled fuel
is not covered under the SUBARU
Limited Warranty.
CAUTION
Never add any cleaning agents to
the fuel tank. Th e addition of a
cleaning agent may cause
damage to the fuel system. After refuelin g, turn the cap to the
right until it clicks to ensure that it
is fully tightened. If the cap is not
securely tightened, fuel may leak
out while the vehicle is being
driven or fuel spillage could
occur in the event of an accident,
creating a fire hazard. Do not let fuel spill on the exterior
surfaces of the vehicle. Because
fuel may damage the paint, be
sure to wipe off any spilled fuel
quickly. Paint damage caused by
spilled fuel is not covered under
the SUBARU Limited Warranty. Always use a genuine SUBARU
fuel filler cap. If you use the
wrong cap, it may not fit or have
proper venting and your fuel tank
and emission control system may
be damaged. It could also lead to
fuel spillage and a fire.
BRZ_U.book 226 ページ 2022年3月29日 火曜日 午後3時59分