2023 PEUGEOT LANDTREK tow
[x] Cancel search: towPage 88 of 164
86
Driving
– Close proximity to the vehicle in front (lane
markings may not be detected).
–
Roads that are narrow
, winding.
Risk of undesirable operation
The system should be deactivated in the
following situations:
–
When changing a wheel or working near a
wheel.
–
T
owing or with a bicycle carrier on a towing
device, especially with trailer not plugged in or
not approved.
–
Road in poor condition, unstable or with very
poor grip (risk of aquaplaning, snow
, ice).
–
Adverse weather conditions.
–
Driving on racing circuits.
–
Driving on a rolling road.
Deactivation/Activation
By default, the system is automatically activated
at every engine start.
► At any time, press and hold this button (for
around 5 seconds) to deactivate the system or
press briefly to reactivate it.
The warning lamp lights up on the
instrument panel when the system is
activated.
Malfunction
In the event of a malfunction, this warning
lamp comes on on the instrument panel,
accompanied by the display of a message and
an audible signal.
Contact a PEUGEOT dealer or a qualified
workshop.
Parking sensors
For more information, refer to the
General recommendations on the use
of driving and manoeuvring aids .
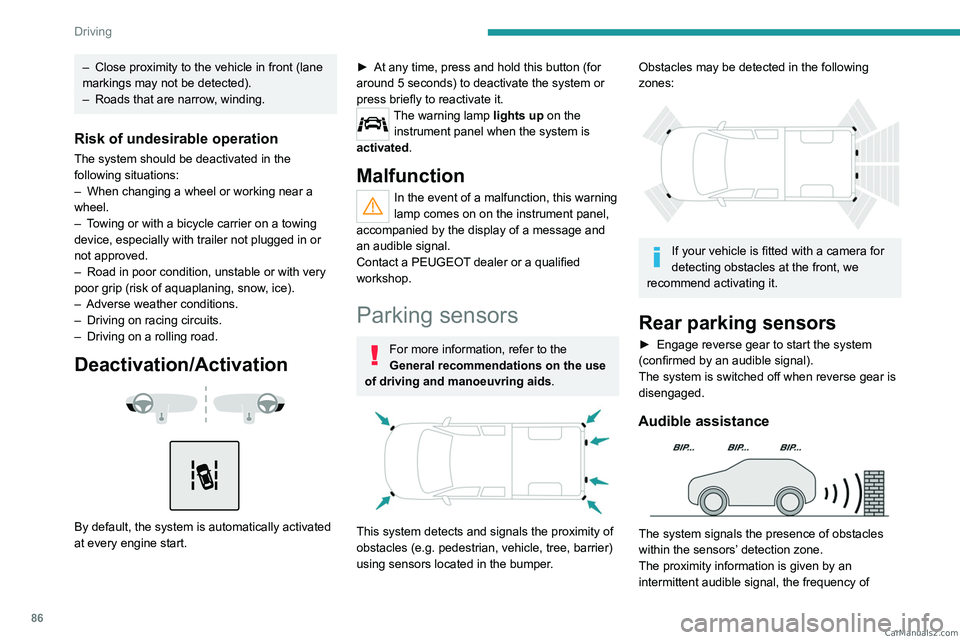
This system detects and signals the proximity of
obstacles (e.g.
pedestrian, vehicle, tree, barrier)
using sensors located in the bumper.
Obstacles may be detected in the following
zones:
If your vehicle is fitted with a camera for
detecting obstacles at the front, we
recommend activating it.
Rear parking sensors
► Engage reverse gear to start the system
(confirmed by an audible signal).
The system is switched off when reverse gear is
disengaged.
Audible assistance
The system signals the presence of obstacles
within the sensors’ detection zone.
The proximity information is given by an
intermittent audible signal, the frequency of CarM an uals 2 .c o m
Page 89 of 164
87
Driving
6which increases as the vehicle approaches the
obstacle.
When the distance between the vehicle and
the obstacle becomes less than about thirty
centimetres, the audible signal becomes
continuous.
The sound emitted by the speaker (right or
left) indicates the side on which the obstacle is
located.
Visual assistance
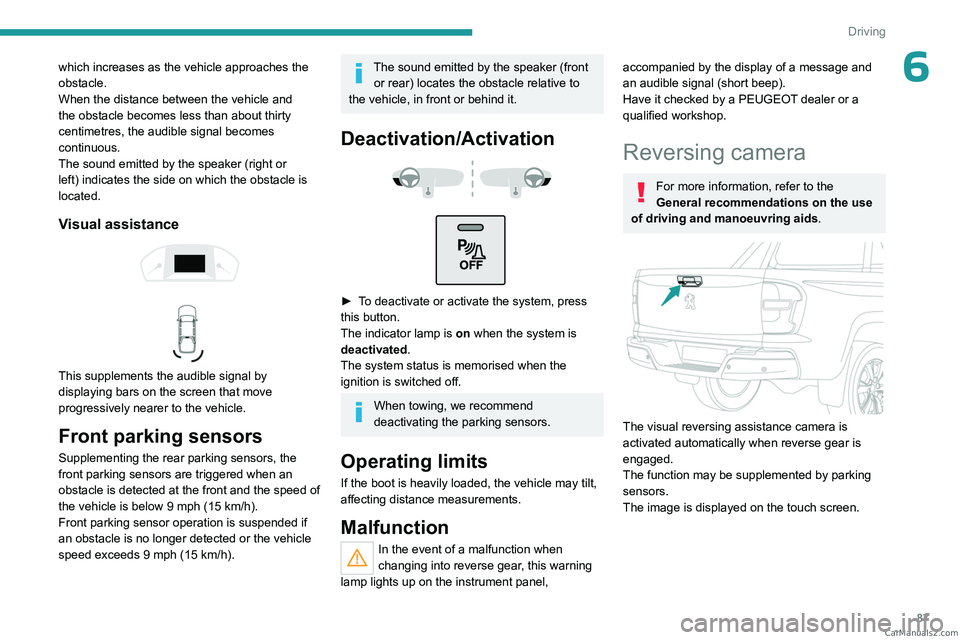
This supplements the audible signal by
displaying bars on the screen that move
progressively nearer to the vehicle.
Front parking sensors
Supplementing the rear parking sensors, the
front parking sensors are triggered when an
obstacle is detected at the front and the speed of
the vehicle is below 9 mph (15 km/h).
Front parking sensor operation is suspended if
an obstacle is no longer detected or the vehicle
speed exceeds 9 mph (15
km/h).
The sound emitted by the speaker (front or rear) locates the obstacle relative to
the vehicle, in front or behind it.
Deactivation/Activation
► To deactivate or activate the system, press
this button.
The indicator lamp is on when the system is
deactivated.
The system status is memorised when the
ignition is switched off.
When towing, we recommend
deactivating the parking sensors.
Operating limits
If the boot is heavily loaded, the vehicle may tilt,
affecting distance measurements.
Malfunction
In the event of a malfunction when
changing into reverse gear, this warning
lamp lights up on the instrument panel,
accompanied by the display of a message and
an audible signal (short beep).
Have it checked by a PEUGEOT dealer or a
qualified workshop.
Reversing camera
For more information, refer to the
General recommendations on the use
of driving and manoeuvring aids .
The visual reversing assistance camera is
activated automatically when reverse gear is
engaged.
The function may be supplemented by parking
sensors.
The image is displayed on the touch screen.
CarM an uals 2 .c o m
Page 96 of 164
94
Practical information
Recommended fuel
Petrol engines are compatible with minimum 91
RON unleaded fuel.
Diesel engines are compatible with type B0
fuel not containing Fatty Acid Methyl Ester
(biofuel) and B7, B10 and B15* type fuels
conforming to EN590 and EN16734 standards
containing respectively up to 7%, 10% and 15%
of Fatty Acid Methyl Ester.
Depending on the country of sale, the Diesel
fuel must be suited to the ambient temperature
in order to optimise engine performance and
minimise polluting emissions.
Temperature greater than Diesel quality
+5°C (+41°F) N°0
-5°C (+23°F) N°-10
-10°C (+14°F) N°-20
-25°C (-13°F) N°-35
The use of any other type of (bio) fuel
(e.g. vegetable or animal oils, pure or
diluted, domestic fuel) is strictly prohibited
(risk of damage to the engine and fuel
system).
* BlueHDi Diesel o nly.
Diesel at low temperature
At temperatures below 0 °C (+32 °F), the
formation of paraffins in summer-type Diesel
fuels could prevent the engine from operating
correctly
. In these temperature conditions, use
winter-type Diesel fuel and keep the fuel tank
more than 50
% full.
At temperatures below -15
°C (+5 °F) to avoid
problems starting, it is best to park the vehicle
under shelter (heated garage).
Travelling abroad
Certain fuels could damage your vehicle’s
engine.
In certain countries, the use of a particular
fuel may be required (specific octane rating,
specific trade name, etc.) to ensure correct
operation of the engine.
For all additional information, consult a dealer.
Refuelling
Fuel tank capacity: approximately 80 litres.
Reserve level: approximately 11 litres.
Low fuel level
When the low fuel level is reached, this
warning lamp lights up on the instrument
panel. When it first comes on, about 11 litres of
fuel remain.
Until sufficient fuel is added, this warning lamp
appears every time the ignition is switched on,
accompanied by the message and the audible
signal. When driving, this message and audible
signal are repeated with increasing frequency as
the fuel level drops towards 0.
You must refuel as soon as possible to avoid
running out of fuel.
For more information on Running out of fuel
(Diesel), refer to the corresponding section.
A small arrow by the warning lamp indicates which side of the vehicle the
fuel filler flap is located on.
Refuelling
When refuelling, at least 10 litres must be added
in order to be registered by the fuel gauge.
Opening the filler cap may create a noise caused
by an inrush of air. This vacuum is normal,
caused by the sealing of the fuel system.
To refuel in complete safety:
►
Always switch off the engine.
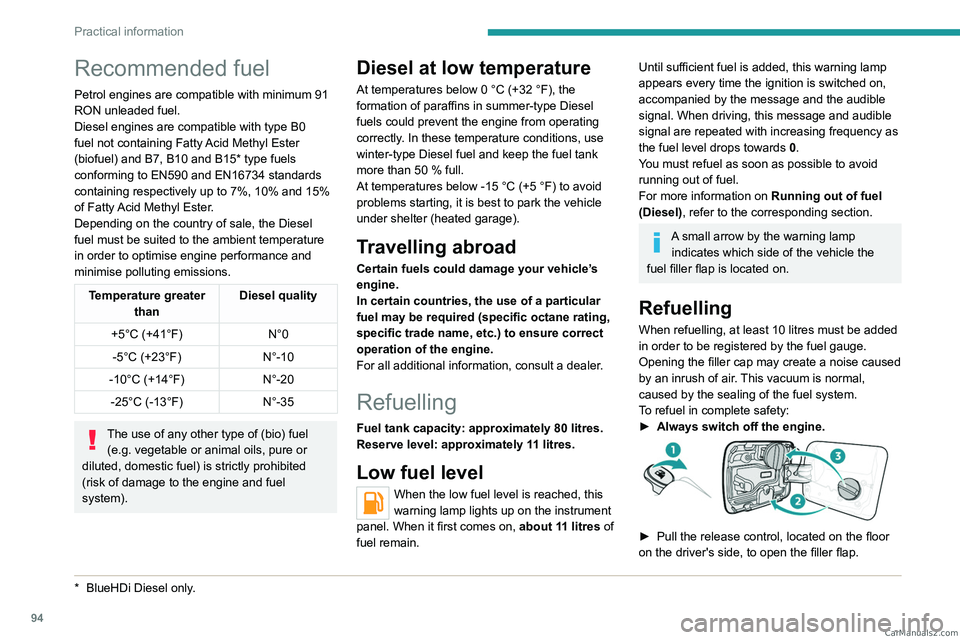
► Pull the release control, located on the floor
on the driver's side, to open the filler flap. CarM an uals 2 .c o m
Page 97 of 164
95
Practical information
7► Take care to select the pump that delivers the
correct fuel type for your vehicle's engine (see a
reminder label on the inside of the filler flap).
►
T
urn the filler cap to the left, remove it and
place it on its support (on the filler
flap).
►
Insert the filler nozzle and push it in as far as
possible before starting to refuel (to minimise the
risk of splashing).
Do not continue after the nozzle’
s third cut-
out. Doing so may cause malfunctions.
►
Put the filler cap back in place and turn it to
the right.
►
Close the fuel filler flap.
If you have put in the wrong fuel for the
vehicle, you must have the fuel tank
drained and filled with the correct fuel before
starting the engine.
Depending on version, the vehicle is fitted with
a catalytic converter, which helps to reduce the
level of harmful emissions in the exhaust gases.
For petrol engines, you must use unleaded
fuel.
The filler neck is narrower, admitting unleaded
petrol nozzles only.
Towing device
Load distribution
► Distribute the load in the trailer so that the
heaviest items are as close as possible to the
axle, and the nose weight approaches the
maximum permitted without exceeding it.
Air density decreases with altitude, thus reducing
engine performance. The maximum towable load
must be reduced by 10% per 1,000
metres of
altitude.
Use genuine towing devices and wiring
harnesses approved by PEUGEOT. We
recommend having them fitted by a
PEUGEOT dealer or a qualified workshop.
If not fitted by a PEUGEOT dealer, they must
still be fitted in accordance with the vehicle
manufacturer's instructions.
Certain driving or manoeuvring aid functions
are automatically deactivated while an
approved towing system is in use.
For more information about driving with a
towing device fitted to a trailer and associated
with the Trailer stability assist, refer to the
corresponding section.
Comply with the maximum authorised
towable weight, as indicated on your
vehicle's registration certificate, on the
manufacturer's label and in the Technical
data section of this guide.
If using accessories attached to the
towing device (e.g. bicycle carriers, tow
boxes):
–
Comply with the maximum authorised nose
weight.
–
Do not transport more than 4 conventional
bicycles or 2 electric bicycles.
When loading bicycles onto a bicycle carrier
on a towball, be sure to place the heaviest
bicycles as close as possible to the vehicle.
Observe the legislation in force in the
country where you are driving.
Snow chains
In wintry conditions, snow chains improve
traction as well as the behaviour of the vehicle
when braking.
Snow chains must be fitted only to
driving wheels.
Observe the legislation in force in your
country relating to the use of snow
chains and maximum authorised speeds.
Only use chains designed for the vehicle's wheel
type:
Tyre size Link size
245/70 R16 13 to 16
mm
265/65 R17 13 to 16
mm
265/60 R18 13 to 16
mm
It is also possible to use snow socks.
For more information on snow chains, contact a
PEUGEOT dealer or a qualified workshop. CarM an uals 2 .c o m
Page 99 of 164
97
Practical information
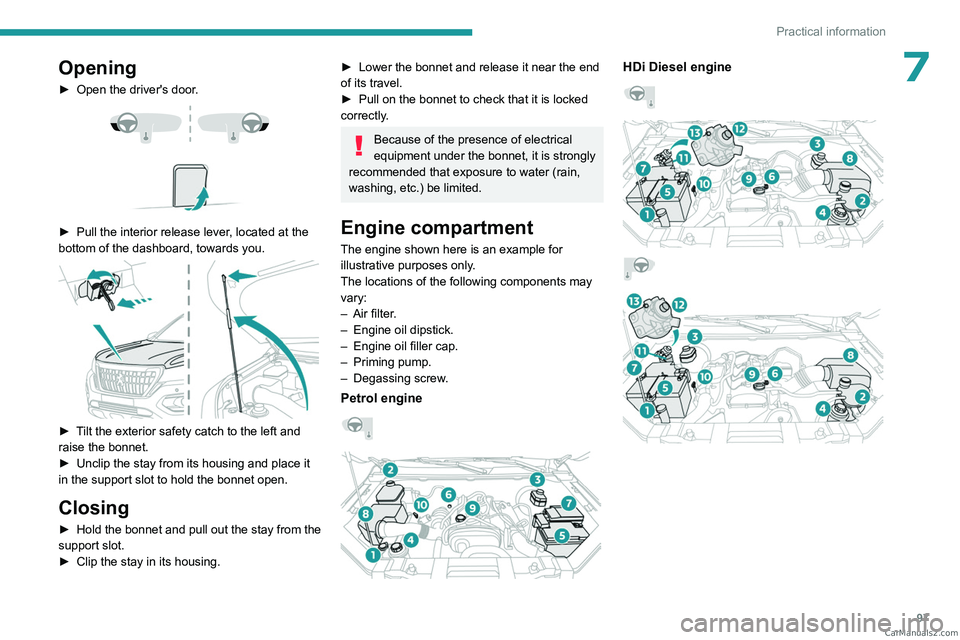
7Opening
► Open the driver's door.
► Pull the interior release lever , located at the
bottom of the dashboard, towards you.
► Tilt the exterior safety catch to the left and
raise the bonnet.
►
Unclip the stay from its housing and place it
in the support slot to hold the bonnet open.
Closing
► Hold the bonnet and pull out the stay from the
support slot.
►
Clip the stay in its housing.
► Lower the bonnet and release it near the end
of its travel.
►
Pull on the bonnet to check that it is locked
correctly
.
Because of the presence of electrical
equipment under the bonnet, it is strongly
recommended that exposure to water (rain,
washing, etc.) be limited.
Engine compartment
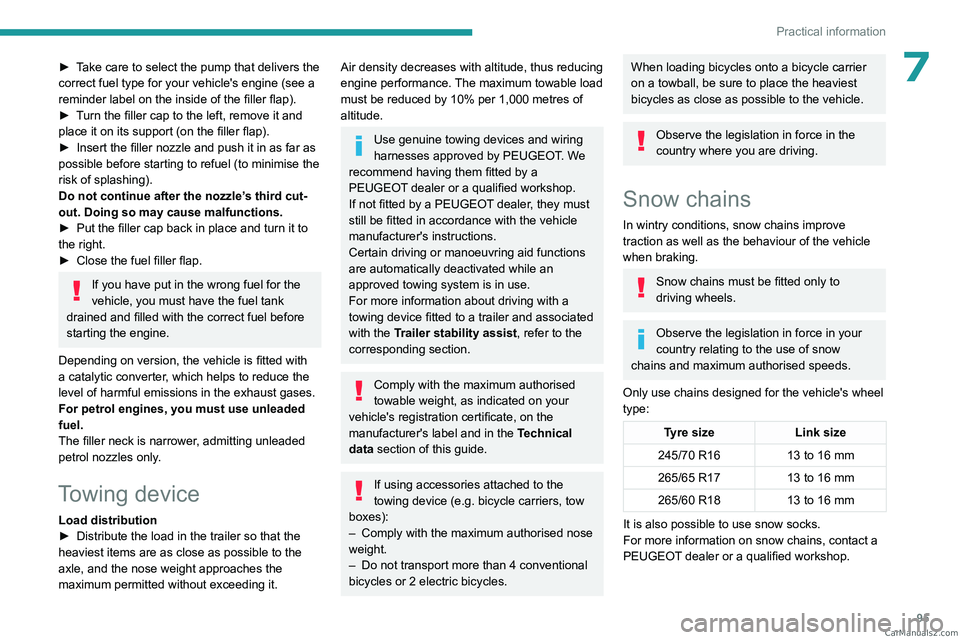
The engine shown here is an example for
illustrative purposes only.
The locations of the following components may
vary:
–
Air filter
.
–
Engine oil dipstick.
–
Engine oil filler cap.
–
Priming pump.
–
Degassing screw
.
Petrol engine
HDi Diesel engine
CarM an uals 2 .c o m
Page 104 of 164
102
Practical information
used in town, over short distances. It may be
necessary to have the condition of the brakes
checked, even between vehicle services.
Unless there is a leak in the circuit, a drop in the
brake fluid level indicates that the brake pads
are worn.
After washing the vehicle, moisture, or in wintry conditions, ice can form on the
brake discs and pads: braking efficiency may
be reduced. Gently dab the brakes to dry and
defrost them.
Brake disc wear
For information on checking brake disc
wear, contact a PEUGEOT dealer or a
qualified workshop.
Manual parking brake
If you notice excessive brake lever travel
or decreased effectiveness, the parking
brake must be adjusted, even between two
services.
This system must be checked by a PEUGEOT
dealer or a qualified workshop.
Steering wheel
Play or a loss of precision in the steering
means that this system needs to be
checked.
This system must be checked by a PEUGEOT
dealer or a qualified workshop.
Wheels and tyres
The inflation pressure of all tyres, including the spare wheel, must be
checked on "cold” tyres at least once a month.
The pressures indicated on the tyre pressure
label are valid for "cold" tyres. If you have driven
for more than 10 minutes or more than 6 miles
(10 kilometres) at over 31 mph (50
km/h), add
0.3 bar (30 kPa) to the values indicated on the
label.
The pressure difference between the left-hand
side and right-hand side tyres must not exceed
0.05 bar (5 kPa).
Under-inflation increases energy
consumption. Non-compliant tyre
pressures cause tyres to wear prematurely
and have an adverse effect on the vehicle's
road holding - risk of accident!
Driving with worn or damaged tyres reduces the
braking and road holding performance of the
vehicle. Regularly check the condition of the
tyres (tread and sidewalls) and rims as well as
the presence of the valve caps.
When the wear indicators no longer appear set
back from the tread, the depth of the grooves is
less than 1.6 mm; replace the tyres as soon as
possible.
Regularly remove foreign bodies trapped in the
tyre tread.
Using different size wheels and tyres from those
specified can affect the lifetime of tyres, wheel
rotation, ground clearance, the speedometer
reading and have an adverse effect on road
holding.
Fitting different tyres on the front and rear axles
can cause the ESC to mistime.
Fitting winter tyres to only one axle could cause
you to lose control of the vehicle. Fitting winter
tyres to both axles is recommended.
Always mark the direction of rotation on the tyres
that will be stored when fitting winter or summer
tyres. Store them in a cool, dry place and away
from direct exposure to the sun's rays.
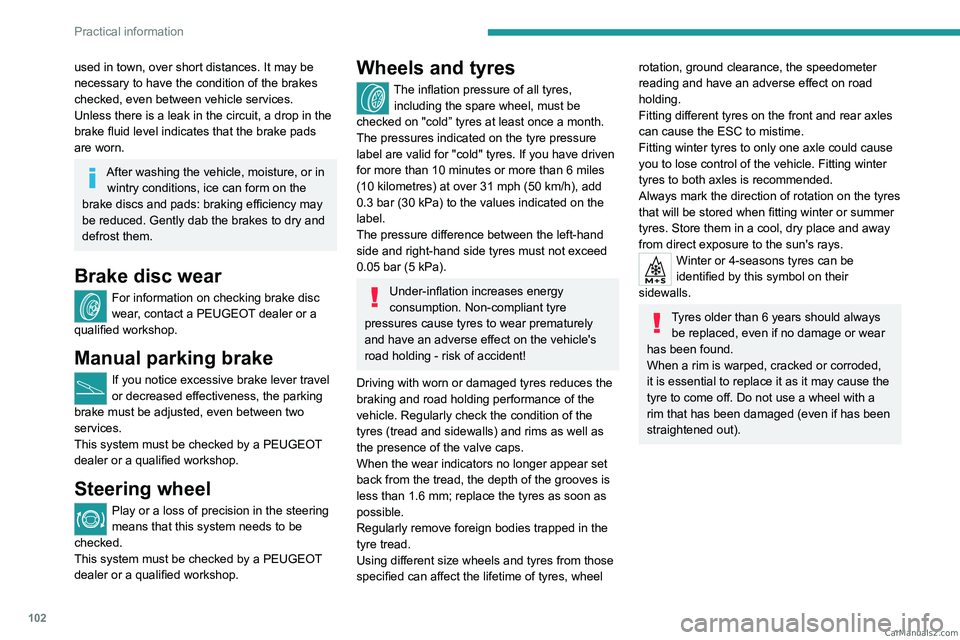
Winter or 4-seasons tyres can be
identified by this symbol on their
sidewalls.
Tyres older than 6 years should always be replaced, even if no damage or wear
has been found.
When a rim is warped, cracked or corroded,
it is essential to replace it as it may cause the
tyre to come off. Do not use a wheel with a
rim that has been damaged (even if has been
straightened out). CarM an uals 2 .c o m
Page 109 of 164
107
Practical information
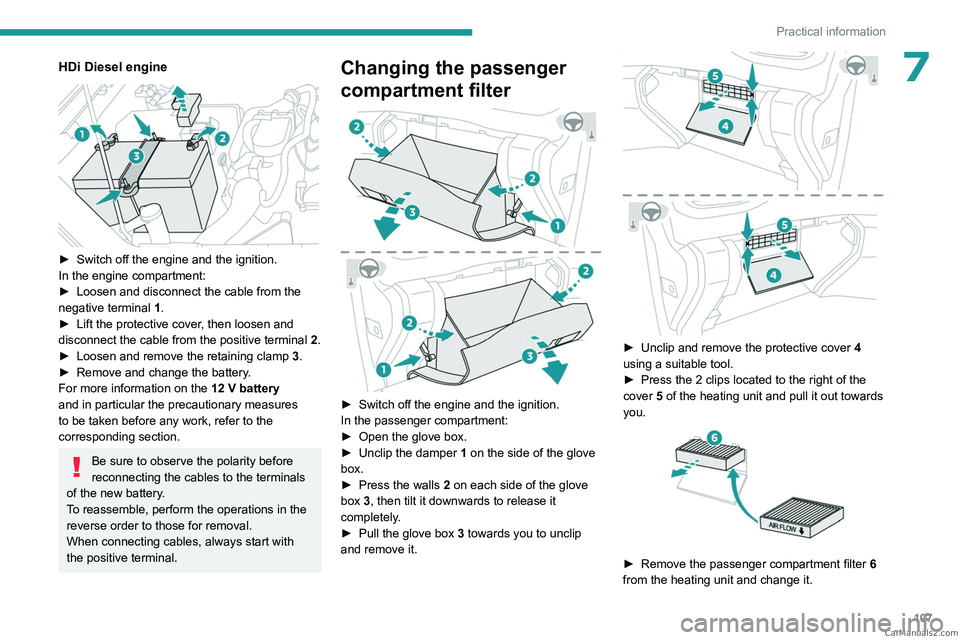
7HDi Diesel engine
► Switch off the engine and the ignition.
In the engine compartment:
►
Loosen and disconnect the cable from the
negative terminal
1
.
►
Lift the protective cover
, then loosen and
disconnect the cable from the positive terminal
2
.
►
Loosen and remove the retaining clamp
3
.
►
Remove and change the battery
.
For more information on the 12 V battery
and in particular the precautionary measures
to be taken before any work, refer to the
corresponding section.
Be sure to observe the polarity before
reconnecting the cables to the terminals
of the new battery.
To reassemble, perform the operations in the
reverse order to those for removal.
When connecting cables, always start with
the positive terminal.
Changing the passenger
compartment filter
► Switch off the engine and the ignition.
In the passenger compartment:
►
Open the glove box.
►
Unclip the damper 1
on the side of the glove
box.
►
Press the walls
2 on each side of the glove
box 3, then tilt it downwards to release it
completely.
►
Pull the glove box 3
towards you to unclip
and remove it.
► Unclip and remove the protective cover 4
using a suitable tool.
►
Press the 2 clips located to the right of the
cover
5 of the heating unit and pull it out towards
you.
► Remove the passenger compartment filter 6
from the heating unit and change it. CarM an uals 2 .c o m
Page 113 of 164

111
Practical information
7– cleaning products directly on the throttle
bearings as well as on the body's connector;
–
hard, sharp or abrasive tools to remove
difficult deposits. Use a soft cloth with a
suitable detergent.
Refitting the throttle body
Before refitting the throttle body, check
the condition of the seal. If it is damaged,
replace it with a new one.
►
Install the seal on the intake manifold and fit
the throttle body
B, making sure that the seal
does not fall.
For reassembly, carry out the operations in the
reverse order to those for removal. Tighten the
screws to the correct tightening torque.
Free-wheeling
In certain situations, you must allow the vehicle
to free-wheel (while being towed, on a rolling
road, in an automatic car wash, or being
transported by rail or sea freight, etc.).
The procedure differs depending on the type of
gearbox and transmission.
Do not leave the vehicle unattended
while coasting.
/
To release them
► With the vehicle stationary and the engine
running, depress the brake pedal and release
the parking brake.
►
With a manual gearbox, move the gear lever
into neutral.
►
With an automatic gearbox, select position N
.
►
For 4-wheel drive vehicles (4x4), put the
transmission selector in 2H
mode.
►
Switch the ignition off.
Advice on care and maintenance
General recommendations
Observe the following recommendations to avoid
damaging the vehicle.
Exterior
Never use a high-pressure jet wash in
the engine compartment - risk of
damaging the electrical components!
Do not wash the vehicle in bright sunshine or
extremely cold conditions.
When washing the vehicle in an
automatic roller-brush car wash, be sure
to lock the doors and, depending on version,
move the electronic key away.
When using a pressure washer, keep the jet
nozzle at a minimum distance of 30 cm from
the vehicle (particularly when cleaning areas
containing chipped paint, sensors or seals).
Promptly clean up any stains containing
chemicals liable to damage the vehicle's
paintwork (including tree resin, bird
droppings, insect secretions, pollen and tar).
Depending on the environment, clean the
vehicle frequently to remove salty deposits
(in coastal areas), soot (in industrial areas)
and mud/salts (in wet or cold areas). These
substances can be highly corrosive.
Contact a PEUGEOT dealer or a qualified
workshop for advice on removing stubborn
stains requiring special products (such as tar
or insect removers).
Apply silicone oil to the door and window
seals every year and regularly lubricate the
door hinges and the locks.
To avoid damaging the seals when the vehicle
is parked for a long time, apply silicone-based
lubricant to the door seals and wax on the
bodywork in contact with the seals.
Preferably, have paint touch-ups performed
by a PEUGEOT dealer or a qualified
workshop.
Interior
When washing the vehicle, never use a
water hose or high-pressure jet to clean
the interior.
Liquids carried in cups or other open
containers can spill, presenting a risk of CarM an uals 2 .c o m