2023 PEUGEOT EXPERT instrument panel
[x] Cancel search: instrument panelPage 159 of 348
157
Driving
6With a manual gearbox, third gear or higher must
be engaged.
With a drive selector, mode D or B must be
engaged.
Cruise control remains active after
changing gear, regardless of the gearbox
type, on engines fitted with the Stop & Start
function.
Switching off the ignition cancels any
speed setting.
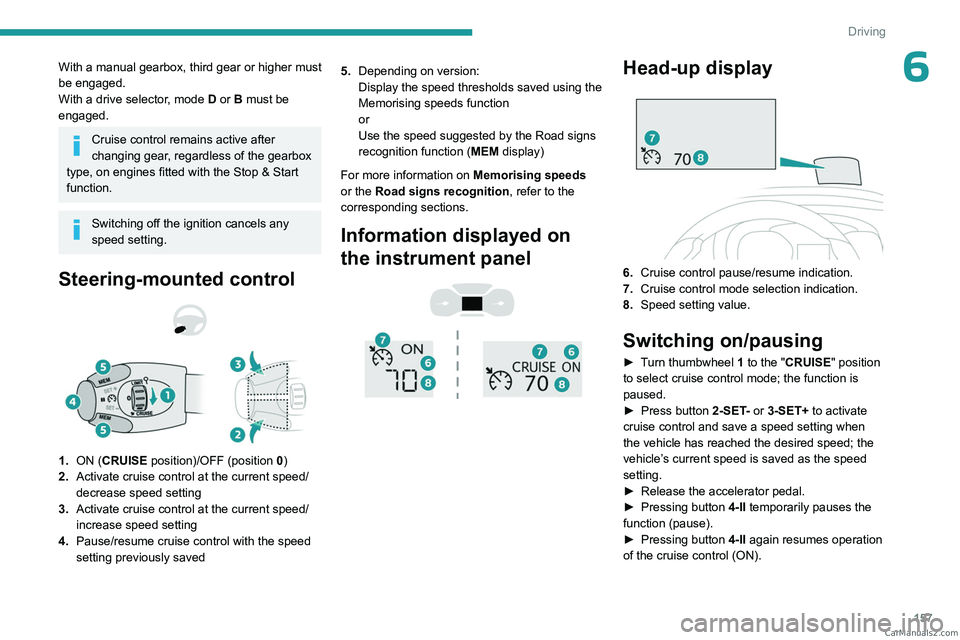
Steering-mounted control
1. ON (CRUISE position)/OFF (position 0)
2. Activate cruise control at the current speed/
decrease speed setting
3. Activate cruise control at the current speed/
increase speed setting
4. Pause/resume cruise control with the speed
setting previously saved 5.
Depending on version:
Display the speed thresholds saved using the
Memorising speeds function
or
Use the speed suggested by the Road signs
recognition function ( MEM display)
For more information on Memorising speeds
or the Road signs recognition , refer to the
corresponding sections.
Information displayed on
the instrument panel
Head-up display
6. Cruise control pause/resume indication.
7. Cruise control mode selection indication.
8. Speed setting value.
Switching on/pausing
► Turn thumbwheel 1 to the "CRUISE" position
to select cruise control mode; the function is
paused.
►
Press button
2-SET- or 3-SET+ to activate
cruise control and save a speed setting when
the vehicle has reached the desired speed; the
vehicle’s current speed is saved as the speed
setting.
►
Release the accelerator pedal.
►
Pressing button 4-II
temporarily pauses the
function (pause).
►
Pressing button 4-II
again resumes operation
of the cruise control (ON). CarM an uals 2 .c o m
Page 160 of 348
158
Driving
Cruise control can also be paused
temporarily:
–
by pressing the brake pedal.
–
by pressing the clutch pedal with a manual
gearbox (depending on the engine fitted).
–
automatically
, if the electronic stability
control (ESC) system is triggered.
Changing the cruise speed
setting
The cruise control must be active.
To change the cruise speed setting, based on
the vehicle’s current speed:
►
For steps of +/- 1
mph (1 km/h), briefly
press
2-SET- or 3-SET+ repeatedly.
►
For steps of +/- 5
mph (5 km/h), press and
hold
2-SET- or 3-SET+.
Pressing and holding 2-SET - or 3-SET+
results in a rapid change in the speed of
the vehicle.
As a precaution, we recommend setting a cruise speed fairly close to the current
speed of your vehicle, to avoid any sudden
acceleration or deceleration of the vehicle.
To change the cruise speed setting using memorised speed settings and from the touch
screen:
►
Press
5-MEM to display the memorised
speed settings.
► Press the touch screen button for the desired
speed setting.
The selection screen closes after a few
moments.
This setting becomes the new cruise speed.
T
o change the cruise speed setting using the
speed suggested by the Road signs recognition
function displayed on the instrument panel:
►
Press
5-MEM once; a message is displayed,
confirming the memorisation request.
►
Press
5-MEM again to save the suggested
speed.
The new speed setting value is displayed on the
instrument panel.
Temporarily exceeding the
programmed speed
If needed (when overtaking, for example),
it is possible to exceed the programmed
speed by pressing the accelerator pedal.
Cruise control is temporarily deactivated and the
programmed speed displayed flashes.
To return to the programmed speed, simply
release the accelerator pedal.
Once the vehicle has returned to the
programmed speed, cruise control takes over
again and the programmed speed setting stops
flashing.
When descending a steep hill, the cruise
control system cannot prevent the
vehicle from exceeding the programmed
speed.
You may have to brake to control the speed of
your vehicle. In this case, the cruise control is
automatically paused.
To activate the system again, with the vehicle
speed above 25 mph (40
km/h), press button
4.
Switching off
► Turn the thumbwheel 1 to the "0” position: the
cruise control information disappears from the
screen.
Malfunction
In the event of a malfunction, dashes are
displayed flashing and then fixed instead of the
speed setting.
Have it checked by a PEUGEOT dealer or a
qualified workshop.
Adaptive cruise control
Refer to the General recommendations
on the use of driving and
manoeuvring aids and to Cruise control
- particular recommendations. CarM an uals 2 .c o m
Page 162 of 348
160
Driving
Pressing and holding either button
2-SET- or 3-SET+ results in a rapid
change in the speed of the vehicle.
Pausing/resuming cruise control
► Press 4-II or depress the brake pedal. To
pause cruise control, it is also possible to: •
Shift from mode
D to N,
•
Depress the clutch pedal for more than 10
seconds.
•
Press the electric parking brake control.
►
Press
4-II to restart cruise control. Cruise
control may have been paused automatically: •
When the inter-vehicle distance threshold is
reached.
•
When the distance between your vehicle and
the one in front becomes too short.
•
When the vehicle starts moving too slowly or
the vehicle in front starts moving too slowly
.
•
When the ESC system is triggered.
When the driver attempts to reactivate
cruise control, after the function has been
paused, the message "Activation not possible,
unsuitable conditions" is briefly displayed if
reactivation is not possible (safety conditions
not met).
Using the Road signs recognition function
or speed limit sign memorisation to
modify the speed setting.
► Press 5-MEM to accept the speed setting
proposed by the system on the instrument panel
or touch screen, then press again to confirm.
To prevent any sudden acceleration or deceleration of the vehicle, select a
speed setting fairly close to the current speed
of your vehicle.
Changing the inter-vehicle distance
► Press 6 to display the distance setting
thresholds ("Distant", "Normal" or "Close"), then
press again to select a threshold.
After a few seconds, the option is accepted and
will be memorised when the ignition is switched
off.
Temporarily exceeding the speed setting
► Depress the accelerator pedal. Distance
monitoring and cruise control are deactivated as
long as you continue to accelerate.
The speed
on the instrument panel flashes.
Deactivating the system
► Turn the knob 1 upwards into position 0
(OFF).
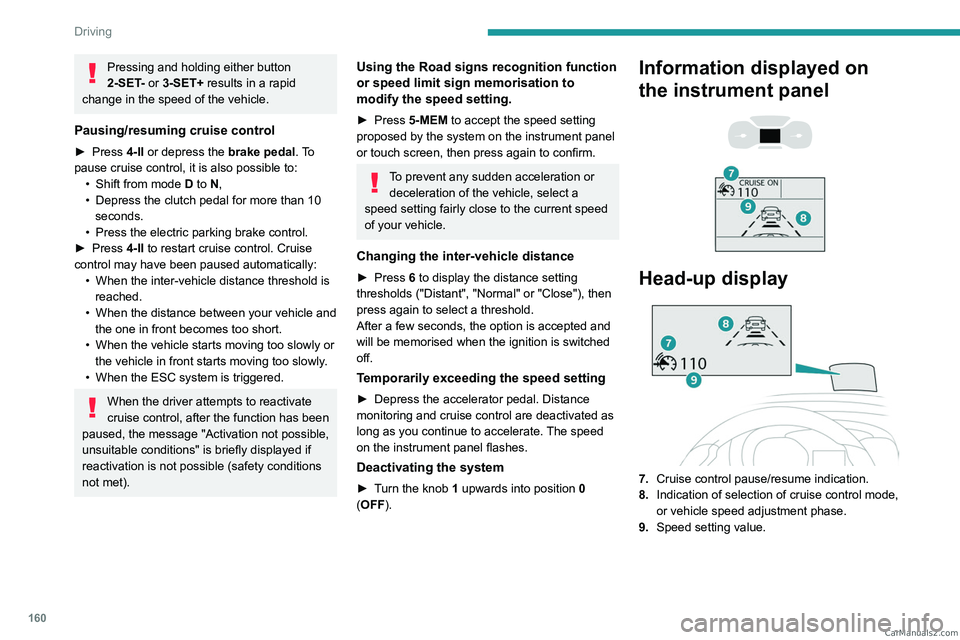
Information displayed on
the instrument panel
Head-up display
7. Cruise control pause/resume indication.
8. Indication of selection of cruise control mode,
or vehicle speed adjustment phase.
9. Speed setting value. CarM an uals 2 .c o m
Page 165 of 348
163
Driving
6Seat belts fastened for all passengers.
Stabilised speed on roads with no or low
curvature.
This warning lamp lights up on the instrument panel without any additional
message, to indicate that the automatic braking
system is not available.
This is a normal behavior indicating that a
condition is not fulfilled and which does not
request the support of a workshop.
In any situations with ignition on where automatic
braking presents a risk, deactivating the
system via the vehicle's configuration menu is
recommended, for instance:
–
T
owing a trailer (particularly a trailer without its
own braking system).
–
Carrying long objects on roof bars or roof rack.
–
Driving with snow chains.
–
Using an automatic car wash.
–
Performing any maintenance (e.g.
changing a
wheel, working inside the engine compartment).
–
Placing the vehicle on a rolling bench in a
workshop.
–
T
owing the vehicle.
–
Following a front bumper deformation.
–
Following a damage of the windscreen close
to the detection camera.
In case the detection is degraded or
temporarily unavailable by environment
conditions, then a driver indication is not
displayed (because a driver action is not
requested).
It can be dangerous to drive if the brake
lamps are not in perfect working order.
The driver must not overload the vehicle (keep within the GVW limit and load
height limits for roof bars).
Collision Risk Alert
This function warns the driver if there is a risk
of collision with the preceding vehicle, or with a
pedestrian or cyclist.
Modifying the alert trigger threshold
This trigger threshold determines the sensitivity
with which the function warns of the risk of
collision.
The threshold is set via the vehicle configuration menu with the audio
system or touch screen.
►
Select one of the three pre-defined
thresholds: "
Far", "Normal" or "Close".
The last threshold selected is memorised when
the ignition is switched off.
Operation
Depending on the collision risk detected by the
system and the alert trigger threshold chosen
by the driver, different levels of alert may be
triggered and displayed on the instrument panel.
The system takes into account the vehicle
dynamics, the difference speed of the own
vehicle and the object identified for the
collision risk, and the operation of the vehicle
(e.g. actions on the pedals, steering wheel) to
trigger the alert at the most relevant moment.
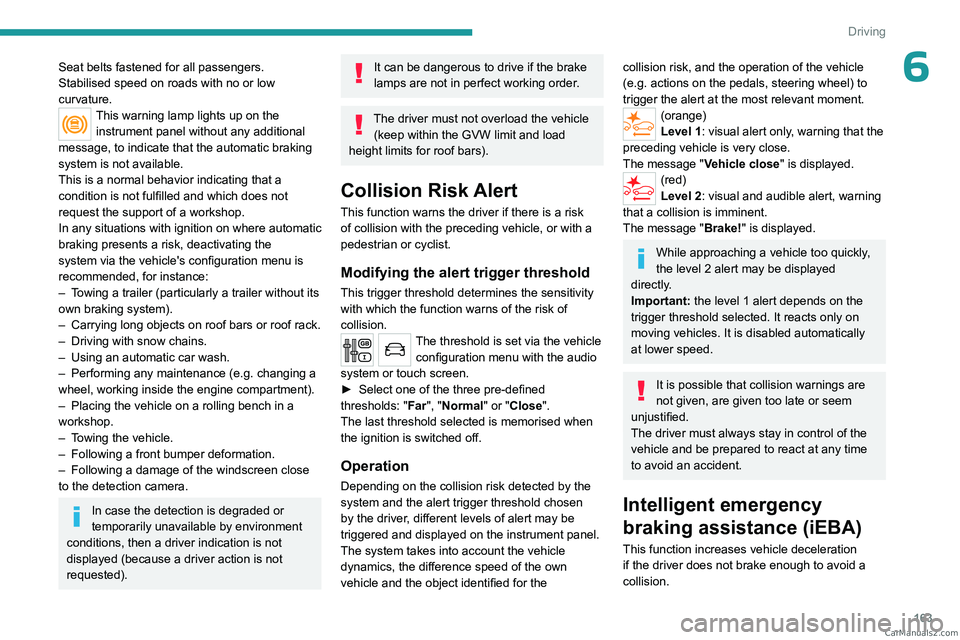
(orange)
Level 1: visual alert only, warning that the
preceding vehicle is very close.
The message "Vehicle close" is displayed.
(red)
Level 2: visual and audible alert, warning
that a collision is imminent.
The message "Brake! " is displayed.
While approaching a vehicle too quickly,
the level 2 alert may be displayed
directly.
Important: the level 1 alert depends on the
trigger threshold selected. It reacts only on
moving vehicles. It is disabled automatically
at lower speed.
It is possible that collision warnings are
not given, are given too late or seem
unjustified.
The driver must always stay in control of the
vehicle and be prepared to react at any time
to avoid an accident.
Intelligent emergency
braking assistance (iEBA)
This function increases vehicle deceleration
if the driver does not brake enough to avoid a
collision. CarM an uals 2 .c o m
Page 166 of 348

164
Driving
This assistance is only provided if the driver
presses the brake pedal.
Active Safety Brake
This function, also called "automatic emergency
braking", intervenes after the acoustic alert if the
driver does not operate the brake pedal quickly
enough.
The system aims at reducing the speed of
impact or avoiding a collision if the driver fails to
react.
Below a speed of 19 mph (30 km/h),
automatic emergency braking may slow
down the vehicle to a complete stop.
Otherwise, for versions with camera only
, the
speed may be reduced by a maximum of 16
mph (25
km/h).
For versions with camera and radar, the
speed reduction may be extended to 31 mph
(50
km/h), if both sensors are able to detect
the thread.
Operation
The system operates subject to the following
conditions:
–
At reduced speed in an urban environment,
when a stationary vehicle, pedestrian or cyclist
is detected.
–
The vehicle's speed is between 6 mph and
53 mph (10
km/h and 85 km/h) (versions with
camera only) or 87 mph (140 km/h) (versions
with camera and radar) when a moving vehicle
is detected.
This warning lamp flashes (for approximately 10 seconds) as soon as
the function applies the vehicle’s brakes.
During the flashing time, the function is not
available.
With an automatic gearbox, in the event of
automatic emergency braking, keep the brake
pedal depressed, also after a complete stop is
reached, to prevent the vehicle from rolling away.
With a manual gearbox, in the event of automatic
emergency braking bringing the vehicle to a
complete stop, the engine may stall.
The driver can override the automatic emergency braking at any time by
strongly turning the steering wheel (evasive
manoeuver) and/or by firmly pressing the
accelerator pedal.
The brake pedal may feel hard and vibrate slightly while the function is
operating.
If the vehicle comes to a complete stop,
automatic braking is maintained for 1 to
2
seconds.
Deactivation/Activation
By default, the system is automatically activated
at every engine start.
The settings are changed via the vehicle configuration menu.
Deactivation of the system is signalled by
the illumination of this warning lamp,
accompanied by the display of a message.
Malfunction
This warning lamp lights up on the instrument panel, if the automatic braking
system is reduced or degraded.
This is a normal behavior, which does not
request the support of a qualified workshop. CarM an uals 2 .c o m
Page 167 of 348

165
Driving
6This may be caused by a reduced visibility
(e.g. rain, fog, snow, blinding by low sun) or by
a real sensor blockage. In this case, stop the
vehicle and verify if the front camera or the front
radar is covered by dirt, snow, ice or anything
preventing the sensing.
In the event of a malfunction, this warning
lamp lights up on the instrument panel,
accompanied by the display of a message and
an audible signal.
Have it checked by a PEUGEOT dealer or a
qualified workshop.
If these warning lamps come on after the
engine has been switched off and then
restarted, contact a PEUGEOT dealer or a
qualified workshop to have the system checked.
These warning lamps light up on the instrument panel and/or in the
warning lamp display for seat belts and front
passenger airbag to indicate that the driver's
and/or front passenger's seat belt is not fastened
(depending on version). The automatic braking
system is deactivated until the seat belts are
fastened.
Lane departure warning
For more information, refer to the
General recommendations on the use
of driving and manoeuvring aids .
This system, using a camera which recognises
solid or broken lines, detects the involuntary
crossing of longitudinal traffic lane markings on
the ground.
If the direction indicator is not used at speeds
above 50 mph (80
km/h) and there is a risk of
one of these lines on the road surface being
crossed, the system triggers the alert.
This system is particularly useful on motorways
and main roads.
Detection - Alert
You are alerted by the flashing of this warning lamp in the instrument panel,
accompanied by an audible signal.
No warning is transmitted while the
direction indicator is active and for
approximately 20 seconds after the direction
indicator is switched off.
Activation/Deactivation
With audio system
► To activate or deactivate the system, press
this button.
The indicator lamp is on when the system is
activated.
With touch screen
The settings are changed via the vehicle configuration menu.
Malfunction
Depending on the vehicle’s equipment:The indicator lamp in this button flashes.
or
/The button flashes and a fault appears.
Consult a PEUGEOT dealer or a qualified
workshop. CarM an uals 2 .c o m
Page 172 of 348

170
Driving
Malfunction
In the event of a malfunction when
changing into reverse gear, this warning
lamp lights up on the instrument panel,
accompanied by the display of a message and
an audible signal (short beep).
Have it checked by a PEUGEOT dealer or a
qualified workshop.
Visiopark 1
For more information, refer to the
General recommendations on the use
of driving and manoeuvring aids .
As soon as reverse gear is engaged with the
engine running, this system displays views of
your vehicle’s close surroundings on the touch
screen using a camera located at the rear of the
vehicle.
The screen is divided into two parts with a
contextual view and a view from above the
vehicle in its close surroundings.
The parking sensors supplement the information
on the view from above the vehicle.
Various contextual views may be displayed:
–
Standard view
.
–
180° view
.
–
Zoom view
.
AUTO mode is activated by default.
In this mode, the system chooses the best view
to display
(standard or zoom).
You can change the type of view at any time
during a manoeuvre.
The system status is not saved when the ignition
is switched off.
Principle of operation
Using the rear camera, the vehicle's close
surroundings are recorded during manoeuvres
at low speed.
An image from above your vehicle in its close
surroundings is reconstructed (represented
between the brackets) in real time and as the
manoeuvre progresses.
It facilitates the alignment of your vehicle when
parking and allows obstacles close to the vehicle
to be seen. It is automatically deleted if the
vehicle remains stationary for too long.
The display disappears above approximately 6 mph (10 km/h).
The system is automatically deactivated
about 7 seconds after coming out of reverse
or on opening a door or the boot.
Activation
Activation is automatic on engaging reverse gear
at a speed lower than 6 mph (10 km/h).
CarM an uals 2 .c o m
Page 176 of 348
174
Practical information
Compatibility of fuels
Diesel fuels conforming to the EN590, EN16734
and EN16709 standards and containing up to
7%, 10%, 20% and 30% fatty acid methyl ester
respectively. The use of B20 or B30 fuels, even
occasionally, imposes special maintenance
conditions referred to as "Arduous conditions".
Paraffinic Diesel fuel conforming to the EN15940
standard.
The use of any other type of (bio) fuel (e.g. pure or diluted vegetable or animal
oils, domestic fuel) is strictly prohibited - risk
of damaging the engine and fuel system!
The only Diesel fuel additives authorised for use are those that meet the B715000
standard.
Diesel at low temperature
At temperatures below 0 °C (+32 °F), the
formation of paraffins in summer-type Diesel
fuels could prevent the engine from operating
correctly
. In these temperature conditions, use
winter-type Diesel fuel and keep the fuel tank
more than 50
% full.
At temperatures below -15 °C (+5 °F) to avoid
problems starting, it is best to park the vehicle
under shelter (heated garage).
Travelling abroad
Certain fuels could damage your vehicle’s
engine.
In certain countries, the use of a particular
fuel may be required (specific octane rating,
specific trade name, etc.) to ensure correct
operation of the engine.
For all additional information, consult a dealer.
Refuelling
Fuel tank capacity: approximately 69 litres.
Reserve level: approximately 6 litres.
Low fuel level
When the low fuel level is reached,
one of these warning lamps lights
up on the instrument panel, accompanied by the
display of a message and an audible signal.
When it first comes on, about 8 litres of fuel
remain.
You must refuel as soon as possible to avoid
running out of fuel.
For more information on Running out of fuel
(Diesel), refer to the corresponding section.
A small arrow by the warning lamp indicates which side of the vehicle the
fuel filler flap is located on.
Stop & Start
Never refuel with the engine in STOP
mode; you must switch off the ignition.
Refuelling
At least 8 litres of fuel must be added, in order to
be registered by the fuel gauge.
Opening the filler cap may create a noise caused
by an inrush of air. This is entirely normal and
results from the sealing of the fuel system.
To refuel in complete safety:
►
Always switch off the engine.
►
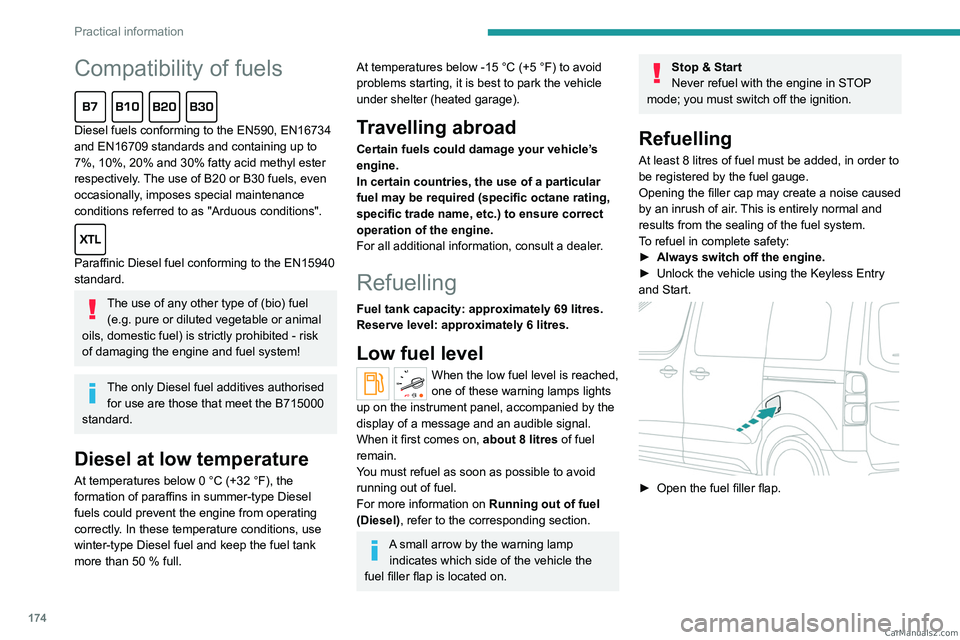
Unlock the vehicle using the Keyless Entry
and Start.
► Open the fuel filler flap. CarM an uals 2 .c o m