2023 PEUGEOT EXPERT gearbox
[x] Cancel search: gearboxPage 150 of 348
148
Driving
(depending on engine), when you place the gear
lever in neutral and release the clutch pedal.
With an automatic gearbox: when the brake
pedal is depressed or when the position
N
is
selected, with the vehicle stationary.
Time counter
A time counter adds up the time spent in standby
during the journey. It is reset to zero every time
the ignition is switched on.
Special cases
The engine will not go into standby if the
conditions for operation are not met and in the
following cases:
–
Steep slope (ascending or descending).
–
V
ehicle has not exceeded 6 mph (10 km/h)
since the last engine start (with the key or the
START/STOP button).
–
Needed
to maintain a comfortable temperature
in the passenger compartment.
–
Demisting active.
In these cases, this indicator lamp flashes
for a few seconds, then goes off.
After the engine has restarted, STOP mode is not available until the vehicle
has reached a speed of 5 mph (8
km/h).
During parking manoeuvres, STOP mode
is not available for a few seconds after
coming out of reverse gear or turning the
steering wheel.
Restarting the engine (START mode)
The engine automatically restarts as soon as the
driver indicates the intention of moving off again:
With a manual gearbox: when the clutch pedal
is fully depressed.
With an automatic gearbox:
–
With the selector in position D
or M: when the
brake pedal is released.
–
With the selector in position N
and the brake
pedal released: when the position D or M is
selected.
–
With the selector in position P
and the brake
pedal depressed: when the position R, N, D or M
is selected.
–
When the reverse gear is engaged.
Special cases
The engine will restart automatically if the
conditions for operation are met again and in the
following cases:
–
Deselecting the Sport mode (depending on
equipment).
–
With a
manual gearbox: vehicle speed
exceeds 16 mph (25 km/h) or 2 mph (3 km/h)
(depending on engine).
–
With an
automatic gearbox, vehicle speed
exceeds 2 mph (3
km/h).
In these cases, this indicator lamp flashes
for a few seconds, then goes off.
Malfunctions
Depending on the vehicle’s equipment:
In the event of a system malfunction, this
warning lamp flashes on the instrument
panel.
The warning lamp in this button flashes and a message appears, accompanied by
an audible signal.
Have it checked by a PEUGEOT dealer or a
qualified workshop.
The vehicle stalls in STOP mode
All of the instrument panel warning lamps come
on if there is a fault.
Depending on version, a warning message
may also be displayed, prompting you to place
the gear selector in position N and depress the
brake pedal.
►
Switch off the ignition then start the engine
again with the key or the " ST
ART/STOP" button.
12 V battery
The Stop & Start system requires a
12 V battery of specific technology and
specification.
All work must be carried out only by a
PEUGEOT
dealer or a qualified workshop
Tyre under-inflation detection
This system alerts the driver if one or more tyres
suffer a drop in pressure.
The alert is raised when the vehicle is moving,
not when stationary. CarM an uals 2 .c o m
Page 159 of 348
157
Driving
6With a manual gearbox, third gear or higher must
be engaged.
With a drive selector, mode D or B must be
engaged.
Cruise control remains active after
changing gear, regardless of the gearbox
type, on engines fitted with the Stop & Start
function.
Switching off the ignition cancels any
speed setting.
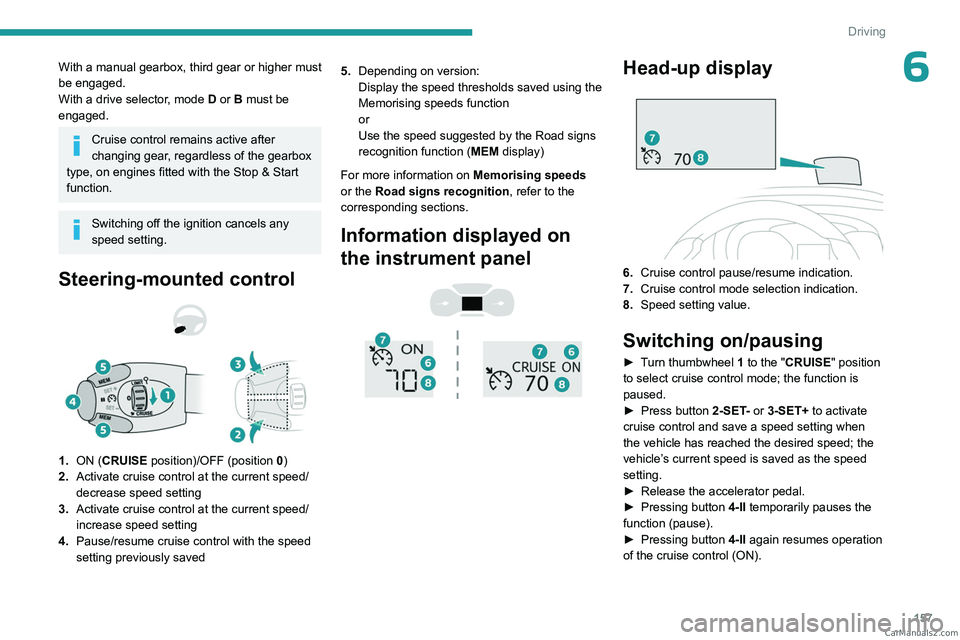
Steering-mounted control
1. ON (CRUISE position)/OFF (position 0)
2. Activate cruise control at the current speed/
decrease speed setting
3. Activate cruise control at the current speed/
increase speed setting
4. Pause/resume cruise control with the speed
setting previously saved 5.
Depending on version:
Display the speed thresholds saved using the
Memorising speeds function
or
Use the speed suggested by the Road signs
recognition function ( MEM display)
For more information on Memorising speeds
or the Road signs recognition , refer to the
corresponding sections.
Information displayed on
the instrument panel
Head-up display
6. Cruise control pause/resume indication.
7. Cruise control mode selection indication.
8. Speed setting value.
Switching on/pausing
► Turn thumbwheel 1 to the "CRUISE" position
to select cruise control mode; the function is
paused.
►
Press button
2-SET- or 3-SET+ to activate
cruise control and save a speed setting when
the vehicle has reached the desired speed; the
vehicle’s current speed is saved as the speed
setting.
►
Release the accelerator pedal.
►
Pressing button 4-II
temporarily pauses the
function (pause).
►
Pressing button 4-II
again resumes operation
of the cruise control (ON). CarM an uals 2 .c o m
Page 160 of 348
158
Driving
Cruise control can also be paused
temporarily:
–
by pressing the brake pedal.
–
by pressing the clutch pedal with a manual
gearbox (depending on the engine fitted).
–
automatically
, if the electronic stability
control (ESC) system is triggered.
Changing the cruise speed
setting
The cruise control must be active.
To change the cruise speed setting, based on
the vehicle’s current speed:
►
For steps of +/- 1
mph (1 km/h), briefly
press
2-SET- or 3-SET+ repeatedly.
►
For steps of +/- 5
mph (5 km/h), press and
hold
2-SET- or 3-SET+.
Pressing and holding 2-SET - or 3-SET+
results in a rapid change in the speed of
the vehicle.
As a precaution, we recommend setting a cruise speed fairly close to the current
speed of your vehicle, to avoid any sudden
acceleration or deceleration of the vehicle.
To change the cruise speed setting using memorised speed settings and from the touch
screen:
►
Press
5-MEM to display the memorised
speed settings.
► Press the touch screen button for the desired
speed setting.
The selection screen closes after a few
moments.
This setting becomes the new cruise speed.
T
o change the cruise speed setting using the
speed suggested by the Road signs recognition
function displayed on the instrument panel:
►
Press
5-MEM once; a message is displayed,
confirming the memorisation request.
►
Press
5-MEM again to save the suggested
speed.
The new speed setting value is displayed on the
instrument panel.
Temporarily exceeding the
programmed speed
If needed (when overtaking, for example),
it is possible to exceed the programmed
speed by pressing the accelerator pedal.
Cruise control is temporarily deactivated and the
programmed speed displayed flashes.
To return to the programmed speed, simply
release the accelerator pedal.
Once the vehicle has returned to the
programmed speed, cruise control takes over
again and the programmed speed setting stops
flashing.
When descending a steep hill, the cruise
control system cannot prevent the
vehicle from exceeding the programmed
speed.
You may have to brake to control the speed of
your vehicle. In this case, the cruise control is
automatically paused.
To activate the system again, with the vehicle
speed above 25 mph (40
km/h), press button
4.
Switching off
► Turn the thumbwheel 1 to the "0” position: the
cruise control information disappears from the
screen.
Malfunction
In the event of a malfunction, dashes are
displayed flashing and then fixed instead of the
speed setting.
Have it checked by a PEUGEOT dealer or a
qualified workshop.
Adaptive cruise control
Refer to the General recommendations
on the use of driving and
manoeuvring aids and to Cruise control
- particular recommendations. CarM an uals 2 .c o m
Page 161 of 348
159
Driving
6This system automatically maintains the speed of your vehicle at a value which
you set (speed setting), while keeping a safe
distance from the vehicle in front (target vehicle),
and which has been set beforehand by the
driver. The system controls the vehicle's
acceleration and deceleration automatically
using only engine braking (as if the driver had
pressed the "-" minus button).
To do this, it uses a radar located in the front
bumper.
Primarily designed for driving on main
roads and motorways, this system only
works with moving vehicles driving in the
same direction as your vehicle.
If the driver operates a direction indicator
to overtake a slower vehicle, the cruise
control allows the vehicle to temporarily
approach the vehicle in front to assist the
overtaking manoeuvre, without ever
exceeding the speed setting.
Some vehicles present on the road may
not be properly seen or may be
misinterpreted by the radar (e.g. a lorry),
which may lead to a poor assessment of
distance and lead to the vehicle accelerating
or braking inappropriately.
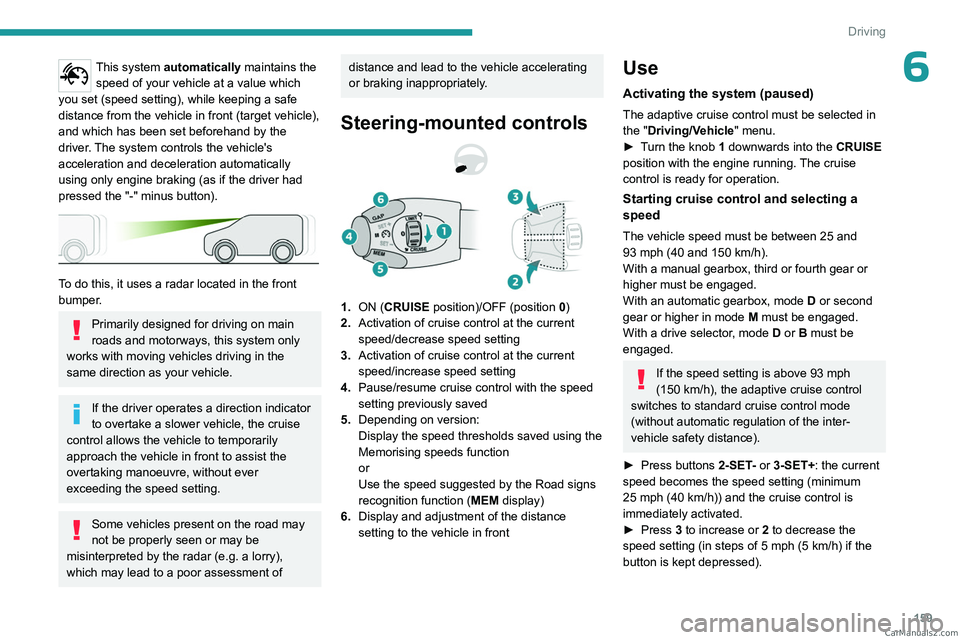
Steering-mounted controls
1. ON (CRUISE position)/OFF (position 0)
2. Activation of cruise control at the current
speed/decrease speed setting
3. Activation of cruise control at the current
speed/increase speed setting
4. Pause/resume cruise control with the speed
setting previously saved
5. Depending on version:
Display the speed thresholds saved using the
Memorising speeds function
or
Use the speed suggested by the Road signs
recognition function ( MEM display)
6. Display and adjustment of the distance
setting to the vehicle in front
Use
Activating the system (paused)
The adaptive cruise control must be selected in
the "Driving/Vehicle" menu.
►
T
urn the knob 1 downwards into the CRUISE
position with the engine running. The cruise
control is ready for operation.
Starting cruise control and selecting a
speed
The vehicle speed must be between 25 and
93 mph (40 and 150 km/h).
With a manual gearbox, third or fourth gear or
higher must be engaged.
With an automatic gearbox, mode
D
or second
gear or higher in mode
M
must be engaged.
With a drive selector, mode
D or B must be
engaged.
If the speed setting is above 93 mph
(150 km/h), the adaptive cruise control
switches to standard cruise control mode
(without automatic regulation of the inter-
vehicle safety distance).
►
Press buttons
2-SET- or 3-SET+: the current
speed becomes the
speed setting (minimum
25
mph (40 km/h)) and the cruise control is
immediately activated.
►
Press
3 to increase or 2 to decrease the
speed setting (in steps of 5 mph (5 km/h) if the
button is kept depressed). CarM an uals 2 .c o m
Page 166 of 348

164
Driving
This assistance is only provided if the driver
presses the brake pedal.
Active Safety Brake
This function, also called "automatic emergency
braking", intervenes after the acoustic alert if the
driver does not operate the brake pedal quickly
enough.
The system aims at reducing the speed of
impact or avoiding a collision if the driver fails to
react.
Below a speed of 19 mph (30 km/h),
automatic emergency braking may slow
down the vehicle to a complete stop.
Otherwise, for versions with camera only
, the
speed may be reduced by a maximum of 16
mph (25
km/h).
For versions with camera and radar, the
speed reduction may be extended to 31 mph
(50
km/h), if both sensors are able to detect
the thread.
Operation
The system operates subject to the following
conditions:
–
At reduced speed in an urban environment,
when a stationary vehicle, pedestrian or cyclist
is detected.
–
The vehicle's speed is between 6 mph and
53 mph (10
km/h and 85 km/h) (versions with
camera only) or 87 mph (140 km/h) (versions
with camera and radar) when a moving vehicle
is detected.
This warning lamp flashes (for approximately 10 seconds) as soon as
the function applies the vehicle’s brakes.
During the flashing time, the function is not
available.
With an automatic gearbox, in the event of
automatic emergency braking, keep the brake
pedal depressed, also after a complete stop is
reached, to prevent the vehicle from rolling away.
With a manual gearbox, in the event of automatic
emergency braking bringing the vehicle to a
complete stop, the engine may stall.
The driver can override the automatic emergency braking at any time by
strongly turning the steering wheel (evasive
manoeuver) and/or by firmly pressing the
accelerator pedal.
The brake pedal may feel hard and vibrate slightly while the function is
operating.
If the vehicle comes to a complete stop,
automatic braking is maintained for 1 to
2
seconds.
Deactivation/Activation
By default, the system is automatically activated
at every engine start.
The settings are changed via the vehicle configuration menu.
Deactivation of the system is signalled by
the illumination of this warning lamp,
accompanied by the display of a message.
Malfunction
This warning lamp lights up on the instrument panel, if the automatic braking
system is reduced or degraded.
This is a normal behavior, which does not
request the support of a qualified workshop. CarM an uals 2 .c o m
Page 197 of 348
195
Practical information
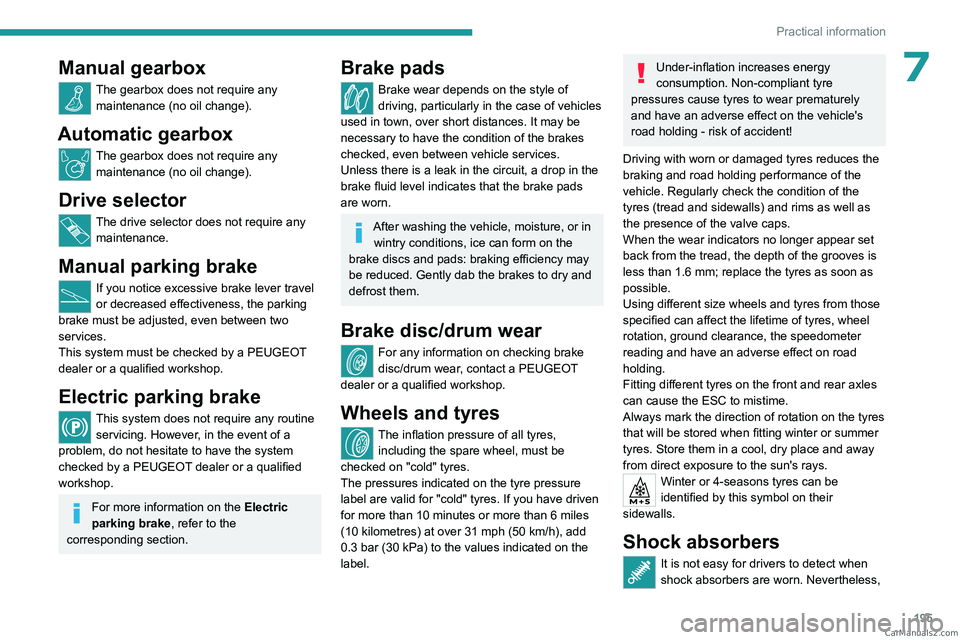
7Manual gearbox
The gearbox does not require any maintenance (no oil change).
Automatic gearbox
The gearbox does not require any maintenance (no oil change).
Drive selector
The drive selector does not require any maintenance.
Manual parking brake
If you notice excessive brake lever travel
or decreased effectiveness, the parking
brake must be adjusted, even between two
services.
This system must be checked by a PEUGEOT
dealer or a qualified workshop.
Electric parking brake
This system does not require any routine servicing. However, in the event of a
problem, do not hesitate to have the system
checked by a PEUGEOT dealer or a qualified
workshop.
For more information on the Electric
parking brake, refer to the
corresponding section.
Brake pads
Brake wear depends on the style of
driving, particularly in the case of vehicles
used in town, over short distances. It may be
necessary to have the condition of the brakes
checked, even between vehicle services.
Unless there is a leak in the circuit, a drop in the
brake fluid level indicates that the brake pads
are worn.
After washing the vehicle, moisture, or in wintry conditions, ice can form on the
brake discs and pads: braking efficiency may
be reduced. Gently dab the brakes to dry and
defrost them.
Brake disc/drum wear
For any information on checking brake
disc/drum wear, contact a PEUGEOT
dealer or a qualified workshop.
Wheels and tyres
The inflation pressure of all tyres, including the spare wheel, must be
checked on "cold" tyres.
The pressures indicated on the tyre pressure
label are valid for "cold" tyres. If you have driven
for more than 10
minutes or more than 6 miles
(10
kilometres) at over 31 mph (50 km/h), add
0.3
bar (30 kPa) to the values indicated on the
label.
Under-inflation increases energy
consumption. Non-compliant tyre
pressures cause tyres to wear prematurely
and have an adverse effect on the vehicle's
road holding - risk of accident!
Driving with worn or damaged tyres reduces the
braking and road holding performance of the
vehicle. Regularly check the condition of the
tyres (tread and sidewalls) and rims as well as
the presence of the valve caps.
When the wear indicators no longer appear set
back from the tread, the depth of the grooves is
less than 1.6
mm; replace the tyres as soon as
possible.
Using different size wheels and tyres from those
specified can affect the lifetime of tyres, wheel
rotation, ground clearance, the speedometer
reading and have an adverse effect on road
holding.
Fitting different tyres on the front and rear axles
can cause the ESC to mistime.
Always mark the direction of rotation on the tyres
that will be stored when fitting winter or summer
tyres. Store them in a cool, dry place and away
from direct exposure to the sun's rays.
Winter or 4-seasons tyres can be
identified by this symbol on their
sidewalls.
Shock absorbers
It is not easy for drivers to detect when
shock absorbers are worn. Nevertheless, CarM an uals 2 .c o m
Page 200 of 348
198
Practical information
► After filling, perform the same sequence of
operations in reverse order .
In order not to overfill the AdBlue® tank:
–
Add between 10 and 13 litres using
AdBlue® containers.
–
Stop after the nozzle’ s first automatic cut-
out, if you are refilling at a service station.
The system only registers AdBlue
®
intermediate top-ups of 5
litres or more.
If the AdBlue® tank is completely empty
– which is confirmed by the message
“Top up AdBlue: Starting impossible ” – it is
essential to add at least 10
litres.
Top-up detection may not be instantaneous
after addition. It may take a few minutes of
driving before the top-up detection is effective.
Free-wheeling
In certain situations, it is necessary to put the
vehicle into free-wheeling mode (e.g. towing, on
a rolling road, automatic car wash (Wash mode),
rail or sea transport).
The procedure varies according to the type of
gearbox and parking brake.
Never leave the vehicle unattended with
the vehicle into free-wheeling mode.
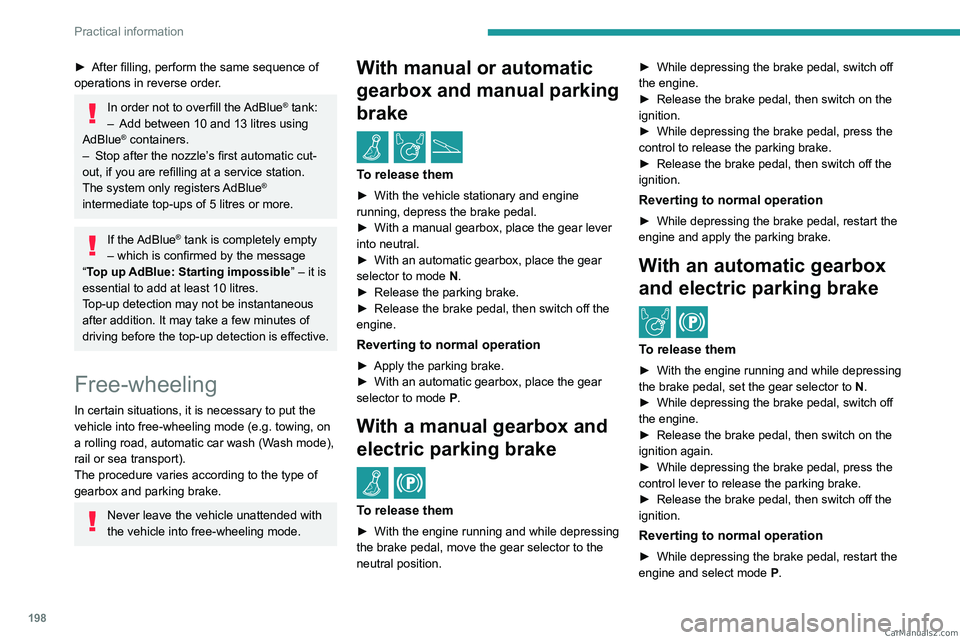
With manual or automatic
gearbox and manual parking
brake
/
To release them
► With the vehicle stationary and engine
running, depress the brake pedal.
►
With a manual gearbox, place the gear lever
into neutral.
►
With an automatic gearbox, place the gear
selector to mode
N.
►
Release the parking brake.
►
Release the brake pedal, then switch off the
engine.
Reverting to normal operation
► Apply the parking brake.
► With an automatic gearbox, place the gear
selector to mode
P.
With a manual gearbox and
electric parking brake
/
To release them
► With the engine running and while depressing
the brake pedal, move the gear selector to the
neutral position. ►
While depressing the brake pedal, switch off
the engine.
►
Release the brake pedal, then switch on the
ignition.
►
While depressing the brake pedal, press the
control to release the parking brake.
►
Release the brake pedal, then switch off the
ignition.
Reverting to normal operation
► While depressing the brake pedal, restart the
engine and apply the parking brake.
With an automatic gearbox
and electric parking brake
/
To release them
► With the engine running and while depressing
the brake pedal, set the gear selector to N
.
►
While depressing the brake pedal, switch off
the engine.
►
Release the brake pedal, then switch on the
ignition again.
►
While depressing the brake pedal, press the
control lever to release the parking brake.
►
Release the brake pedal, then switch off the
ignition.
Reverting to normal operation
► While depressing the brake pedal, restart the
engine and select mode P . CarM an uals 2 .c o m
Page 211 of 348
209
In the event of a breakdown
8► Progressively return the wheel to the carrier
by pushing alternately at the left and right until it
is clear of the hook fixing area.
►
Engage the carrier on the hook, then tighten
the bolt using the wheelbrace
until the bolt is fully
tightened.
Tyre in the carrier
You can change the size of the tyre on the spare
wheel by following the instructions below.
Original
tyre size Standard Long
215/65 R16 Placing a 225 wheel in the carrier is prohibited. There is no
restriction.
215/60 R17
215/60 R17
M&S
225/55 R17 Placing a 215 wheel in the
carrier is not
recommended (risk of noise).
A punctured tyre of size 215 or 225 can be placed in the carrier.
Removing a wheel
Parking the vehicle
Immobilise the vehicle where it does
not obstruct traffic: the ground must be level,
stable and non-slippery.
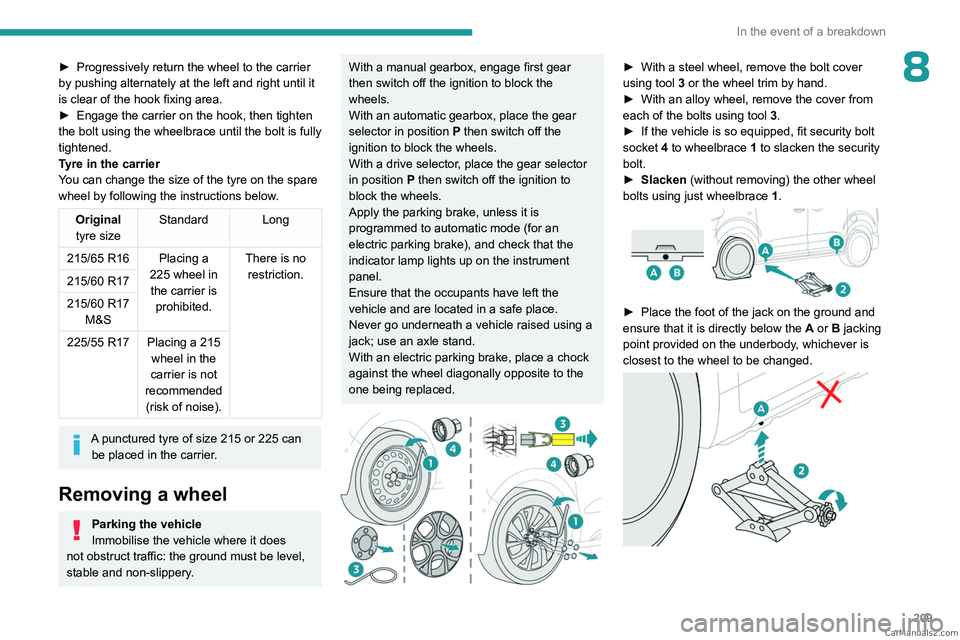
With a manual gearbox, engage first gear
then switch off the ignition to block the
wheels.
With an automatic gearbox, place the gear
selector in position P then switch off the
ignition to block the wheels.
With a drive selector, place the gear selector
in position P then switch off the ignition to
block the wheels.
Apply the parking brake, unless it is
programmed to automatic mode (for an
electric parking brake), and check that the
indicator lamp lights up on
the instrument
panel.
Ensure that the occupants have left the
vehicle and are located in a safe place.
Never go underneath a vehicle raised using a
jack; use an axle stand.
With an electric parking brake, place a chock
against the wheel diagonally opposite to the
one being replaced.
► With a steel wheel, remove the bolt cover
using tool 3
or the wheel trim by hand.
►
With an alloy wheel, remove the cover from
each of the bolts using tool 3
.
►
If the vehicle is so equipped, fit security bolt
socket
4 to wheelbrace 1 to slacken the security
bolt.
►
Slacken
(without removing) the other wheel
bolts using just wheelbrace 1.
► Place the foot of the jack on the ground and
ensure that it is directly below the A
or B jacking
point provided on the underbody, whichever is
closest to the wheel to be changed.
CarM an uals 2 .c o m