2023 PEUGEOT EXPERT child restraint
[x] Cancel search: child restraintPage 112 of 348
11 0
Safety
Make sure that the seat belt is correctly
positioned and tightened.
For child seats with a support leg, ensure that
the support leg is in firm and steady contact
with the floor.
An incorrectly installed child seat in a vehicle compromises the child's safety in
the event of an accident.
Ensure that there is no seat belt or seat belt
buckle under the child seat, as this could
destabilise it.
Remember to fasten the seat belts or the
child seat harness keeping the slack relative
to the child's body to a minimum, even for
short journeys.
When installing a child seat using the seat
belt, ensure that the seat belt is tightened
correctly on the child seat and that it secures
the child seat firmly on the vehicle seat. If
the passenger seat is adjustable, move it
forwards if necessary.
Remove the head restraint before
installing a child seat with a backrest on a
passenger seat.
Ensure that the head restraint is stored or
attached securely to prevent it from being
thrown around the vehicle in the event of
sharp braking. Refit the head restraint once
the child seat has been removed.
Installing a booster seat
The chest part of the seat belt must be
positioned on the child's shoulder without
touching the neck.
Ensure that the lap part of the seat belt
passes correctly over the child's thighs.
Use a booster seat with a backrest, equipped
with a belt guide at shoulder level.
Additional protections
To prevent accidental opening of the
doors and rear windows, use the "Child lock".
Take care not to open the rear windows by
more than one third.
To protect young children from the sun's rays,
fit side blinds on the rear windows.
As a safety measure, do not leave:
–
A
child alone and unsupervised inside a
vehicle.
–
A
child or an animal in a vehicle which is
exposed to the sun, with the windows closed.
–
The keys within reach of children inside the
vehicle.
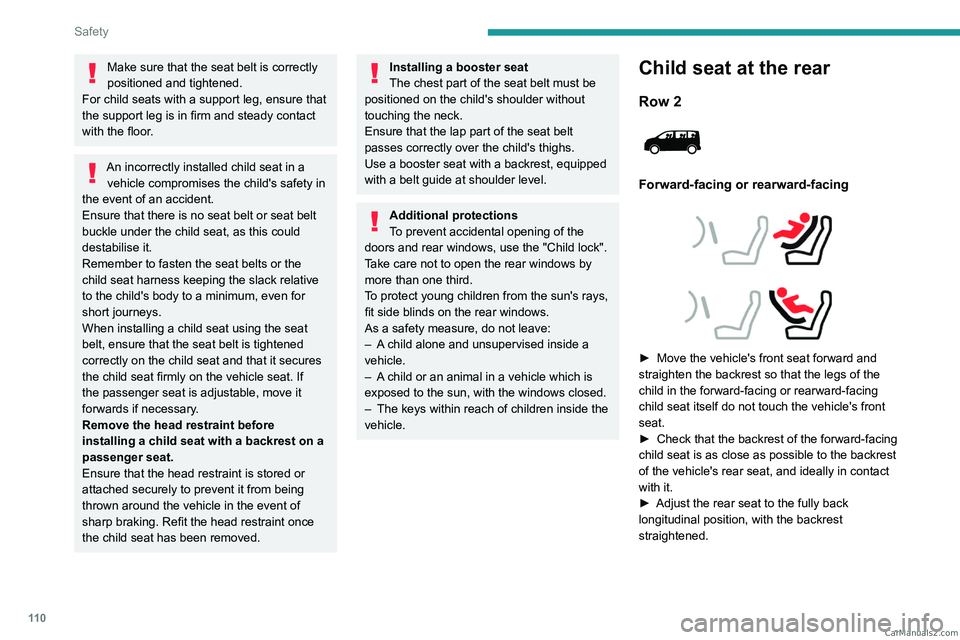
Child seat at the rear
Row 2
Forward-facing or rearward-facing
► Move the vehicle's front seat forward and
straighten the backrest so that the legs of the
child in the forward-facing or rearward-facing
child seat itself do not touch the vehicle's front
seat.
►
Check that the backrest of the forward-facing
child seat is as close as possible to the backrest
of the vehicle's rear seat, and ideally in contact
with it.
►
Adjust the rear seat to the fully back
longitudinal position, with the backrest
straightened. CarM an uals 2 .c o m
Page 113 of 348
111
Safety
5Ensure that the seat belt is correctly
tensioned.
For child seats with a support leg, ensure
that the support leg is in firm and steady
contact with the floor. If necessary, adjust the
vehicle's front seat.
Row 3
If a child seat is installed on a passenger seat in
the third row, move the seats in the second row
forward and straighten the backrests so that the
child seat and the child's legs do not touch the
seats in the second row.
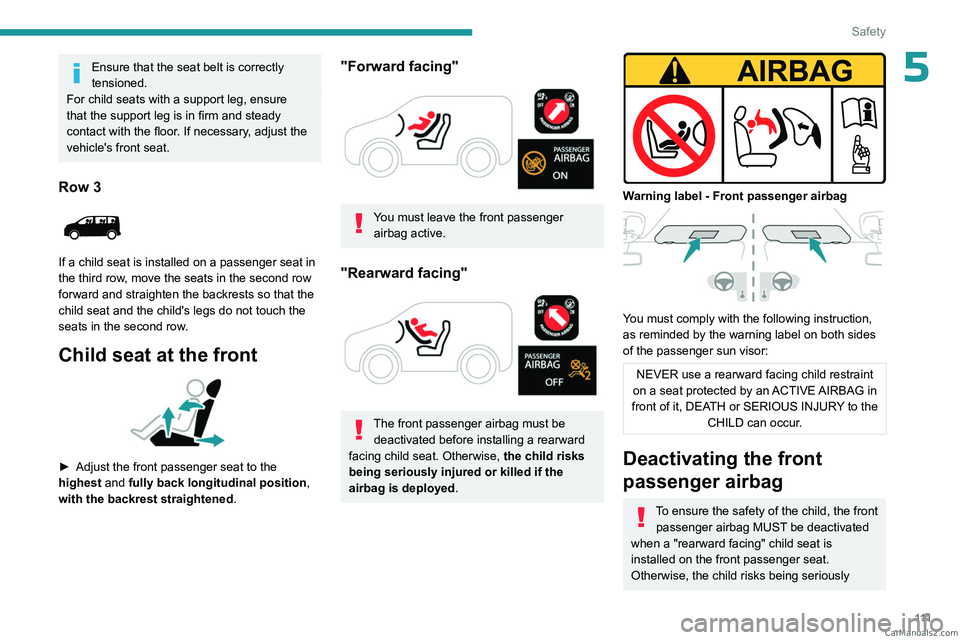
Child seat at the front
► Adjust the front passenger seat to the
highest and fully back longitudinal position ,
with the backrest straightened.
"Forward facing"
You must leave the front passenger airbag active.
"Rearward facing"
The front passenger airbag must be deactivated before installing a rearward
facing child seat. Otherwise, the child risks
being seriously injured or killed if the
airbag is deployed .
Warning label - Front passenger airbag
You must comply with the following instruction,
as reminded by the warning label on both sides
of the passenger sun visor:
NEVER use a rearward facing child restraint
on a seat protected by an ACTIVE AIRBAG in
front of it, DEATH or SERIOUS INJURY to the CHILD can occur.
Deactivating the front
passenger airbag
To ensure the safety of the child, the front passenger airbag MUST be deactivated
when a "rearward facing" child seat is
installed on the front passenger seat.
Otherwise, the child risks being seriously CarM an uals 2 .c o m
Page 120 of 348
11 8
Safety
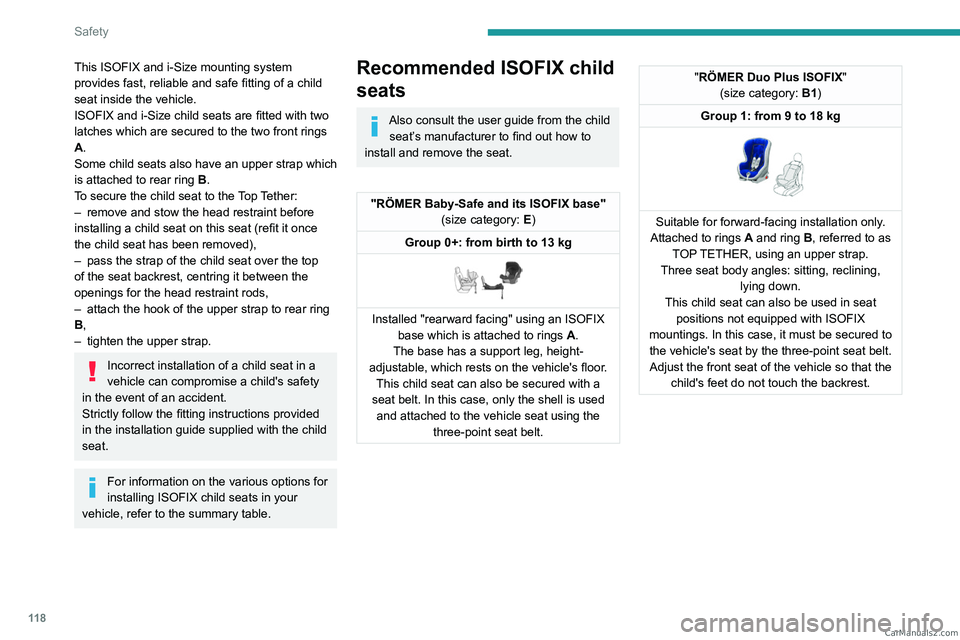
This ISOFIX and i-Size mounting system
provides fast, reliable and safe fitting of a child
seat inside the vehicle.
ISOFIX and
i-Size child seats are fitted with two
latches which are secured to the two front rings
A.
Some child seats also have an upper strap which
is attached to rear ring B.
To secure the child seat to the Top Tether:
–
remove and stow the head restraint before
installing a child seat on this seat (refit it once
the child seat has been removed),
–
pass the strap
of the child seat over the top
of the seat backrest, centring it between the
openings for the head restraint rods,
–
attach the hook of the upper strap to rear ring
B
,
–
tighten the upper strap.
Incorrect installation of a child seat in a
vehicle can compromise a child's safety
in the event of an accident.
Strictly follow the fitting instructions provided
in the installation guide supplied with the child
seat.
For information on the various options for
installing ISOFIX child seats in your
vehicle, refer to the summary table.
Recommended ISOFIX child
seats
Also consult the user guide from the child seat’s manufacturer to find out how to
install and remove the seat.
"RÖMER Baby-Safe and its ISOFIX base" (size category: E)
Group 0+: from birth to 13 kg
Installed "rearward facing" using an ISOFIX base which is attached to rings A .
The base has a support leg, height-
adjustable, which rests on the vehicle's floor. This child seat can also be secured with a
seat belt. In this case, only the shell is used and attached to the vehicle seat using the three-point seat belt.
"RÖMER Duo Plus ISOFIX "
(size category: B1)
Group 1: from 9 to 18 kg
Suitable for forward-facing installation only.
Attached to rings A and ring B, referred to as
TOP TETHER, using an upper strap.
Three seat body angles: sitting, reclining, lying down.
This child seat can also be used in seat positions not equipped with ISOFIX
mountings. In this case, it must be secured to the vehicle's seat by the three-point seat belt. Adjust the front seat of the vehicle so that the child's feet do not touch the backrest. CarM an uals 2 .c o m
Page 132 of 348
130
Safety
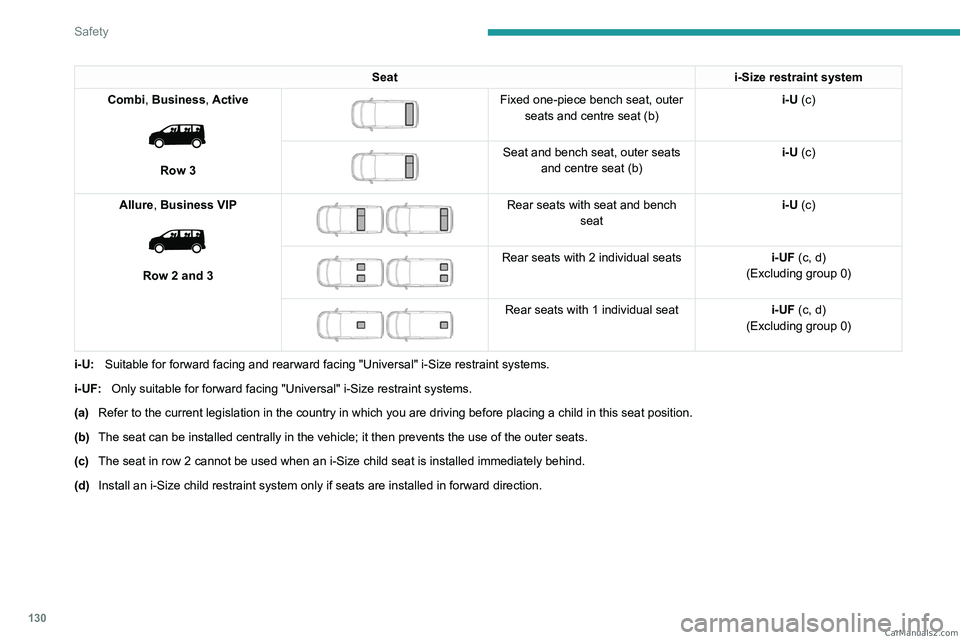
Seati-Size restraint system
Combi, Business, Active
Row 3
Fixed one-piece bench seat, outer seats and centre seat (b) i-U (c)
Seat and bench seat, outer seats
and centre seat (b) i-U (c)
Allure, Business VIP
Row 2 and 3
Rear seats with seat and bench seat i-U (c)
Rear seats with 2 individual seats
i-UF (c, d)
(Excluding group 0)
Rear seats with 1 individual seat i-UF (c, d)
(Excluding group 0)
i-U: Suitable for forward facing and rearward facing "Universal" i-Size restr\
aint systems.
i-UF: Only suitable for forward facing "Universal" i-Size restraint systems.
(a) Refer to the current legislation in the country in which you are driving\
before placing a child in this seat position.
(b) The seat can be installed centrally in the vehicle; it then prevents the use of the outer seats.
(c) The seat in row 2 cannot be used when an i-Size child seat is installed \
immediately behind.
(d) Install an i-Size child restraint system only if seats are installed in \
forward direction. CarM an uals 2 .c o m
Page 300 of 348
8 Seats, restraints
Seats, restraints
Child restraints ............................... 8
Child restraint installation locations ..................................... 8 Child restraints
Child restraint installation
locations
As
required by European regulations,
this table gives the options for
installing child seats secured using
the seat belt and universally
approved as well as the larger ISOFIX
and i-Size child seats on seat
positions equipped with ISOFIX
mountings in the vehicle.
Yes : Suitable for fitment of the designated catecory of the
child restraint system.
No : Not suitable for fitment of the designated catecory of the
child restraint system.CarM an uals 2 .c o m
Page 301 of 348
Seats, restraints 9
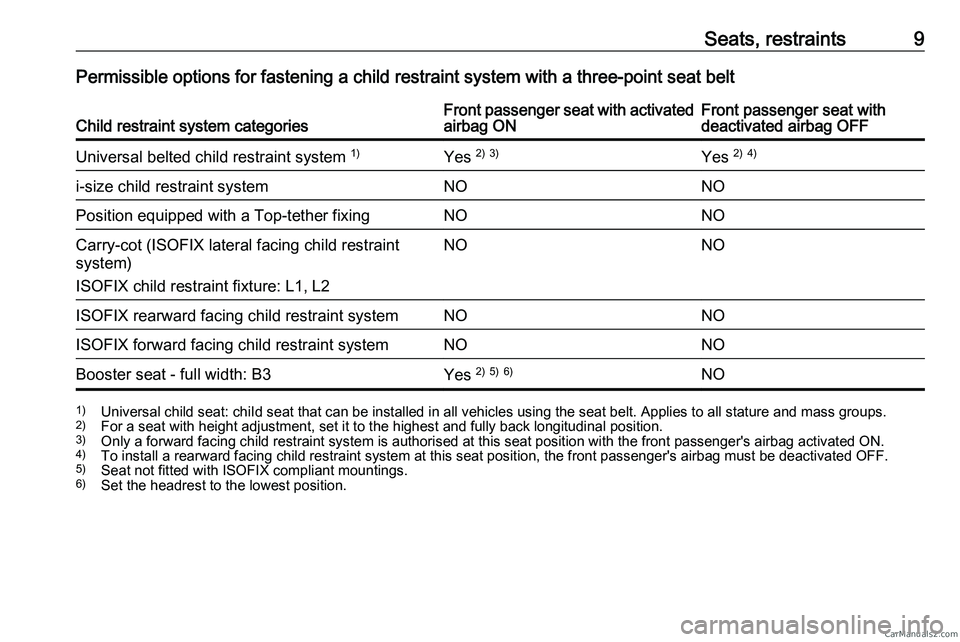
Permissible options for fastening a child restraint system with a three-point seat belt
Child restraint system categories Front passenger seat with activated
airbag ON Front passenger seat with
deactivated airbag OFF
Universal belted child restraint system 1)
Yes 2)
3)
Yes 2)
4)
i-size child restraint system NONO
Position equipped with a Top-tether fixing NO NO
Carry-cot (ISOFIX lateral facing child restraint
system)
ISOFIX child restraint fixture: L1, L2 NO
NO
ISOFIX rearward facing child restraint system NO NO
ISOFIX forward facing child restraint system NO NO
Booster seat - full width: B3 Yes 2)
5)
6)
NO1)
Universal child seat: chiId seat that can be installed in all vehicles using the seat belt. Applies to all stature and mass groups.
2) For a seat with height adjustment, set it to the highest and fully back longitudinal position.
3) Only a forward facing child restraint system is authorised at this seat position with the front passenger's airbag activated ON.
4) To install a rearward facing child restraint system at this seat position, the front passenger's airbag must be deactivated OFF.
5) Seat not fitted with ISOFIX compliant mountings.
6) Set the headrest to the lowest position.CarM an uals 2 .c o m
Page 320 of 348
28
Index C
Capacities .................................... 26
Charging ....................................... 14
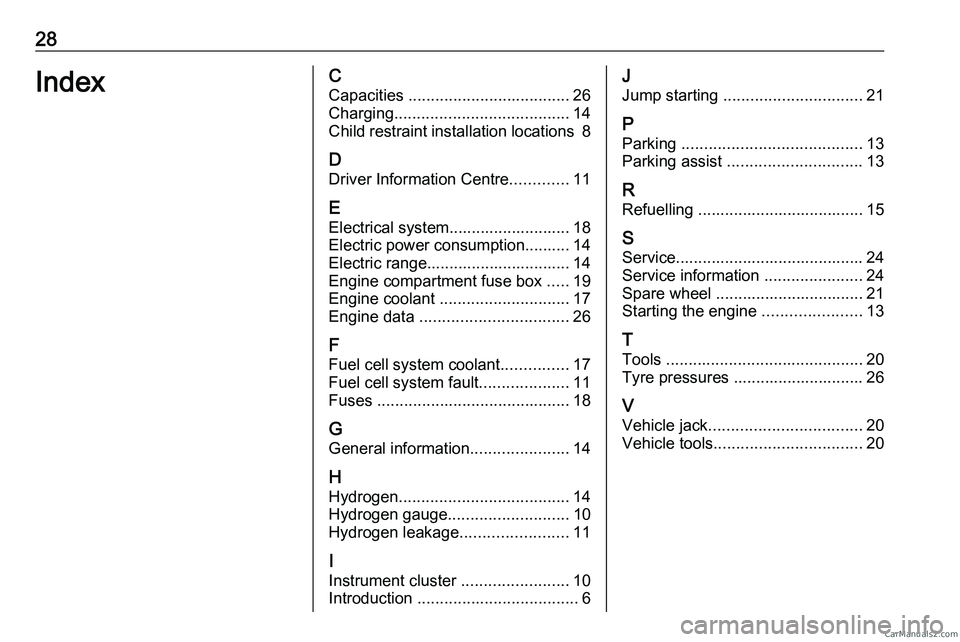
Child
restraint installation locations 8
D Driver Information Centre .............11
E Electrical system........................... 18
Electric power consumption.......... 14
Electric range................................ 14
Engine compartment fuse box .....19
Engine coolant ............................. 17
Engine data ................................. 26
F
Fuel cell system coolant ...............17
Fuel cell system fault.................... 11
Fuses ........................................... 18
G General information ......................14
H Hydrogen ...................................... 14
Hydrogen gauge ........................... 10
Hydrogen leakage ........................11
I
Instrument cluster ........................ 10
Introduction .................................... 6 J
Jump starting ............................... 21
P Parking ........................................ 13
Parking assist .............................. 13
R Refuelling
..................................... 15
S Service.......................................... 24
Service information ......................24
Spare wheel ................................. 21
Starting the engine ......................13
T
Tools ............................................ 20
Tyre pressures ............................. 26
V Vehicle jack .................................. 20
Vehicle tools ................................. 20CarM an uals 2 .c o m