2023 PEUGEOT EXPERT air conditioning
[x] Cancel search: air conditioningPage 96 of 348

94
Lighting and visibility
The screenwash then the windscreen wipers
operate for a pre-determined time.
With automatic air conditioning, any
action on the screenwash control results
in temporary closure of the air intake to
protect the passenger compartment from any
odour.
To avoid damaging the wiper blades, do not operate the screenwash if the
screenwash reservoir is empty.
Only operate the screenwash if there is no
risk of the fluid freezing on the windscreen
and hindering visibility. During the winter
period, use "very cold climate" rated products.
Never top up with water.
Low screenwash fluid level
When the low level of the reservoir is
reached, this warning lamp lights up on
the instrument panel, accompanied by an
audible signal and a message.
It comes on when the ignition is switched on,
or every time the stalk is operated, until the
reservoir is refilled.
Refill the screenwash reservoir (or have it
refilled) the next time you stop.
Automatic windscreen wipers
In AUTO mode, the windscreen wipers operate
automatically and adapt to the intensity of the
rainfall.
Detection is via a rain/brightness sensor, located
at the top centre of the windscreen behind the
rear view mirror.
Do not cover the rain/sunshine sensor.
When using an automatic car wash,
switch off the automatic wipers and the
ignition.
In winter, wait until the windscreen is
completely clear of ice before activating the
automatic wipers.
Switching on
► Give a short downwards push to the control
stalk.
A
wiping cycle confirms that the instruction has
been accepted.
This indicator lamp lights up on the instrument panel, accompanied by a
message.
Switching off
► Give the control stalk another brief push
downwards or set the control stalk to another
position ( Int
, 1 or 2).
This indicator lamp goes off on the instrument panel, accompanied by a
message.
If the ignition has been off for more than
one minute, the automatic wipers must
be reactivated by pushing the control stalk
downwards.
Malfunction
If a fault occurs with the automatic wipers, the
wipers operate in intermittent mode.
Have it checked by a PEUGEOT dealer or a
qualified workshop.
Rear wiper
Off.
Intermittent wipe.
Wash-wipe (set duration). CarM an uals 2 .c o m
Page 149 of 348
147
Driving
6When starting the vehicle, no mode can be
selected until the READY indicator lamp is
displayed.
When the message disappears, the selected
mode is activated and remains indicated on the
instrument panel (except Normal mode).
Each time the ignition is switched on, Normal
mode is selected by default.
Normal
This optimises the driving range and dynamic
performance.
To obtain maximum torque and power, depress
the accelerator pedal fully.
Eco
Optimises energy consumption, by reducing
the output of the heating and air conditioning
(without actually deactivating them) and limiting
both motor torque and power.
Power
Provides equivalent vehicle performance when
fully laden (GVW) to when the vehicle is in
Normal mode and when unladen.
Stop & Start
The Stop & Start function puts the engine temporarily into standby - STOP mode - during
phases when the vehicle is stationary (e.g.
red
lights, traffic jams). The engine automatically
restarts - START mode - as soon as the driver
indicates the intention of moving off again.
Primarily designed for urban use, the function
is intended to reduce fuel consumption and
exhaust emissions as well as the noise level
when stationary.
The function does not affect the functionalities of
the vehicle, in particular the braking.
Deactivation/Reactivation
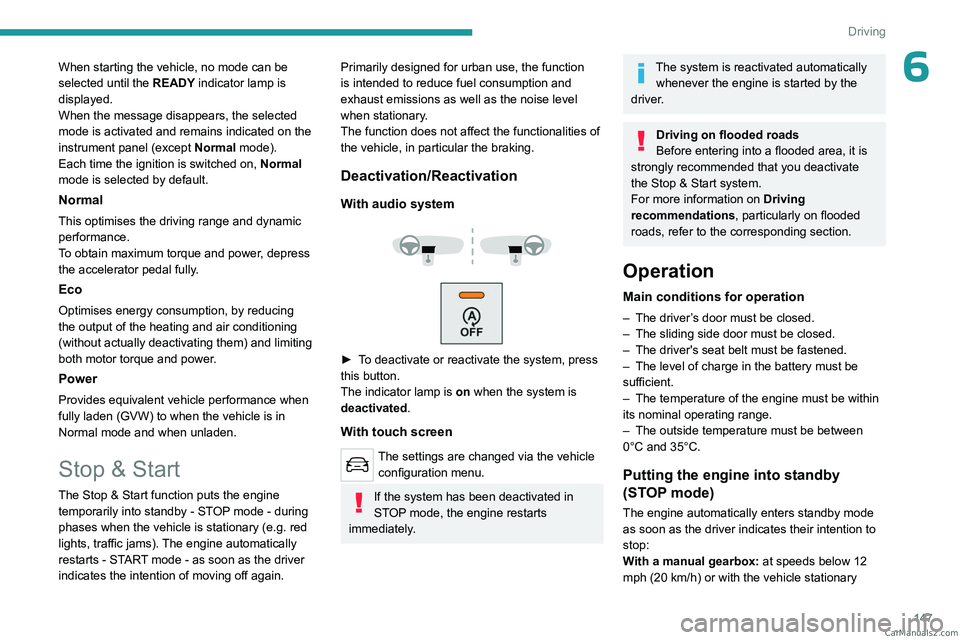
With audio system
► To deactivate or reactivate the system, press
this button.
The indicator lamp is on when the system is
deactivated.
With touch screen
The settings are changed via the vehicle configuration menu.
If the system has been deactivated in
STOP mode, the engine restarts
immediately.
The system is reactivated automatically whenever the engine is started by the
driver.
Driving on flooded roads
Before entering into a flooded area, it is
strongly recommended that you deactivate
the Stop & Start system.
For more information on Driving
recommendations, particularly on flooded
roads, refer to the corresponding section.
Operation
Main conditions for operation
– The driver ’s door must be closed.
– The sliding side door must be closed.
–
The driver's seat belt must be fastened.
–
The level of charge in the battery must be
sufficient.
–
The temperature of the engine must be within
its nominal operating range.
–
The outside temperature must be between
0°C and 35°C.
Putting the engine into standby
(STOP mode)
The engine automatically enters standby mode
as soon as the driver indicates their intention to
stop:
With a manual gearbox: at speeds below 12
mph (20
km/h) or with the vehicle stationary CarM an uals 2 .c o m
Page 182 of 348
180
Practical information
Standard charging, mode 2
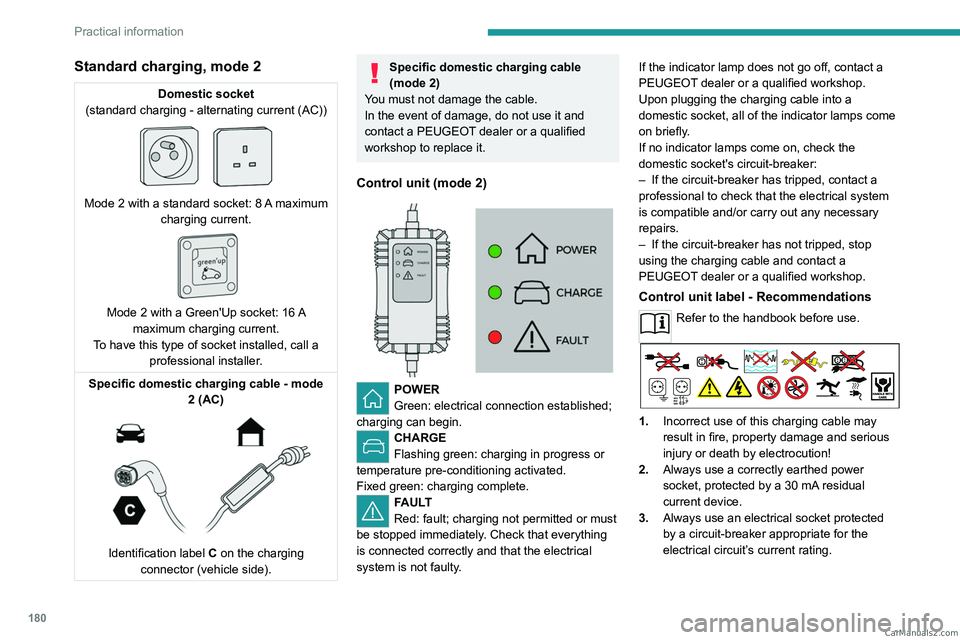
Domestic socket
(standard charging - alternating current (AC))
Mode 2 with a standard socket: 8 A maximum
charging current.
Mode 2 with a Green'Up socket: 16 A
maximum charging current.
To have this type of socket installed, call a professional installer.
Specific domestic charging cable - mode 2 (AC)
Identification label C on the charging
connector (vehicle side).
Specific domestic charging cable
(mode 2)
You must not damage the cable.
In the event of damage, do not use it and
contact a PEUGEOT dealer or a qualified
workshop to replace it.
Control unit (mode 2)
POWER
Green: electrical connection established;
charging can begin.
CHARGE
Flashing green: charging in progress or
temperature pre-conditioning activated.
Fixed green: charging complete.
FAULT
Red: fault; charging not permitted or must
be stopped immediately. Check that everything
is connected correctly and that the electrical
system is not faulty. If the indicator lamp does not go off, contact a
PEUGEOT dealer or a qualified workshop.
Upon plugging the charging cable into a
domestic socket, all of the indicator lamps come
on briefly.
If no indicator lamps come on, check the
domestic socket's circuit-breaker:
–
If the circuit-breaker has tripped, contact a
professional to check that the electrical system
is compatible and/or carry out any necessary
repairs.
–
If the circuit-breaker has not tripped, stop
using the charging cable and contact a
PEUGEOT
dealer or a qualified workshop.
Control unit label - Recommendations
Refer to the handbook before use.
1.
Incorrect use of this charging cable may
result in fire, property damage and serious
injury or death by electrocution!
2. Always use a correctly earthed power
socket, protected by a 30
mA residual
current device.
3. Always use an electrical socket protected
by a circuit-breaker appropriate for the
electrical circuit’s current rating. CarM an uals 2 .c o m
Page 190 of 348

188
Practical information
Load reduction mode
This system manages the use of certain
functions according to the level of charge
remaining in the battery.
When the vehicle is being driven, the load
reduction function temporarily deactivates certain
functions, such as the air conditioning and the
heated rear screen.
The deactivated functions are reactivated
automatically as soon as conditions permit.
Snow chains
In wintry conditions, snow chains improve
traction as well as the behaviour of the vehicle
when braking.
Snow chains must be fitted only to the
front wheels.
They must never be fitted to "space-saver"
type spare wheels.
Observe the legislation in force in your
country relating to the use of snow
chains and maximum authorised speeds.
Only use chains that have been designed for the
type of wheel fitted to your vehicle.
Original tyre size Type of chain 215/65 R16 12
mm link
Original tyre size Type of chain215/60 R17 KONIG K-SUMMIT VAN K84
225/55 R17
You can also use snow socks.
For more information, contact a PEUGEOT
dealer or a qualified workshop.
Installation tips
► To fit the snow chains during a journey, stop
the vehicle on a flat surface at the side of the
road.
►
Apply the parking brake and position any
wheel chocks under the wheels to prevent
movement of the vehicle.
►
Fit the snow chains following the instructions
provided by the manufacturer
.
►
Move off gently and drive for a few moments,
without exceeding 31
mph (50 km/h).
►
Stop the vehicle and check that the snow
chains are correctly tightened.
It is strongly recommended that you
practise fitting the snow chains on a level
and dry surface before setting off.
Avoid driving with snow chains on roads that have been cleared of snow to avoid
damaging the vehicle's tyres and the road
surface. If the vehicle is fitted with alloy
wheels, check that no part of the chain or its
fixings is in contact with the wheel rim.
Towing device
Load distribution
► Distribute the load in the trailer so that the
heaviest items are as close as possible to the
axle, and the nose weight approaches the
maximum permitted without exceeding it.
Air density decreases with altitude, thus reducing
engine performance.
The maximum towable load
must be reduced by 10% per 1,000
metres of
altitude.
Use genuine towing devices and wiring
harnesses approved by PEUGEOT. We
recommend having them fitted by a
PEUGEOT dealer or a qualified workshop.
If not fitted by a PEUGEOT dealer, they must
still be fitted in accordance with the vehicle
manufacturer's instructions.
Certain driving or manoeuvring aid functions
are automatically deactivated while an
approved towing system is in use.
For more information about driving with a
towing device fitted to a trailer and associated
with the Trailer stability assist, refer to the
corresponding section.
Comply with the maximum authorised
towable weight, as indicated on your
vehicle's registration certificate, on the
manufacturer's label and in the Technical
data section of this guide. CarM an uals 2 .c o m
Page 196 of 348

194
Practical information
For more information on AdBlue® (BlueHDi),
and in particular the supply of AdBlue, refer to
the corresponding section.
Checks
Unless otherwise indicated, check these
components in accordance with the
Manufacturer's service schedule and according
to your engine.
Otherwise, have them checked by a PEUGEOT
dealer or a qualified workshop.
Only use products recommended by
PEUGEOT or products of equivalent
quality and specification.
In order to optimise the operation of
components as important as those in the
braking system, PEUGEOT selects and offers
very specific products.
12 V battery
The battery does not require any maintenance.
Check regularly that the terminals are correctly
tightened (versions without quick-release
terminals) and that the connections are clean.
For more information on the precautions
to take before any work on the 12 V
battery, refer to the corresponding section.
Versions equipped with Stop & Start are
fitted with a 12 V lead-acid battery with
special technology and specifications.
Its replacement should be carried out only by
a PEUGEOT dealer or a qualified workshop.
Passenger compartment
filter
Depending on the environment and the
use of the vehicle (e.g. dusty atmosphere,
city driving), change it twice as often, if
necessary .
A clogged passenger compartment filter
can adversely affect air conditioning
system performance and generate
undesirable odours.
Air filter
Depending on the environment and the
use of the vehicle (e.g. dusty atmosphere,
city driving), change it twice as often, if
necessary .
Oil filter
Change the oil filter each time the engine
oil is changed.
Particle filter (Diesel)
/ The start of clogging of the
particle filter is indicated by the
temporary lighting of this warning lamp,
accompanied by an alert message.
As soon as traffic conditions allow, regenerate
the filter by driving at a speed of at least 37
mph
(60
km/h), with an engine speed above 2,500
rpm, for about 15 minutes (until the warning lamp
goes out).
If it is not possible to reach 37
mph (60 km/h),
leave the engine running at idle for about 15
minutes, then drive with an engine speed above
2,500 rpm for 15 minutes.
Do not switch off the engine until the filter
is fully regenerated; repeated intervals
can degrade the engine oil prematurely.
Regenerating the filter while the vehicle is
stationary is not recommended.
Following prolonged operation of the
vehicle at very low speed or at idle, you
may, in exceptional circumstances, notice
water vapour coming from the exhaust while
accelerating. These emissions have no
impact on the vehicle’s behaviour and the
environment.
New vehicle
During the first few particle filter
regeneration operations, you may notice a
"burning" smell. This is perfectly normal. CarM an uals 2 .c o m
Page 246 of 348
244
Audio System with Touch Screen
Audio System with Touch Screen
Multimedia audio system -
Applications - Bluetooth
®
telephone
The functions and settings described
vary according to the vehicle version and
configuration, as well as the country of sale.
For safety reasons and because they
require sustained attention by the driver,
the following operations must be carried out
with the vehicle stationary and the ignition
on:
–
Pairing the smartphone with the system via
Bluetooth.
–
Using the smartphone.
–
Connecting to the CarPlay® or Android
Auto applications (certain applications stop
displaying when the vehicle is moving).
–
Changing the system settings and
configuration.
The system is protected so that it only operates in the vehicle.
The message Energy economy mode is
displayed when the system is about to go into
standby.
The system’s Open Source Software (OSS) source codes are available at the
following addresses:
https://www.groupe-psa.com/fr/oss/
https://www.groupe-psa.com/en/oss/
First steps
With the engine running, a press mutes
the sound.
With the ignition off, a press turns the system on.
Increase or decrease the volume using
the wheel or the "plus" or "minus" buttons
(depending on the equipment).
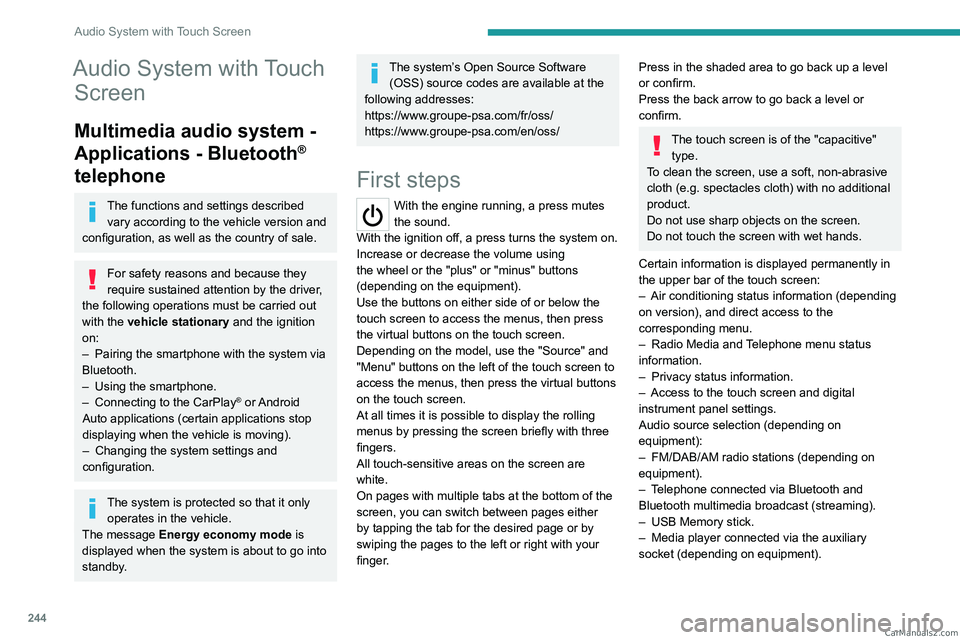
Use the buttons on either side of or below the
touch screen to access the menus, then press
the virtual buttons on the touch screen.
Depending on the model, use the "Source" and
"Menu" buttons on the left of the touch screen to
access the menus, then press the virtual buttons
on the touch screen.
At all times it is possible to display the rolling
menus by pressing the screen briefly with three
fingers.
All touch-sensitive areas on the screen are
white.
On pages with multiple tabs at the bottom of the
screen, you can switch between pages either
by tapping the tab for the desired page or by
swiping the pages to the left or right with your
finger.
Press in the shaded area to go back up a level
or confirm.
Press the back arrow to go back a level or
confirm.
The touch screen is of the "capacitive" type.
To clean the screen, use a soft, non-abrasive
cloth (e.g. spectacles cloth) with no additional
product.
Do not use sharp objects on the screen.
Do not touch the screen with wet hands.
Certain information is displayed permanently in
the upper bar of the touch screen:
–
Air conditioning status information (depending
on version), and direct access to the
corresponding menu.
–
Radio Media and
Telephone menu status
information.
–
Privacy status information.
–
Access to the touch screen and digital
instrument panel settings.
Audio source selection (depending on
equipment):
–
FM/DAB/AM radio stations (depending on
equipment).
–
T
elephone connected via Bluetooth and
Bluetooth multimedia broadcast (streaming).
–
USB Memory stick.
–
Media player connected via the auxiliary
socket (depending on equipment).
CarM an uals 2 .c o m
Page 249 of 348
247
Audio System with Touch Screen
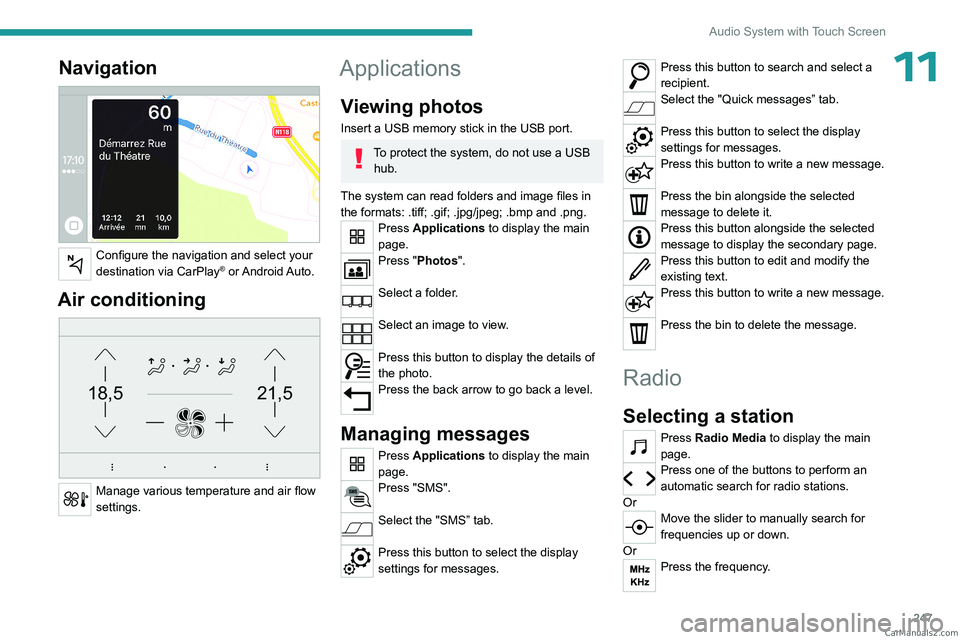
11Navigation
Configure the navigation and select your
destination via CarPlay® or Android Auto.
Air conditioning
21,518,5
Manage various temperature and air flow
settings.
Applications
Viewing photos
Insert a USB memory stick in the USB port.
To protect the system, do not use a USB hub.
The system can read folders and image files in
the formats: .tiff; .gif; .jpg/jpeg; .bmp and .png.
Press Applications to display the main
page.
Press "Photos".
Select a folder.
Select an image to view.
Press this button to display the details of
the photo.
Press the back arrow to go back a level.
Managing messages
Press Applications to display the main
page.
Press "SMS".
Select the "SMS” tab.
Press this button to select the display
settings for messages.
Press this button to search and select a
recipient.
Select the "Quick messages” tab.
Press this button to select the display
settings for messages.
Press this button to write a new message.
Press the bin alongside the selected
message to delete it.
Press this button alongside the selected
message to display the secondary page.
Press this button to edit and modify the
existing text.
Press this button to write a new message.
Press the bin to delete the message.
Radio
Selecting a station
Press Radio Media to display the main
page.
Press one of the buttons to perform an
automatic search for radio stations.
Or
Move the slider to manually search for
frequencies up or down.
Or
Press the frequency. CarM an uals 2 .c o m
Page 259 of 348
257
3D Connected Navigation
123D Connected Navigation
GPS navigation -
Applications - Multimedia
audio system - Bluetooth
®
telephone
The functions and settings described
vary according to the vehicle version and
configuration, as well as the country of sale.
For safety reasons and because they
require sustained attention by the driver,
the following operations must be carried out
with the vehicle stationary and the ignition
on:
–
Pairing the smartphone with the system via
Bluetooth.
–
Using the smartphone.
–
Connecting to the CarPlay® or Android
Auto applications (certain applications stop
displaying when the vehicle is moving).
–
W
atching a video (the video stops when the
vehicle starts to move again).
–
Changing the system settings and
configuration.
AM and DAB radio are not available on Hybrid vehicles.
The system is protected so that it only operates in the vehicle.
The message Energy economy mode is
displayed when the system is about to go into
standby.
System and map updates can be
downloaded from the Brand's website.
The update procedure is also available there.
The system’s Open Source Software (OSS) source codes are available at the
following addresses:
https://www.groupe-psa.com/fr/oss/
https://www.groupe-psa.com/en/oss/
First steps
With the engine running, a press mutes
the sound.
With the ignition off, a press turns the system on.
Increase or decrease the volume using
the wheel or the "plus" or "minus" buttons
(depending on the equipment).
Use the menu buttons on either side of or below
the touch screen for access to the menus, then
press the virtual buttons in the touch screen.
Depending on the model, use the "Source" or
"Menu" buttons to access the rolling menus, then
press the virtual buttons in the touch screen.
Display the rolling menus at any time by pressing
the screen briefly with three fingers.
All of the touch areas of the screen are white.
Press the back arrow to go back a level.
Press "OK" to confirm.
The touch screen is of the "capacitive" type.
To clean the screen, use a soft, non-abrasive
cloth (e.g. spectacles cloth) with no additional
product.
Do not use sharp objects on the screen.
Do not touch the screen with wet hands.
Certain information is displayed permanently
in the side bars or in the upper bar of the touch
screen (depending on equipment):
–
Air conditioning status information (depending
on version), and direct access to the
corresponding menu.
–
Go directly to the audio source selection
option, to view the list of radio stations (or list of
titles depending on the source).
–
Go to the "Notifications" of messages, emails,
map updates and, depending on the services,
the navigation notifications.
–
Go to the settings for the touch screen and the
digital instrument panel.
Audio source selection (depending on
equipment):
–
FM/DAB/AM radio stations (depending on
equipment).
–
T
elephone connected via Bluetooth and
Bluetooth multimedia broadcast (streaming).
–
USB memory stick. CarM an uals 2 .c o m