2023 PEUGEOT EXPERT run flat
[x] Cancel search: run flatPage 207 of 348

205
In the event of a breakdown
8
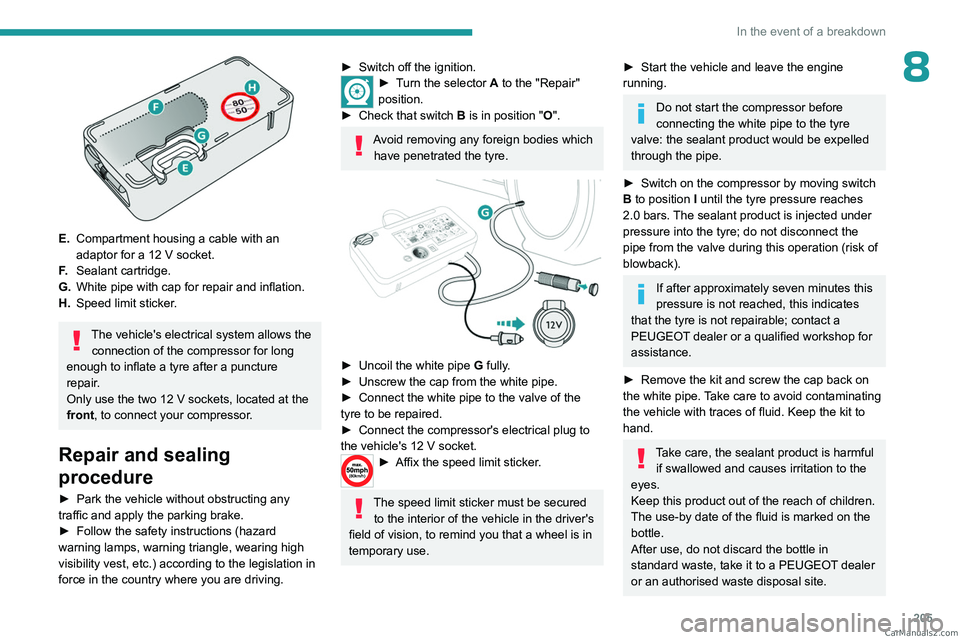
E.Compartment housing a cable with an
adaptor for a 12
V socket.
F. Sealant cartridge.
G. White pipe with cap for repair and inflation.
H. Speed limit sticker.
The vehicle's electrical system allows the
connection of the compressor for long
enough to inflate a tyre after a puncture
repair.
Only use the two 12 V sockets, located at the
front, to connect your compressor.
Repair and sealing
procedure
► Park the vehicle without obstructing any
traffic and apply the parking brake.
►
Follow the safety instructions (hazard
warning lamps, warning triangle, wearing high
visibility vest, etc.) according to the legislation in
force in the country where you are driving.
► Switch off the ignition.► Turn the selector A to the "Repair"
position.
►
Check that switch
B is in position " O".
Avoid removing any foreign bodies which
have penetrated the tyre.
► Uncoil the white pipe G fully.
► Unscrew the cap from the white pipe.
►
Connect the white pipe to the valve of the
tyre to be repaired.
►
Connect the compressor's electrical plug to
the vehicle's 12 V socket.
► Affix the speed li mit sticker.
The speed limit sticker must be secured
to the interior of the vehicle in the driver's
field of vision, to remind you that a wheel is in
temporary use.
► Start the vehicle and leave the engine
running.
Do not start the compressor before
connecting the white pipe to the tyre
valve: the sealant product would be expelled
through the pipe.
►
Switch on the compressor by moving switch
B
to position I until the tyre pressure reaches
2.0 bars. The sealant product is injected under
pressure into the tyre; do not disconnect the
pipe from the valve during this operation (risk of
blowback).
If after approximately seven minutes this
pressure is not reached, this indicates
that the tyre is not repairable; contact a
PEUGEOT dealer or a qualified workshop for
assistance.
►
Remove the kit and screw the cap back on
the white pipe.
Take care to avoid contaminating
the vehicle with traces of fluid. Keep the kit to
hand.
Take care, the sealant product is harmful if swallowed and causes irritation to the
eyes.
Keep this product out of the reach of children.
The use-by date of the fluid is marked on the
bottle.
After use, do not discard the bottle in
standard waste, take it to a PEUGEOT dealer
or an authorised waste disposal site. CarM an uals 2 .c o m
Page 208 of 348

206
In the event of a breakdown
Do not forget to obtain a new bottle of
sealant, available from a PEUGEOT dealer or
a qualified workshop.
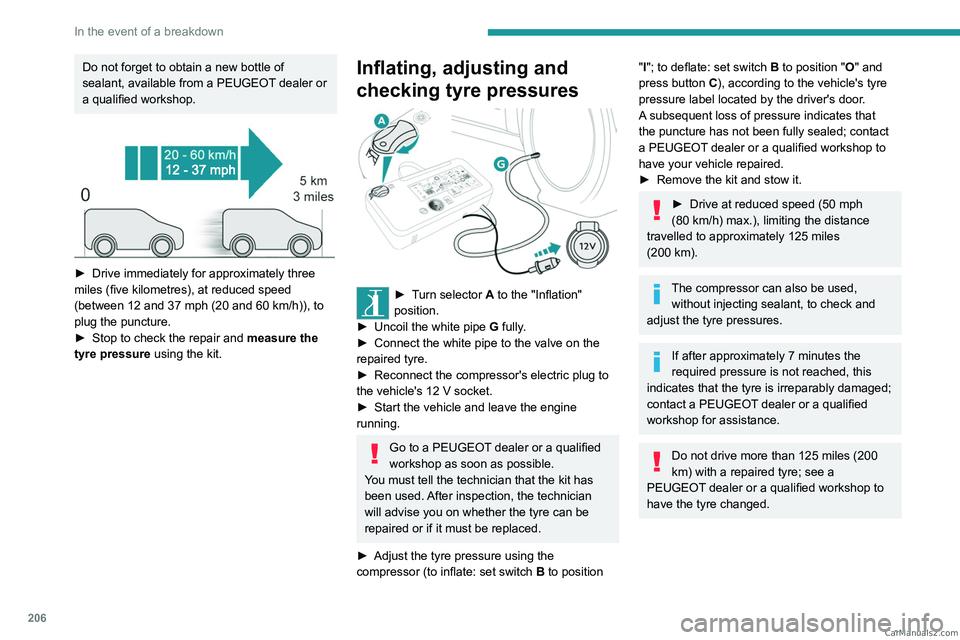
► Drive immediately for approximately three
miles (five kilometres), at reduced speed
(between 12 and 37
mph (20 and 60 km/h)), to
plug the puncture.
►
Stop to check the repair and measure the
tyre pressure using the kit.
Inflating, adjusting and
checking tyre pressures
► Turn selector A to the "Inflation"
position.
►
Uncoil the white pipe G
fully.
►
Connect the white pipe to the valve on the
repaired tyre.
►
Reconnect the compressor's electric plug to
the vehicle's 12
V socket.
►
Start the vehicle and leave the engine
running.
Go to a PEUGEOT dealer or a qualified
workshop as soon as possible.
You must tell the technician that the kit has
been used. After inspection, the technician
will advise you on whether the tyre can be
repaired or if it must be replaced.
►
Adjust the tyre pressure using the
compressor (to inflate: set switch
B to position
"I"; to deflate: set switch B to position "O" and
press button C), according to the vehicle's tyre
pressure label located by the driver's door.
A subsequent loss of pressure indicates that
the puncture has not been fully sealed; contact
a PEUGEOT dealer or a qualified workshop to
have your vehicle repaired.
►
Remove the kit and stow it.
► Drive at reduced speed (50 mph
(80 km/h) max.), limiting the distance
travelled to approximately 125 miles
(200
km).
The compressor can also be used, without injecting sealant, to check and
adjust the tyre pressures.
If after approximately 7 minutes the
required pressure is not reached, this
indicates that the tyre is irreparably damaged;
contact a PEUGEOT
dealer or a qualified
workshop for assistance.
Do not drive more than 125 miles (200
km) with a repaired tyre; see a
PEUGEOT dealer or a qualified workshop to
have the tyre changed. CarM an uals 2 .c o m
Page 219 of 348

217
In the event of a breakdown
8Symbols
No sparks or naked flames, no smoking.
Always protect your eyes. Explosive gases can cause blindness and injury.
Keep the vehicle's battery out of the reach
of children.
The vehicle's battery contains sulphuric acid which can make you go blind or
cause severe burns.
For more information, refer to the
handbook.
Explosive gases can be present close to
the battery.
Always replace the battery with one of equivalent specification.
Access to the battery
The battery is located under the bonnet.
► Open the bonnet using the interior release
lever
, then the exterior safety catch.
►
Secure the bonnet stay
.
► Remove the plastic cover to access the (+)
terminal, if your vehicle has one.
The battery (-) terminal is not accessible.
There is a remote earth point near the battery
.
For more information on the Bonnet and
the Engine , refer to the corresponding
sections.
Starting using another
battery
If the vehicle's battery is flat, the engine can be
started using a backup battery (either external or
from another vehicle) and jump leads or using a
battery booster.
Never start the engine by connecting a
battery charger.
Never use a 24
V or higher battery booster.
Check beforehand that the backup battery
has a nominal voltage of 12
V and a capacity
at least equal to that of the discharged
battery.
The two vehicles must not be in contact with
each other.
Switch off all electricity-consuming equipment
on both vehicles (audio system, wipers,
lighting, etc.).
Make sure that the jump leads are well away
from the engine’s moving parts (fan, belt,
etc.).
Do not disconnect the (+) terminal while the
engine is running.
► Lift the plastic cover on the (+) terminal, if the
vehicle has one.
►
Connect the red cable to the (+) terminal of
flat battery
A (at the metal elbow), then to the
(+) terminal of the backup battery
B or of the
booster.
►
Connect one end of the green or black cable
to the (-) terminal of the backup battery
B or of CarM an uals 2 .c o m
Page 288 of 348

286
Alphabetical index
Charge level indicator (Electric) 22
Charging cable
180
Charging cable (Electric)
179
Charging connector
(Electric)
178, 183, 185–186
Charging flap (Electric)
178, 183, 185–186
Charging system (Electric)
5, 8, 27, 176, 191
Charging the traction battery
(Electric)
22, 176, 183, 185–186
Checking the engine oil level
19
Checking the levels
191–193
Checking tyre pressures
(using the kit)
204, 206–207
Checks
191, 194–196
Checks, routine
194–195
Child lock
131
Child lock on rear windows
131
Children
106, 113, 119–121, 128, 128–129
Children (safety)
131
Child seats
106, 109–116, 128
Child seats, conventional
112–116
Child seats, i-Size
128
Child seats, ISOFIX
119–121, 128, 128–129
Cleaning (advice)
177, 199–201
Closing the boot
44
Closing the doors
29, 33, 43–44
Collision Risk Alert
162–163
Compressor, tyre inflation
204
Configuration, vehicle
26–27
Connected applications
269
Connection, Android Auto
251, 269
Connection, Apple CarPlay
251, 268Connection,
Bluetooth
239, 252–253, 269–270, 274–275
Connection, Wi-Fi network
270
Connectivity
268
Consumptions
27
Container, AdBlue®
197
Control, emergency boot release
36
Control, emergency door
29, 34–35
Control, heated seats
50–51
Control stalk, lighting
88
Control stalk, wipers
93–95
Control unit
179–180
Courtesy lamp
86
Courtesy lamp, front
86–87, 215
Courtesy lamp, rear
86–87, 215
Courtesy lamps
86–87, 215
Crew cab, fixed
65–66
Crew cab, folding
66
Cruise control
151, 153–154, 156–158
Cruise control,
adaptive
153–154, 158, 161–163
Cruise control,
adaptive with Stop function
153–154
Cruise control by
speed limit recognition
153–154
D
DAB (Digital Audio Broadcasting) -
Digital radio
235–236, 249, 272
Date (setting)
28, 255, 277
Daytime running lamps 89, 212–213
Deactivating the passenger
airbag
107, 111–112
Deactivation of DSC (ESC)
101
Deadlocking
34
Deferred charging
27
Deferred charging (Electric)
27, 178, 183, 186
Defrosting
52, 81
Defrosting, rear screen
82
Demisting
81
Demisting, rear
82
Dimensions
229
Dipstick
19, 192
Direction indicators
(turn signals)
89, 212–214, 216
Display, head-up
11
Domestic charging
180
Domestic charging (Electric)
184–186, 227
Door pockets
68
Doors, rear
43–44
Doors, side
39
Doors, side-hinged
33–34, 43–44, 214
Drive,
electric
5, 8, 27, 176, 189, 191, 216, 220, 227
Driver’s attention warning
166
Drive selector (Electric)
145, 195
Driving
132–133
Driving aids camera (warnings)
150
Driving aids (recommendations)
150
Driving economically
7
Driving modes
146
Driving modes (Electric)
146–147 CarM an uals 2 .c o m