Page 65 of 244

63
Ease of use and comfort
3► Compress the control B and lift the load
space cover on the right then on the left to
remove it.
Installation
► Position the left-hand end of the load space
cover roller in its location 1
behind the rear left
seat.
►
Compress the roller control B
and put the
roller in place in its location 2 on the right.
►
Release the control to secure the load space
cover
.
►
Unroll it until it clips on the boot pillars.
In the event of sudden deceleration,
objects placed on the load space cover
can turn into projectiles.
High load retaining net (SW)
Hooked onto the special upper and lower fixings,
this removable net allows the use of the entire
loading volume up to the roof:
–
behind the front seats (row 1) when the rear
seats are folded,
–
behind the rear seats (row 2) when the load
space cover is removed.
It protects the occupants in case of
sudden braking.
Row 1
► Fold down the rear seats.
► Remove the rear head restraints.
►
Position the net's roller above the two rails
(located on the back of the folded rear seats).
►
Slide the two rails B
in the grooves A and
push the roller from left to right to secure it.
►
Unroll the net without stretching it.
►
Position one of the ends of the net's metal
bar in the corresponding upper fixing 1
.
►
Compress the net's metal bar
, then pull it to
position the other end in the other upper fixing 1.
►
Check that the net is hooked and tightened
correctly
.
Never reposition the rear seats while the
net's roller is attached to the folded
backrests.
Page 66 of 244

64
Ease of use and comfort
Row 2
► Roll up then remove the load space cover.
► Fold down the rear seats.
►
Position the left-hand end of the net roller in
side support 3
by reaching from the left-hand
side of the passenger compartment.
►
Position the right-hand end of the net roller in
side support 4
by reaching from the right-hand
side of the passenger compartment.
►
Press each side to lock in the roller; the red
indicators must not be visible.
►
Unroll the net from the boot.
►
Position one of the ends of the net's metal
bar in the corresponding upper fixing 2
.
►
Compress the net's metal bar
, then pull it to
position the other end in the other upper fixing 2.
►
Check that the net is hooked and tightened
correctly
.
►
Lift up and lock the rear seats.
12 V accessory socket
► To connect a 12 V accessory (maximum
power: 120 W), lift the cover and plug in a
suitable adaptor.
►
Switch on the ignition.
The connection of an electrical device not approved by PEUGEOT, such as a
USB charger, may adversely affect the
operation of vehicle electrical systems,
causing faults such as poor radio reception or
interference with displays in the screens.
Stowing rings
Sedan
SW
The boot has four stowing rings to secure
luggage using different types of retaining nets.
For the SW, two of the rings are fixed and the
other two are movable in tracks.
For more information on the various nets,
contact a PEUGEOT dealer.
To move one of the movable rings:
► While pressing the button, slide the ring in
its track.
►
Once in the desired position, release the
button to lock it.
T
o remove or refit one of the movable rings:
Page 67 of 244
65
Ease of use and comfort
3► Bring it to an oblong slot on the track.
► T o observe the direction of installation, make
sure the ring is positioned vertically and towards
the outside of the vehicle.
Do not confuse the stowing rings with the
bag hooks or the Top Tether fixings.
Storage well
Sedan
SW
► Lift the boot floor as far as possible to access
the storage well.
Depending on version, it includes:
–
A
temporary puncture repair kit with the tool
kit.
–
A
spare wheel with the tool kit.
–
The traction battery charging cable
(Rechargeable hybrid).
Boot lamp
It comes on automatically when the boot is
opened and goes off automatically when the
boot is closed.
The lighting time varies according to the
circumstances:
–
When the ignition is off, approximately 10
minutes.
–
In energy saving mode, approximately 30
seconds.
–
With the engine running, unlimited.
Page 68 of 244

66
Lighting and visibility
Exterior lighting control
stalk
Main lighting
Automatic illumination of lamps/daytime running lamps
Sidelamps only
Dipped or main beam headlamps
Headlamp dipping
► Pull the lighting control stalk to switch
between dipped and main beam headlamps. In "
AUTO" and sidelamps mode, pull the lighting
control stalk to switch the main beam headlamps
on directly ("headlamp flash").
Display
Illumination of the corresponding indicator
lamp on the instrument panel confirms that the
selected lighting is on.
A fault with a lamp is signalled by the permanent illumination of this warning
lamp, accompanied by the display of a message
and an audible signal.
Rear foglamps
They only work if the dipped or main beam headlamps are on.
► Rotate the ring forwards/backwards to turn
them on/off.
When the lighting is switched off automatically
("
AUTO" position) the foglamps and the dipped
beam headlamps remain on.
When the rear foglamps are activated, the "fog"
mode of the Adaptive Frontlight System function
can be activated at the front.
For more information on the Adaptive Frontlight
System , refer to the corresponding section.
Switching on the foglamps is prohibited
in clear weather or in rain, both day and
night. In these situations, the power of their
beams may dazzle other drivers. They must
only be used in fog or falling snow (rules may
vary depending on country).
Do not forget to switch off the foglamps when
they are no longer necessary.
Switching off of the lighting when the
ignition is switched off
When the ignition is switched off, all of the
lamps turn off immediately, except for the
dipped beam headlamps if automatic guide-
me-home lighting is activated.
Switching on the lamps after
switching off the ignition
To reactivate the lighting control, rotate the
ring to the "AUTO" position, then to the
desired position.
If the driver's door is opened, a temporary
audible signal warns the driver that the lamps
are on.
They will go off automatically after a period
of time that depends on the level of charge in
the battery (entering energy economy mode).
In some weather conditions (e.g. low
temperature or humidity), misting on the
internal surface of the glass of the headlamps
and rear lamps is normal, and will disappear
Page 69 of 244

67
Lighting and visibility
4after the lamps have been on for a few
minutes.
Never look too closely at the light beam
of LED technology lamps - risk of serious
eye injury!
Daytime running lamps/
Sidelamps
These LED lamps at the front and rear of the
vehicle light up automatically when the engine
starts.
They perform the following functions:
–
Daytime running lamps (lighting control stalk
at position
"AUTO" with adequate ambient light).
–
Sidelamps (lighting control stalk at position
"
AUTO" with low ambient light or "Sidelamps
only" or "Dipped/main beam headlamps").
Direction indicators
► Left or right: lower or raise the lighting control
stalk, beyond the point of resistance.
If you keep the direction indicators on for
more than 20 seconds, the volume of the
audible signal will increase if the speed is
above 50 mph (80 km/h).
Three flashes
► Press briefly upwards or downwards, without
going beyond the point of resistance; the
direction indicators will flash 3 times.
The lighting of the rear 3D Full LED direction indicators is scrolling.
Parking lamps
Vehicle side marking by lighting the sidelamps
on the traffic side only.
►
Within one minute after switching off the
ignition, operate the lighting control stalk
upwards or downwards, depending on the side
of the traffic (e.g. when parking on the right, push
the lighting control stalk down to light up on the
left).
This is confirmed by an audible signal and the
lighting of the corresponding direction indicator
lamp on the instrument panel.
►
T
o switch off the parking lamps, return the
lighting control stalk to the central position.
Headlamp beam height
adjustment
Automatic Peugeot Matrix LED Technology 2.0
headlamp adjustment
This system automatically adjusts the height
of the headlamp beams according to different
parameters (e.g.
vehicle load).
In the event of a malfunction, this warning
lamp lights up on the instrument panel,
accompanied by the display of a message and
an audible signal.
The system places the headlamp beams in the
lowest position.
Have it checked by a PEUGEOT dealer or a
qualified workshop.
Do not touch the Peugeot Matrix LED
Technology 2.0 headlamps - risk of
electrocution!
Page 70 of 244

68
Lighting and visibility
Automatic illumination of lamps
With the lighting control stalk in the “ AUTO”
position and if a low level of exterior brightness
is detected by the rain/sunshine sensor, the
sidelamps and dipped beam headlamps are
switched on automatically, without any action on
the part of the driver. They may also come on if
rain is detected, at the same time as automatic
operation of the windscreen wipers.
As soon as the brightness returns to a sufficient
level or after the windscreen wipers are switched
off, the lamps are switched off automatically.
Malfunction
In the event of a malfunction of the rain/
sunshine sensor, the vehicle’s lamps
come on and this warning lamp is displayed on
the instrument panel, accompanied by an
audible signal and/or the display of a message.
Have it checked by a PEUGEOT dealer or a
qualified workshop.
Do not cover the rain/sunshine sensor
located at the top centre of the
windscreen behind the interior rear view
mirror; the associated functions would no
longer be controlled.
In fog or snow, the rain/sunshine sensor
may detect sufficient light. For this
reason, the lighting will not come on
automatically.
The inner surface of the windscreen may become misted up and affect the proper
operation of the rain/sunshine sensor.
In humid and cold weather, demist the
windscreen regularly.
Guide-me-home and
welcome lighting
Guide-me-home lighting
Automatic
With the ring of the lighting control stalk in the
"AUTO” position and when the light is poor, the
dipped beam headlamps come on automatically
when the ignition is switched off.
You can activate/deactivate and adjust the duration of the guide-me-home
lighting in the Settings
> Vehicle touch screen
application.
Manual
► With the ignition off, pull the lighting control
stalk toward you ("headlamp flash") to activate/
deactivate the function.
Manual guide-me-home lighting goes off
automatically after a period of time.
Welcome lighting
When the vehicle is unlocked in low light
conditions and the "Automatic illumination of
headlamps" function is activated, this system
automatically switches on:
–
On the outside, sidelamps, dipped beam
headlamps and door mirror spotlamps.
–
Inside, courtesy lamps and footwell lighting.
You can activate/deactivate and adjust the duration of the welcome lighting in the
Settings
> Vehicle touch screen application.
Door mirror spotlamps
These spotlamps facilitate access to the vehicle
by lighting the ground near the front doors.
The spotlamps come on automatically:
Page 71 of 244

69
Lighting and visibility
4– when the vehicle is unlocked.
– when a door is opened.
–
when a request to locate the vehicle is
received from the remote control.
They also come on with the welcome lighting
and guide-me-home lighting functions.
They go off automatically after 30 seconds.
Automatic lighting systems - General
recommendations
The automatic lighting systems use a detection
camera, located at the top of the windscreen.
Operating limits
The system may be disrupted or not work
correctly:
–
When visibility conditions are poor
(e.g.
snowfall, heavy rain).
–
If the windscreen is dirty
, misted-up or
masked (e.g.
sticker) in front of the camera.
–
If the vehicle is facing highly reflective signs
or safety barrier reflectors.
The system is not able to detect:
–
Road users that do not have their own
lighting, such as pedestrians.
–
V
ehicles with hidden lighting (e.g. travelling
behind a safety barrier on the motorway).
–
V
ehicles at the top or bottom of a steep
slope, on winding roads, on crossroads.
Maintenance
Clean the windscreen regularly,
particularly the area in front of the camera.
The internal surface of the windscreen can
also become misted around the camera.
In humid and cold weather, demist the
windscreen regularly.
Do not allow snow to accumulate on the
bonnet or roof of the vehicle as this could
obstruct the camera.
Peugeot Matrix LED
Technology 2.0
For more information, refer to the
General recommendations for
automatic lighting systems.
This system automatically adapts the main
beam according to the driving conditions, so that
optimum illumination is maintained for the driver,
without causing a nuisance to other road users.
The driver remains responsible for the vehicle's lighting, its correct use in the
prevailing light, visibility and traffic conditions,
and for compliance with driving and vehicle
regulations.
The system is active from 28 mph
(45 km/h) and deactivates below 22 mph
(35
km/h).
Activation/Deactivation
► Place the ring of the lighting control stalk in
the “ AUTO” position.
This indicator lamp comes on in the instrument panel.
It is configured in the Settings > Vehicle
touch screen application.
The state of the system is stored when the
ignition is switched off.
When deactivated, the lighting system changes
to "Automatic illumination of lamps" mode.
It is recommended that you deactivate
the function in foggy or snowy conditions
or in case of heavy mist.
The function temporarily is deactivated when
the system detects thick fog or when the
foglamps are switched on manually. This is
signalled by the indicator lamp going off on
the instrument panel.
Operation
Using a camera, the system detects the driving
conditions (brightness, lights from oncoming or
followed vehicles, road turns) and adapts the
beams of the main headlamps accordingly.
The modules that make up the main beams
switch on and off gradually, segment by
segment, depending on the driving conditions
detected.
Page 72 of 244

70
Lighting and visibility
Nominal main beam lighting is restored as soon
as the vehicle is no longer detected by the
system.
Followed vehicle
When approaching a vehicle from behind, only
those lamp segments directed at the followed
vehicle go off, thereby creating a "tunnel" so as
not to dazzle its driver.
Oncoming vehicle
When an oncoming vehicle approaches, only
those lamp segments directed at this vehicle
go off, thereby creating a "tunnel" during the
duration of the approach.
Entering an illuminated area
At the entrance to an illuminated area (e.g. a
town), the lamp segments are gradually switched
off from the outside to the inside of the vehicle to
switch to the dipped beams.
Exiting an illuminated area
The lamp segments gradually light up from the
inside to the outside of the vehicle to restore the
main beams.
Pause
If the situation requires a change of headlamp
beam, the driver can take over at any time.
►
Switch the dipped/main beam headlamps
manually to pause the function.
The lighting system changes to "Automatic
illumination of lamps" mode.
►
T
o reactivate the function, manually switch
the dipped/main beam headlamps again.
Malfunction
In the first case, this warning lamp goes
out on the instrument panel, accompanied
by the display of a message if the sensor is
masked.
This is a normal behavior, which does not
request the support of a qualified workshop.
Stop the vehicle and verify if the front camera is
covered by dirt, mud, sand, snow, ice or anything
preventing the sensing.
The system is operational again after the
detection field has been cleaned.
In the second case, this warning lamp
goes out on the instrument panel,
accompanied by an audible signal and the
display of a message if a malfunction occurs with
the adaptive headlamp lighting or the camera.
Have it checked by a PEUGEOT dealer or a
qualified workshop.
Do not cover the rain/sunshine sensor
located at the top centre of the
windscreen behind the interior rear view
mirror; the associated functions would no
longer be controlled.
Adaptive Frontlight System
This function has several lighting modes, specific
to each driving situation.
The intensity and width of the light beam of the
main headlamps and the modules vary so as to
increase or reduce the range of the lighting.
The modules switch on and off sequentially
so as to expand and direct the light beam to
increase or decrease the lighting up of the sides
of the road.
This function is a driving aid which cannot, in any circumstances, replace
the need for vigilance on the part of the driver
who must continually adapt the driving of the
vehicle to the visibility and traffic conditions.
 1
1 2
2 3
3 4
4 5
5 6
6 7
7 8
8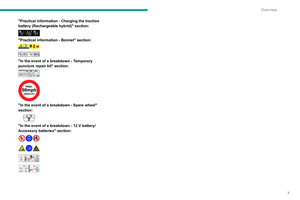 9
9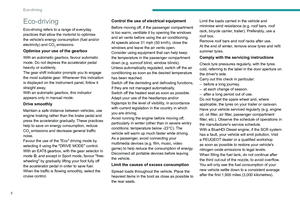 10
10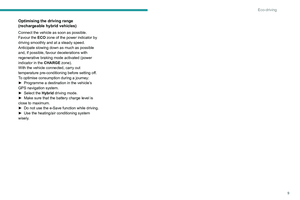 11
11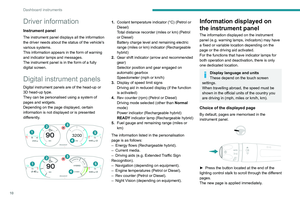 12
12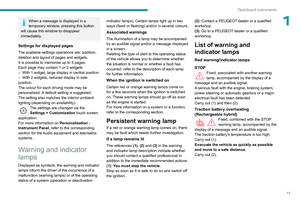 13
13 14
14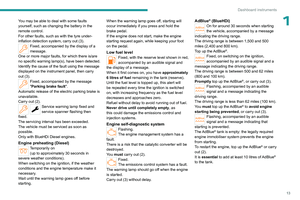 15
15 16
16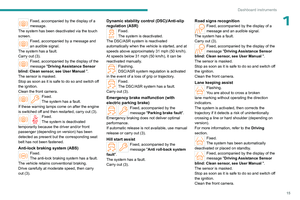 17
17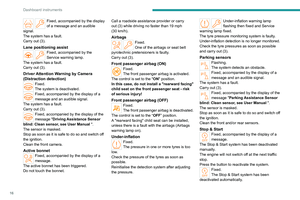 18
18 19
19 20
20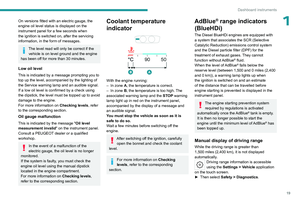 21
21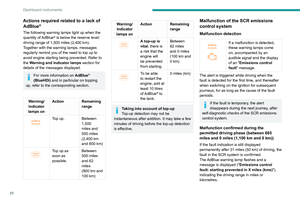 22
22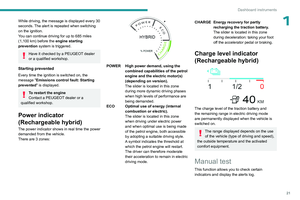 23
23 24
24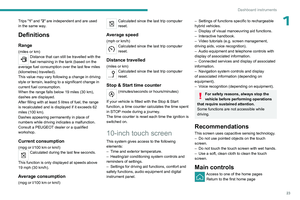 25
25 26
26 27
27 28
28 29
29 30
30 31
31 32
32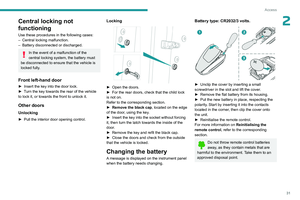 33
33 34
34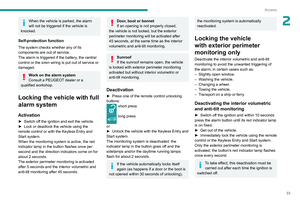 35
35 36
36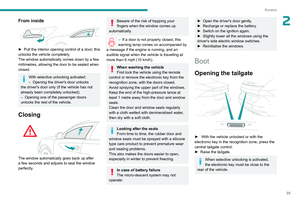 37
37 38
38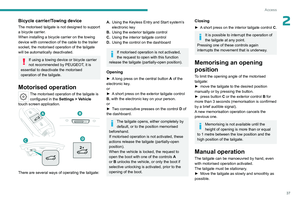 39
39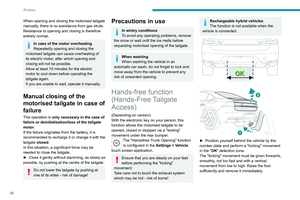 40
40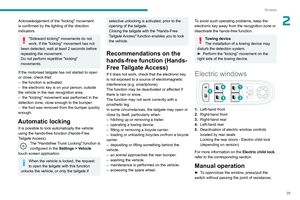 41
41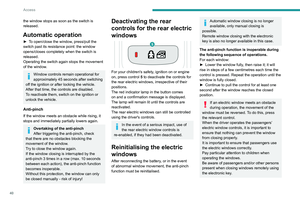 42
42 43
43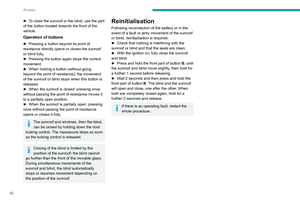 44
44 45
45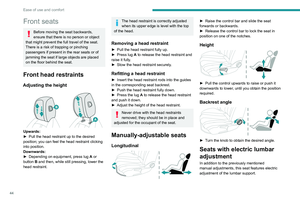 46
46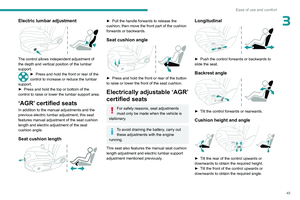 47
47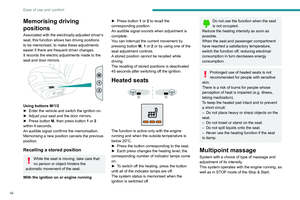 48
48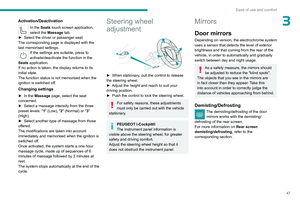 49
49 50
50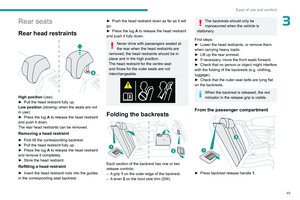 51
51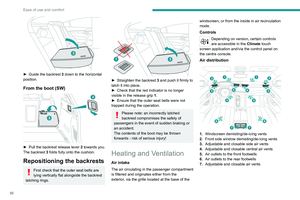 52
52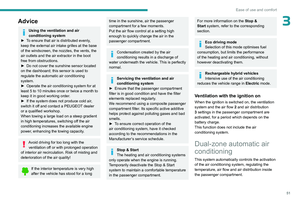 53
53 54
54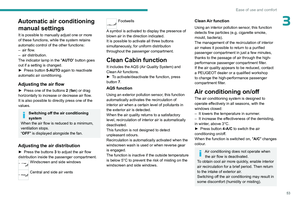 55
55 56
56 57
57 58
58 59
59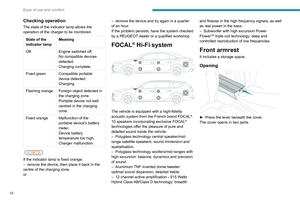 60
60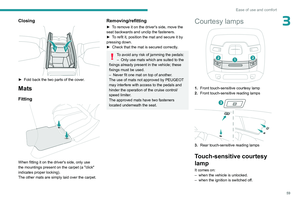 61
61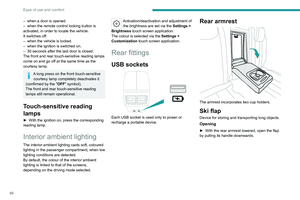 62
62 63
63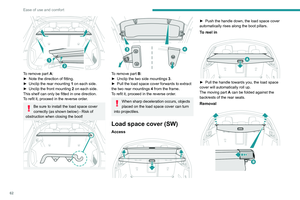 64
64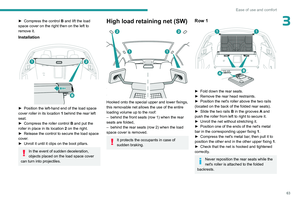 65
65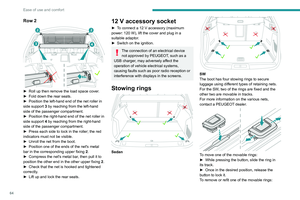 66
66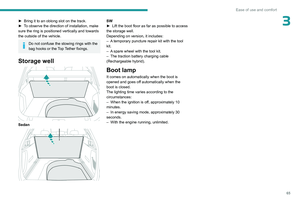 67
67 68
68 69
69 70
70 71
71 72
72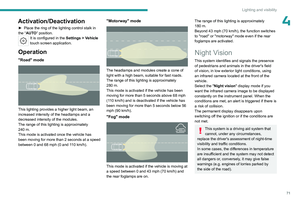 73
73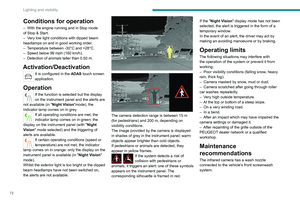 74
74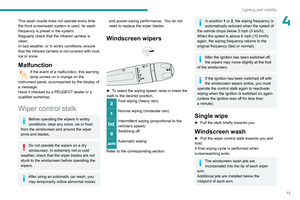 75
75 76
76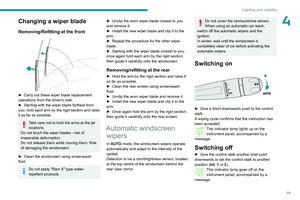 77
77 78
78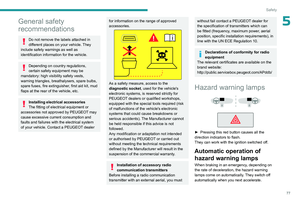 79
79 80
80 81
81 82
82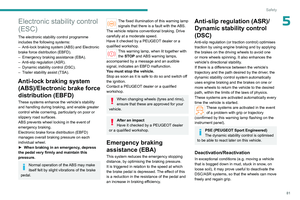 83
83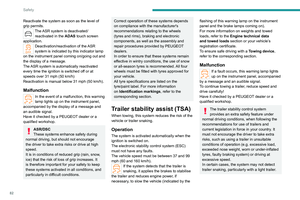 84
84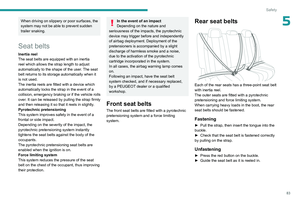 85
85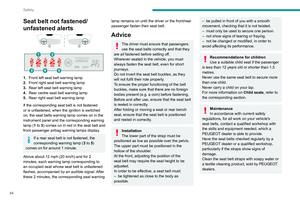 86
86 87
87 88
88 89
89 90
90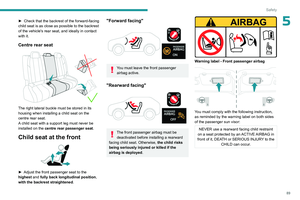 91
91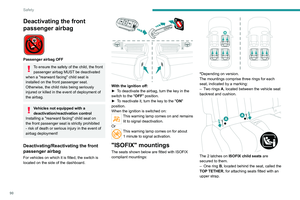 92
92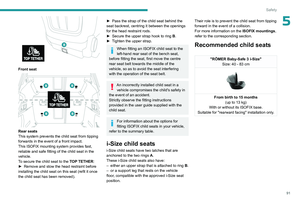 93
93 94
94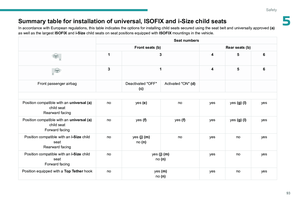 95
95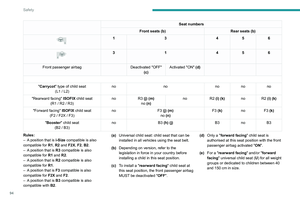 96
96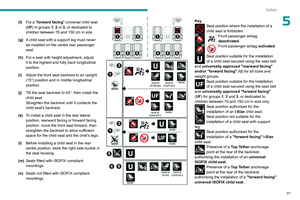 97
97 98
98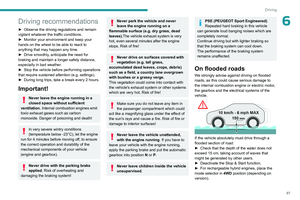 99
99 100
100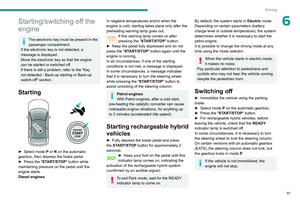 101
101 102
102 103
103 104
104 105
105 106
106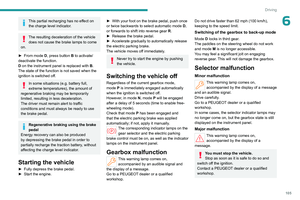 107
107 108
108 109
109 110
110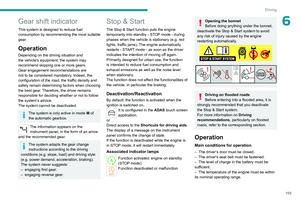 111
111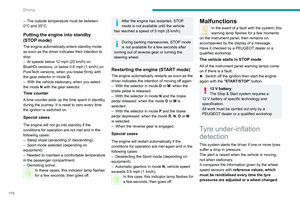 112
112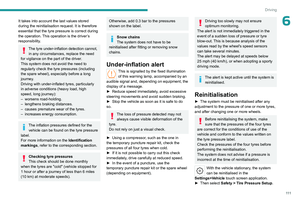 113
113 114
114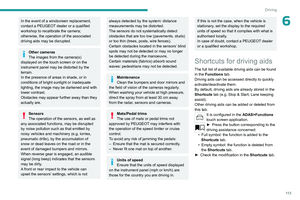 115
115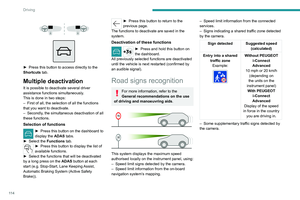 116
116 117
117 118
118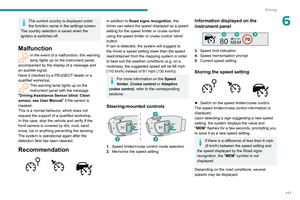 119
119 120
120 121
121 122
122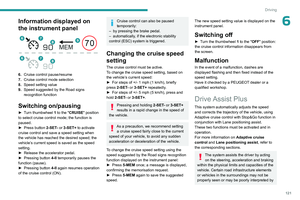 123
123 124
124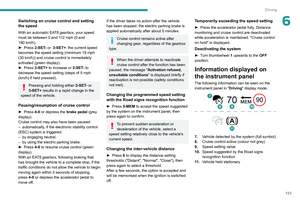 125
125 126
126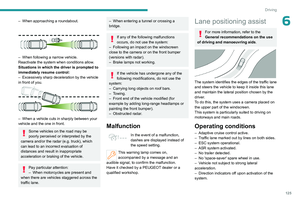 127
127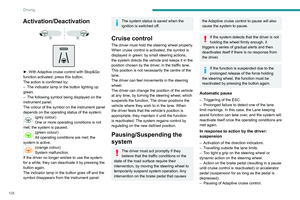 128
128 129
129 130
130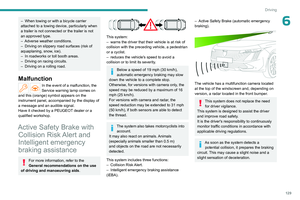 131
131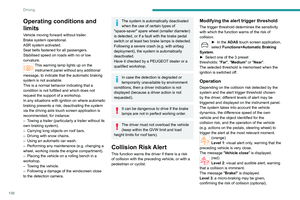 132
132 133
133 134
134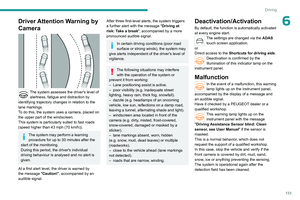 135
135 136
136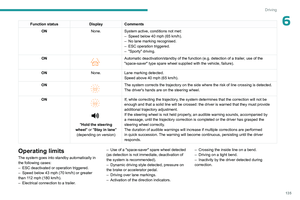 137
137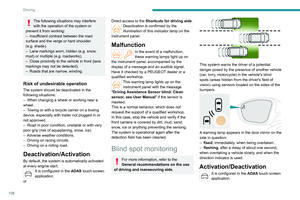 138
138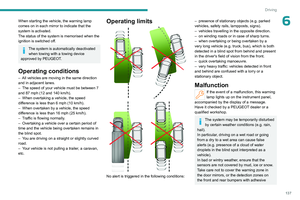 139
139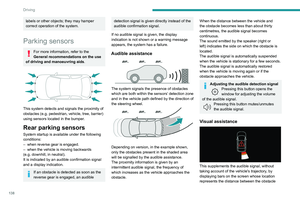 140
140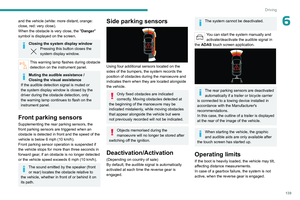 141
141 142
142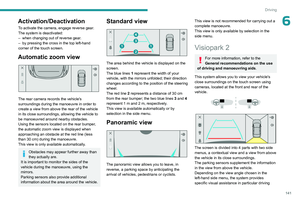 143
143 144
144 145
145 146
146 147
147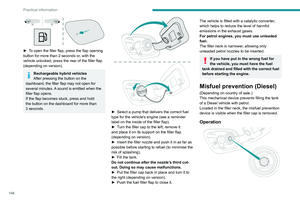 148
148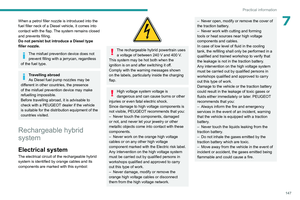 149
149 150
150 151
151 152
152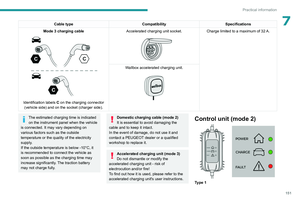 153
153 154
154 155
155 156
156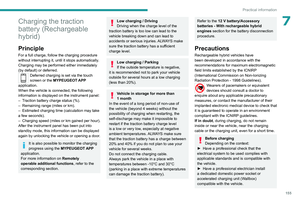 157
157 158
158 159
159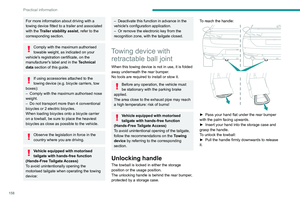 160
160 161
161 162
162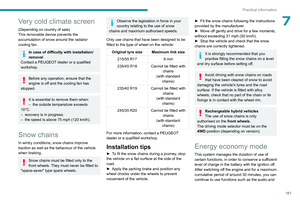 163
163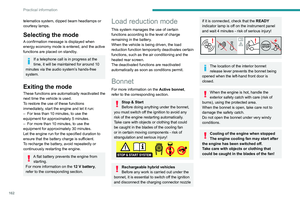 164
164 165
165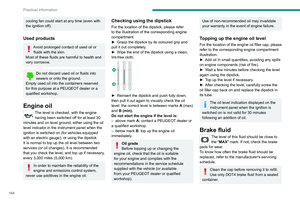 166
166 167
167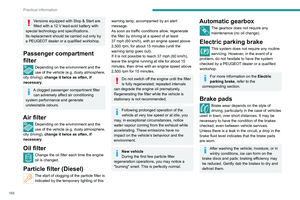 168
168 169
169 170
170 171
171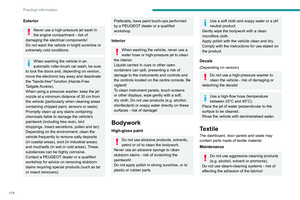 172
172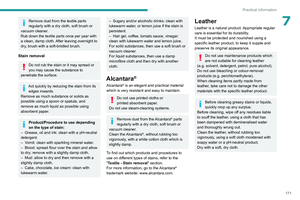 173
173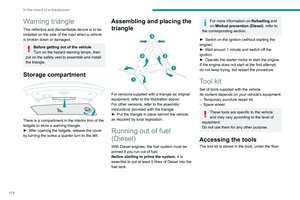 174
174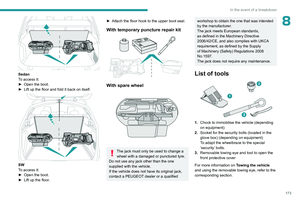 175
175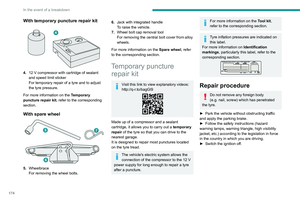 176
176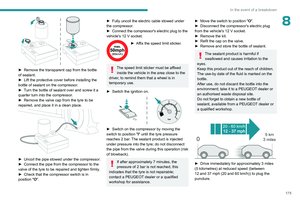 177
177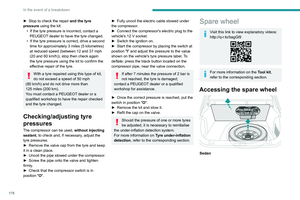 178
178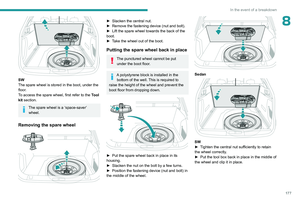 179
179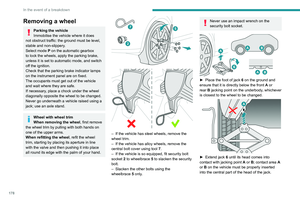 180
180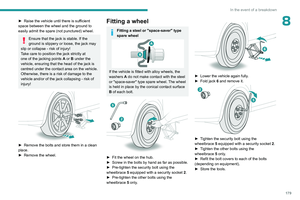 181
181 182
182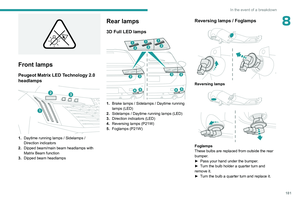 183
183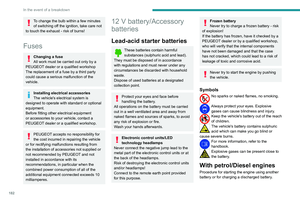 184
184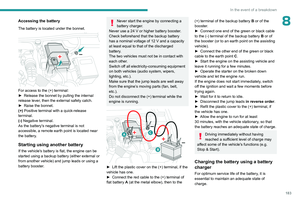 185
185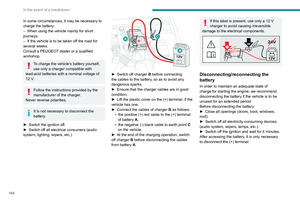 186
186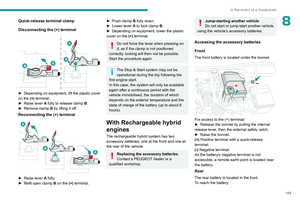 187
187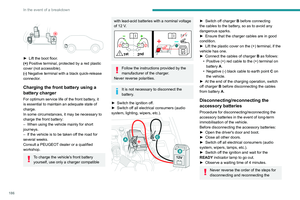 188
188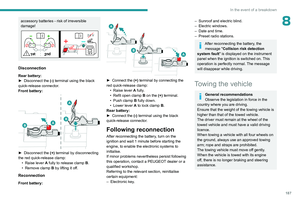 189
189 190
190 191
191 192
192 193
193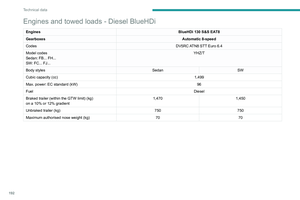 194
194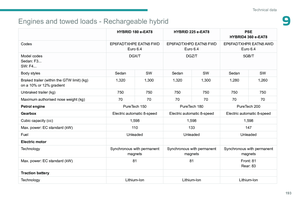 195
195 196
196 197
197 198
198 199
199 200
200 201
201 202
202 203
203 204
204 205
205 206
206 207
207 208
208 209
209 210
210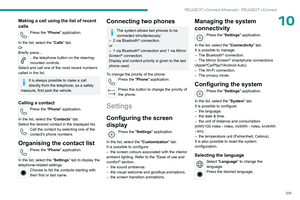 211
211 212
212 213
213 214
214 215
215 216
216 217
217 218
218 219
219 220
220 221
221 222
222 223
223 224
224 225
225 226
226 227
227 228
228 229
229 230
230 231
231 232
232 233
233 234
234 235
235 236
236 237
237 238
238 239
239 240
240 241
241 242
242 243
243