2023 PEUGEOT 508 child lock
[x] Cancel search: child lockPage 43 of 244

41
Access
2Do not put your head or arms through the
open windows when the vehicle is moving -
risk of serious injury!
Panoramic sunroof
The panoramic sunroof consists of a movable
glass panel that slides over the roof and a blind
that can be opened independently. Opening the
sunroof automatically opens the blind.
►
T
o operate the panoramic sunroof or the
blind, use the buttons in the roof console.
A. Sunroof blind control
B. Sunroof control
The sunroof or blind can be operated when the
ignition is turned on (if the battery is charged
enough), with the engine running, in STOP mode
of Stop & Start, and up to 45
seconds after
turning off the ignition or after locking the vehicle.
Precautions
Do not put your head or arms through the
sunroof while the vehicle is moving - risk
of serious injury!
Do not operate the sunroof if transverse
roof bars are fitted - risk of serious
damage!
Do not place heavy loads on the movable
glass panel of the sunroof.
If the sunroof is wet, following a rain
shower or washing the vehicle, wait until
it is completely dry before operating it.
Do not operate the sunroof if it is covered by
snow or ice - risk of damage!
Use only plastic scrapers to remove snow or
ice from the sunroof.
Regularly check the condition of the
sunroof seals (e.g. presence of dust,
dead leaves).
If using a car wash, check first that the roof is
correctly closed and keep the high-pressure
jet at least 30 centimetres from the seals.
Never leave the vehicle with the sunroof
open.
Operation
When opening the sunroof fully, the movable
glass moves to a partially open position, then
slides over the roof. Any intermediate position is
possible.
Depending on the speed of the vehicle,
the partially open position may vary to
improve the acoustics.
Before operating the sunroof or blind
control buttons, ensure that no object or
person might prevent the movement.
Be particularly aware of children when
operating the sunroof or blind.
If something is trapped when operating the
sunroof or blind, you should reverse the
movement of the sunroof or blind by pressing
the control in question.
The driver must ensure that passengers use
the sunroof and blind correctly.
Anti-pinch system
If the sunroof or blind encounters an obstacle
when closing, the movement is automatically
reversed.
The roof anti-pinch system is designed to be
effective at speeds of up to 75 mph (120
km/h).
Opening/Closing
► To open the sunroof or the blind, use the
part of the button located towards the rear of the
vehicle.
Page 90 of 244

88
Safety
Child seats
The regulations on carrying children are specific to each country. Refer to the
legislation in force in your country.
For maximum safety, please observe the
following recommendations:
–
In accordance with European regulations,
all children under the age of 12 or less than
1.5 metres tall must travel in approved child
seats suited to their size or weight , on seats
fitted with a seat belt or ISOFIX mountings.
–
Statistically
, the safest seats in your
vehicle for carrying children are the rear
seats.
–
Children ageing less than 15
months must
travel in the "rearward facing" position,
whether in the front or rear of the vehicle.
It is recommended that children travel
on the rear seats of the vehicle:
–
"rearward facing" up to the age of 3.
–
"forward facing" over the age of 3.
Make sure that the seat belt is correctly
positioned and tightened.
For child seats with a support leg, ensure that
the support leg is in firm and steady contact
with the floor.
An incorrectly installed child seat in a vehicle compromises the child's safety in
the event of an accident.
Ensure that there is no seat belt or seat belt
buckle under the child seat, as this could
destabilise it.
Remember to fasten the seat belts or the
child seat harness keeping the slack relative
to the child's body to a minimum, even for
short journeys.
When installing a child seat using the seat
belt, ensure that the seat belt is tightened
correctly on the child seat and that it secures
the child seat firmly on the vehicle seat. If
the passenger seat is adjustable, move it
forwards if necessary.
Remove the head restraint before
installing a child seat with a backrest on a
passenger seat.
Ensure that the head restraint is stored or
attached securely to prevent it from being
thrown around the vehicle in the event of
sharp braking. Refit the head restraint once
the child seat has been removed.
Installing a booster seat
The chest part of the seat belt must be
positioned on the child's shoulder without
touching the neck.
Ensure that the lap part of the seat belt
passes correctly over the child's thighs.
Use a booster seat with a backrest, equipped
with a belt guide at shoulder level.
Additional protections
To prevent accidental opening of the
doors and rear windows, use the "Child lock".
Take care not to open the rear windows by
more than one third.
To protect young children from the sun's rays,
fit side blinds on the rear windows.
As a safety measure, do not leave:
–
A
child alone and unsupervised inside a
vehicle.
–
A
child or an animal in a vehicle which is
exposed to the sun, with the windows closed.
–
The keys within reach of children inside the
vehicle.
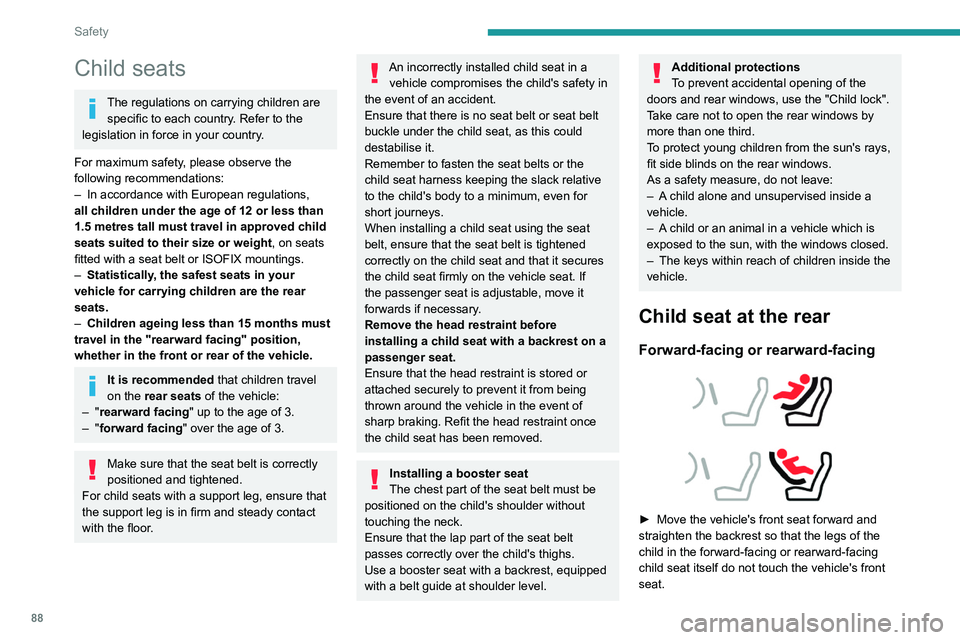
Child seat at the rear
Forward-facing or rearward-facing
► Move the vehicle's front seat forward and
straighten the backrest so that the legs of the
child in the forward-facing or rearward-facing
child seat itself do not touch the vehicle's front
seat.
Page 98 of 244

96
Safety
"Rearward facing" ISOFIX child seat:
–
R1
: ISOFIX child seat for a baby.
–
R2
: ISOFIX reduced size child seat.
–
R3
: ISOFIX large size child seat.
"Forward facing" ISOFIX child seat:
–
F2X
: ISOFIX child seat for toddlers.
–
F2
: ISOFIX reduced height child seat.
–
F3
: ISOFIX full height child seat.
Booster child seat:
–
B2
: reduced width booster seat.
–
B3
: full width booster seat.
Seat position authorised for the
installation of an ISOFIX child seat.
Seat position where the installation of an
ISOFIX child seat is forbidden.
For seat adjustments, refer to the summary table
"Installing universal, ISOFIX and i-Size child
seats ".
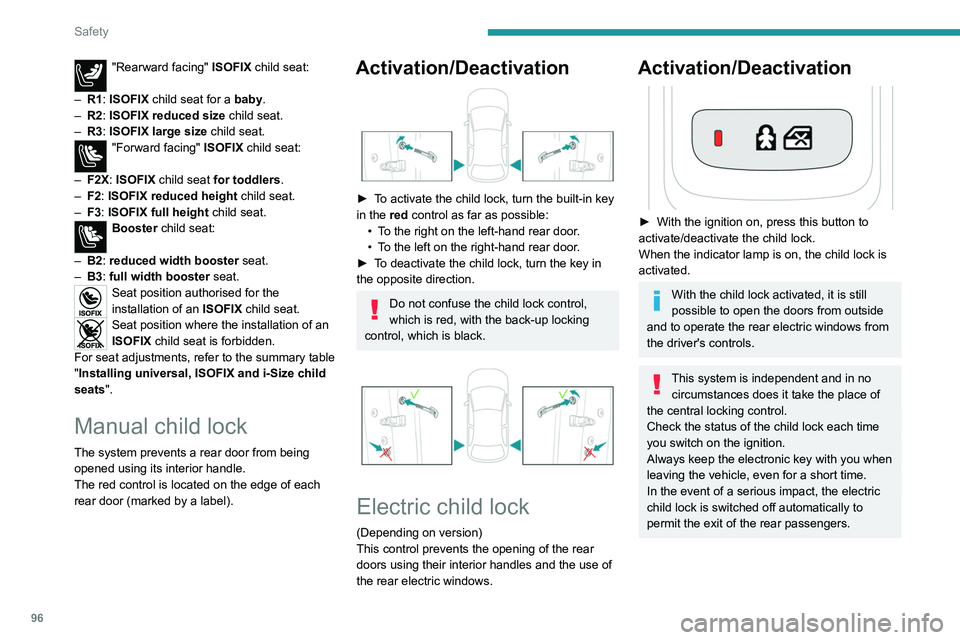
Manual child lock
The system prevents a rear door from being
opened using its interior handle.
The red control is located on the edge of each
rear door (marked by a label).
Activation/Deactivation
► To activate the child lock, turn the built-in key
in the red control as far as possible:
•
T
o the right on the left-hand rear door.
•
T
o the left on the right-hand rear door.
►
T
o deactivate the child lock, turn the key in
the opposite direction.
Do not confuse the child lock control,
which is red, with the back-up locking
control, which is black.
Electric child lock
(Depending on version)
This control prevents the opening of the rear
doors using their interior handles and the use of
the rear electric windows.
Activation/Deactivation
► With the ignition on, press this button to
activate/deactivate the child lock.
When the indicator lamp is on, the child lock is
activated.
With the child lock activated, it is still
possible to open the doors from outside
and to operate the rear electric windows from
the driver's controls.
This system is independent and in no circumstances does it take the place of
the central locking control.
Check the status of the child lock each time
you switch on the ignition.
Always keep the electronic key with you when
leaving the vehicle, even for a short time.
In the event of a serious impact, the electric
child lock is switched off automatically to
permit the exit of the rear passengers.
Page 103 of 244

101
Driving
6On certain versions with an automatic gearbox
(EAT8), the steering column does not lock.
Electric parking brake
In automatic mode, this system applies the
parking brake when the engine is switched off
and releases it when the vehicle moves off.
At any time, with the engine running:
► T o apply the parking brake, briefly pull the
control.
►
T
o release it, briefly push the control while
pressing the brake pedal.
Automatic mode is activated by default.
This automatic operation can be deactivated in
certain situations.
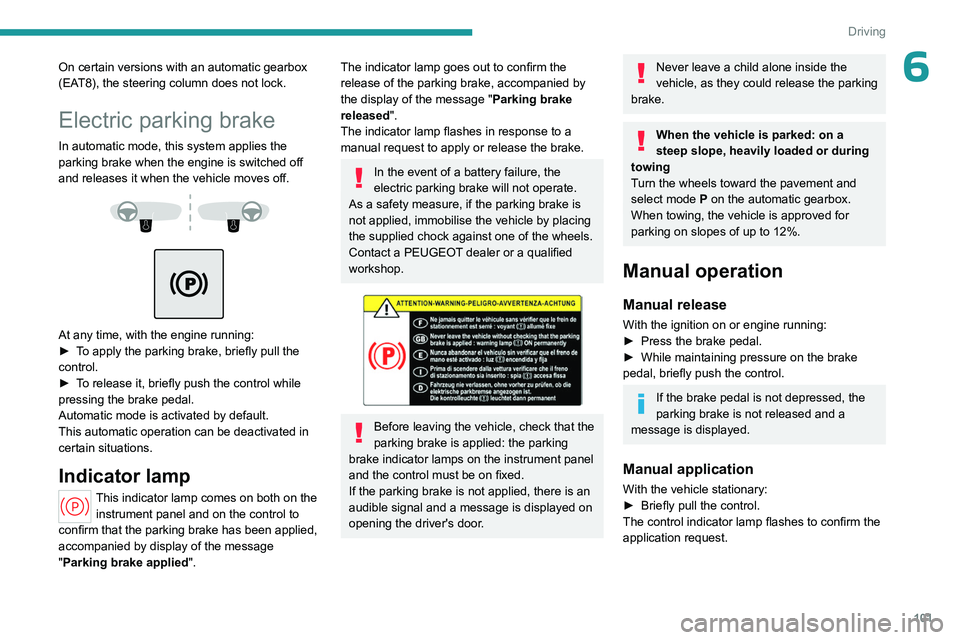
Indicator lamp
This indicator lamp comes on both on the instrument panel and on the control to
confirm that the parking brake has been applied,
accompanied by display of the message
"Parking brake applied".
The indicator lamp goes out to confirm the
release of the parking brake, accompanied by
the display of the message " Parking brake
released ".
The indicator lamp flashes in response to a
manual request to apply or release the brake.
In the event of a battery failure, the
electric parking brake will not operate.
As a safety measure, if the parking brake is
not applied, immobilise the vehicle by placing
the supplied chock against one of the wheels.
Contact a PEUGEOT dealer or a qualified
workshop.
Before leaving the vehicle, check that the
parking brake is applied: the parking
brake indicator lamps on the instrument panel
and the control must be on fixed.
If the parking brake is not applied, there is an
audible signal and a message is displayed on
opening the driver's door.
Never leave a child alone inside the
vehicle, as they could release the parking
brake.
When the vehicle is parked: on a
steep slope, heavily loaded or during
towing
Turn the wheels toward the pavement and
select mode
P on the automatic gearbox.
When towing, the vehicle is approved for
parking on slopes of up to 12%.
Manual operation
Manual release
With the ignition on or engine running:
► Press the brake pedal.
►
While maintaining pressure on the brake
pedal, briefly push the control.
If the brake pedal is not depressed, the
parking brake is not released and a
message is displayed.
Manual application
With the vehicle stationary:
► Briefly pull the control.
The control indicator lamp flashes to confirm the
application request.
Page 218 of 244

216
Alphabetical index
Charging flap (Rechargeable hybrid) 149,
155–157
Charging the traction battery
(Rechargeable hybrid)
21, 147, 155–157
CHECK
21
Checking the engine oil level
18
Checking the levels
163–165
Checking tyre pressures
(using the kit)
174, 176
Checks
163, 165–167
Checks, routine
165–167
Child lock
96
Children
84, 90–92
Children (safety)
96
Child seats
84, 88–89, 92
Child seats, conventional
92, 95
Child seats, i-Size
91–92, 95
Child seats, ISOFIX
90, 92, 95
Cigar lighter
56
Cleaning (advice)
148, 169–171
Closing the boot
28–29, 36
Closing the doors
28–29, 34
Collision Risk Alert
129–130
Comfort mode
107
Configuration, vehicle
10, 24
Connection, Bluetooth
204
Connectivity
209
Consumptions
24
Container, AdBlue®
168
Control, emergency boot release
36
Control, emergency door
30–31
Control, heated seats
46Controls, steering mounted 104
Control stalk, lighting
66–67
Control stalk, wipers
73–75
Control unit
149–151, 156
Courtesy lamp, front
59
Courtesy lamps
59–60
Cruise control
117, 119, 121
Cruise control, adaptive
121–122
Cruise control, adaptive with Stop function
11 7
Cruise control by speed limit recognition
11 7
Cup holder
56
D
Date (setting) 210
Daytime running lamps
67, 181
Deactivating the passenger airbag
85, 89–90
Deadlocking
27, 29
Deferred charging
25, 157
Deferred charging (Rechargeable
hybrid)
24–25, 149, 155
Defrosting
47, 54
Defrosting, front
54
Defrosting, rear screen
55
Demisting
47, 54
Demisting, front
54
Demisting, rear
55
Diagnosis, vehicle
21
Dials and gauges
10
Digital instrument panel
10
Dimensions
194
Dipstick 18, 164
Direction indicators (turn signals)
67, 181
Display screen, instrument panel
10
Domestic charging
151
Domestic charging (Rechargeable
hybrid)
156–157
Door pockets
56
Doors
34
Drive Assist Plus
121
Driver’s attention warning
132–133
Driving
43, 97–98
Driving aids camera (warnings)
11 2
Driving aid shortcuts
11 3
Driving aids (recommendations)
11 2
Driving economically
8
Driving modes
106
Driving positions (storing)
46
Dynamic stability control (DSC)
81
E
EBFD 81
Eco-driving (advice)
8
ECO mode
106
Electric automatic gearbox (Rechargeable
hybrid)
103
Electric windows
39
Electronic brake force distribution (EBFD)
81
Emergency braking assistance (EBA)
81
Emergency call
78–79
Emergency switching off
100