2023 PEUGEOT 408 fold seats
[x] Cancel search: fold seatsPage 33 of 244

31
Access
2Doors
Opening
From outside
► After unlocking the vehicle or with the
"Keyless Entry and Start" system electronic key
in the recognition zone, pull the door handle.
From inside
► Pull the interior opening control of a door; this
unlocks the vehicle completely .
With selective unlocking activated:
– Opening the driver's door unlocks
the driver's door only (if the vehicle has not
already been completely unlocked).
–
Opening one of the passenger doors
unlocks the rest of the vehicle.
Boot
Opening the tailgate
► With the vehicle unlocked or with the
electronic key in the recognition zone, press the
central tailgate control.
►
Raise the tailgate.
When selective unlocking is activated,
the electronic key must be close to the
rear of the vehicle.
The tailgate is not designed to hold a bicycle carrier.
Closing the tailgate
► Lower the tailgate using the interior grips.
► Release the grips and press down on the
outside of the tailgate to close it.
In the event of a malfunction or if you
experience difficulty opening or closing
the tailgate, have it checked by a PEUGEOT
dealer or a qualified workshop without delay,
to avoid the issue deteriorating and prevent
any risk of the tailgate dropping, potentially
causing serious injury.
Back-up release
To manually unlock the boot in the event of a
battery or central locking failure.
Unlocking
► Fold the rear seats to gain access to the lock
from inside the boot.
► Insert a small screwdriver into hole A of the
lock to unlock the boot.
►
Move the latch to the left.
Locking after closing
If the fault persists after closing again, the boot
will remain locked.
Motorised tailgate
(Depending on version)
The motorised tailgate must only be operated
with the vehicle stationary.
Check that there is enough space to
allow for the movement of the motorised
tailgate.
CarM an uals 2 .c o m
Page 49 of 244

47
Ease of use and comfort
3cover or if the load space cover has items
placed on it.
Rear bench seat
Rear head restraints
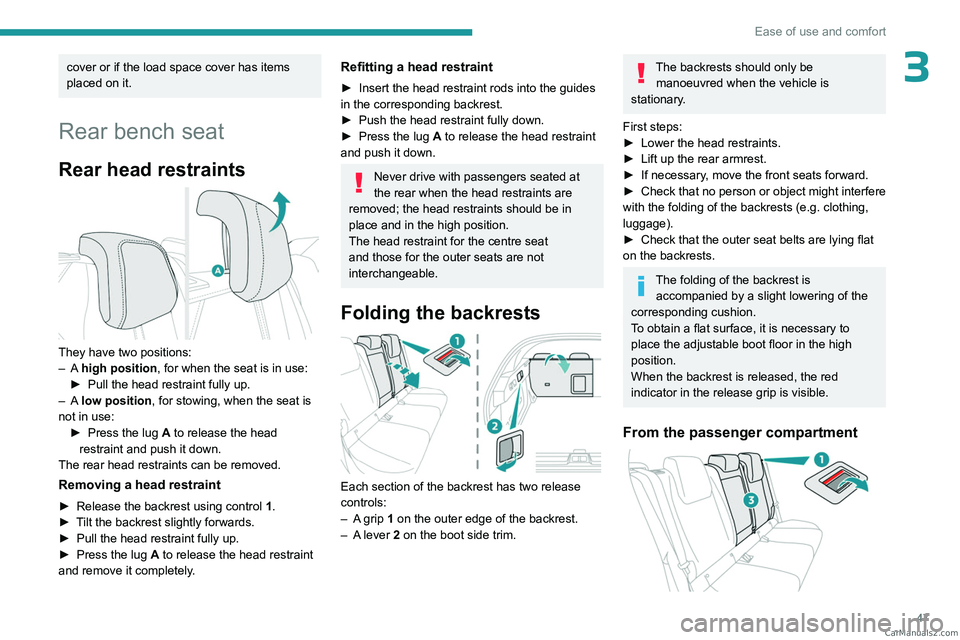
They have two positions:
– A high position , for when the seat is in use:
►
Pull the head restraint fully up.
–
A low position , for stowing, when the seat is
not in use: ►
Press the lug
A to release the head
restraint and push it down.
The rear head restraints can be removed.
Removing a head restraint
► Release the backrest using control 1 .
► T ilt the backrest slightly forwards.
►
Pull the head restraint fully up.
►
Press the lug
A to release the head restraint
and remove it completely.
Refitting a head restraint
► Insert the head restraint rods into the guides
in the corresponding backrest.
►
Push the head restraint fully down.
►
Press the lug
A to release the head restraint
and push it down.
Never drive with passengers seated at
the rear when the head restraints are
removed; the head restraints should be in
place and in the high position.
The head restraint for the centre seat
and those for the outer seats are not
interchangeable.
Folding the backrests
Each section of the backrest has two release
controls:
–
A
grip 1 on the outer edge of the backrest.
–
A
lever 2 on the boot side trim.
The backrests should only be manoeuvred when the vehicle is
stationary.
First steps:
►
Lower the head restraints.
►
Lift up the rear armrest.
►
If necessary
, move the front seats forward.
►
Check
that no person or object might interfere
with the folding of the backrests (e.g.
clothing,
luggage).
►
Check that the outer seat belts are lying flat
on the backrests.
The folding of the backrest is accompanied by a slight lowering of the
corresponding cushion.
To obtain a flat surface, it is necessary to
place the adjustable boot floor in the high
position.
When the backrest is released, the red
indicator in the release grip is visible.
From the passenger compartment
CarM an uals 2 .c o m
Page 81 of 244

79
Safety
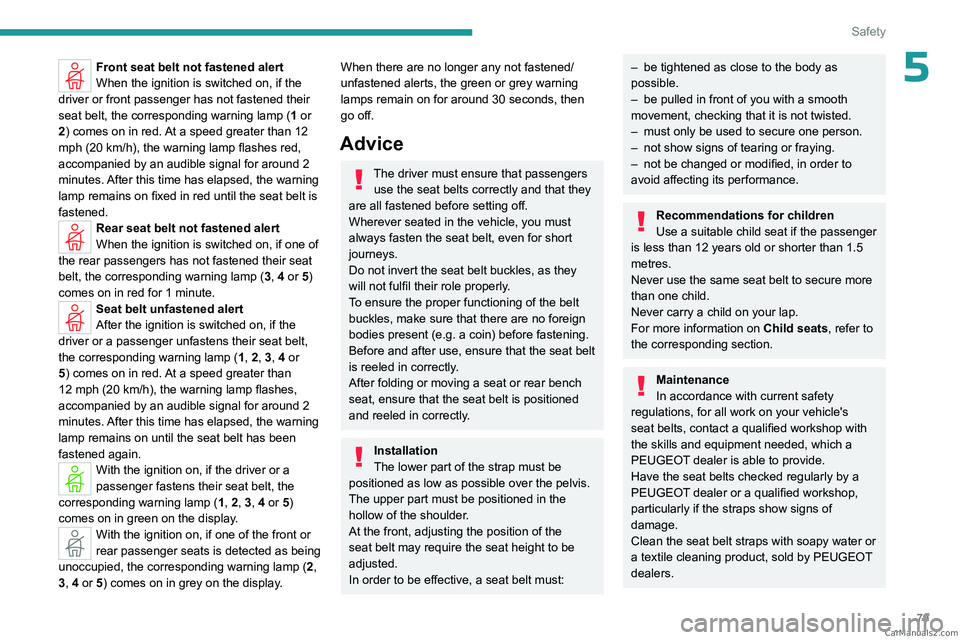
5Front seat belt not fastened alert
When the ignition is switched on, if the
driver or front passenger has not fastened their
seat belt, the corresponding warning lamp ( 1 or
2) comes on in red. At a speed greater than 12
mph (20
km/h), the warning lamp flashes red,
accompanied by an audible signal for around 2
minutes. After this time has elapsed, the warning
lamp remains on fixed in red until the seat belt is
fastened.
Rear seat belt not fastened alert
When the ignition is switched on, if one of
the rear passengers has not fastened their seat
belt, the corresponding warning lamp ( 3, 4 or 5)
comes on in red for 1 minute.
Seat belt unfastened alert
After the ignition is switched on, if the
driver or a passenger unfastens their seat belt,
the corresponding warning lamp ( 1, 2, 3, 4 or
5) comes on in red. At a speed greater than
12 mph (20
km/h), the warning lamp flashes,
accompanied by an audible signal for around 2
minutes. After this time has elapsed, the warning
lamp remains on until the seat belt has been
fastened again.
With the ignition on, if the driver or a
passenger fastens their seat belt, the
corresponding warning lamp ( 1, 2, 3, 4 or 5)
comes on in green on the display.
With the ignition on, if one of the front or
rear passenger seats is detected as being
unoccupied, the corresponding warning lamp ( 2,
3, 4 or 5) comes on in grey on the display.
When there are no longer any not fastened/
unfastened alerts, the green or grey warning
lamps remain on for around 30 seconds, then
go off.
Advice
The driver must ensure that passengers use the seat belts correctly and that they
are all fastened before setting off.
Wherever seated in the vehicle, you must
always fasten the seat belt, even for short
journeys.
Do not invert the seat belt buckles, as they
will not fulfil their role properly.
To ensure the proper functioning of the belt
buckles, make sure that there are no foreign
bodies present (e.g.
a coin) before fastening.
Before and after use, ensure that the seat belt
is reeled in correctly.
After folding or moving a seat or rear bench
seat, ensure that the seat belt is positioned
and reeled in correctly.
Installation
The lower part of the strap must be
positioned as low as possible over the pelvis.
The upper part must be positioned in the
hollow of the shoulder.
At the front, adjusting the position of the
seat belt may require the seat height to be
adjusted.
In order to be effective, a seat belt must:
– be tightened as close to the body as
possible.
–
be pulled in front of you with a smooth
movement, checking that it is not twisted.
–
must only be used to secure one person.
–
not show signs of tearing or fraying.
–
not be changed or modified, in order to
avoid affecting its performance.
Recommendations for children
Use a suitable child seat if the passenger
is less than 12 years old or shorter than 1.5
metres.
Never use the same seat belt to secure more
than one child.
Never carry a child on your lap.
For more information on Child seats, refer to
the corresponding section.
Maintenance
In accordance with current safety
regulations, for all work on your vehicle's
seat belts, contact a qualified workshop with
the skills and equipment needed, which a
PEUGEOT dealer is able to provide.
Have the seat belts checked regularly by a
PEUGEOT dealer or a qualified workshop,
particularly if the straps show signs of
damage.
Clean the seat belt straps with soapy water or
a textile cleaning product, sold by PEUGEOT
dealers. CarM an uals 2 .c o m
Page 212 of 244

210
Alphabetical index
Filter, oil 163
Filter, passenger compartment
49, 163
Fitting a wheel
172, 174
Fitting roof bars
157–158
Fittings, boot
59
Fittings, interior
54
Fittings, rear
58
Flap, charging
153
Flap, fuel filler
143
Flap, ski
59
Flashing indicators
62
Flat bed (towing)
183
Fluid, brake
162
Fluid, engine coolant
162
Foglamps, rear
61, 176
Folding the rear seats
47–48
Frequency (radio)
200
Fuel
8, 143
Fuel consumption
8, 18
Fuel level, low
143
Fuel (tank)
143
Fuses
177
G
Gauge, fuel 143
Gearbox, automatic
96–99, 101, 163, 177
Gearbox, manual
101
Gear shift indicator
101
Glove box
54
H
Hands-free access 33–34
Hands-free tailgate
33–34
Hazard warning lamps
72, 168
Headlamps (adjustment)
62
Headlamps, automatic dipping
64–65
Headlamps, automatic operation
63
Headlamps, halogen
62
Headlamps, main beam
64
Head restraints, front
41
Head restraints, rear
47–48
Head-up display
67
Heated steering wheel
45
Heating
48
Heating, programmable
22, 53
Hi-Fi system
57
High voltage
144
Hill start assist
100–101
Histogramme, fuel consumption
22
Horn
73
I
Ignition 93, 202
Ignition on
93
Immobiliser, electronic
92
Indicator, coolant temperature
18
Indicator, engine oil level
17
Indicators, direction
62
Indicator, service
17
Inflating tyres
164, 188
Inflating tyres and accessories
(using the kit)
169, 171
Information, vehicle
10, 205
Infrared camera
67, 105
Instrument panel
10, 19, 19–20, 106
Instrument panels
10
ISOFIX mountings
85, 88–89
J
Jack 168–169, 172
Jump starting
178
K
Key 24–25, 29
Key, electronic
26–27
Keyless Entry and Starting
24, 26–27, 92–93
Key not recognised
94
Key with remote control
24, 92
Kit, hands-free
197
Kit, puncture repair
168–169
Kit, temporary puncture repair
168–171
Klaxon
73
L
Labels, identification 188
Lamps, parking
62
Lamps, rear
176 CarM an uals 2 .c o m