2023 PEUGEOT 408 ad blue
[x] Cancel search: ad bluePage 18 of 244

16
Dashboard instruments
Peugeot Matrix LED Technology 2.0Fixed, accompanied by an audible signal
and a message.
A malfunction
of the Peugeot Matrix LED
Technology 2.0 headlamps or of the camera has
been detected.
Carry out (2).
Automatic headlamp dippingFixed, accompanied by an audible signal
and a message.
A function or camera malfunction is detected.
Carry out (2).
Green warning/indicator lamps
Stop & Start
Fixed.
When the vehicle stops, the Stop & Start
system puts the engine into STOP mode.
Flashing temporarily.
STOP mode is momentarily unavailable
or START mode is automatically triggered.
For more information, refer to the Driving
section.
Vehicle ready to drive (Rechargeable
hybrid)
Fixed, accompanied by an audible signal
when it comes on.
The vehicle is ready to drive.
The indicator lamp goes out upon reaching a
speed of approximately 3 mph (5
km/h) and
lights up again when the vehicle stops moving.
The lamp will go out when you switch off the
motor and exit the vehicle.
Seat unoccupied/Seat belt not fastenedFixed.
(grey)
With the ignition on, one of the front or rear
passenger seats is considered to be unoccupied.
Seat occupied/Seat belt fastenedFixed.
With the ignition on, the driver or a
passenger has fastened their seat belt.
Direction indicatorsFlashing with audible signal.
The direction indicators are on.
Daytime running lamps/SidelampsFixed.
With adequate ambient light, the daytime
running lamps are on.
With inadequate ambient light, the sidelamps
are on.
Dipped beam headlampsFixed.
The lamps are on.
Night Vision
Fixed.
(grey)
The function is activated, but not available.
Fixed.
The function is active.
All of the conditions are met: the system is
operating.
For more information, refer to the Lighting and
visibility section.
Peugeot Matrix LED Technology 2.0Fixed.
(grey)
The function is activated, but not available.
All the operating conditions have not been met.
Fixed.
The function is active.
All of the conditions are met: the system is
operating.
For more information, refer to the Lighting and
visibility section.
Automatic headlamp dippingFixed.
The function has been activated
via the touch screen.
The lighting control stalk ring is in the “ AUTO”
position.
For more information, refer to the Lighting and
visibility section.
Blue warning/indicator lamps
Main beam headlamps
Fixed.
The lamps are on.
Black/white warning lamps
Foot on the brake
Fixed.
Insufficient or no pressure on the brake
pedal.
With the engine running, before releasing the
parking brake, to move out of mode P on an
automatic gearbox. CarM an uals 2 .c o m
Page 24 of 244

22
Dashboard instruments
1.Active driving mode
2. Petrol engine
3. Electric motor
4. Traction battery charge level
The energy flows have a specific colour for each
type of driving:
–
Blue: 100% electrical energy
.
–
White: energy from the petrol engine.
–
Green: energy recovery
.
Statistics
This page shows electrical energy and fuel
consumption statistics.
1. Average electrical consumption for the current
trip (kWh/100 km) and historical values:
–
Blue graph: energy consumed directly from
the traction battery
.
–
Green graph: energy regenerated during
deceleration and braking phases used to
recharge the
traction battery.
2. Average fuel consumption for the current trip
(l/100
km) and historical values (orange graph).
Charging
This page allows you to programme deferred
charging.
For more information on Charging the traction
battery (Rechargeable hybrid), refer to the
corresponding section.
e-SAVE
The e-SAVE function makes it possible to
reserve all or part of the electrical energy of the
traction battery to be used later during a journey
(e.g.
passing through an urban area or an area
reserved for electric vehicles).
►
Activate the function by pressing ON
, then
select the electric range to be reserved ( 6 miles
(10 km), 12 miles (20 km) or the full range
MAX).
Activation of the function is confirmed by the lighting of this indicator lamp on the
instrument panel and the indication of the energy
reserve in miles or kms.
►
T
o use the energy reserve, choose the
Electric driving mode in the mode selector.
If the requested range exceeds the
available range (not recommended), the
internal combustion engine starts to recharge
the traction battery up to the requested
threshold. This leads to excessive fuel
consumption.
i-Toggles
This system is an additional touch screen
associated with the PEUGEOT i-Connect
Advanced. It is designed to provide a
personalised display of shortcuts to applications
or presets.
By default, it directs you to the main applications:
Media, Climate, Navigation, Phone, Mirror
Screen, etc.
The shortcuts can be replaced by: radio preset,
temperature preset, pre-selected destination,
pre-selected contact, pre-selected smartphone,
etc.
For more information on
Personalisation -
i-T
oggles, refer to the corresponding section for
the Audio equipment and telematics systems.
If the vehicle is exposed to sunlight for an
extended period, the touch screen can
become very hot.
Wait a few minutes before using the system.
Remotely operable
additional functions
(Rechargeable hybrid)
(Depending on country of sale)
CarM an uals 2 .c o m
Page 124 of 244

122
Driving
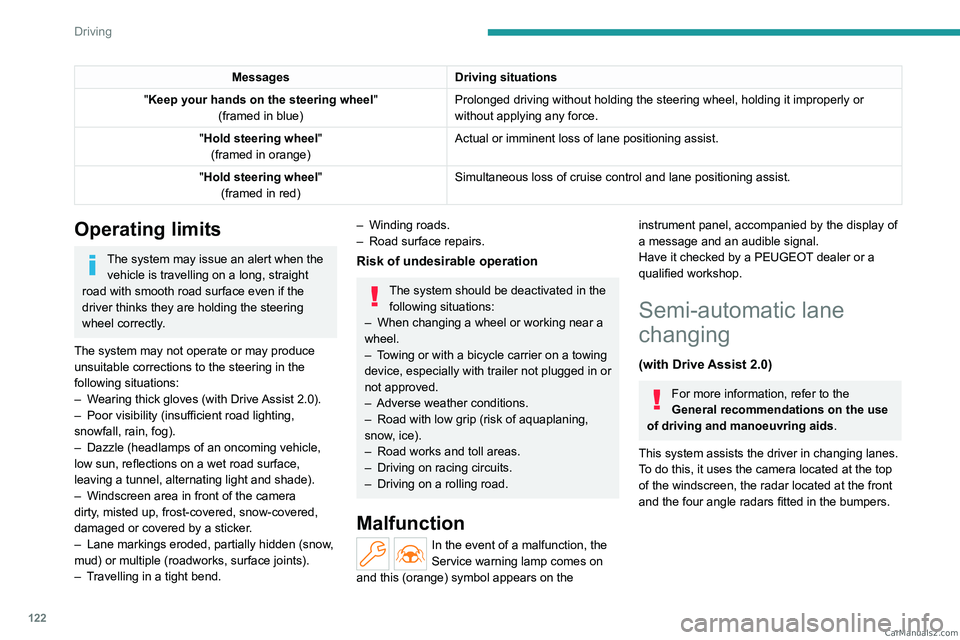
MessagesDriving situations
"Keep your hands on the steering wheel "
(framed in blue) Prolonged driving without holding the steering wheel, holding it imprope\
rly or
without applying any force.
"Hold steering wheel "
(framed in orange) Actual or imminent loss of lane positioning assist.
"Hold steering wheel "
(framed in red) Simultaneous loss of cruise control and lane positioning assist.
Operating limits
The system may issue an alert when the
vehicle is travelling on a long, straight
road with smooth road surface even if the
driver thinks they are holding the steering
wheel correctly.
The system may not operate or may produce
unsuitable corrections to the steering in the
following situations:
–
W
earing thick gloves (with Drive Assist 2.0).
–
Poor visibility (insufficient road lighting,
snowfall, rain, fog).
–
Dazzle (headlamps of an oncoming vehicle,
low sun, reflections on a wet road surface,
leaving a tunnel, alternating light and shade).
–
Windscreen area in front of the camera
dirty
, misted up, frost-covered, snow-covered,
damaged or covered by a sticker.
–
Lane markings eroded, partially hidden (snow
,
mud) or multiple (roadworks, surface joints).
–
T
ravelling in a tight bend.
– Winding roads.
– Road surface repairs.
Risk of undesirable operation
The system should be deactivated in the following situations:
–
When changing a wheel or working near a
wheel.
–
T
owing or with a bicycle carrier on a towing
device, especially with trailer not plugged in or
not approved.
–
Adverse weather conditions.
–
Road with low grip (risk of aquaplaning,
snow
, ice).
–
Road works and toll areas.
–
Driving on racing circuits.
–
Driving on a rolling road.
Malfunction
In the event of a malfunction, the
Service warning lamp comes on
and this (orange) symbol appears on the
instrument panel, accompanied by the display of
a message and an audible signal.
Have it checked by a PEUGEOT dealer or a
qualified workshop.
Semi-automatic lane
changing
(with Drive Assist 2.0)
For more information, refer to the
General recommendations on the use
of driving and manoeuvring aids .
This system assists the driver in changing lanes.
To do this, it uses the camera located at the top
of the windscreen, the radar located at the front
and the four angle radars fitted in the bumpers. CarM an uals 2 .c o m
Page 128 of 244

126
Driving
(orange)
“Lane change interrupted: Stay in the
lane”
The system cannot manage the current driving
situation.
Brake, accelerate or use the steering wheel,
depending on the context.
(blue)
"Lane change canceled"
Continuation of the systems: Lane positioning
assist and Adaptive cruise control.
or
Interruption at the initiative of the driver.
(red)
"Take back control"
The system cannot manage the current driving
situation.
Brake, accelerate or use the steering wheel,
depending on the context.
Operating limits
The system should only be used on driving lane.
The system may not work in the following
situations:
–
W
earing thick gloves.
–
Poor visibility (insufficient road lighting,
snowfall, rain, fog).
–
Dazzle (headlamps of an oncoming vehicle,
low sun, reflections on a wet road surface,
leaving a tunnel, alternating light and shade).
–
Windscreen area in front of the camera
dirty
, misted up, frost-covered, snow-covered,
damaged or covered by a sticker.
– Lane markings eroded, partially hidden (snow ,
mud) or multiple (roadworks, surface joints).
–
T
ravelling in a tight bend.
–
Winding roads.
–
Road surface repairs.
The system must not be activated in the following situations:
–
When changing a wheel or working near a
wheel.
–
T
owing or with a bicycle carrier on a towing
device, especially with trailer not plugged in or
not approved.
–
Adverse weather conditions.
–
Road with low grip (risk of aquaplaning,
snow
, ice).
–
Unusual configuration such as road works
areas, toll areas and emergency lanes.
–
Driving on racing circuits.
–
Driving on a rolling road.
If the system detects that the driver is not
holding the steering wheel firmly enough,
it triggers a series of gradual alerts and then
deactivates itself if there is no response from
the driver.
Malfunction
In the event of a malfunction, this warning
lamp lights up on the instrument panel,
accompanied by the display of a message and
an audible signal.
Have it checked by a PEUGEOT dealer or a
qualified workshop.
Active Safety Brake with Collision Risk Alert and
Intelligent emergency
braking assistance
For more information, refer to the
General recommendations on the use
of driving and manoeuvring aids .
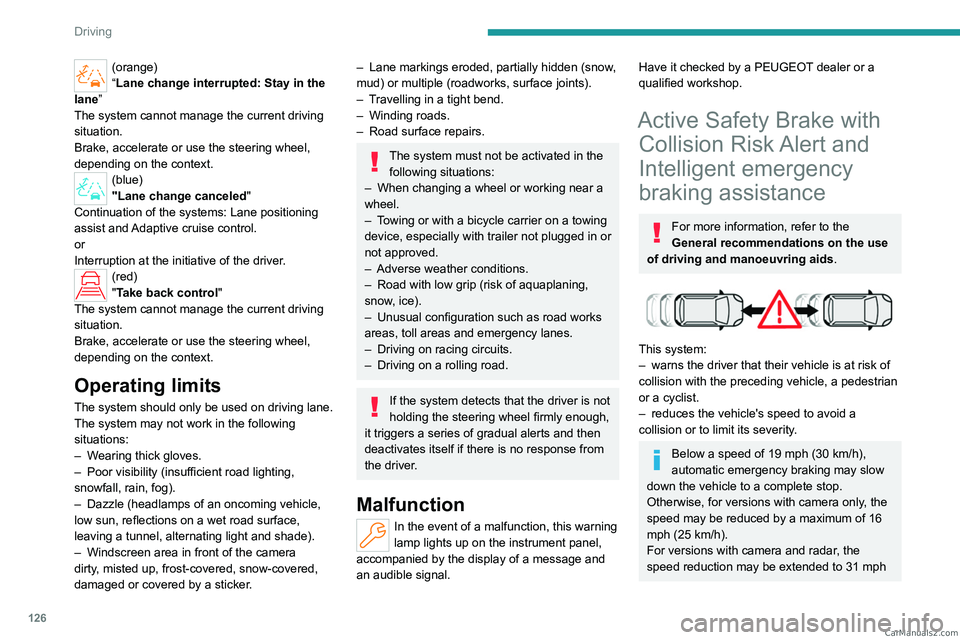
This system:
–
warns the driver that their vehicle is at risk of
collision with the preceding vehicle, a pedestrian
or a cyclist.
–
reduces the vehicle's speed to avoid a
collision or to limit its severity
.
Below a speed of 19 mph (30 km/h),
automatic emergency braking may slow
down the vehicle to a complete stop.
Otherwise, for versions with camera only
, the
speed may be reduced by a maximum of 16
mph (25
km/h).
For versions with camera and radar, the
speed reduction may be extended to 31 mph CarM an uals 2 .c o m
Page 140 of 244

138
Driving
Parking sensors also provide additional
information about the area around the vehicle.
Standard view
The area behind the vehicle is displayed on the
screen.
The blue lines 1 represent the width of your
vehicle, with the mirrors unfolded; their direction
changes according to the position of the steering
wheel.
The red line 2 represents a distance of 30
cm
from the rear bumper; the two blue lines 3 and 4
represent 1
m and 2 m, respectively.
This view is available automatically or by
selection in the side menu.
Panoramic view
The panoramic view allows you to leave, in
reverse, a parking space by anticipating the
arrival of vehicles, pedestrians or cyclists.
This view is not recommended for carrying out a
complete manoeuvre.
This view is only available by selection in the
side menu.
Visiopark 3
For more information, refer to the
General recommendations on the use
of driving and manoeuvring aids .
This system allows you to view your vehicle's
close surroundings
on the touch screen using
cameras, located at the front and rear of the
vehicle, as well as under the door mirrors.
The screen is divided into 4 parts with two side
menus, a contextual view and a view from above
the vehicle in its close surroundings.
The parking sensors supplement the information
in the view from above the vehicle. Depending on the view angle chosen in the
left-hand side menu, the system provides
specific visual assistance in particular driving
conditions, such as entering a blind intersection
or manoeuvring in areas with reduced visibility.
Different contextual views are available for the
rear or for the front:
–
Automatic zoom view
.
–
Standard view
.
–
Panoramic view
.
Depending on the context, the system chooses
the best view to display (standard or automatic
zoom).
The view type can be changed at any time
during the manoeuvre.
The system status is not saved when the ignition
is switched off.
Operating principle
Reconstructed view
The cameras are activated and a reconstruction
of a view from above your vehicle in its close
surroundings is displayed on the touch screen.
Live view
CarM an uals 2 .c o m
Page 141 of 244

139
Driving
6The front, rear and side views automatically
appear in the view from above the vehicle.
It is also possible to display any live view by
selecting the corresponding zone.
The front view can be selected in forward gear
up to 10 mph (16 km/h).
Installing the very cold climate screen
can alter the image transmitted by the
front camera.
An additional jet is fitted above the number plate to clean the reversing camera (depending on
version).
►
The washing of the reversing camera is
triggered by operating the windscreen wash.
Settings
In the side menu, this menu allows you to
carry out the following operations:
–
adjust the volume of the audible signal.
–
adjust the brightness.
–
adjust the contrast.
–
activation/deactivation of camera washing.
Activation/Deactivation
Automatic
With the rear camera, engine running and
vehicle stationary, rear vision is displayed
automatically if reverse gear is engaged.
With the front camera, engine running and speed
below 10 mph (16 km/h), rear vision is displayed
automatically if a gear is engaged.
Manual
► In the ADAS touch screen application,
select Functions>Panoramic Camera
The system is deactivated:
–
automatically for the rear
, when changing out
of reverse gear.
–
automatically for the front, above
approximately 10 mph (16 km/h).
–
by pressing the cross in the top left-hand
corner of the touch screen.
Automatic zoom view
The front or rear camera records the
surroundings during the manoeuvre to create
a front or rear view from above the vehicle in
its close surroundings, making it possible to
manoeuvre the vehicle around the surrounding
obstacles.
Using the sensors located on the front or
rear
bumper, the automatic zoom view is
displayed when approaching an obstacle at the
red line (less than 30 cm) during the manoeuvre.
This view is only available automatically.
Depending on version, it can be activated/
deactivated in the ADAS application of the touch
screen.
Obstacles may appear further away than
they actually are.
It is important to monitor the sides of the
vehicle during the manoeuvre, using the
mirrors.
Parking sensors also provide additional
information about the area around the vehicle.
Standard view
Depending on the context, the area behind or in
front of your vehicle is displayed on the screen.
The blue lines (at the rear)/orange lines (at the
front) 1 represent the width of your vehicle, with
the mirrors unfolded;
their direction changes
according to the position of the steering wheel.
The red line 2 represents a distance of 30 cm
from the rear or front bumper; the two blue lines
(at the rear)/orange lines (at the front)
3
and
4
represent 1 m and 2 m respectively.
This view is available automatically or by
selection in the left-hand side menu. CarM an uals 2 .c o m
Page 148 of 244

146
Practical information
► Stop the vehicle as soon as possible in the
best conditions of safety .
►
Switch off the ignition.
►
Evacuate the vehicle as quickly as possible
and move to a safe distance.
►
Call the fire department and/or the
emergency services and tell them that the
vehicle is an electric one.
Danger of death / Risk of serious
injury
A chain reaction can occur up to a traction
battery fire.
Disposal of the traction battery
The traction battery is designed for the life of the
vehicle if the recommendations of PEUGEOT
are followed.
If it becomes necessary to replace the battery,
contact the PEUGEOT dealer for instructions on
its disposal. Improper disposal carries the risk of
severe burns, electric shock, and damage to the
environment.
In accordance with regulations, PEUGEOT
ensures a second life or recycling of this
component in collaboration with qualified
operators.
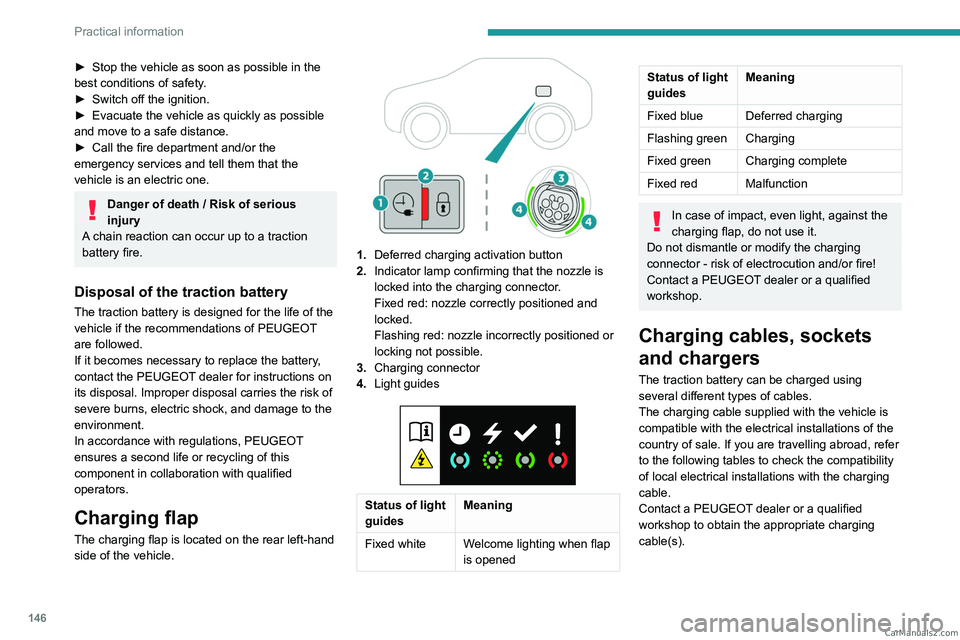
Charging flap
The charging flap is located on the rear left-hand
side of the vehicle.
1. Deferred charging activation button
2. Indicator lamp confirming that the nozzle is
locked into the charging connector.
Fixed red: nozzle correctly positioned and
locked.
Flashing red: nozzle incorrectly positioned or
locking not possible.
3. Charging connector
4. Light guides
Status of light
guides Meaning
Fixed white Welcome lighting when flap
is opened
Status of light
guidesMeaning
Fixed blue Deferred charging
Flashing green Charging
Fixed green Charging complete
Fixed red Malfunction
In case of impact, even light, against the
charging flap, do not use it.
Do not dismantle or modify the charging
connector - risk of electrocution and/or fire!
Contact a PEUGEOT dealer or a qualified
workshop.
Charging cables, sockets
and chargers
The traction battery can be charged using
several different types of cables.
The charging cable supplied with the vehicle is
compatible with the electrical installations of the
country of sale. If you are travelling abroad, refer
to the following tables to check the compatibility
of local electrical installations with the charging
cable.
Contact a PEUGEOT dealer or a qualified
workshop to obtain the appropriate charging
cable(s). CarM an uals 2 .c o m
Page 155 of 244

153
Practical information
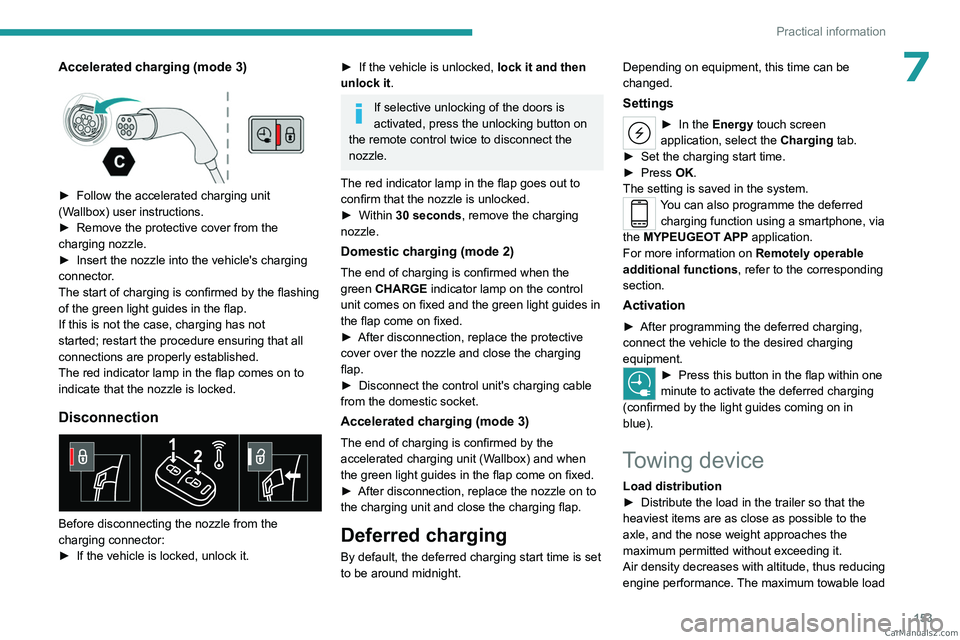
7Accelerated charging (mode 3)
► Follow the accelerated charging unit
(W allbox) user instructions.
►
Remove the protective cover from the
charging nozzle.
►
Insert the nozzle into the vehicle's charging
connector
.
The start of charging is confirmed by the flashing
of the green light guides in the flap.
If this is not the case, charging has not
started; restart the procedure ensuring that all
connections are properly established.
The red indicator lamp in the flap comes on to
indicate that the nozzle is locked.
Disconnection
Before disconnecting the nozzle from the
charging connector:
►
If the vehicle is locked, unlock it.
► If the vehicle is unlocked, lock it and then
unlock it .
If selective unlocking of the doors is
activated, press the unlocking button on
the remote control twice to disconnect the
nozzle.
The red indicator lamp in the flap goes out to
confirm that the nozzle is unlocked.
►
Within
30 seconds, remove the charging
nozzle.
Domestic charging (mode 2)
The end of charging is confirmed when the
green CHARGE indicator lamp on the control
unit comes on fixed and the green light guides in
the flap come on fixed.
►
After disconnection, replace the protective
cover over the nozzle and close the charging
flap.
►
Disconnect the control unit's charging cable
from the domestic socket.
Accelerated charging (mode 3)
The end of charging is confirmed by the
accelerated charging unit (Wallbox) and when
the green light guides in the flap come on fixed.
►
After disconnection, replace the nozzle on to
the charging unit and close the charging flap.
Deferred charging
By default, the deferred charging start time is set
to be around midnight. Depending on equipment, this time can be
changed.
Settings
► In the
Energy touch screen
application, select the Charging tab.
►
Set the charging start time.
►
Press
OK.
The setting is saved in the system.
You can also programme the deferred charging function using a smartphone, via
the MYPEUGEOT APP application.
For more information on Remotely operable
additional functions , refer to the corresponding
section.
Activation
► After programming the deferred charging,
connect the vehicle to the desired charging
equipment.
► Press this button in the flap within one
minute to activate the deferred charging
(confirmed by the light guides coming on in
blue).
Towing device
Load distribution
► Distribute the load in the trailer so that the
heaviest items are as close as possible to the
axle, and the nose weight approaches the
maximum permitted without exceeding it.
Air density decreases with altitude, thus reducing
engine performance.
The maximum towable load CarM an uals 2 .c o m