2023 PEUGEOT 408 tow bar
[x] Cancel search: tow barPage 173 of 244

171
In the event of a breakdown
8If after approximately 7 minutes, the
pressure of 2 bar is not reached, this
indicates that the tyre is not repairable;
contact a PEUGEOT dealer or a qualified
workshop for assistance.
►
Move the switch to position
"O".
►
Disconnect the compressor's electric plug
from the vehicle's 12
V socket.
►
Remove the kit.
►
Refit the cap on the valve.
►
Remove and store the bottle of sealant.
The sealant product is harmful if swallowed and causes irritation to the
eyes.
Keep this product out of the reach of children.
The use-by date of the fluid is marked on the
bottle.
After use, do not discard the bottle into the
environment; take it to a PEUGEOT dealer or
an authorised waste disposal site.
Do not forget to obtain a new bottle of
sealant, available from a PEUGEOT dealer or
a qualified workshop.
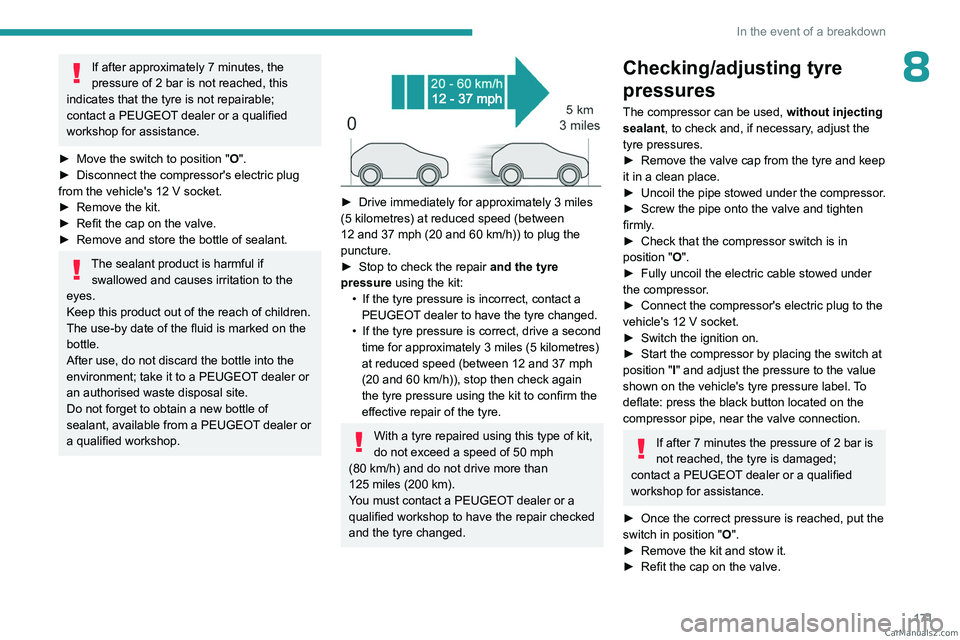
► Drive immediately for approximately 3 miles
(5 kilometres) at reduced speed (between
12 and 37
mph (20 and 60 km/h)) to plug the
puncture.
►
Stop to check the repair
and the tyre
pressure using the kit:
•
If the tyre pressure is incorrect, contact a
PEUGEOT
dealer to have the tyre changed.
•
If the tyre pressure is correct, drive a second
time for approximately 3
miles (5 kilometres)
at reduced speed (between 12 and 37
mph
(20 and 60
km/h)), stop then check again
the tyre pressure using the kit to confirm the
effective repair of the tyre.
With a tyre repaired using this type of kit,
do not exceed a speed of 50 mph
(80
km/h) and do not drive more than
125
miles (200 km).
You must contact a PEUGEOT dealer or a
qualified workshop to have the repair checked
and the tyre changed.
Checking/adjusting tyre
pressures
The compressor can be used, without injecting
sealant, to check and, if necessary, adjust the
tyre pressures.
►
Remove the valve cap from the tyre and keep
it in a clean place.
►
Uncoil
the pipe stowed under the compressor.
►
Screw the pipe onto the valve and tighten
firmly
.
►
Check that the compressor switch is in
position
"O".
►
Fully uncoil the electric cable stowed under
the compressor
.
►
Connect the compressor's electric plug to the
vehicle's 12
V socket.
►
Switch the ignition on.
►
Start the compressor by placing the switch at
position
"I" and adjust the pressure to the value
shown on the vehicle's tyre pressure label. To
deflate: press the black button located on the
compressor pipe, near the valve connection.
If after 7 minutes the pressure of 2 bar is
not reached, the tyre is damaged;
contact a PEUGEOT
dealer or a qualified
workshop for assistance.
►
Once the correct pressure is reached, put the
switch in position
"O".
►
Remove the kit and stow it.
►
Refit the cap on the valve. CarM an uals 2 .c o m
Page 184 of 244

182
In the event of a breakdown
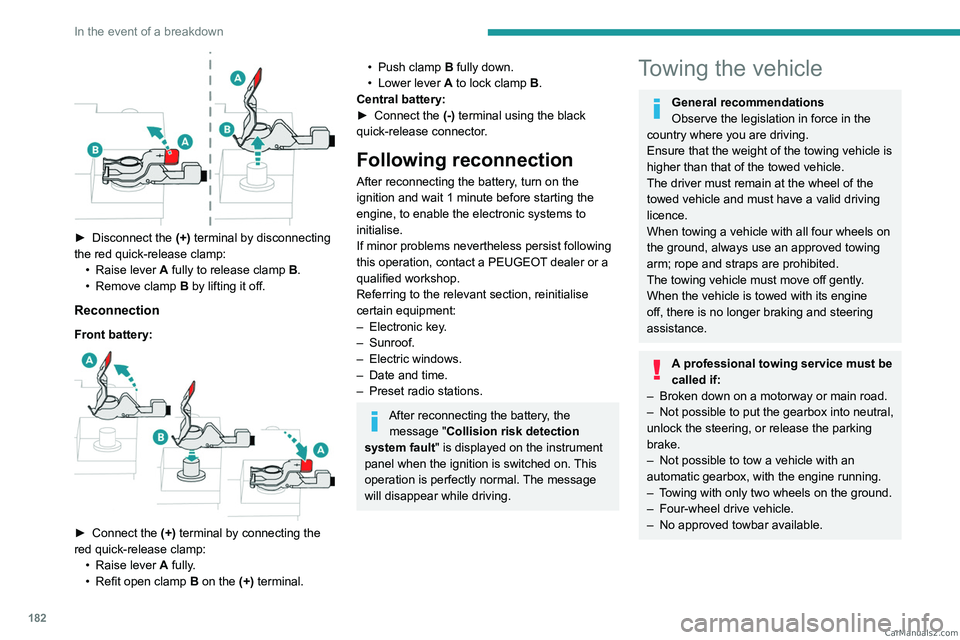
► Disconnect the (+) terminal by disconnecting
the red quick-release clamp: •
Raise lever
A
fully to release clamp
B
.
•
Remove clamp
B
by lifting it off.
Reconnection
Front battery:
► Connect the (+) terminal by connecting the
red quick-release clamp: •
Raise lever
A
fully.
•
Refit open clamp
B
on the (+) terminal.
• Push clamp B fully down.
• Lower lever A to lock clamp B.
Central battery:
►
Connect the
(-) terminal using the black
quick-release connector.
Following reconnection
After reconnecting the battery, turn on the
ignition and wait 1 minute before starting the
engine, to enable the electronic systems to
initialise.
If minor problems nevertheless persist following
this operation, contact a PEUGEOT dealer or a
qualified workshop.
Referring to the relevant section, reinitialise
certain equipment:
–
Electronic key
.
–
Sunroof.
–
Electric windows.
–
Date and time.
–
Preset radio stations.
After reconnecting the battery, the message "Collision risk detection
system fault" is displayed on the instrument
panel when the ignition is switched on. This
operation is perfectly normal. The message
will disappear while driving.
Towing the vehicle
General recommendations
Observe the legislation in force in the
country where you are driving.
Ensure that the weight of the towing vehicle is
higher than that of the towed vehicle.
The driver must remain at the wheel of the
towed vehicle and must have a valid driving
licence.
When towing a vehicle with all four wheels on
the ground, always use an approved towing
arm; rope and straps are prohibited.
The towing vehicle must move off gently.
When the vehicle is towed with its engine
off, there is no longer braking and steering
assistance.
A professional towing service must be
called if:
–
Broken down on a motorway or main road.
–
Not possible to put
the gearbox into neutral,
unlock the steering, or release the parking
brake.
–
Not possible to tow a vehicle with an
automatic gearbox, with the engine running.
–
T
owing with only two wheels on the ground.
–
Four-wheel drive vehicle.
–
No approved towbar available. CarM an uals 2 .c o m
Page 185 of 244

183
In the event of a breakdown
8Rechargeable hybrid vehicles
Before any intervention, with the ignition
on, depress the brake pedal and select mode N, then switch off the hybrid system (READY
indicator lamp off).
Always call on professionals for recovery of
the vehicle on a flatbed lorry or trailer.Use the towing eye only to free the vehicle
if it is stuck, or to secure it for recovery on a
flatbed lorry or trailer.
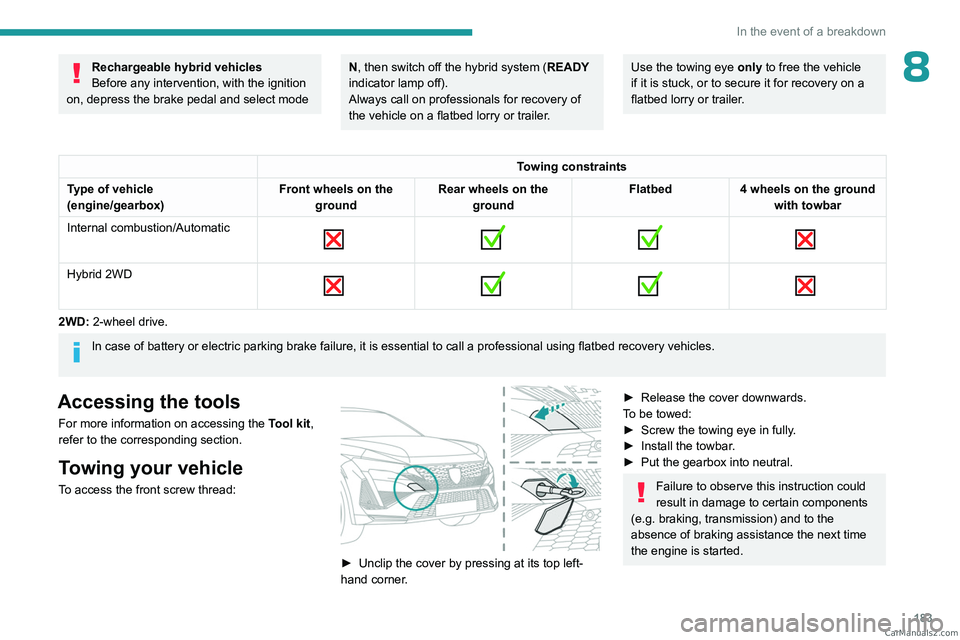
Towing constraints
Type of vehicle
(engine/gearbox) Front wheels on the
ground Rear wheels on the
ground Flatbed
4 wheels on the ground
with towbar
Internal combustion/Automatic
Hybrid 2WD
2WD: 2-wheel drive.
In case of battery or electric parking brake failure, it is essential to call a p
rofessional using flatbed recovery vehicles.
Accessing the tools
For more information on accessing the Tool kit,
refer to the corresponding section.
Towing your vehicle
To access the front screw thread:
► Unclip the cover by pressing at its top left-
hand corner .
► Release the cover downwards.
T o be towed:
►
Screw the towing eye in fully
.
►
Install the towbar
.
►
Put the gearbox into neutral.
Failure to observe this instruction could
result in damage to certain components
(e.g. braking, transmission) and to the
absence of braking assistance the next time
the engine is started. CarM an uals 2 .c o m
Page 186 of 244

184
In the event of a breakdown
Never tow the vehicle with the driving
wheels on the ground and the engine off.
►
Unlock the steering and release the parking
brake.
►
Switch on the hazard warning lamps on both
vehicles in accordance with the legislation in
force in the country in which you are driving.
►
Move off gently
, drive slowly and only for a
short distance.
Towing another vehicle
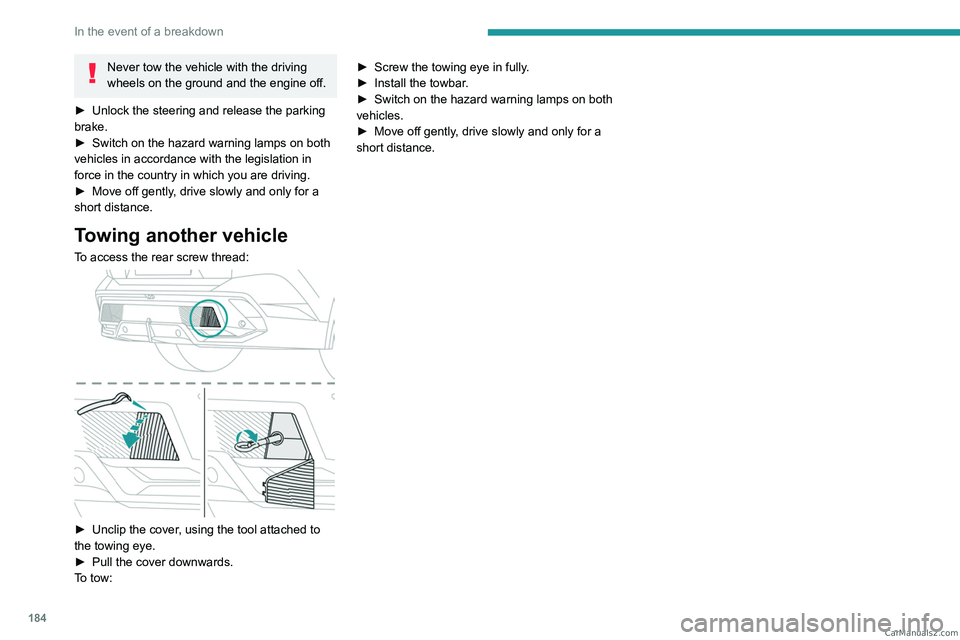
To access the rear screw thread:
► Unclip the cover , using the tool attached to
the towing eye.
►
Pull the cover downwards.
T
o tow: ►
Screw the towing eye in fully
.
►
Install the towbar
.
►
Switch on the hazard warning lamps on both
vehicles.
►
Move off gently
, drive slowly and only for a
short distance. CarM an uals 2 .c o m
Page 212 of 244

210
Alphabetical index
Filter, oil 163
Filter, passenger compartment
49, 163
Fitting a wheel
172, 174
Fitting roof bars
157–158
Fittings, boot
59
Fittings, interior
54
Fittings, rear
58
Flap, charging
153
Flap, fuel filler
143
Flap, ski
59
Flashing indicators
62
Flat bed (towing)
183
Fluid, brake
162
Fluid, engine coolant
162
Foglamps, rear
61, 176
Folding the rear seats
47–48
Frequency (radio)
200
Fuel
8, 143
Fuel consumption
8, 18
Fuel level, low
143
Fuel (tank)
143
Fuses
177
G
Gauge, fuel 143
Gearbox, automatic
96–99, 101, 163, 177
Gearbox, manual
101
Gear shift indicator
101
Glove box
54
H
Hands-free access 33–34
Hands-free tailgate
33–34
Hazard warning lamps
72, 168
Headlamps (adjustment)
62
Headlamps, automatic dipping
64–65
Headlamps, automatic operation
63
Headlamps, halogen
62
Headlamps, main beam
64
Head restraints, front
41
Head restraints, rear
47–48
Head-up display
67
Heated steering wheel
45
Heating
48
Heating, programmable
22, 53
Hi-Fi system
57
High voltage
144
Hill start assist
100–101
Histogramme, fuel consumption
22
Horn
73
I
Ignition 93, 202
Ignition on
93
Immobiliser, electronic
92
Indicator, coolant temperature
18
Indicator, engine oil level
17
Indicators, direction
62
Indicator, service
17
Inflating tyres
164, 188
Inflating tyres and accessories
(using the kit)
169, 171
Information, vehicle
10, 205
Infrared camera
67, 105
Instrument panel
10, 19, 19–20, 106
Instrument panels
10
ISOFIX mountings
85, 88–89
J
Jack 168–169, 172
Jump starting
178
K
Key 24–25, 29
Key, electronic
26–27
Keyless Entry and Starting
24, 26–27, 92–93
Key not recognised
94
Key with remote control
24, 92
Kit, hands-free
197
Kit, puncture repair
168–169
Kit, temporary puncture repair
168–171
Klaxon
73
L
Labels, identification 188
Lamps, parking
62
Lamps, rear
176 CarM an uals 2 .c o m
Page 215 of 244

213
Alphabetical index
Stowing rings 59
Sunshine sensor
49
Sun visor
54
Suspension
164
Switching off the engine
92
Synchronising the remote control
30
T
Tables of engines 186–187
Tailgate
31
Tank, fuel
143
Technical data
186–187
Telephone
197–198, 201–202
Temperature, coolant
18
Time (setting)
203
Tool box
60
Tools
168–169
Top Tether (fixing)
85, 88–89
Total distance recorder
19
Touch screen
20–22, 53
Towball, quickly detachable
154–157
Towbar
77, 153
Towbar with quickly detachable
towball
154–157
Towed loads
185–187
Towing
182–183
Towing another vehicle
182, 184
Towing the vehicle
182–183
Traction battery charge
148
Traction battery (Rechargeable
hybrid)
19, 144–145, 151
Traction control (ASR) 76
Trailer
77, 153
Trailer stability assist (TSA)
77
Trajectory control systems
75
Triangle, warning
168
Trip computer
19–20
Tyres
164, 188
Tyre under-inflation detection
103, 170
U
Under-inflation (detection) 103
Unlocking
24, 26
Unlocking from the inside
28
Unlocking the boot
24, 27
Unlocking the doors
28
Unlocking the tailgate
24, 27
Updating the time
203
V
Vehicle data recording and privacy 205
Ventilation
48–49
Visibility
52
Visiopark
138
Visiopark 1
136
W
Wallbox (Rechargeable hybrid) 146–147, 152
Warning and indicator lamps 11
Warning lamp, driver's seat belt
not fastened
78
Warning lamp, READY
160
Warning lamps
11
Warning lamp, seat belts
78
Warnings and indicators
11
Washing
105
Washing (advice)
145, 165–166
Weights
185
Welcome lighting
64
Wheel, spare
164, 168–169, 172
Window controls
37
Windscreen, heated
53
Wiper blades (changing)
71
Wipers
68
Wipers, automatic rain sensitive
70
Wipers, windscreen
69–70 CarM an uals 2 .c o m