2023 PEUGEOT 408 instrument panel
[x] Cancel search: instrument panelPage 20 of 244

18
Dashboard instruments
For more information on Checking levels, refer
to the corresponding section.
Oil gauge malfunction
This is indicated by the message " Oil level
measurement invalid" on the instrument panel.
Consult a PEUGEOT dealer or a qualified
workshop.
In the event of a malfunction of the
electric gauge, the oil level is no longer
monitored.
If the system is faulty, you must check the
engine oil level using the manual dipstick
located in the engine compartment.
For more information on Checking levels,
refer to the corresponding section.
Coolant temperature
indicator
With the engine running:
– In zone A, the temperature is correct.
–
In zone
B, the temperature is too high. The
associated warning lamp and the STOP
warning
lamp light up in red on the instrument panel,
accompanied by the display of a message and
an audible signal.
You must stop the vehicle as soon as it is
safe to do so.
Wait a few minutes before switching off the
engine.
After switching off the ignition, carefully open the bonnet and check the coolant
level.
For more information on Checking
levels, refer to the corresponding
section.
Power indicator
(Rechargeable hybrid)
The power indicator shows in real time the power demanded from the vehicle.
There are 3 zones:
POWER High power demand, using the combined capabilities of the petrol
engine and the electric motor.
The slider is located in this zone
during more dynamic driving phases
when high levels of performance are
being demanded.
ECO Optimal use of energy (internal combustion or electric).
The slider is located in this zone
when driving under electric power
and when optimal use is being made
of the petrol engine, both accessible
by adopting a suitable driving style.
A symbol indicates the threshold at
which the petrol engine will restart.
The driver can therefore moderate
their acceleration to remain in electric
driving mode.
CHARGE Energy recovery for partly recharging the traction battery.
The slider is located in this zone
during deceleration: taking your foot
off the accelerator pedal or braking. CarM an uals 2 .c o m
Page 21 of 244

19
Dashboard instruments
1Charge level indicator
(Rechargeable hybrid)
The charge level of the traction battery and
the remaining range in electric driving mode
are permanently displayed when the vehicle is
switched on.
The range displayed depends on the use of the vehicle (type of driving and speed),
the outside temperature and the activated
comfort equipment.
Manual test
This function allows you to check certain
indicators and display the alerts log.
The test is launched in the Settings> Vehicle touch screen application.
►
Then select
Safety > Diagnostics.
The following information is displayed on the
instrument panel:
–
T
yre pressures.
–
Engine oil level (depending on engine).
–
Next service due.
–
Current alerts.
This information is also displayed automatically every time the ignition is
switched on.
Total distance recorder
The total distance recorder measures the total
distance travelled by the vehicle since its initial
registration.
With the ignition on, the total distance is
displayed at all times. It remains displayed for
30
seconds after switching off the ignition. It is
displayed when the driver's door is opened, and
when the vehicle is locked or unlocked.
When travelling abroad, you may have to
change the distance units (miles or km):
the displayed speed must be in the local
country’s official unit (mph or km/h).
The unit is changed via the screen's
configuration application, with the vehicle
stationary.
Rechargeable hybrid vehicles
The total distance recorder is only
accessible from the trip computer.
For more information on the Trip computer,
refer to the corresponding section.
Lighting dimmer
Used to manually adjust the brightness of the
instruments and controls to suit the exterior light
level.
It is configured in the Settings >
Brightness touch screen application.
►
In the "
Cockpit" category, press or move the
slider to the desired setting.
Trip computer
Displays information related to the current trip
(range, fuel consumption, average speed, etc.).
Data displayed on the
instrument panel
Displaying the different tabs
► Pressing the button located on the end of the
wiper control stalk displays the following tabs in
turn:
–
Current information:
•
Current consumption (Petrol).
•
T
ime counter for Stop & Start (Petrol).
•
Percentage of the current journey travelled
in all-electric driving mode (Rechargeable
hybrid).
•
T
otal distance recorder (Rechargeable
hybrid). CarM an uals 2 .c o m
Page 22 of 244

20
Dashboard instruments
– Trips "1" then "2":• A verage speed.
•
A
verage fuel consumption.
•
Distance travelled.
Trip reset
► When the desired trip is displayed,
press the button on the end of the wiper
control stalk for more than 2
seconds.
Trips "1" and "2" are independent and are used
in the same way.
Definitions
Range
(miles or km)Distance that can still be travelled with the
fuel remaining in the tank (based on the
average fuel consumption over the last few miles
(kilometres) travelled).
This value may vary following a change in driving
style or terrain, leading to a significant change in
current fuel consumption.
When the range falls below 19 miles (30
km),
dashes are displayed.
After filling with at least 5 litres of fuel, the range
is recalculated and is displayed if it exceeds 62
miles (100
km).
Dashes appearing permanently in place of
numbers while driving indicates a malfunction.
Consult a PEUGEOT dealer or a qualified
workshop.
Current consumption
(mpg or l/100 km or km/l)Calculated during the last few seconds.
This function is only displayed at speeds above
19 mph (30
km/h).
Average consumption
(mpg or l/100 km or km/l)Calculated since the last trip computer
reset.
Average speed
(mph or km/h)Calculated since the last trip computer
reset.
Distance travelled
(miles or km)Calculated since the last trip computer
reset.
Stop & Start time counter
(minutes/seconds or hours/minutes)
If your vehicle is fitted with the Stop & Start
function, a time counter calculates the time spent
in STOP mode during a journey.
The time counter is reset each time the ignition is
switched on.
10-inch touch screen
This system gives access to the following elements:
–
T
ime and exterior temperature.
–
Heating/air conditioning system controls and
reminders of settings.
–
Settings for driving aid functions, comfort and
safety functions, audio equipment and digital
instrument panel.
–
Settings of functions specific to rechargeable
hybrid vehicles.
–
Display of visual manoeuvring aid functions.
–
Interactive handbook.
–
V
ideo tutorials (e.g. screen management,
driving aids, voice recognition).
–
Audio equipment and telephone controls with
display of
associated information.
–
Connected services and display of associated
information.
–
Navigation system controls and display
of associated information (depending on
equipment).
–
V
oice recognition (depending on equipment).
For safety reasons, always stop the
vehicle before performing operations
that require sustained attention.
Some functions are not accessible while
driving. CarM an uals 2 .c o m
Page 23 of 244

21
Dashboard instruments
1Recommendations
These recommendations are valid for the touch
screen and for the i-Toggles (depending on
equipment).
The touch screen and the i-Toggles screen are
capacitive touch screens.
Do not use pointed objects on the touch screen.
Do not touch the touch screen with wet hands.
►
Use a soft, clean cloth to clean the touch
screen.
Main controls
Access to one of the home pages Return to the first home page
Direct access to the Climate application
Direct access to the Shortcuts for
driving aids
►
Swipe down from the upper edge of the touch
screen to access a list of quick settings (e.g.
Brightness
, Diagnostics).
►
Depending on the pages displayed on the
screen, with or without the context menu, scroll
the text by swiping with your finger
, as with a
smartphone.
Show/Hide context menu
Return to the previous page
►
T
o change the status of a function, press the
description for the corresponding line (change
confirmed by the slider moving to the right/left:
function activated/deactivated).
Access additional information on the function
Access to function parameters
Adding/Removing shortcuts
Short press, ignition off: system on/off.
Short press, ignition on: mute/restore
sound.
Long press, ignition on: start standby mode
(mute sound, screens and clock display off).
Rotation: volume adjustment.
Applications
Press this button to access the
applications wall.
From any page, press the touch screen
with three fingers to display the
applications wall.
To obtain information about the other
applications not listed here, refer to the sections
describing the audio and telematic systems.
ADAS
Activation/Deactivation and configuration
of the driving aid functions.
Climate
Settings for temperature, air flow, etc.
For more information on Dual-zone automatic
air conditioning , refer to the corresponding
section. Activation/Deactivation of the heated steering
wheel.
For more information on the
Heated steering
wheel, refer to the corresponding section.
Seats
Activation/Deactivation and configuration
of the seat comfort functions (heating and
massages).
For more information on the Heated seats
or on the Multi-point massages, refer to the
corresponding section.
Settings
Main settings for the audio system, touch
screen and digital instrument panel.
Activation/Deactivation and configuration of
the exterior lighting, vehicle access and safety
functions.
Energy
Access to the rechargeable hybrid system
features (energy flow, consumption statistics,
deferred charging, e
- SAVE function).
Energy application
Energy Flow
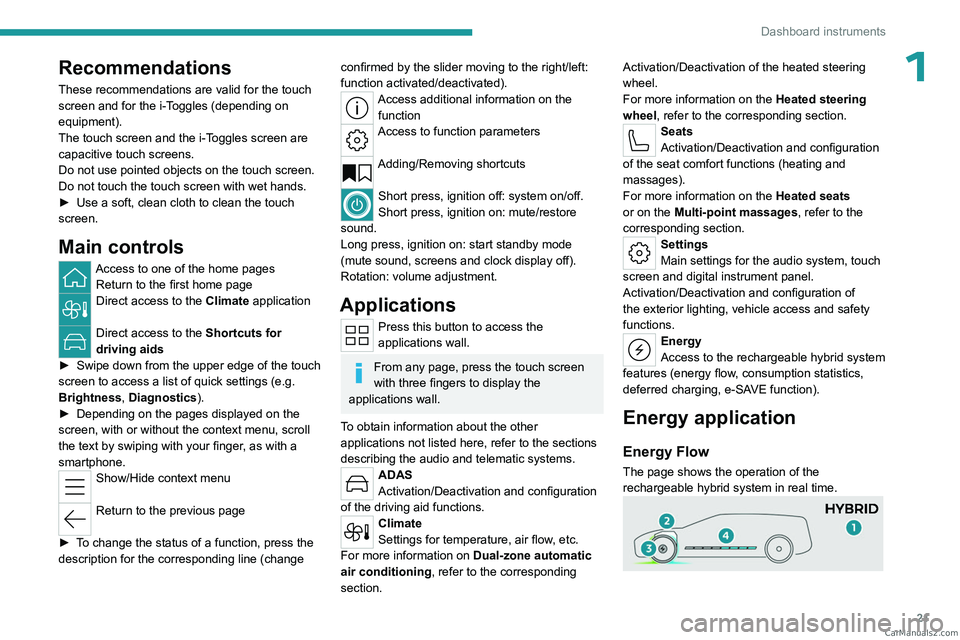
The page shows the operation of the
rechargeable hybrid system in real time. CarM an uals 2 .c o m
Page 24 of 244

22
Dashboard instruments
1.Active driving mode
2. Petrol engine
3. Electric motor
4. Traction battery charge level
The energy flows have a specific colour for each
type of driving:
–
Blue: 100% electrical energy
.
–
White: energy from the petrol engine.
–
Green: energy recovery
.
Statistics
This page shows electrical energy and fuel
consumption statistics.
1. Average electrical consumption for the current
trip (kWh/100 km) and historical values:
–
Blue graph: energy consumed directly from
the traction battery
.
–
Green graph: energy regenerated during
deceleration and braking phases used to
recharge the
traction battery.
2. Average fuel consumption for the current trip
(l/100
km) and historical values (orange graph).
Charging
This page allows you to programme deferred
charging.
For more information on Charging the traction
battery (Rechargeable hybrid), refer to the
corresponding section.
e-SAVE
The e-SAVE function makes it possible to
reserve all or part of the electrical energy of the
traction battery to be used later during a journey
(e.g.
passing through an urban area or an area
reserved for electric vehicles).
►
Activate the function by pressing ON
, then
select the electric range to be reserved ( 6 miles
(10 km), 12 miles (20 km) or the full range
MAX).
Activation of the function is confirmed by the lighting of this indicator lamp on the
instrument panel and the indication of the energy
reserve in miles or kms.
►
T
o use the energy reserve, choose the
Electric driving mode in the mode selector.
If the requested range exceeds the
available range (not recommended), the
internal combustion engine starts to recharge
the traction battery up to the requested
threshold. This leads to excessive fuel
consumption.
i-Toggles
This system is an additional touch screen
associated with the PEUGEOT i-Connect
Advanced. It is designed to provide a
personalised display of shortcuts to applications
or presets.
By default, it directs you to the main applications:
Media, Climate, Navigation, Phone, Mirror
Screen, etc.
The shortcuts can be replaced by: radio preset,
temperature preset, pre-selected destination,
pre-selected contact, pre-selected smartphone,
etc.
For more information on
Personalisation -
i-T
oggles, refer to the corresponding section for
the Audio equipment and telematics systems.
If the vehicle is exposed to sunlight for an
extended period, the touch screen can
become very hot.
Wait a few minutes before using the system.
Remotely operable
additional functions
(Rechargeable hybrid)
(Depending on country of sale)
CarM an uals 2 .c o m
Page 31 of 244

29
Access
2Back-up procedures
Lost keys, remote control,
electronic key
Go to a PEUGEOT dealer with the vehicle's
registration certificate, your personal
identification documents and if possible, the label
bearing the key code.
The PEUGEOT dealer will be able to retrieve the
key code and the transponder code, enabling a
new key to be ordered.
Complete unlocking/locking
of the vehicle with the key
Use this procedure in the following situations:
– Remote control battery discharged.
–
Remote control malfunction.
–
V
ehicle battery discharged.
–
V
ehicle in an area subject to strong
electromagnetic interference.
In the first case, change the remote control
battery.
In the second case, reinitialise
the remote
control.
Refer to the corresponding sections.
► Insert the key in the notch of the lock cover
and remove the lock cover .
►
Insert the key into the door lock.
►
T
urn the key towards the front or the rear to
unlock or lock the vehicle.
If the vehicle is fitted with an alarm, it will
not be activated when locking with the
key.
If the alarm is activated, the siren sounds
when the door is opened; switch on the
ignition to stop it.
Central locking not
functioning
Use these procedures in the following cases:
– Central locking malfunction.
–
Battery disconnected or discharged.
In the event of a malfunction of the
central locking system, the battery must
be disconnected to ensure that the vehicle is
locked fully.
Front left-hand door
► Insert the key into the lock and turn it towards
the front or rear of the vehicle to lock and unlock
the door
.
Other doors
Unlocking
► Pull the interior door opening control.
Locking
► Open the doors.
► For the rear doors, check that the child lock
is not on.
Refer to the corresponding section.
►
Gently insert the key into the latch located in
the door lock, then turn the latch an eighth of a
turn towards the outside of the door
.
►
Close the doors and check from the outside
that the vehicle is locked.
Changing the battery
A message is displayed on the instrument panel
when the battery needs changing. CarM an uals 2 .c o m
Page 42 of 244

40
Ease of use and comfort
Driving position
Correct seating position
Adopting a good driving position contributes to
improving driver comfort and protection.
It also optimises interior and exterior visibility as
well as access to controls.
Certain seat adjustments described in this
section depend on the trim level and the country
in which the vehicle is sold.
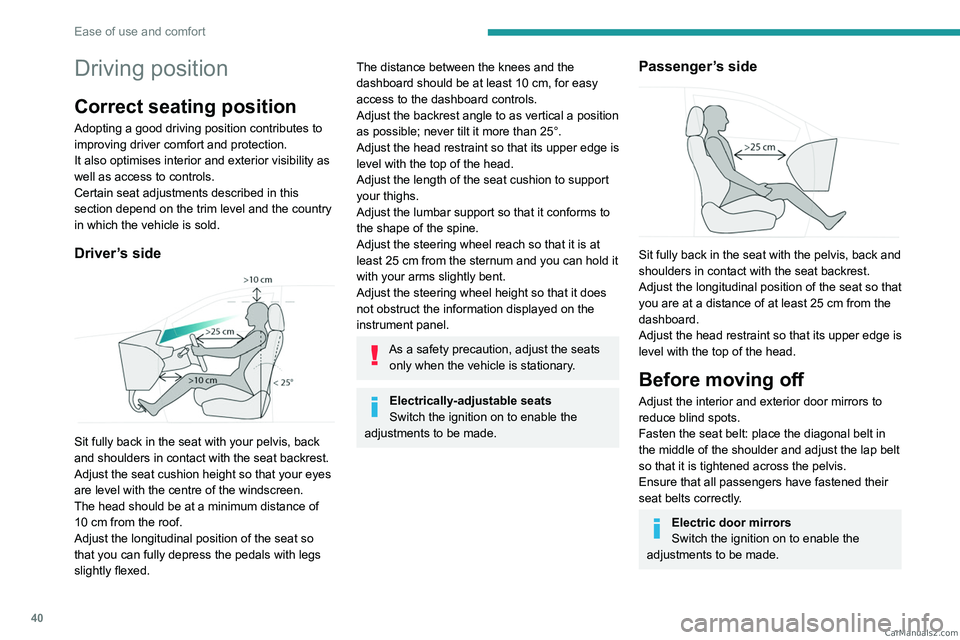
Driver’s side
Sit fully back in the seat with your pelvis, back
and shoulders in contact with the seat backrest.
Adjust the seat cushion height so that your eyes
are level with the centre of the windscreen.
The head should be at a minimum distance of
10 cm from the roof.
Adjust the longitudinal position of the seat so
that you can fully depress the pedals with legs
slightly flexed.
The distance between the knees and the
dashboard should be at least 10 cm, for easy
access to the dashboard controls.
Adjust the backrest angle to as vertical a position
as possible; never tilt it more than 25°.
Adjust the head restraint so that its upper edge is
level with the top of the head.
Adjust the length of the seat cushion to support
your thighs.
Adjust the lumbar support so that it conforms to
the shape of the spine.
Adjust the steering wheel reach so that it is at
least 25
cm from the sternum and you can hold it
with your arms slightly bent.
Adjust the steering wheel height so that it does
not obstruct the information displayed on the
instrument panel.
As a safety precaution, adjust the seats only when the vehicle is stationary.
Electrically-adjustable seats
Switch the ignition on to enable the
adjustments to be made.
Passenger’s side
Sit fully back in the seat with the pelvis, back and
shoulders in contact with the seat backrest.
Adjust the longitudinal position of the seat so that
you are at a distance of at least 25
cm from the
dashboard.
Adjust the head restraint so that its upper edge is
level with the top of the head.
Before moving off
Adjust the interior and exterior door mirrors to
reduce blind spots.
Fasten the seat belt: place the diagonal belt in
the middle of the shoulder and adjust the lap belt
so that it is tightened across the pelvis.
Ensure that all passengers have fastened their
seat belts correctly.
Electric door mirrors
Switch the ignition on to enable the
adjustments to be made. CarM an uals 2 .c o m
Page 47 of 244

45
Ease of use and comfort
3Steering wheel
adjustment
► When stationary, pull the control to release
the steering wheel.
►
Adjust the height and reach to suit your
driving position.
►
Push the control to lock the steering wheel.
For safety reasons, these adjustments
must only be carried out with the vehicle
stationary.
PEUGEOT i-Cockpit®
The instrument panel information is
visible above the steering wheel, for greater
safety and driving comfort.
Adjust the steering wheel height so that it
does not obstruct the instrument panel.
Heated steering wheel
In cold weather, this function heats the circular
part of the steering wheel. It can be activated when the outside temperature
is below 20°C.
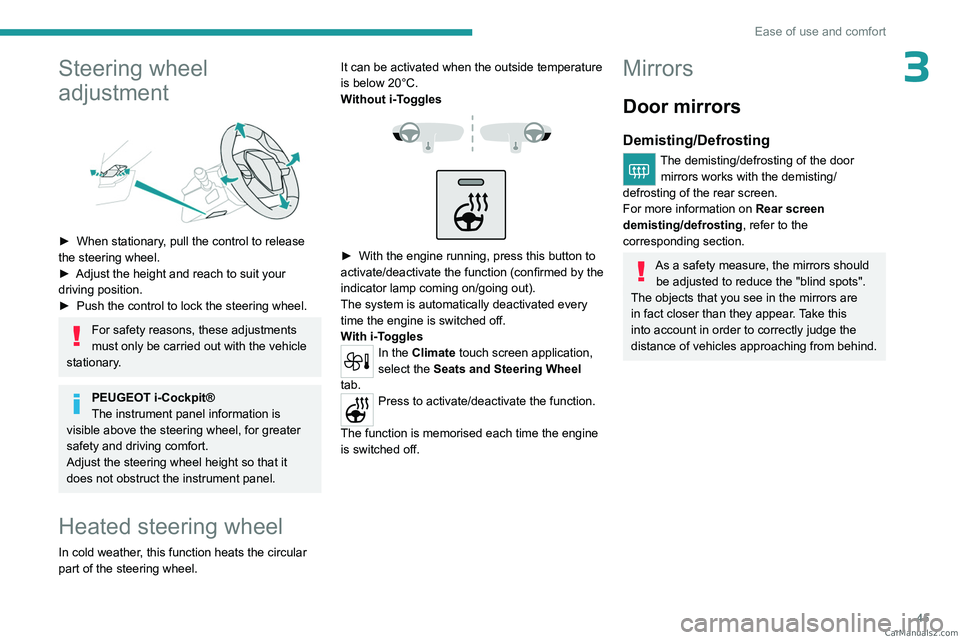
Without
i-Toggles
► With the engine running, press this button to
activate/deactivate the function (confirmed by the
indicator lamp coming on/going out).
The system is automatically deactivated every
time the engine is switched off.
W
ith i-Toggles
In the Climate touch screen application,
select the Seats and Steering Wheel
tab.
Press to activate/deactivate the function.
The function is memorised each time the engine
is switched off.
Mirrors
Door mirrors
Demisting/Defrosting
The demisting/defrosting of the door mirrors works with the demisting/
defrosting of the rear screen.
For more information on Rear screen
demisting/defrosting , refer to the
corresponding section.
As a safety measure, the mirrors should be adjusted to reduce the "blind spots".
The objects that you see in the mirrors are
in fact closer than they appear. Take this
into account in order to correctly judge the
distance of vehicles approaching from behind. CarM an uals 2 .c o m